NPACI Rocks Cluster Distribution: Users Guide: 
| ||
|---|---|---|
| Prev | Chapter 1. Installing a Rocks Cluster | Next |
This section describes how to install your Rocks cluster frontend with the Rocks Base CD coupled with the HPC Roll CD.
 | The minimum requirement in order to bring up a frontend is to have the Rocks Base CD, the HPC Roll CD and the Kernel Roll CD. That is, using only the Rocks Base CD will result in a non-functional frontend. |
Insert the Rocks Base CD into your frontend machine and reset the frontend machine.
After the frontend boots off the CD, you will see the boot screen:

When you see the screen above, type:
frontend |
| The "boot:" prompt arrives and departs the screen quickly. It is easy to miss. If you do miss it, the node will assume it is a compute appliance, and the frontend installation will fail and you will have to restart the installation (by rebooting the node). |
 | If the installation fails, very often you will see a screen that complains of a missing /tmp/ks.cfg kickstart file. To get more information about the failure, access the kickstart and system log by pressing Alt-F3 and Alt-F4 respectively. |
After you type frontend the installer will start running. Soon, you'll see a screen that looks like:

To add the HPC Roll, select 'Yes' by pressing the space bar.
After the CD/DVD drive ejects the Rocks Base media, put the HPC Roll CD into the drive.
To install the HPC Roll, select 'Ok' by pressing the space bar.
When the HPC Roll is discovered, you'll see window with the message:
Found Roll 'hpc' |
Then you are asked if you have another Roll to add.
Repeat the steps 3-5, but this time use the Kernel Roll.
After adding the Kernel Roll, you'll be asked if you have another roll to add.

If you are just adding the HPC and Kernel Rolls, then answer 'No' by hitting the 'Tab' key (which highlights the 'No' button) then hit the space bar.
If you adding another Roll, hit the spacebar and the CD will eject. Remove the Kernel roll and put in the next Roll and answer 'Yes'. (This is the same procedure as described in Step 4 for the HPC roll).
After you've added the rolls, you'll be asked to put the Rocks Base CD back into the drive.
Put the Rocks Base CD back into the drive, then answer 'Ok' by hitting the space bar.
| If you are building an IA64-based frontend, you may see an error message on the screen regarding volname and the installation will continue to ask for the Rocks Base DVD. This occurs because the DVD drive in the frontend is a low-cost drive and it requires a driver to be preloaded in order to support the volname command. A workaround is to reboot the frontend with the Rocks Base DVD, but this time at the ELILO boot prompt, type: frontend driverload=ide-scsi hdb=ide-scsi If your DVD is recognized by Linux as hda, you'll have to change the above line to: frontend driverload=ide-scsi hda=ide-scsi |
Then you'll see the Cluster Information screen:

| It is important that you specify the canonical Fully Qualified Hostname, that is, the hostname cannot be an alias. Choose your hostname carefully. The hostname is written to dozens of files on both the frontend and compute nodes, if the hostname is changed cluster services will no longer be able to find the frontend machine. Some of these services include: SGE, Globus, NFS, AutoFS, and Apache. |
All the fields, other than the Fully Qualified Hostname, are optional. Once you fill out the screen, then hit the 'Ok' button.
The disk partitioning screen allows you to select automatic or manual partitioning.
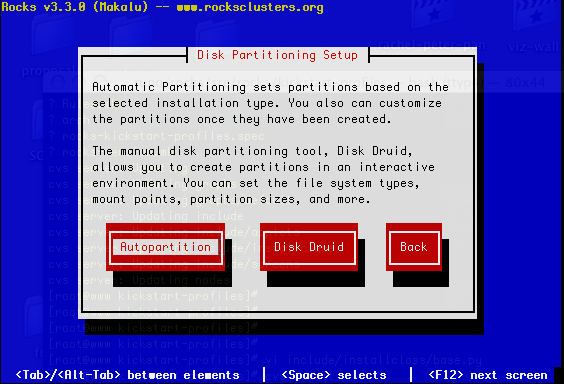
To select automatic partitioning, hit the Autopartition button. This will partition the frontend like:
Table 1-1. Frontend -- Default Root Disk Partition
| Partition Name | Size |
|---|---|
| / | 6 GB |
| swap | 1 GB |
| /export | remainder of root disk |
To manually partition your frontend machine, select Disk Druid.
| If you select manual partitioning, you must specify at least 6 GBs for the root partition and you must create a separate /export partition. |
Automatic partitioning is the default (and recommended).
The private cluster network configuration screen allows you to set up the networking parameters for the ethernet network that connects the frontend to the compute nodes.

 | It is recommended that you accept the defaults (by hitting the Tab key until the Ok button is highlighted, then hitting the Enter key). But for those who have unique circumstances that requires different values for the internal ethernet connection, we have exposed the network configuration parameters. |
The public cluster network configuration screen allows you to set up the networking parameters for the ethernet network that connects the frontend to the outside network (e.g., the internet).
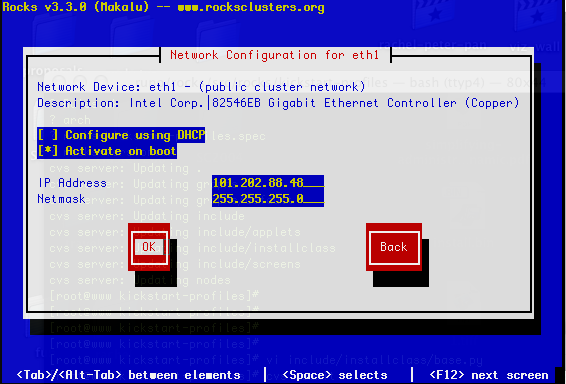
The above window is an example of how we configured the external network on one of our frontend machines.
| Note: DHCP configuration of the public network connection is not supported. |
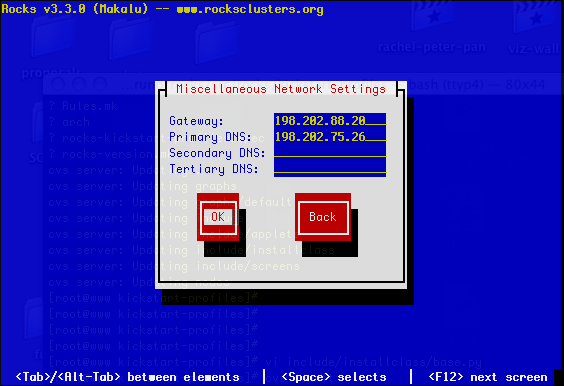
Configure the the Gateway and DNS entries:
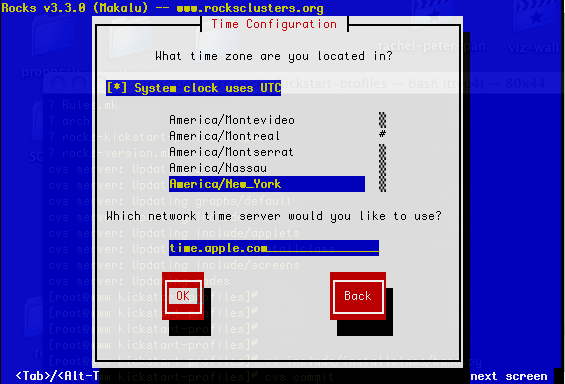
Set the timezone and NTP server.
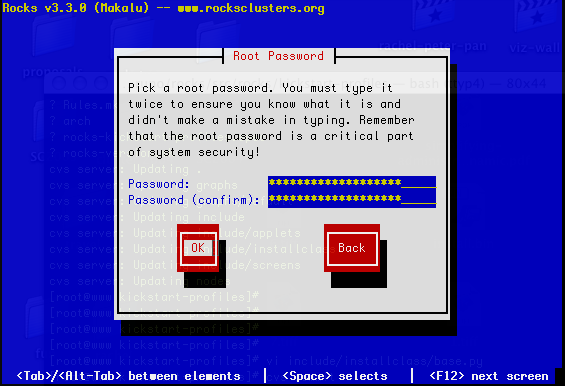
Input the root password:
The frontend will format it's file systems, then install the packages:
