| Inkscape » Paths » Live Path Effects (LPE) |    |
|---|
New in v0.46.
Live Path Effects, or LPE for short, is a system for applying some kind of effect to a path. Inkscape stores the path so that it can be modified at a later time with the effect automatically updating. The original path and attached data are stored in the SVG file in the Inkscape name space so it doesn't display in other SVG renderers. The result will display.
Inkscape v0.46 only includes a few LPEs. With a solid framework in place, it is planned to migrate most of the path effects found under the Effects menu to LPEs. This has two advantages: The effects will be faster to render and the original path is stored for future editing.
To use an LPE, select a path (the “skeleton” path), call up the Path Effects dialog ( → (Shift+Ctrl+7)), select the desired effect from the drop-down menu in the dialog, and then click the Apply button.
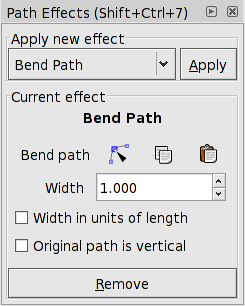
When an object is selected that was generated by an LPE and the Node Tool is enabled, the original skeleton path is shown in red. This path can be edited like any other path.
Several of the effects require an additional path. In this case, a
path is automatically generated (a straight green line). To see
this path, either click on the node editing icon (
![]() )
in the dialog or press 7 while the object is
selected and the Node Tool is active. The path is fully editable
like any other path. The path can be replaced by another through
pasting from the clipboard using the paste icon
(
)
in the dialog or press 7 while the object is
selected and the Node Tool is active. The path is fully editable
like any other path. The path can be replaced by another through
pasting from the clipboard using the paste icon
(
![]() ) in the dialog. It can also be copied to the
clipboard by using the copy icon (
) in the dialog. It can also be copied to the
clipboard by using the copy icon (
![]() ) in the
dialog.
) in the
dialog.
An LPE can be converted to regular paths by using the → (Shift+Ctrl+C) command.
This effect takes an existing path and allows one to “bend” it in a well defined way via a second control path. The control path is automatically created. The style of the original path is used for the style of the bent path.
To apply the effect, with the source path selected, select the
Bend Path option from the drop-down menu in
the Path Effects dialog. Click on the Apply
button. The path will turn red. A red path always corresponds to
the original source or skeleton path. Next, click on the node icon
(
![]() ) in the Path Effects dialog. A green,
horizontal path will appear in place of the red path. This path
controls the bending. It can be manipulated in all the ways that a
regular path can be including adding new nodes and dragging the
path.
) in the Path Effects dialog. A green,
horizontal path will appear in place of the red path. This path
controls the bending. It can be manipulated in all the ways that a
regular path can be including adding new nodes and dragging the
path.
![[Warning]](../images/admons/warning.png) | Warning |
|---|---|
It is easy to apply this Path Effect multiple times... leading to bizarre behavior. Check the SVG tree with the XML Editor dialog if strange things are happening. |
The effect assumes that the path to distort is orientated in the horizontal direction. If it is in the vertical orientation, one can check the Original path is vertical box. This distorts the aspect ratio. Restore the aspect ratio by checking the Width in units of length box. The size of the bent path can be changed by changing the size of the control path.
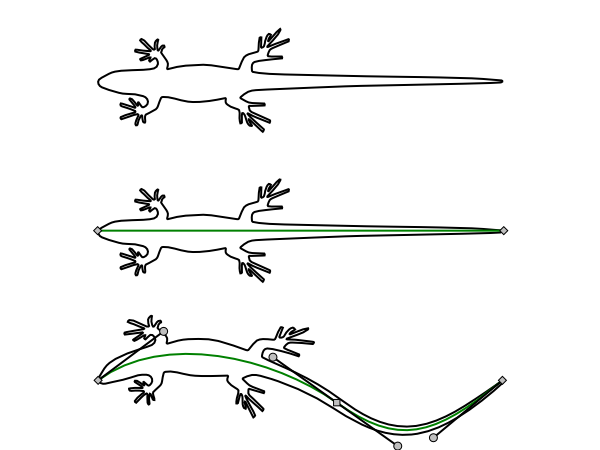
The width of the bent path can be altered with the Width entry box.
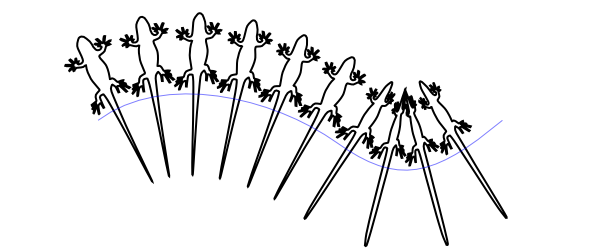
This effect puts one or more copies of one path (“pattern”) along a second, control or skeleton path. The resulting object takes the attributes (Fill, etc.) of the skeleton path.
This LPE duplicates much of the functionality of the Pattern along Path effect. The advantage of using the LPE version is that both the pattern and the skeleton path can be edited at a later time. The disadvantages are that only paths can be used for the pattern and that there are fewer options. One subtle difference is that the LPE version will bend straight lines drawn with two nodes while the other version leaves them straight.
![[Note]](../images/admons/note.png) | Note |
|---|---|
Only a path can be used as a pattern. Many objects such as Rectangles, Ellipses and text must first be converted to a path ( → (Shift+Ctrl+C)). |
To put a pattern on a path:
Copy the pattern: Select the pattern and copy it to the clipboard ( → (Ctrl+C)). The pattern must be a single path.
Select the skeleton path: Only one can be selected.
Apply the effect to skeleton path: In the Path Effects dialog, select Pattern Along Path and click on the Apply button.
Paste pattern:
Click on the Paste (
![]() ) icon in dialog.
) icon in dialog.
The bounding box of the pattern is used for placing the pattern along the path, with the bounding box of one pattern copy touching the bounding box of the next copy (if no additional spacing is specified).
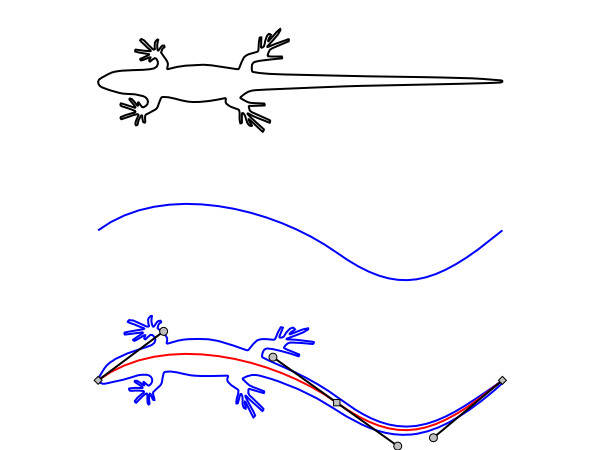
To edit the pattern, click on the node editing icon
(
![]() ) in the dialog. A temporary green copy of the
pattern will appear at the pattern's original location. Any edit to
this copy will be reflected in the final object.
) in the dialog. A temporary green copy of the
pattern will appear at the pattern's original location. Any edit to
this copy will be reflected in the final object.
To edit the skeleton path, select the object with the Node Tool. A temporary red copy of the skeleton path will appear. This can be edited as any other path.
A different pattern can be applied to the skeleton path by copying
the pattern to the clipboard (( → (Ctrl+X) or
→ (Ctrl+C)) and then clicking on the
Paste (
![]() ) button in the dialog.
) button in the dialog.
A copy of the original pattern can be placed on the clipboard by
clicking on the Copy (
![]() )
button in the dialog. The copy will have all attributes unset.
)
button in the dialog. The copy will have all attributes unset.
The Pattern copies drop-down menu has options to stretch the pattern to the path length and/or to put multiple copies along the skeleton path.
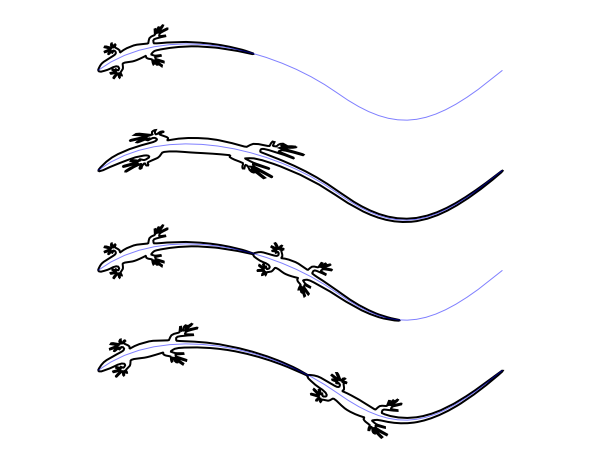
The LPE assumes that the pattern is drawn horizontally. This can be changed to vertical by checking the Pattern is vertical box.
This effect draws a series of intermeshed gears. It is more of a toy effect, designed to demonstrate the possibilities of LPEs. The Gear Effect can also be used to draw gears with a bit more control.
The effect uses the nodes of a path to determine how the gears are drawn. At least three nodes are needed to specify the first gear. Additional gears require one additional node each. Some nodes may be skipped if they would result in impractical gears.
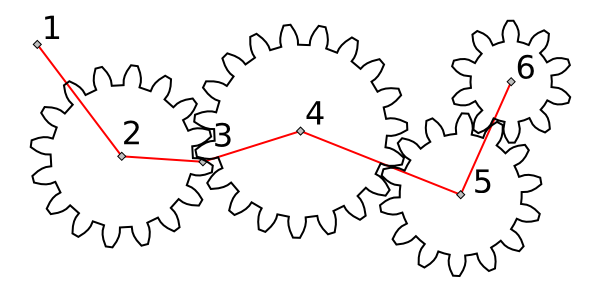
Two parameters are available: Teeth determines the number of teeth on the first gear. Phi determines the Pressure Angle of the gears. For real gears the Pressure Angle is typically 14.5, 20, or 25 degrees. Note: The default angle is 5 degrees, not a very realistic value.
This effect draws a series of Stroke paths between points on sub-paths. Some of the things it is useful for are drawing hatched shading and for drawing hair.
To stitch a sub-path:
Draw the sub-paths: Draw two simple paths. Combine into a compound path consisting of two sub-paths using → (Ctrl+K). The two sub-paths should be drawn in the same direction. If not, use the → (Shift+R) command on one of the sub-paths (prior to combining) to reverse its direction.
Apply the effect to compound path: In the Path Effects dialog, select Stitch Sub-Paths from the Apply new effect menu and click on the Apply button.
Adjust Stroke path:
Click on the node editing icon (
![]() ) to edit
the Stroke path.
) to edit
the Stroke path.
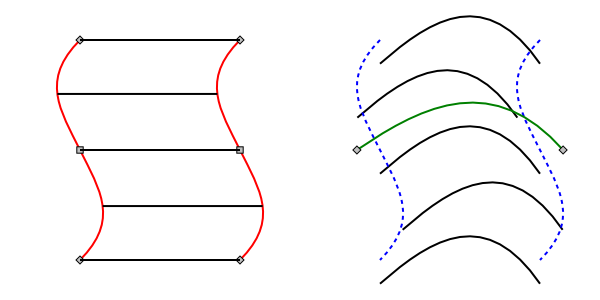
The Stitch Sub-Paths effect can be used to create the hatchings typically used in engravings as shown in the following example. While the Interpolate Effect could be used to created some of the shadings, it can not create the horizontal shadings on the cylinder below (likewise, the Stitch Sub-Paths effect can not easily create the precise circular hatching inside the cylinder).
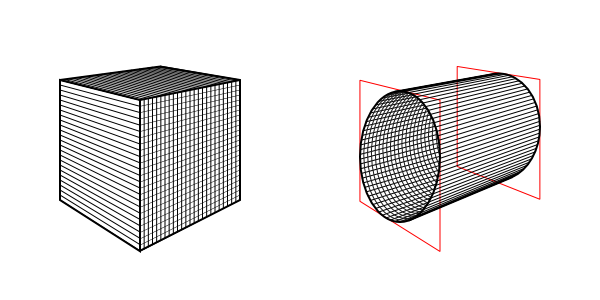
By varying both the sub-paths and the Stroke path quite complicated hatchings can be created. The hatchings can be clipped to limit their range. The Tweak Tool could also be used to refine the hatchings if the hatchings are converted to stroked paths (see Chapter 10, Tweak Tool ).
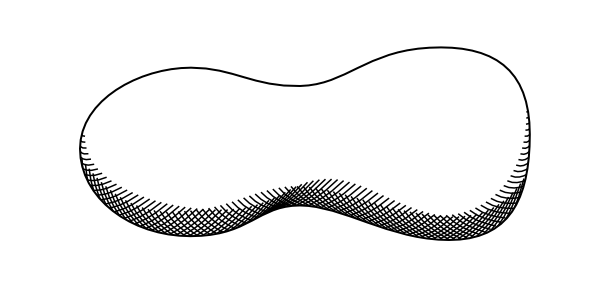
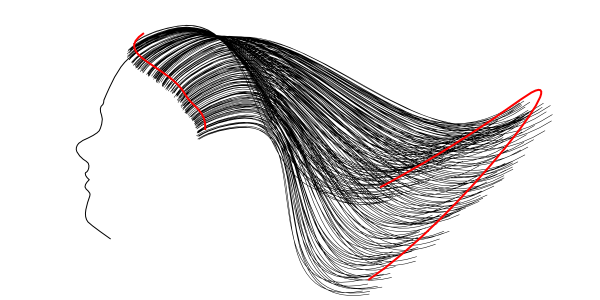
The Stroke Sub-Paths LPE has options that add
random shifts to the start and end of each stitching
path. The “variance” options can be used to draw hair
as shown below. Each variance has a dice icon (
![]() )
next to it which, if clicked, sets a new starting random number
seed. This will change the random shifts but keep the average
shift the same.
)
next to it which, if clicked, sets a new starting random number
seed. This will change the random shifts but keep the average
shift the same.
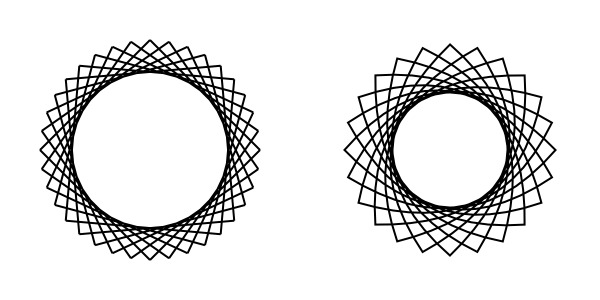
Interesting geometric patterns can be created with this effect as shown below.
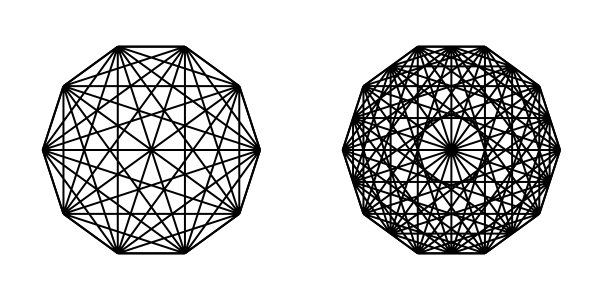
What if multiple sub-paths are used? Each sub-path will be connected to every other sub-path by the specified Number of paths. This can be used to created some interesting patterns.
© 2005-2008 Tavmjong Bah. | Get the book. |