Getting Started with iOS
Introduction
Apache Cordova is a library used to create native mobile applications using Web technologies. The application is created using HTML, CSS and JavaScript and compiled for each specific platform using the platform native tools. Cordova provides a standard set of JavaScript APIs to access device features on all supported platforms. This document describes how to get started using Apache Cordova for the iOS platform.
Requirements
- Intel-based Computer with Mac® OS X® Lion or greater (10.7.4+) The Apple® tools required for building iOS applications run only on the OS X operating system. The version of the development environment required, Xcode® 4.5, runs only on Mac OS X version 10.7 (Lion) or greater.
-
Xcode 4.5 and iOS 6 SDK To submit apps to the Apple App Store℠, you must be using the latest versions of the Apple tools. Currently the latest versions are Xcode 4.5.2 and the iOS 6 SDK (Software Development Kit). The download of Xcode 4.5.2 includes the iOS 6 SDK.
- Download from the App Store (https://itunes.apple.com/us/app/xcode/id497799835?mt=12).
- Download from Apple Developer Downloads (https://developer.apple.com/downloads/index.action). Note: This link requires Apple Developer registration.
-
Xcode Command Line Tools
Cordova uses the command line to create a new application project. To access the Xcode tools from the command line an additional download is required. The tools are downloaded from within Xcode.
- Open Xcode
- Select the following via the Xcode Menus: Xcode Preferences> Downloads>Command Line Tools. This will download and install copies of the core command line tools and system headers into system folders on your computer.
-
iOS Device
You can test many of the Cordova features using the iOS simulator that is installed with the iOS SDK and Xcode, but you will need an actual device to fully test all of the device features used in your applications before submitting to the App Store. The device must have at least iOS 5.x installed - this is the minimum iOS version supported as of Cordova 2.3. Devices that support at least iOS 5 include all iPad® models, iPhone® 3GS and above, and iPod® Touch 3rd Generation or later. In addition, to install apps onto a device, you must be a member of the iOS Developer Program from Apple. The program costs $99 per year. This Getting Started guide documents deploying the application to the iOS simulator so registration with the developer program is not required.
Install Cordova
Download Cordova
Download the latest version of Apache Cordova from http://www.apache.org/dist/cordova/. Click on the Download icon and select cordova-X.Y.Z-src.zip to download to your machine. The X, Y and Z represent the version number of Cordova, for example 2.6.0. The download includes the code for all of the Apache Cordova supported platforms.
Extract Cordova
To access the code it will need to be extracted from the archive (.zip) file.
Navigate to the folder where you downloaded the code. Find the cordova-X.Y.Z-src.zip file. Note: The file names change with each new version of Cordova. The file name will be different if you are using an updated or newer version of Cordova.
Using the Finder® app, double click the file to extract. This will create a directory named, cordova-X.Y.Z.
Expand this folder and locate the cordova-ios.zip file and double click to extract it.
The code for iOS is within the cordova-ios directory structure.
Project Creation
Xcode projects for Cordova are created by invoking a script file via the command line. The following steps explain how to create the necessary directory structure, open and use the Terminal application to create a new project, and execute the create script.
Determine Project Location
Determine where on your system you will locate the Xcode project files for your application. For this tutorial I created a CordovaXY directory under my Documents folder: ~/Documents/CordovaXY where the X and Y refer the to Cordova version #.
In Finder navigate to the Documents Directory.
Create a directory called CordovaXY within the Documents directory where the X and Y represent the Cordova version number (23, for example). You can use a different directory name or location if you wish but you will need to remember this directory location and name for subsequent steps.
Open Terminal
In Finder, navigate to the Applications Folder. Find and expand the Utilities Folder.
Locate the Terminal app and double click to open it.
-
In Finder, navigate to the cordova-ios directory from the downloaded and extracted Cordova code and expand it if necessary. Highlight the bin directory as shown:
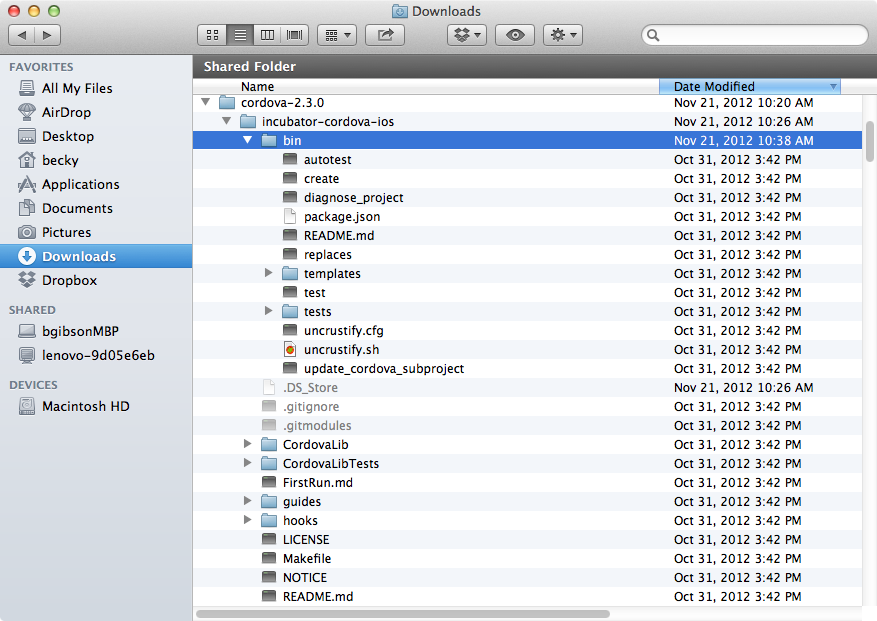
Note: This screen capture was from the Cordova-2.3.0 download, your listing will vary based on the actual Cordova version installed.
Drag this directory to the open Terminal icon in the dock. This will open up a default terminal window with the path set to the bin directory.
Create New Project
Command Line Syntax
-
Determine Required Parameters
There are 3 ordered, required parameters for creating a Cordova project from the command line:
-
project location
This is the directory where the Xcode project and files for the application will be located. This tutorial is using ~/Documents/CordovaXY as the base location and the application name as the project directory. Thus the location for our project will be ~/Documents/CordovaXY/HelloWorld, where HelloWorld is the project name (note that the X and Y represent the Cordova version, for example 22 for version 2.2). The final directory, HelloWorld in this example, must not already exist as it will be created during execution of the command.
-
package name
When submitting apps to the App Store, this must be the reverse domain name App ID that is created via the Apple Provisioning Portal (described in the Deploy to Device section). The Provisioning Portal is accessible once you have paid for and signed into your iOS Developer Account. Since you will not be submitting this sample app, this tutorial uses org.apache.Cordova plus the app name, HelloWorld: org.apache.cordova.HelloWorld
-
project name
This is the name of the actual project. Most developers make the project name and the application name the same. In this example the project name is HelloWorld.
-
-
Execute the Command
In the terminal app with bin as the current directory, enter the 3 pieces of information via the following command:
./create ~/Documents/CordovaXY/HelloWorld org.apache.cordova.HelloWorld HelloWorld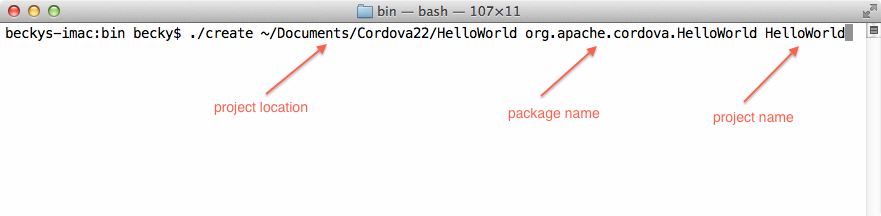
-
Fix Common Problems
No Developer Directory Found
The “Error: No developer directory found at /Developer” message is displayed if the create script can not find the location of the command line tools within Xcode. This can occur if more than one version of Xcode is installed on the system or when upgrading from older versions of Xcode. The solution is to run the xcode-select command to set the location. If you have installed Xcode in the default location the command to execute is:
sudo /usr/bin/xcode-select -switch /Applications/Xcode.app/Contents/DeveloperSee http://developer.apple.com/library/mac/#documentation/Darwin/Reference/ManPages/man1/xcode-select.1.html for more information on the xcode-select command if you have installed Xcode in a different location.
Optional Features
-
Additional Parameters
The default create script copies the necessary common library files from the Cordova distribution directory into your Xcode project directory. These files will appear within the CordovaLib directory of your project structure. Some development organizations prefer to have developers reference the common Cordova library files from a fixed location. A common location helps to insure that all developers are using the exact same copy of the CordovaLib code. This is accomplished by adding the --shared parameter to the create command. The following command will create a project that references the CordovaLib directory from the iOS directory location where the create script is executed:
./create --shared ~/Documents/CordovaXY/HelloWorld org.apache.cordova.HelloWorld HelloWorldThe Xcode project is still created in the ~/Documents/CordovaXY/HelloWorld directory, but it references the CordovaLib files from the fixed location of the Cordova distribution rather than a copy of these files within the project directory.
-
Additional Scripts
Within the cordova-ios/bin directory there is an additional script that changes the location of the CordovaLib directory to refer to a shared location after the project has been created,
./update_cordova_subproject path/to/your/projectMost users will be satisfied with the default project creation procedure and do not need this additional script. This script uses the location of CordovaLib directory at the same directory level as the bin directory from which it is run as the shared location for CordovaLib. To modify the newly created HelloWorld project to use a shared location for CordovaLib, execute the following command from the bin directory:
./update_cordova_subproject ~/Documents/CordovaXY/HelloWorld
Running the Application
Open the Project
Using the Finder app, navigate to the location where you created the project. This guide uses ~/Documents/CordovaXY/HelloWorld. Double click the HelloWorld.xcodeproj file to open the project in Xcode.
Your screen should look similar to:
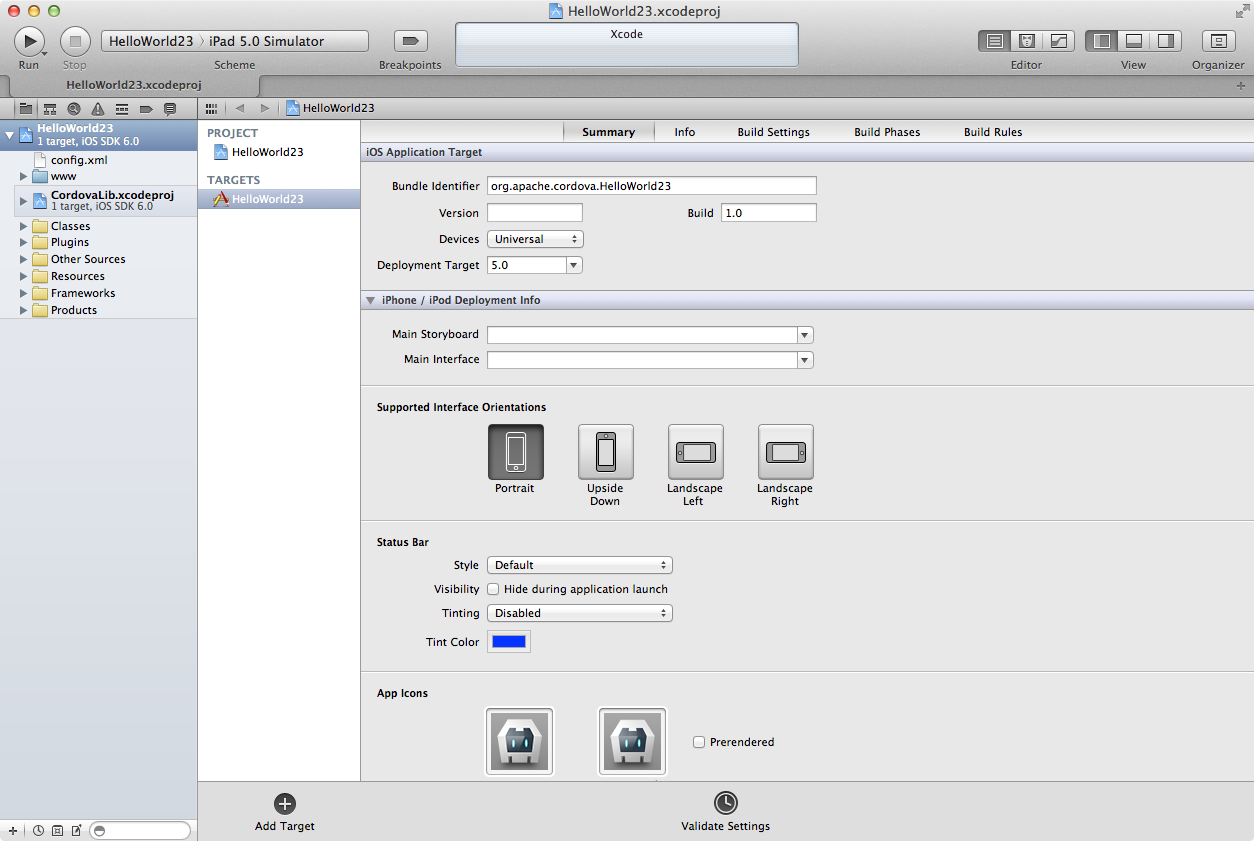 Note: this screen capture shows a project that was created with the name as HelloWorld23.
Deploy to the Simulator
- In the upper left hand corner of Xcode, click on the Scheme drop down and select the project name, HelloWorld, as the target.
Click the device section and select an iOS Simulator such as iPhone 6.0 Simulator as shown:
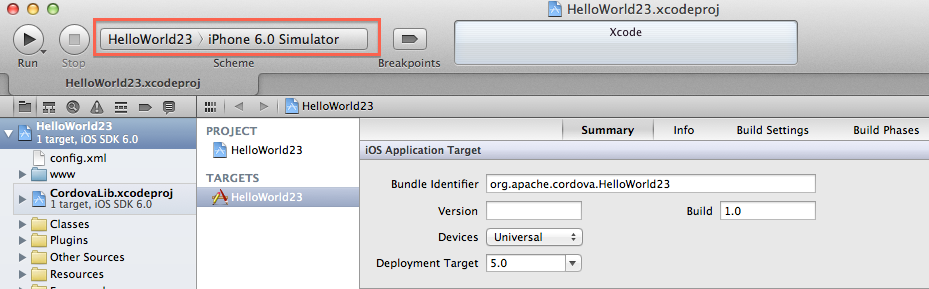
Click the Run button in your project window's toolbar to build, deploy and run the application in the simulator.
Deploy to the Device
Requirements
There are several requirements to deploy to a device. Since this information is not related directly to Cordova, please refer to the Apple Configuring Development and Distribution Assets section of the Tools Workflow Guide for iOS documentation for complete details.
Join the Apple iOS Developer Program
Create a Provisioning Profile within the iOS Provisioning Portal. You can use the Development Provisioning Assistant within the Provisioning Portal to create and install the profile and certificate for use within Xcode.
Verify that the Code Signing Identity in the Code Signing sections of the Hello World Xcode project settings has been set with your provisioning profile name.
Deployment Steps
- Plug your device into your Mac via the USB Cable.
-
Select the Target and device
- In the upper left hand corner of Xcode, click the Scheme drop down and select the project name, HelloWorld, as the target.
- Click the device section and select your device from the list. If your device is plugged in via the USB but not visible in the device list, click the Organizer button to determine any errors.
Click the run button to build, deploy and run the application on your device.
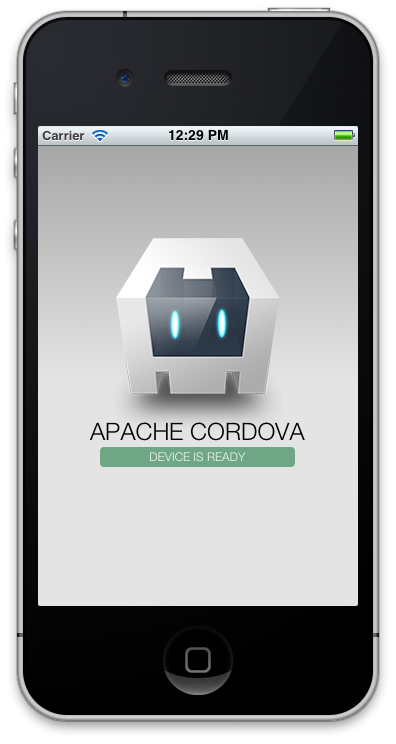
Results
The running HelloWorld app is shown below. The Device is Ready line should be slowly pulsating.
Common Problems
Deprecation Warnings
When an application programming interface (API) has been changed or replaced by another API, it is marked as “deprecated.” The API will still work in the near term but will be removed in a future version of the code library. Apache Cordova contains some of these deprecated interfaces. When you build and deploy an application, Xcode will issue warnings about these deprecated APIs. The ‘invokeString’ method that Xcode is warning about represents functionality to invoke the app from a custom URL. The process for loading from a custom URL has changed but this code is included to provide backwards functionality for apps created with older versions of Cordova. The sample app does not use this functionality so the references to the items causing the warnings can be ignored.
If you wish to remove the warnings you can remove the code that is referencing the invokeString deprecated API.
- Navigate to the MainViewController.m file in the Classes folder.
-
Find and comment out the following code by surrounding it with the begin, /*, and end, */, comment characters as highlighted in the code snippet below.
(void)webViewDidFinishLoad:(UIWebView*)theWebView
{
// only valid if ___PROJECTNAME__-Info.plist specifies a protocol to handle
/*
if (self.invokeString) {
  // this is passed before the deviceready event is fired, so you can access it in js when you receive deviceready
  NSLog(@"DEPRECATED: window.invokeString - use the window.handleOpenURL(url) function instead, which is always called when the app is launched through a custom scheme url.");
  NSString* jsString = [NSString stringWithFormat:@"var invokeString = \"%@\";", self.invokeString];
  [theWebView stringByEvaluatingJavaScriptFromString:jsString];
}
*/
// Black base color for background matches the native apps
theWebView.backgroundColor = [UIColor blackColor];


return [super webViewDidFinishLoad:theWebView];
}
Press Command s to save the file.
Navigate to the AppViewDelegate.m file in the Classes Folder.
-
Comment out the following line by placing a double slash at the beginning of line 73 as shown below:
//self.viewController.invokeString = invokeString; Press Command-s to save the file.
Press Command-b to rebuild the project and eliminate the warnings.
Missing Headers
Some users have encountered compilation errors relating to missing headers. This refers to a problem in the build location and is fixed via Xcode preferences.
- Within the Xcode menus select Xcode>Preferences>Locations.
-
In the Derived Data section click the Advanced button and select Unique as the Build Location as shown:
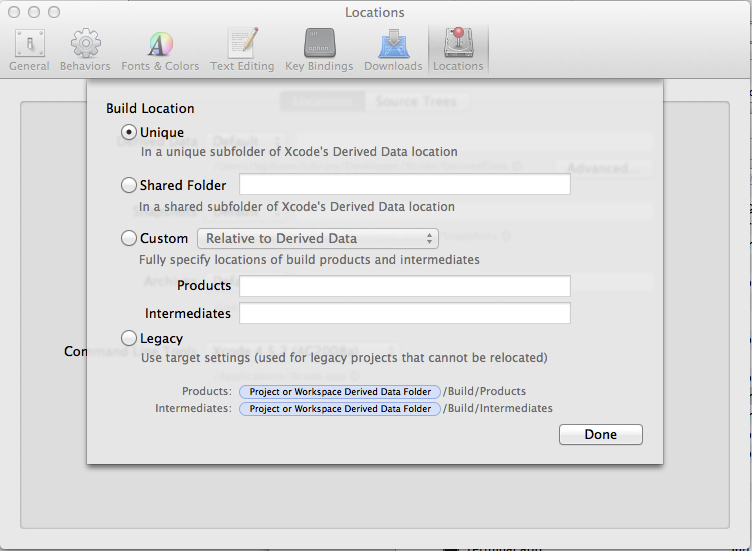
This is the default setting for a new Xcode install but it may have been set differently if you upgraded from an older version of Xcode.
Next Steps
Building Your Own Applications
Include Cordova
All of the code for the sample application is contained within the www directory in the Xcode project structure. The starting page is named index.html. Any page that uses Cordova must include the cordova-*.js file for the associated Cordova version and platform. The format of the JavaScript file name is cordova-x.y.z where x represents the major version number, y the minor version and z any point release. For example, the Cordova 2.2.0 file was named cordova-2.2.0.js. The sample HelloWorld application includes this file from index.html.
  <script type="text/javascript" src="cordova-2.2.0.js"></script>
  <script type="text/javascript" src="js/index.js"></script>
  <script type="text/javascript">
          app.initialize();
  </script>
Wait for deviceReady Event
When loading a page, Cordova’s deviceReady event must fire before you can access any of the platform features via the Cordova JavaScript APIs. Within the sample application this is set up within the app object found within the js/index.js file. The app.initialze() call at the bottom of the index.html file (visible in the previous code example) sets in motion the binding of events to receive and respond to the deviceReady event.
Another common method of initializing a page is to add an event listener for the deviceReady event within the handler for the body onload event as shown in the code snippet below:
  <head>
    <script type="text/javascript" src="cordova-2.6.0.js"></script>
    <script>
      function onLoad() {
    document.addEventListener(
      ‘deviceready’, onDeviceReady, false);
    }
    function onDeviceReady() {
      // do Something!
      // example: display a Cordova Alert
      // see docs.cordova.io for full details
      navigator.notification.alert(
        'Cordova is ready!',       // message
        function() {//do something},  // callback
        'Congratulations',            // title
        'Done'                      // buttonName
       );
    }
    </script>
    </head>
    <body onload=”onLoad();”>
    .....
Code Your Application
Replace the sample code in the www directory of a new project with the HTML, JavaScript and CSS code for your application. The name of the initial file to load when the app is launched should be index.html (advanced users can change this if necessary). As demonstrated in the HelloWorld sample application, subdirectories within the www directory are permitted. Note that the www directory is readonly, you can not write information to this directory during app execution. If you need to store information use the Cordova File or Storage APIs.
You can use many mobile JavaScript frameworks with Cordova to create the UI and page navigation of your application. Popular ones include:
- JQuery Mobile
- Dojo Mobile
- Sencha Touch
Modify Project Settings
There are many additional considerations to make your application unique. The sample HelloWorld application is set up to run in all iOS environments, iPhone, iPod, and iPad. You can design an app for a single device type by modifying the build settings within Xcode.
You should customize the application with your own icons and splash screens. The sample application includes Cordova specific images in the Apple required sizes and resolutions as examples. The Cordova Specific settings are located in the config.xml file and documented in the Cordova Project Settings Guide. Refer to the Resources section for more Apple specific information about building iOS Apps.
Resources
Apple
Some of these references are within the Apple iOS Developer Reference and require an iOS Developer License.
- Start Developing iOS Apps Today provides a quick overview of steps for developing iOS Apps.
- Member Center home page provides links to several iOS technical resources including technical resources, the provisioning portal, distribution guides and community forums.
- Tools Workflow Guide for iOS
- Xcode 4 User Guide
- Session Videos from the Apple World Wide Developer Conference 2012 (WWDC2012)
Apache Cordova
The Apache Cordova home page contains all of the links below and more.
- Cordova API documentation is available at http://docs.cordova.io
- PhoneGap google group to discuss and ask questions about Cordova. This forum is monitored by Cordova developers as well as users. When posting please include the platform, device type, Cordova version and as many details as possible about the error or problem.
- File Cordova bugs at https://issues.apache.org/jira/browse/CB
Credits
Mac®, OS X®, Apple®, Xcode®, App Store℠, iPad®, iPhone®, iPod® and Finder® are Trademarks of Apple Inc.