Installing Designer as Eclipse Plugin
Eclipse allows you to install CloverETL Designer plugin directly into it. All required plugins will be installed during the installation of the CloverETL Designer plugin. You do not need to install them separately.
Installing the CloverETL Designer plugin into Eclipse release is considered installing new software.
See Plugin Installation for supported version of Eclipse
Choose → .
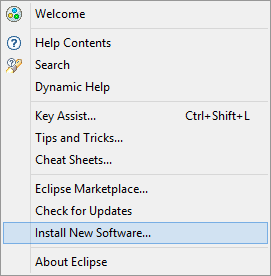
Figure 9.1. Choosing Install New Software in Help Menu
The → wizard displays a list of software sites and items available for installation.
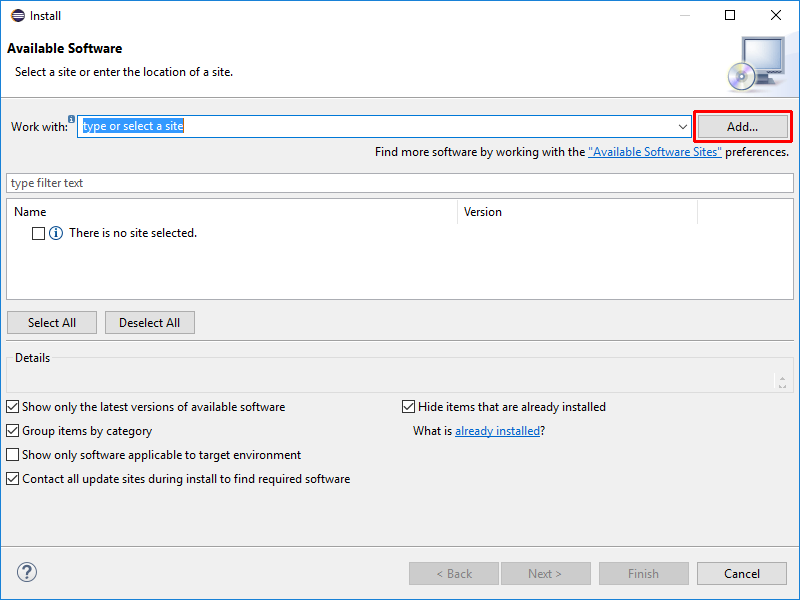 |
Figure 9.2. Available Software (in Eclipse 4.3)
The button allows you to type the plugin location.
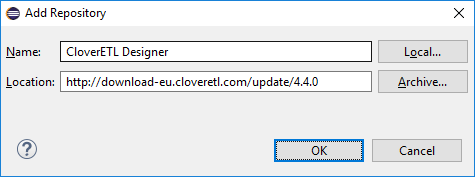
Figure 9.3. Adding a Repository to the Eclipse
Define the Location (url) for Online installation or use the Archive for Offline installation.
![[Note]](figures/note.png) | Note |
|---|---|
The link to the update site can be obtained at your CloverETL Account.
|
Tick the CloverETL Designer and use button.
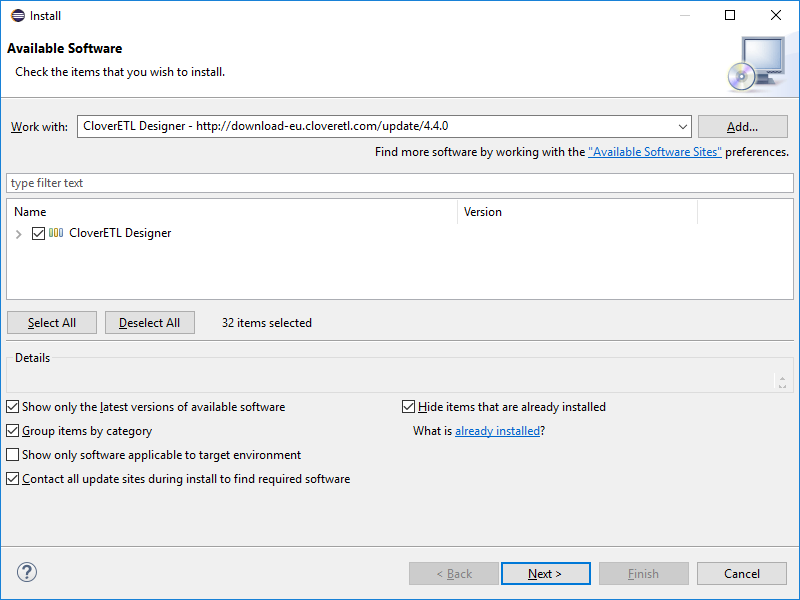 |
Figure 9.4. Installing Eclipse Plugin
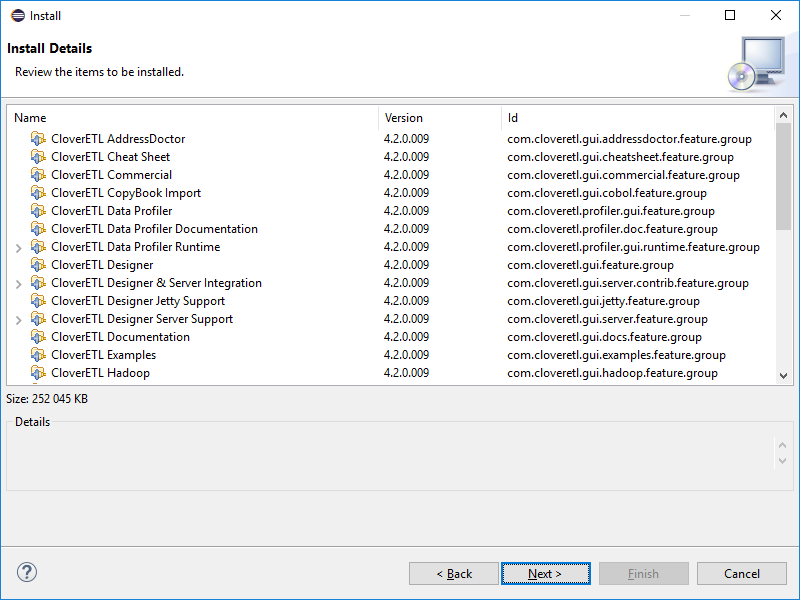 |
Figure 9.5. Overview of CloverETL Plugins to be Installed
Accept the license agreements.
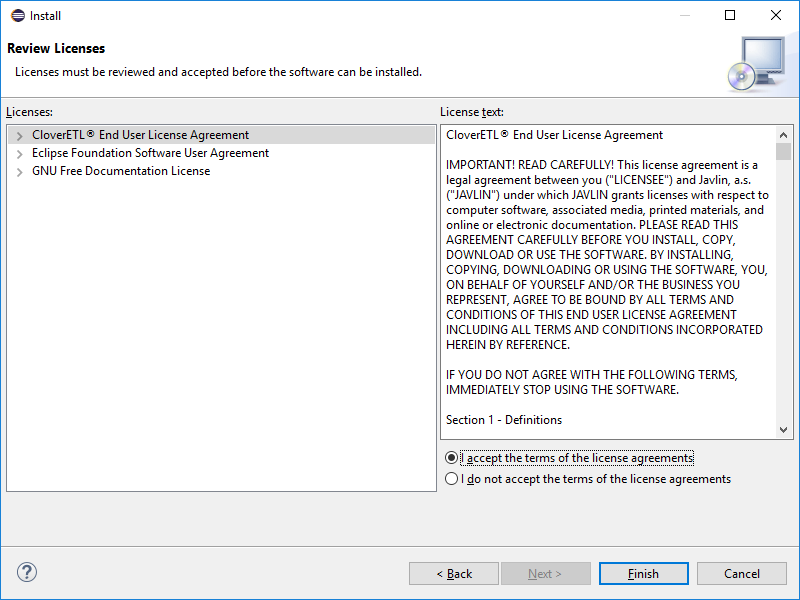 |
Figure 9.6. Accepting License Agreements
To verify that the installation had finished successfully, go to
→ . The CloverETL logo
 should be displayed.
The CloverETL Designer plugin has been installed. You should activate it now.
Continue with: Activating Eclipse Plugin