Copyright © 2006-2008 OW2 Consortium
This work is licensed under the Creative Commons Attribution-ShareAlike License. To view a copy of this license,visit http://creativecommons.org/licenses/by-sa/2.0/deed.en or send a letter to Creative Commons, 559 Nathan Abbott Way, Stanford, California 94305, USA.
$Id: howtos.xml 3272 2008-05-21 09:53:35Z benoitf $
Abstract
The HowTos provided in this guide allow the developer to discover and do some tasks with EasyBeans and some other components.
Table of Contents
List of Figures
Abstract
The GWT (Google Web Toolkit) will be used as the framework for producing clients using the AJAX technique, while EJB3 will be on the server side providing some services (such as persistence).
EJB3 can help developers with the persistence aspects (with the Java Persistence API) or with the business aspects.
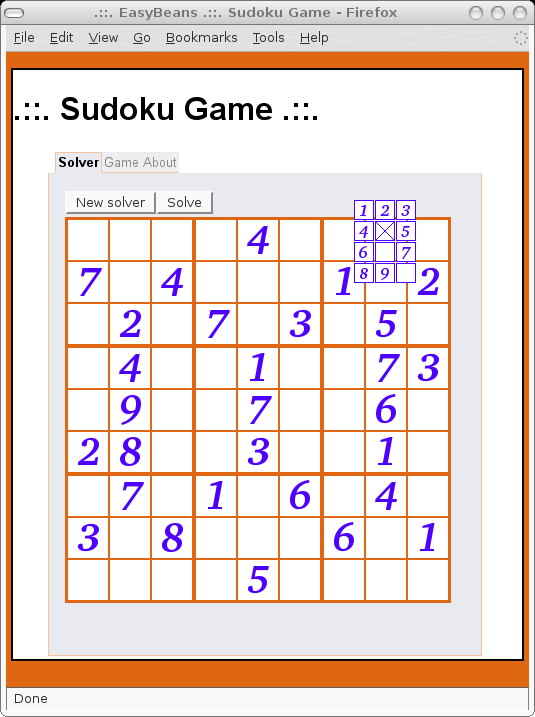
The source of an application, a Sudoku Game, that uses EasyBeans and GWT can be viewed on the Fisheye Sudoku EasyBeans site using a browser. This howto uses some of the code from this application.
A tgz package is also provided on the EasyBeans forge.
Table of Contents
A JDK 5.0 is required to use EasyBeans.
![[Tip]](images/tip.png) |
Tip |
|---|---|
|
GWT only supports JDK 1.4 functions. Therefore, classes that will be transformed by GWT into JavaScript should not use JDK 5 features (such as annotations). Other classes can use the new features (like the EJB3). |
GWT can be used without Eclipse. However, Eclipse is used in this HowTo.
This HowTo uses the EasyBeans Tomcat package. Note that it also works with the JOnAS package or any other EasyBeans package.
EasyBeans can be downloaded from the EasyBeans Web Site.
Tomcat 5.5.20 was used. It should work with other versions as well. Download this software from Tomcat site.
The Toolkit can be downloaded from the Google Web Toolkit download page. The version used in this HowTo is the 1.3 RC1 version running on Linux. This is the first open source version of GWT released with an Apache 2.0 license.
GWT comes with an eclipse project creator tool. The project will have the name Sudoku and will be created in the $HOME/workspace directory.
$ cd gwt-linux-1.3.1/
$ ./projectCreator -eclipse Sudoku -out $HOME/workspace/sudoku
Created directory $HOME/workspace/sudoku/src
Created file $HOME/workspace/sudoku/.project
Created file $HOME/workspace/sudoku/.classpath
A GWT application must be added to the eclipse project. The application creator tool is given the name of the class to generate.
The following files will be generated:
-
The
Sudoku.gwt.xmlfile, which describes the module with entry point. Additionally, this file will be used to add the mapping for the remote service using EasyBeans. -
The
Sudoku.htmlfile, which is a skeleton page that calls the widget's examples. -
The
Sudoku.javafile, which is the class responsible to load widgets (which implements theEntryPointinterface). -
Additionally, there are three scripts that allow files to be launched or compiled. Note that the compile script will be replaced by an ant task in this HowTo.
$ ./applicationCreator -out $HOME/workspace/sudoku -eclipse -out org.objectweb.easybeans.demo.sudoku.web.client.Sudoku
Created directory $HOME/workspace/sudoku/src/org/objectweb/easybeans/demo/sudoku/web
Created directory $HOME/workspace/sudoku/src/org/objectweb/easybeans/demo/sudoku/web/client
Created directory $HOME/workspace/sudoku/src/org/objectweb/easybeans/demo/sudoku/web/public
Created file $HOME/workspace/sudoku/src/org/objectweb/easybeans/demo/sudoku/web/Sudoku.gwt.xml
Created file $HOME//workspace/sudoku/src/org/objectweb/easybeans/demo/sudoku/web/public/Sudoku.html
Created file $HOME//workspace/sudoku/src/org/objectweb/easybeans/demo/sudoku/web/client/Sudoku.java
Created file $HOME/workspace/sudoku/Sudoku.launch
Created file $HOME/workspace/sudoku/Sudoku-shell
Created file $HOME/workspace/sudoku/Sudoku-compile
The two interfaces of the service must be present in the client package. In this howto, the package name is org.objectweb.easybeans.demo.sudoku.web.client.service.
The following two interfaces must be defined:
-
The interface that will be implemented by the remote service
-
The asynchronous interface, which is always a void method. A new parameter must be added on the method and the name of the interface must have a suffix of
Async.
The following is an example of a service that takes an argument and returns an object (A solver).
package org.objectweb.easybeans.demo.sudoku.web.client.service;

import org.objectweb.easybeans.demo.sudoku.web.client.api.GridData;
import org.objectweb.easybeans.demo.sudoku.web.client.api.ServiceException;


import com.google.gwt.user.client.rpc.RemoteService;

/**
 * Interface used to call the servlet facade and then EJB3.
 * @author Florent Benoit
 */
public interface ServletFacadeService extends RemoteService {

    /**
     * Solve a sudoku grid and send in return the solved grid.
     * @param gridData the grid to solve
     * @return the solved grid.
     * @throws ServiceException if solving fails.
     */
    GridData solve(GridData gridData) throws ServiceException;

    /**
     * Checks if a sudoku grid is valid.
     * @param gridData the grid to check
     * @throws ServiceException if checking fails.
     */
    void check(GridData gridData) throws ServiceException;


    /**
     * Generate a sudoku grid and send it in return.
     * @return the generated grid.
     * @throws ServiceException if solving fails.
     */
    GridData generate() throws ServiceException;

}
![[Note]](images/note.png) |
Note |
|---|---|
|
GridData must be a serializable object. However, this
serialization is not JDK serialization. This class must implement
the
The Exception (ServiceException) also implements the
|
The signature is almost the same, except for the following:
-
The return type is void.
-
An extra argument is added in the method signature: the
AsyncCallbackobject. -
The name of the class ends with the
Asynckeyword.
package org.objectweb.easybeans.demo.sudoku.web.client.service;

import org.objectweb.easybeans.demo.sudoku.web.client.api.GridData;

import com.google.gwt.user.client.rpc.AsyncCallback;

/**
 * Asynchronous interface. Same parameters of interface but all methods have an AsyncCallback parameter and are void !.
 * @author Florent Benoit
 */
public interface ServletFacadeServiceAsync {

    /**
     * Asynchronous call to the solve method.
     * @param gridData the grid to solve
     * @param callback the callback to use for this method
     */
    void solve(GridData gridData, AsyncCallback callback);

    /**
     * Checks if a sudoku grid is valid.
     * @param gridData the grid to check
     * @param callback the callback to use for this method
     */
    void check(GridData gridData, AsyncCallback callback);


    /**
     * Generates a sudoku grid and send it in return.
     * @param callback the callback to use for this method
     */
    void generate(AsyncCallback callback);
}
|
Note |
|---|---|
|
The ServiceException is not thrown by the solve() method of
the Async interface. The exceptions will be reported in the
|
This class implements the
IsSerializable interface.
package org.objectweb.easybeans.demo.sudoku.web.client.api;

import com.google.gwt.user.client.rpc.IsSerializable;

/**
 * Represents the data of a sudoku grid.
 * It is a serializable object (gwt) used by remote service.
 * @author Florent Benoit
 */
public class GridData implements IsSerializable {
   ...
}
This class implements the
IsSerializable interface and stores the
message.
Additionally, an empty constructor is required for the serialization.
package org.objectweb.easybeans.demo.sudoku.web.client.api;

import com.google.gwt.user.client.rpc.IsSerializable;

/**
 * Exception thrown by the remote service. <br />
 * Exception needs to be serializable (gwt)
 * @author Florent Benoit
 */
public class ServiceException extends Exception implements IsSerializable {

    /**
     * The message of the exception.
     */
    private String msg;


    /**
     * Empty message.
     */
    public ServiceException() {
        super();
    }

    /**
     * Builds an exception with a given message.
     * @param msg the message of the exception.
     */
    public ServiceException(final String msg) {
        super(msg);
        this.msg = msg;
    }


    /**
     * Gets the message of the exception.
     * @return the message of the exception.
     */
    public String getMessage() {
        return this.msg;
    }

}
The implementation of the service will run on the server side. Therefore, it need not be present in the client package (no JavaScript transformation). The class will be in the server package.
The service is provided as a servlet. Then, the class must
extend the
com.google.gwt.user.server.rpc.RemoteServiceServlet
class.
The Class will look like the following:
package org.objectweb.easybeans.demo.sudoku.web.server.service;

import org.objectweb.easybeans.demo.sudoku.web.client.api.GridData;
import org.objectweb.easybeans.demo.sudoku.web.client.api.ServiceException;

import com.google.gwt.user.server.rpc.RemoteServiceServlet;

/**
 * Implementation of the service that runs on the server side. <br />
 * All is delegate to the EJB3 session facade.
 * @author Florent Benoit
 */
public class ServletFacadeServiceImpl extends RemoteServiceServlet implements ServletFacadeService {

    /**
     * Checks if a sudoku grid is valid.
     * @param gridData the grid to check
     * @throws ServiceException if checking fails.
     */
    public void check(final GridData gridData) throws ServiceException {
        try {
            getFacade().check(gridData.getData());
        } catch (Exception e) {
            throw new ServiceException(e.getMessage());
        }
    }

    /**
     * Solve a sudoku grid and send in return the solved grid.
     * @param gridData the grid to solve
     * @return the solved grid.
     * @throws ServiceException if solving fails.
     */
    public GridData solve(final GridData gridData) throws ServiceException {
        int[][] solvedData = null;
        try {
            solvedData = getFacade().solve(gridData.getData());
        } catch (Exception e) {
            throw new ServiceException(e.getMessage());
        }
        GridData solvedGridData = new GridData();
        solvedGridData.setData(solvedData);
        return solvedGridData;
    }

...

}
A sessionBean facade will be used for delegating all the requests.
The service will use a getFacade() method. InitialContext is built, then the facade is searched and the session bean is returned. The bean can be cached to avoid getting a new bean each time.
The following is the code for this method:
    /**
     * Gets the session facade bean.
     * @return the session bean.
     * @throws Exception if facade is not retrieved
     */
    private SudokuFacade getFacade() throws Exception {
        SudokuFacade sudokuFacade = null;

        Context initialContext = null;
        Hashtable<String, String> env = new Hashtable<String, String>();
        // Use the smart factory
        env.put(Context.INITIAL_CONTEXT_FACTORY, SmartContextFactory.class.getName());
        // Use the default Provider URL port
        env.put(Context.PROVIDER_URL, "smart://localhost:2503");
        initialContext = new InitialContext(env);
        sudokuFacade = (SudokuFacade) initialContext.lookup("SudokuFacade");
        return sudokuFacade;
    }
|
Note |
|---|---|
|
The JNDI name is very simple as the attribute mappedName was used on the @Stateless annotation of the EJB3. The InitialContext factory is the smart factory. This factory allow to download the classes when they are required. The PROVIDER_URL is the default URL of the Smart component. |
When an operation must be performed on the facade session bean, it is done in the following way:
   try {
     ... = getFacade().methodName();
    } catch (Exception e) {
       throw new ServiceException(e.getMessage());
    }
The exception thrown is wrapped in the ServiceException. Only the message is kept and thrown to the client. The error can be printed to the error log to have a full trace on the server side.
The service must be added to an xml file in order to declare it.
In this howto, the file is named
Sudoku.gwt.xml.
The servet element is added to this file along with the class implementing the service and the endpoint of the service (/facade is the following example).
<module>
   <!-- Inherit the core Web Toolkit stuff. -->
   <inherits name='com.google.gwt.user.User'/>

   <!-- Specify the app entry point class. -->
   <entry-point class='org.objectweb.easybeans.demo.sudoku.web.client.Sudoku'/>

   <servlet path='/facade' class='org.objectweb.easybeans.demo.sudoku.web.server.service.ServletFacadeServiceImpl'/>

</module>
An endpoint must be created. The path of the endpoint will use the name of the module and then /facade (the same entry as in the gwt.xml file).
The endpoint will be something similar to "http://localhost:8080/org.objectweb.easybeans.demo/facade".
By using GWT.getModuleBaseURL(), the port and the host need not be known.
ServletFacadeServiceAsync servletFacadeServiceAsync = (ServletFacadeServiceAsync) GWT
        .create(ServletFacadeService.class);
ServiceDefTarget endpoint = (ServiceDefTarget) servletFacadeServiceAsync;
endpoint.setServiceEntryPoint(GWT.getModuleBaseURL() + "/facade");
Before invoking the service, a callback must be built. The asynchronous interface of the service is used. As this interface requires a callback, it must be constructed beforehand.
A callback provides two methods:
-
An
onSuccess(final Object
                result)
method if the call completes successfully. -
An
onFailure(final Throwable
                caught)
method if the call fails.
For the onSuccess method, the result parameter can be cast to GridData, which is the return type of the original method's interface.
final AsyncCallback solvedCallback = new AsyncCallback() {
   /**
     * Called when an asynchronous call completes successfully. It is
     * always safe to downcast the parameter (of type
     * <code>Object</code>) to the return type of the original method
     * for which this is a callback.
     */
   public void onSuccess(final Object result) {
      GridData solvedGridData = (GridData) result;
      ...
   }

   /**
     * Called when an asynchronous call fails to complete normally.
     * @param caught the failure.
     */
   public void onFailure(final Throwable caught) {
      ...
   }
};
A web.xml file must be created to define a
servlet for the remote service that was defined and the mapping must be
done. The mapping must be the same as that used in the client when it
was searching for the endpoint to use.
The following is an example of the xml file:
<?xml version="1.0" encoding="ISO-8859-1">
<web-app xmlns="http://java.sun.com/xml/ns/j2ee"
         xmlns:xsi="http://www.w3.org/2001/XMLSchema-instance"
         xsi:schemaLocation="http://java.sun.com/xml/ns/j2ee http://java.sun.com/xml/ns/j2ee/web-app_2_4.xsd"
         version="2.4">

  <servlet>
    <servlet-name>ServletFacadeService</servlet-name>
    <servlet-class>org.objectweb.easybeans.demo.sudoku.web.server.service.ServletFacadeServiceImpl</servlet-class>
  </servlet>

  <servlet-mapping>
    <servlet-name>ServletFacadeService</servlet-name>
    <url-pattern>/facade</url-pattern>
  </servlet-mapping>

</web-app>
GWT provides some shell scripts to generate the client side. However, it is recommended that an ant task be used.
First, define a classpath. This classpath should include GWT libraries and the path to the source code of the Entry point:
  <path id="gwt.classpath">
    <pathelement location="${project.dir}/src" />
    <pathelement location="${gwt.sdk.location}/gwt-user.jar" />
    <pathelement location="${gwt.sdk.location}/gwt-dev-windows.jar" />
  </path>
Then, compile the code:
  <target name="compile" description="Compile demo" depends="init">
    <javac srcdir="${src.dir}" destdir="${classes.dir}" debug="on">
      <classpath refid="base.classpath" />
    </javac>
  </target>
Finally, generate the GWT:
  <target name="generate-gwt" depends="compile">
    <java classname="com.google.gwt.dev.GWTCompiler" fork="true">
      <arg value="-out" />
      <arg value="${dist.www.dir}" />
      <arg value="org.objectweb.easybeans.demo.sudoku.web.Sudoku" />
      <classpath refid="base.classpath" />
    </java>
  </target>
The AJAX client will be bundled in a war file and will contain the GWT runtime library.
The war task of ant can be used to create the package.
The output generated by the GWT compiler is added at the root of
the WAR file; the libraries go in the WEB-INF/lib folder, and all classes go in
the WEB-INF/classes
folder.
  <target name="build.war"
          description="Build war file"
          depends="compile, generate-gwt">
    <war jarfile="${dist.webapps.dir}/sudoku.war"
         webxml="${resources.dir}/web.xml">
      <fileset dir="${dist.www.dir}/org.objectweb.easybeans.demo.sudoku.web.Sudoku" />
      <lib dir="${lib.dir}">
        <include name="gwt-servlet.jar" />
        <include name="ow_easybeans_component_smartclient.jar" />
      </lib>
      <classes dir="${classes.dir}">
        <include name="**/**" />
      </classes>
    </war>
  </target>
![[Warning]](images/warning.png) |
Warning |
|---|---|
|
The gwt-servlet.jar is used and not the gwt-user.jar file. This is because gwt-user.jar provided by Google contains javax.servlet.* classes, and thus it cannot be deployed on a Tomcat container. |
The war file generated by Ant should be copied to the CATALINA_HOME/webapps folder, and the EJB3
implementation should be copied to the CATALINA_HOME/ejb3s folder.
Documentation about how to start Tomcat/EasyBeans is located in the documentation section of the EasyBeans web site.
The GWT toolkit creates a .launch script that allows launching of an embedded browser and an embedded web container for debugging applications within Eclipse. This script must be modified for EasyBeans access.
The following lines have been added:
<listAttribute key="org.eclipse.jdt.launching.CLASSPATH"> <listEntry value="<?xml version="1.0" encoding="UTF-8"?> <runtimeClasspathEntry containerPath="org.eclipse.jdt.launching.JRE_CONTAINER" javaProject="SudokuWeb" path="1" type="4"/> "/> <listEntry value="<?xml version="1.0" encoding="UTF-8"?> <runtimeClasspathEntry internalArchive="/easybeans-sudoku/src/java" path="3" type="2"/> "/> <listEntry value="<?xml version="1.0" encoding="UTF-8"?> <runtimeClasspathEntry internalArchive="/easybeans-sudoku/output-eclipse" path="3" type="2"/> "/> <listEntry value="<?xml version="1.0" encoding="UTF-8"?> <runtimeClasspathEntry externalArchive="/easybeans-sudoku/lib/gwt-user.jar" path="3" type="2"/> "/> <listEntry value="<?xml version="1.0" encoding="UTF-8"?> <runtimeClasspathEntry externalArchive="/easybeans-sudoku/lib/gwt-dev-linux.jar" path="3" type="2"/> "/> <listEntry value="<?xml version="1.0" encoding="UTF-8"?> <runtimeClasspathEntry externalArchive="/easybeans-sudoku/lib/ow_ejb3_core_api.jar" path="3" type="2"/> "/> <listEntry value="<?xml version="1.0" encoding="UTF-8"?> <runtimeClasspathEntry externalArchive="/easybeans-sudoku/lib/ow_ejb3_persistence_api.jar" path="3" type="2"/> "/> <listEntry value="<?xml version="1.0" encoding="UTF-8"?> <runtimeClasspathEntry externalArchive="/easybeans-sudoku/lib/ow_easybeans_component_smartclient.jar" path="3" type="2"/> "/> </listAttribute>
These libraries are used to access the EasyBeans services. It includes the gwt-user.jar, gwt-dev-linux.jar, EJB3 API (ow_ejb3_core_api.jar and ow_ejb3_persistence_api.jar) and the Smart factory ow_easybeans_component_smartclient.jar.
Although this guide may not answer all questions, it should still be possible to complete the HowTo. The intent of this HowTo is to illustrate how to call remote EJB3s running on EasyBeans using the Google Web Toolkit.
The EasyBeans user guide provides help for developing EJB3 components.