|  | ") |  |
| | | |
 |  |
The basic prerequisite for using LDAP authentication in the broker is to have an X.500 directory server running and configured with a collection of user entries. For users who are unfamiliar with X.500 directory servers, this section briefly describes how to create user entries using the Apache Directory Studio as an administrative tool.
Perform the following steps to add a user entry to the directory server:
Ensure that the X.500 directory server is running (see Install Apache Directory Server).
Start the LDAP Browser, as follows:
If you installed the standalone version of Apache Directory Studio, double-click the relevant icon to launch the application.
If you installed the LDAP Browser plug-in into an existing Eclipse IDE, start Eclipse and open the LDAP perspective. To open the LDAP perspective, select Window|Open Perspective|Other and in the Open Perspective dialog, select LDAP and click OK.
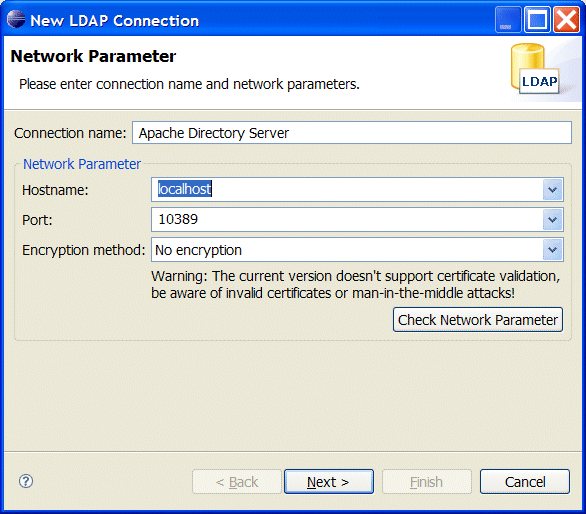
Open a connection to the directory server. Right-click inside the Connections view in the lower left corner and select New Connection. The New LDAP Connection wizard opens.
Specify the network parameters for the new connection. In the Connection
name field, enter Apache Directory Server. In the
Hostname field enter the name of the host where the Apache
Directory Server is running. In the Port field, enter the IP port of the directory
server (for the default instance of the Apache directory server, this is 10389). Click
Next.
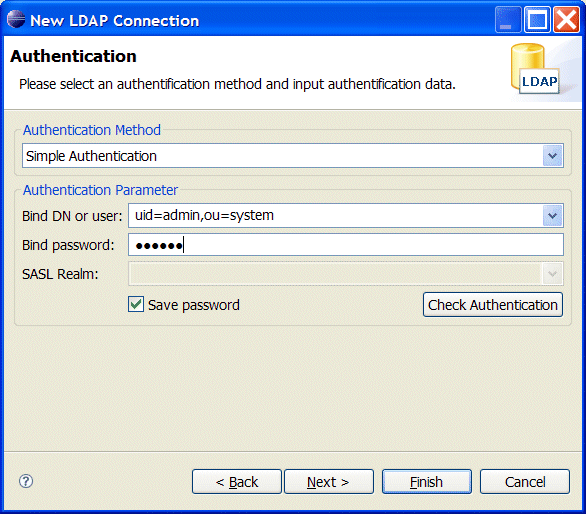
Enter the parameters for simple authentication. In the Bind DN or
user field, enter the DN of the administrator's account on the directory
server (for the default instance of the Apache directory server, this is
uid=admin,ou=system). In the Bind password field,
enter the administrator's password (for the default instance of the Apache directory
server, the administrator's password is secret). Click
Finish.
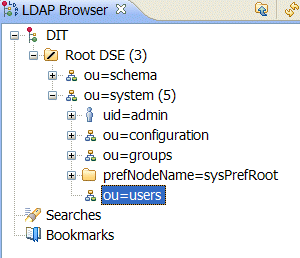
If the connection is successfully established, you should see an outline of the
Directory Information Tree (DIT) in the LDAP Browser view. In the
LDAP Browser view, drill down to the ou=users node,
as shown.
Right-click on the ou=users node and select New
Entry. The New Entry wizard appears.
In the Entry Creation Method pane, you do not need to change any settings. Click Next.
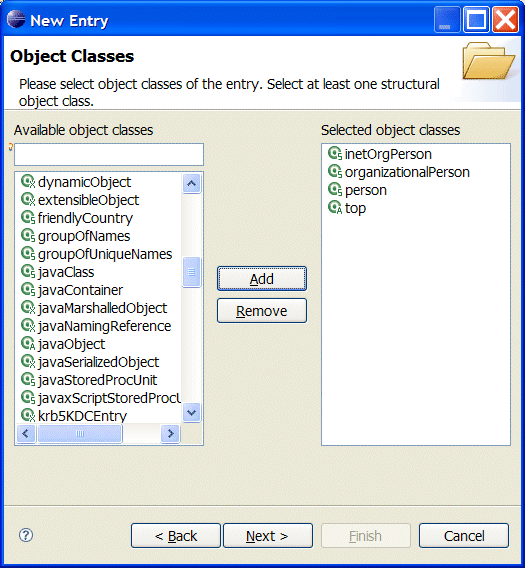
In the Object Classes pane, select inetOrgPerson
from the list of Available object classes on the left and then
click Add to populate the list of Selected object
classes. Click Next.
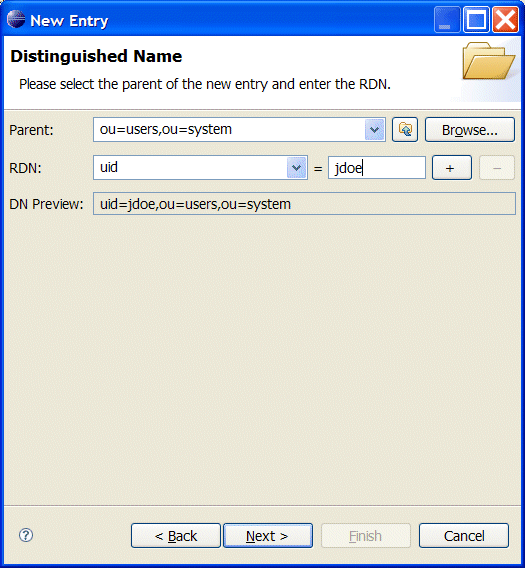
In the Distinguished Name pane, complete the
RDN field, putting uid in front and
jdoe after the equals sign. Click Next.
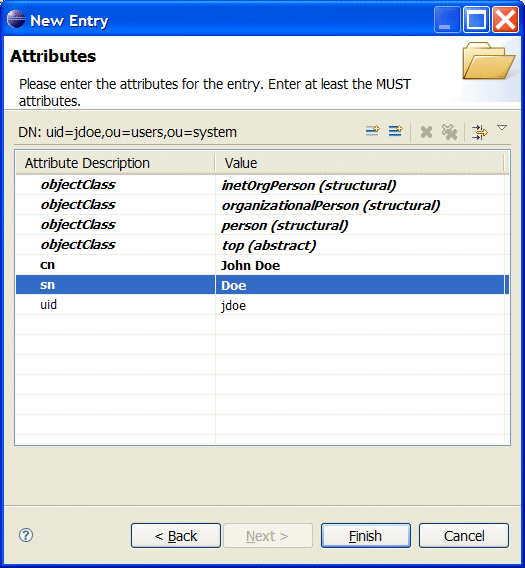
Now fill in the remaining mandatory attributes in the
Attributes pane. Set the cn (common name)
attribute to John Doe and the sn (surname) attribute
to Doe. Click Finish.
Add a userPassword attribute to the user entry. In the LDAP
Browser view, you should now be able to see a new node,
uid=jdoe. Select the uid=jdoe node. Now, right-click in the
Entry Editor view and select New Attribute.
The New Attribute wizard appears.
From the Attribute type drop-down list, select
userPassword. Click Finish.
The Password Editor dialog appears. In the Enter New
Password field, enter the password, secret. Click
Ok.
To add more users, repeat steps 7 to 14.
| |  | |
 |