Cite Test Guide
A step by step guide to the GeoServer Compliance Interoperability Test Engine (CITE).
Contents
Check out CITE tools
Check out the cite tools from subversion:
svn co http://svn.codehaus.org/geoserver/trunk/community/cite cite
From the cite directory check out the test engine:
cd cite
svn co -r 402 http://teamengine.svn.sourceforge.net/svnroot/teamengine/branches/team2 engine
Patch the engine sources:
patch -p0 < engine.patch
Note
This step is necessary if the engine is to be run as a web application in Jetty.
From the cite directory check out the sources for legacy cite testing component:
mkdir cite1
svn co https://svn.opengeospatial.org:8443/ogc-projects/cite/components/cite1/trunk cite1
From the cite directory check out the test sources for each test suite that is to be run:
 mkdir tests
 svn co -r 2740 https://svn.opengeospatial.org:8443/ogc-projects/cite/scripts/wfs/1.0.0/trunk tests/wfs-1.0.0
     svn co -r 2740 https://svn.opengeospatial.org:8443/ogc-projects/cite/scripts/wfs/1.1.0/trunk tests/wfs-1.1.0
svn co -r 2740 https://svn.opengeospatial.org:8443/ogc-projects/cite/scripts/wms/1.1.1/trunk tests/wms-1.1.1
    svn co -r 2740 https://svn.opengeospatial.org:8443/ogc-projects/cite/scripts/wcs/1.0.0/trunk tests/wcs-1.0.0
    svn co -r 2740 https://svn.opengeospatial.org:8443/ogc-projects/cite/scripts/wcs/1.1.1/trunk tests/wcs-1.1.1
Warning
To check out the test sources an account on the OGG portal is required. If you do not have one ask on the developer list for someone to check out the tests for you.
Patch the tests sources:
patch -p0 < tests.patch
Build the CITE tools
From the cite directory execute the following command:
mvn clean install
A successful build should result in the following output:
[INFO] [compiler:testCompile]
[INFO] No sources to compile
[INFO] [surefire:test]
[INFO] No tests to run.
[INFO] [jar:jar]
[WARNING] JAR will be empty - no content was marked for inclusion!
[INFO] Building jar: /Users/jdeolive/Devel/geoserver/trunk/trunk/src/community/cite/target/cite-1.0.jar
[INFO] [install:install]
[INFO] Installing /Users/jdeolive/Devel/geoserver/trunk/trunk/src/community/cite/target/cite-1.0.jar to /Users/jdeolive/.m2/repository/org/geoserver/cite/1.0/cite-1.0.jar
[INFO] ------------------------------------------------------------------------
[INFO] BUILD SUCCESSFUL
[INFO] ------------------------------------------------------------------------
[INFO] Total time: 27 seconds
[INFO] Finished at: Mon Jul 20 10:43:13 EST 2009
[INFO] Final Memory: 20M/36M
[INFO] ------------------------------------------------------------------------
Run the test engine
Note
The engine can be run in one of two ways:
- As a web application as described in this section
- From the command line as described here
Change to the engine directory and execute the following command:
cd engine
mvn jetty:run-exploded
If successful, Jetty should be started:
[INFO] [jetty:run-exploded]
[INFO] Configuring Jetty for project: Compliance + Interopability Testing + Evaluation (CITE) Module
[INFO] Context path = /teamengine
[INFO] Tmp directory =  determined at runtime
[INFO] Web defaults = org/mortbay/jetty/webapp/webdefault.xml
[INFO] Web overrides =  none
[INFO] Starting jetty 6.1.8 ...
2009-07-20 10:45:03.551::INFO:  jetty-6.1.8
2009-07-20 10:45:03.707::INFO:  No Transaction manager found - if your webapp requires one, please configure one.
2009-07-20 10:45:09.893::INFO:  Started [email protected]:9090
[INFO] Started Jetty Server
In a web browser navigate to http://localhost:9090/teamengine
Note
By default the engine is configured to run on port 9090. This can be changed by editing the engine/pom.xml file.
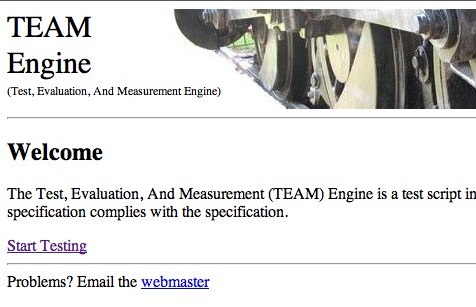
Click the Start Testing link. When prompted for a username and password use “geoserver” and “geoserver”.
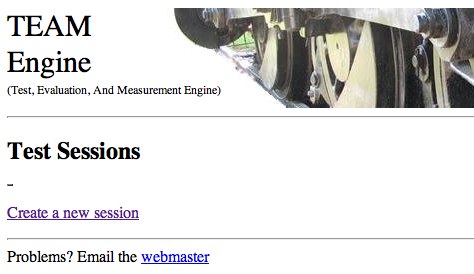
Click the Create a new session link
Choose the test suite to run from the drop down lists and provide a name for the session
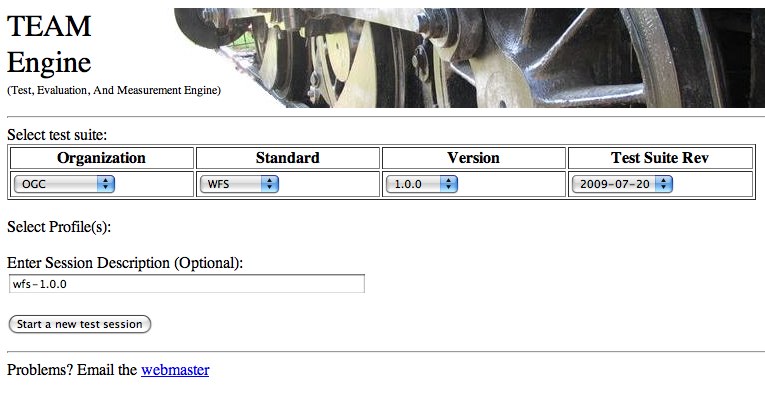
Click the Start a new test session button
Warning
The engine uses a pop-up window to display the status of the test suite. The pop-up will need to be unblocked by the browser and javascript must be enabled for it to work.
Run WFS 1.0 tests
Note
Running WFS 1.0 tests require PostGIS to be installed on the system.
Create a PostGIS user named “cite”:
createuser cite
Create a PostGIS databased named “cite”, owned by the “cite” user:
createdb -T template_postgis -U cite cite
Change directory to the citewfs-1.0 data directory and execute the script cite_data.sql:
psql -U cite cite < cite_data.sql
Start GeoServer with the citewfs-1.0 data directory. Example:
cd <root of geoserver install>
export GEOSERVER_DATA_DIR=<root of geoserver sources>/data/citewfs-1.0
./bin/startup.sh
Create a new wfs-1.0.0 session in teamengine and configure it with the following parameters:
Capabilities URL:
http://localhost:8080/geoserver/wfs?request=getcapabilities&service=wfs&version-1.0.0
All tests included

Run WFS 1.1 tests
Note
Running the wfs 1.0 test suite requires that GeoServer is running with the H2 extension enabled. If you are running from eclipse you can simply use the h2 profile:
mvn eclipse:eclipse -P h2
If you are running an actual release install the H2 extension available from the download page.
Change directory to the citewfs-1.1-h2 data directory and Unpack the H2 database:
cd <root of geoserver sources/data/citewfs-1.1-h2
unzip cite.db.zip
Start GeoServer with the citewfs-1.1-h2 data directory.
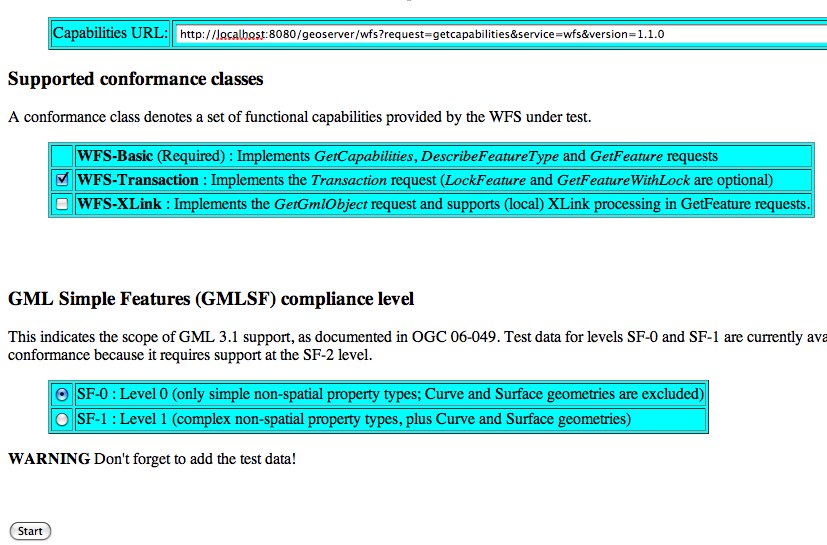
Create a new wfs-1.1.0 session in teamengine and configure it with the following parameters:
Capabilities URL:
http://localhost:8080/geoserver/wfs?service=wfs&request=getcapabilities&version=1.1.0
Supported Conformance Classes:
- Ensure WFS-Transaction is checked
- Ensure WFS-Xlink is unchecked
GML Simple Features: SF-0
Run WMS 1.1 tests
Start GeoServer with the citewms-1.1 data directory.
Create a new wms-1.1.1 session in teamengine and configure it with the following parameters:
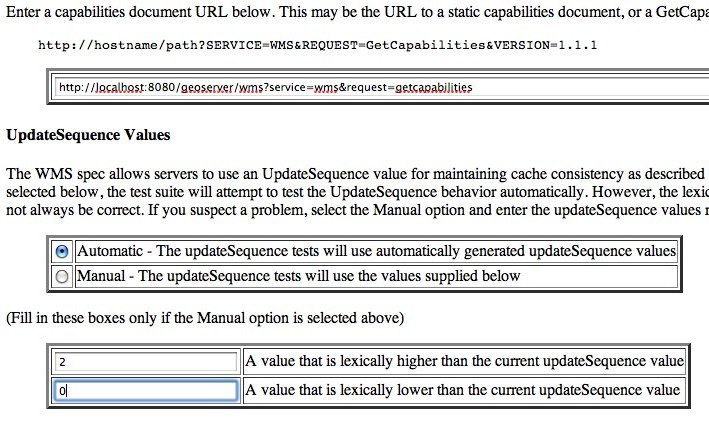
Capabilities URL:
http://localhost:8080/geoserver/wms?&service=wms&request=getcapabilities
UpdateSequence Values:
- Ensure Automatic is selected
- “2” for value that is lexically higher
- “0” for value that is lexically lower
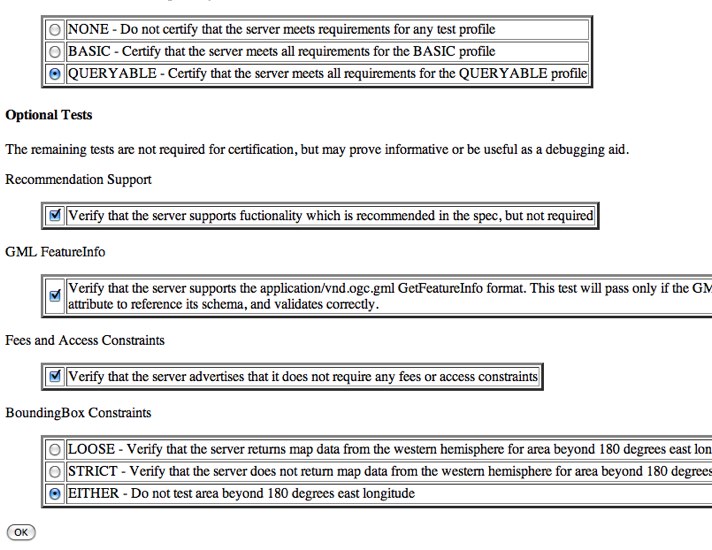
Certification Profile : QUERYABLE
Optional Tests:
- Ensure Recommendation Support is checked
- Ensure GML FeatureInfo is checked
- Ensure Fees and Access Constraints is checked
- For BoundingBox Constraints ensure Either is selected
Click OK
Run WCS 1.1 tests
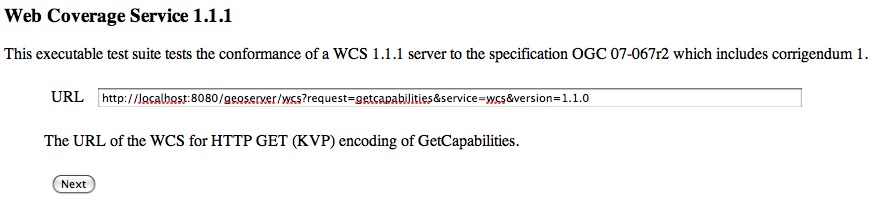
Start GeoServer with the citewcs-1.1 data directory.
Create a new wcs-1.1.0 session in teamengine and configure it with the following parameters:
Capabilities URL:
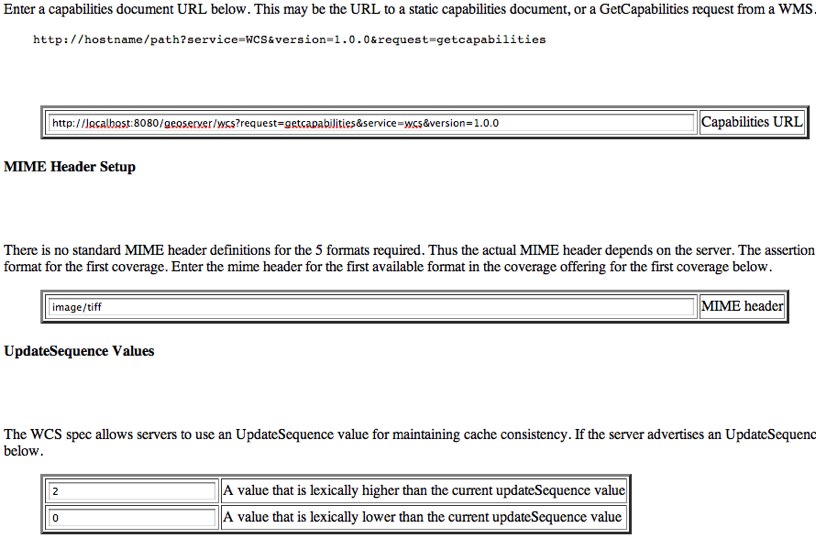
http://localhost:8080/geoserver/wcs?service=wcs&request=getcapabilities&version=1.1.1
Click Next
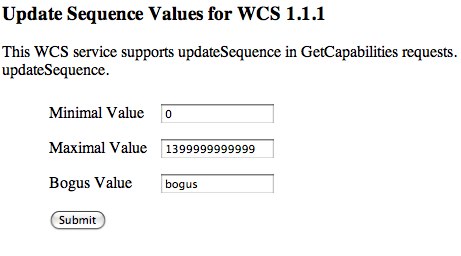
Accept the default values and click Submit
Run WCS 1.0 tests
Warning
The WCS specification does not allow a cite compliant WCS 1.0 and 1.1 version to co-exist. To successfully run the WCS 1.0 cite tests the wms1_1-<VERSION>.jar must be removed from the geoserver WEB-INF/lib directory.
Remove the wcs1_1-<VERSION>.jar from WEB-INF/lib directory.
Start GeoServer with the citewcs-1.0 data directory.
Create a new wcs-1.0.0 session in teamengine and configure it with the following parameters:
Capabilities URL:
http://localhost:8080/geoserver/wcs?service=wcs&request=getcapabilities&version=1.0.0
MIME Header Setup: “image/tiff”
Update Sequence Values:
- “2” for value that is lexically higher
- “0” for value that is lexically lower
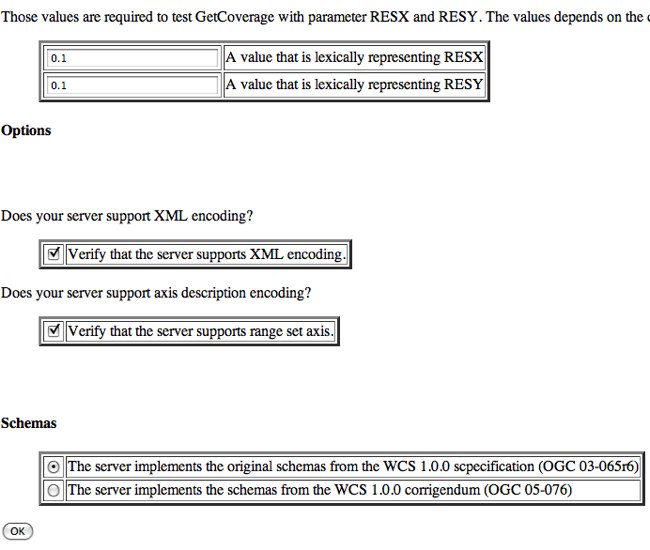
Grid Resolutions:
- “0.1” for RESX
- “0.1” for RESY
Options:
- Ensure Verify that the server supports XML encoding is checked
- Ensure Verify that the server supports range set axis is checked
Schemas:
- Ensure that original schemas is selected
Click OK
Command line
Running a test suite
To run the engine from the command line execute the run.sh script from the cite directory:
cd cite
sh run.sh <testsuite>
Where testsuite is <service>-<version> identifier for the test suite. Example: “wfs-1.1.0”.
Note
When running from the command line the engine uses a Swing pop-up dialog to configure a test session. If you are running Linux and get a blank window, try export AWT_TOOLKIT="MToolkit" before executing run.sh.
Logging results of a test run
To log the results of a test run execute the log.sh script from the cite directory:
cd cite
sh log.sh <testsuite>
The above command will output all the tests run as part of the test suite. For each test the log will report if it passed or failed. For example, to list all the wfs-1.1.0 tests that failed:
sh log.sh wfs-1.1.0 | grep "wfs:wfs-1.1.0" | grep "Failed"
Note
The intermediate grep for “wfs:wfs-1.1.0” will filter out all subtests that failed.
The output of the above command will be something like:
Test wfs:wfs-1.1.0-LockFeature-tc1.1 (wfs-1.1.0/d39e32742_1/d39e728_1/d39e29904_1/d39e28567_1) Passed
Test wfs:wfs-1.1.0-LockFeature-tc2.1 (wfs-1.1.0/d39e32742_1/d39e728_1/d39e29904_1/d39e28580_1) Passed
Test wfs:wfs-1.1.0-LockFeature-tc3.1 (wfs-1.1.0/d39e32742_1/d39e728_1/d39e29904_1/d39e28585_1) Passed
The long string in parantheses beside the test name is the test id. To log information about a specific test append its test id as a parameter to the run.sh script. Example:
sh run.sh wfs-1.1.0 wfs-1.1.0/d39e32742_1/d39e728_1/d39e29904_1/d39e28567_1