NPACI Rocks Cluster Distribution: Users Guide: 
| ||
|---|---|---|
| Prev | Chapter 1. Installing a Rocks Cluster | Next |
This section describes installing a Rocks frontend from a "Central" server over the wide area network, a process called WAN kickstart. The client frontend will retrieve Rocks software (base and rolls) and configuration over the internet, and use these to install itself.
This process does not quite "clone" a frontend since you will fill out fresh installation screens for the new frontend. In addition, no user information nor user files are transferred from the central server. However the distribution and rolls from the central server will be used to install the client frontend.
WAN kickstart requires some initial human coordination between the central server and frontend client. This phase is necessary for each party to authenticate the other. Once the initial kickstart has been completed, however, the client frontend may install or upgrade from the same central without re-authentication (authentication is sticky).
Use a Rocks base CD for your architecture (see downloads) to boot the client frontend, or alternatively a small bootdisk (also available on the downloads page). When the splash screen appears, type:
frontend central=name.your.org |
at the boot: prompt, where "name.your.org" is the fully-qualified domain name of your central server, without http:// or any other prefix or suffix. If you use the special name Rocks, you will attempt to contact central.rocksclusters.org, a central server at SDSC.
If this is the first time your client frontend has kickstarted from this central server, the central must authenticate you based on your IP address or DNS name. It is also a chance for you to inspect the security credentials of the central server. On the central server the program insert-access must be running with the IP address, network, or domain name of your frontend given as an argument.
(On Central) # insert-access .sdsc.edu |
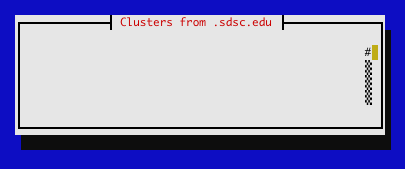
Figure: Central's insert-access program. In this case, frontends from the ".sdsc.edu" domain will be allowed to kickstart from this central; all others will be denied.

Figure: Central's insert-access detects the frontend's access attempt.
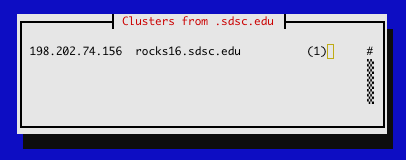
Figure: Central's insert-access shows the IP address, name and number of kickstart attempts this frontend client has made. It is now safe to stop insert-access.
If this is your first time installing off the central server, you will see a screen describing the central's security credentials. Specifically you are seeing the contents of the mod_ssl apache server certificate on the central. At the same time, the insert-access program on the central is displaying your IP address indicating your kickstart attempt.
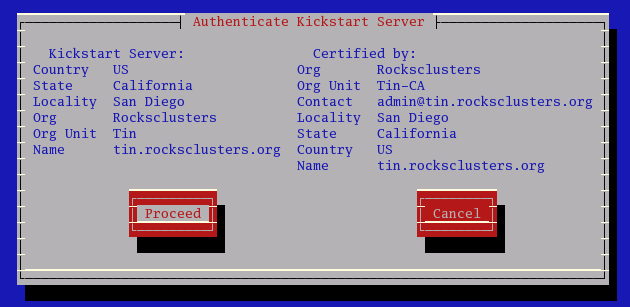
Figure: The WAN kickstart frontend client authentication screen. The left paragraph lists the credentials of the central server; the right paragraph shows the "Certificate Authority" that issued the central's certificate. Pressing "Proceed" will continue the process, choosing "Cancel" will abort the installation.
If the security credentials are to your liking, press the "Proceed" button on the authentication screen. If the central does not have insert-access running, you will see an Could not get access to server error. If you have kickstarted from this central before, no insert-access is required on central and you will immediately see the roll choice screen described below.
After gaining access to the central, your frontend client will download a kickstart file over HTTPS. You will presently see the roll choice screen:
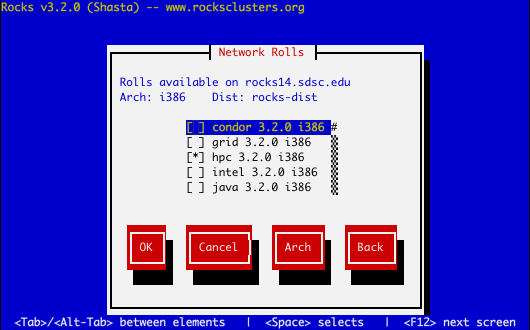
Choose your desired rolls, and press "Ok".
 | If you need a roll for another architecture, choose your rolls for this arch first, press ok. Then say "yes" to another roll server, and choose the same one as before. You will see this screen again. Press the "arch" button, and choose rolls for the non-native architecture. |
You will then see the option to choose another central server to get more rolls.
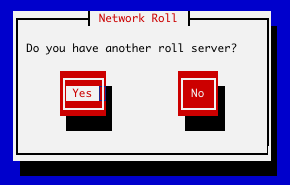
When you are finished adding new network rolls (ones obtained over the network), answer "No" to the new central server question.
Now you can augment your frontend with rolls from a CD. The screens and process for installing CD-based rolls is described in Install Frontend.
When you are finished installing CD-based rolls, you will enter into the familiar Rocks installation windows. These may change depending on what rolls you have selected. Again the Install Frontend section has details for this process.
The contents of the Rocks Base CD will now be transferred to your frontend over the network. Keep in mind the transfer may be over 650MB, which is done via http using standard wget. This phase will take some time, and is affected by network congestion and bandwidth between your frontend and the central server.
The installer will then retrieve the chosen network rolls, rebuild the distribution with all rolls included, then install the packages. Finally, the installer will proceed with the post-section and other elements of a standard frontend install.
Your frontend should now be installed and ready to initialize compute nodes (see section install compute nodes).
| You can also upgrade your frontend over the network, by adding the keyword upgrade boot command (in addition to frontend central=name). Advanced users may want to activate Rocks ekv service on the frontend during the install. Ekv allows you to interact with the install screens over the network. To do this, add the keyword ekv to the boot command. Once the install has begun you can ssh to the frontend. When connected, you will see the RedHat and Rocks install screens. Unfortunately, when ekv is activated, the screens on the physical console (the monitor that is physically connected to the frontend) will get mangled to some extent. |
| Advanced users should know that there exists another boot: option for frontend central. If you have multiple distributions on central (i.e. one for english, one for italian), you may specify dist=name, such as: "boot: frontend central=name.my.org dist=it-dist". This specifies the top-level distribution directory, that central will expect to find at "/home/install/external/it-dist". In addition, if you simply type frontend central (no equal sign), the frontend will attempt to obtain its kickstart file from any DHCP server that will answer. With such a dhcpd server, you can even PXE the frontend! |