Switching the JBoss jBPM database backend is reasonably straightforward. We will step through this process using PostgreSQL and MySQL as an example. The process is identical for all other supported databases. For a number of these supported databases, a number of JDBC drivers, Hibernate configuration files and Ant build files to generate the database creation scripts are present in the jBPM distribution in the DB subproject. If you cannot find these files for the database you wish to use, you should first make sure if Hibernate supports your database. If this is the case you can have a look at files for one of the databases present in the DB project and mimic this using your own database.
For this document, we will use the JBoss jBPM Starter's Kit distribution. We will assume that this starter's kit was extracted to a location on your machine named ${JBPM_SDK_HOME}. You will find the DB subproject of jBPM in the ${JBPM_SDK_HOME}/jbpm-db.
After installing the database, you will have to run the database creation scripts. These will create the jBPM tables in the database. To make the default webapp running with this new database, we will have to update some configuration files of the server included in the Starter's Kit. For these configuration changes, we will not go into too much detail. If you want to know more about the different configuration settings in the server, we advise you to have a look at the JBoss documentation.
Whatever database that you use, make sure that the isolation level of the configured JDBC connection is at least READ_COMMITTED, as explained in Section 7.6.1, “Isolation level of the JDBC connection”
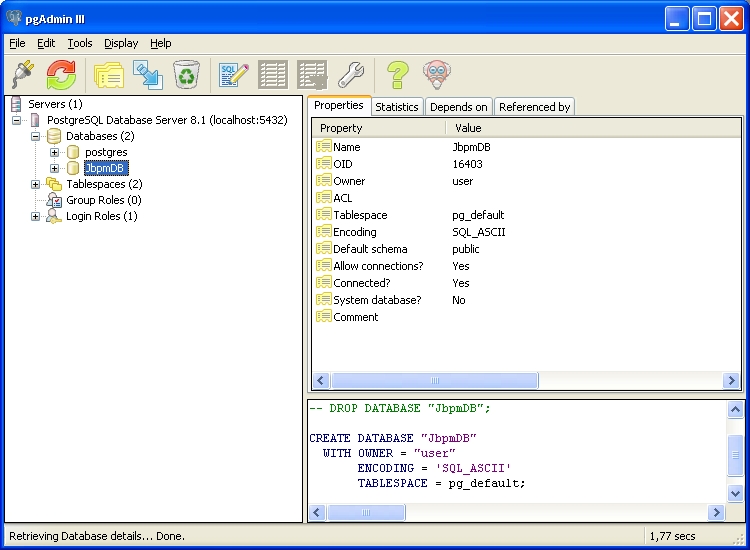
To install PostgreSQL or any other database you may be using, we refer to the installation manual of these products. For Windows PostgreSQL installation is pretty straightforward. The installer creates a dedicated Windows user and allows to define the database administrator. PostgreSQL comes with an administration tool called pgAdmin III that we will use to create the jBPM database. A screenshot of this tool right after creating the JbpmDB database with it is shown in the figure below.
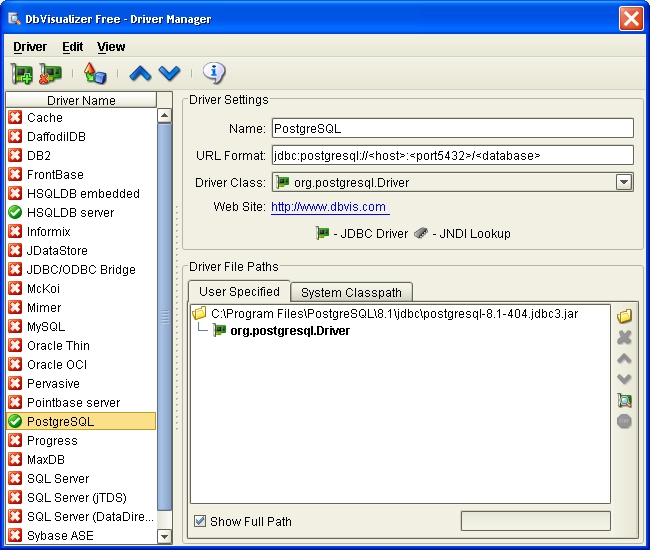
After the installation of the database, we can use a database viewer tool like DBVisualizer to look at the contents of the database. Before you can define a database connection with DBVisualizer, you might have to add the PostgreSQL JDBC driver to the driver manager. Select 'Tools->Driver Manager...' to open the driver manager window. Look at the figure below for an example of how to add the PostgreSQL JDBC driver.
Now everything is set to define a database connection in DBVisualizer to our newly created database. We will use this tool further in this document to make sure the creation scripts and process deployment are working as expected. For an example of creating the connection in DBVisualizer we refer to the following figure. As you can see, there are no tables present yet in this database. We will create them in the following section.
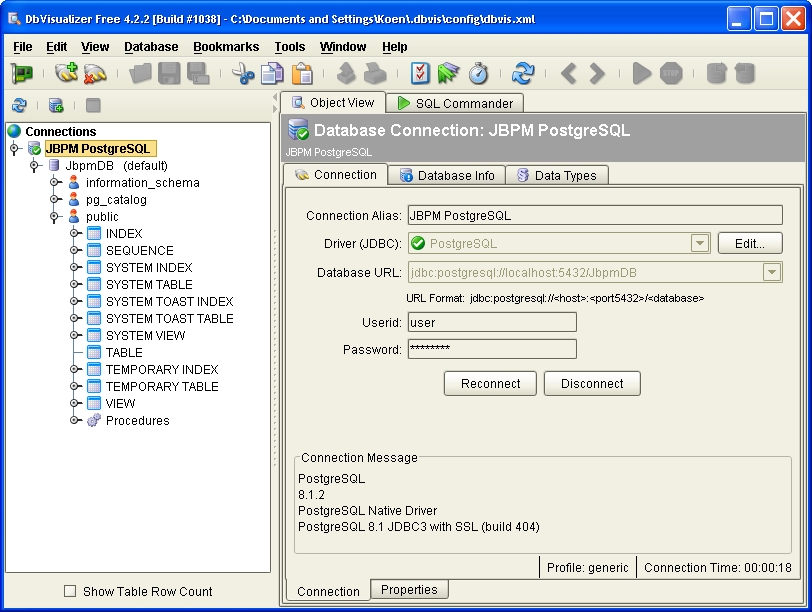
Another thing worth mentioning is the Database URL above : 'jdbc:postgresql://localhost:5432/JbpmDB'. If you created the JbpmDB database with another name, or if PostgreSQL is not running on the localhost machine or on another port, you'll have to adapt your Database URL accordingly.
To install the MySQL database, please refer to the documentation provided by MySQL. The installation is very easy and straightforward and only takes a few minutes in windows. You will need to use the database Administration console provided by MySQL.
In order to get the proper database script generated for your database, you should use the scripts provided in the jBPM Starter's Kit. In the Starter's Kit under the ${JBPM_SSTARTERSKIT_HOME}/jbpm-db/build/${DATABASE_TYPE}/scripts you will find create scripts for all the major databases. Using your database admin console, navigate to the database and then open and execute the create script we just referenced. Below are screen shots doing this for PostGreSQL and MySQL under their respective admin consoles
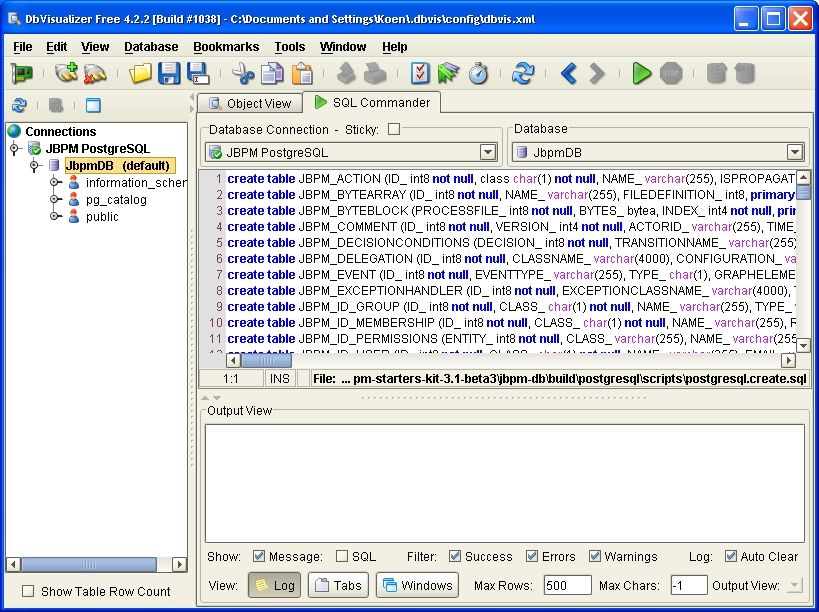
As already mentioned you will find the database scripts for a lot of the supported databases in the DB subproject. The database scripts for PostgreSQL are found in the folder '${JBPM_SDK_HOME}/jbpm-db/build/mysql/scripts. The creation script is called 'postgresql.create.sql'. Using DBVisualizer, you can load this script by switching to the 'SQL Commander' tab and then selecting 'File->Load...'. In the following dialog, navigate to the creation script file. The result of doing so is shown in the figure below.
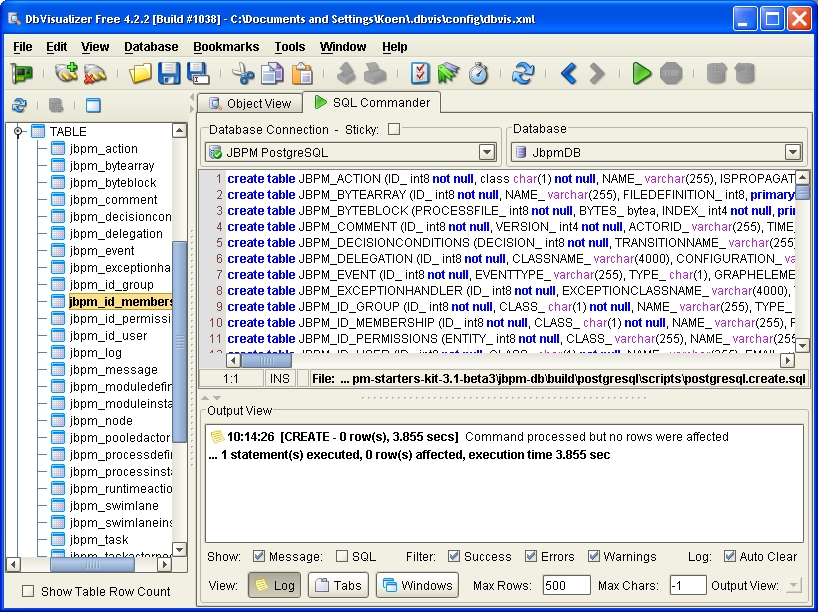
To execution this script with DBVisualizer, you select 'Database->Execute'. After this step all JBoss jBPM tables are created. The situation is illustrated in the figure below.
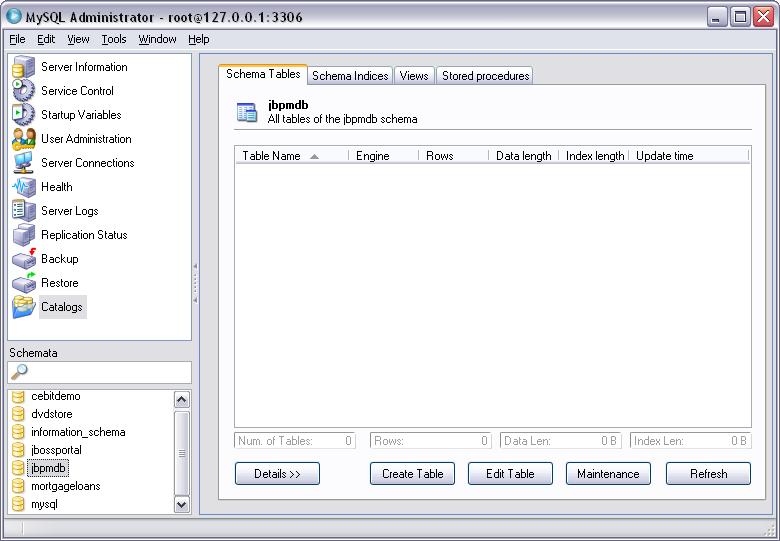
Once you have installed MySQL go ahead and create a jbpm database, use any name you like for this DB. In this example "jbpmdb" was used. A screenshot of the database is below.
You will use the MySQL command line tool to load the database scripts. Open a DOS box or terminal window and type the following command:
mysql -u root -p
You will be prompted for your MySQL password for the root account or whatever account you are using to modify this database. After logging in, type the following command to use the newly created jbpmdb:
use jbpmdb
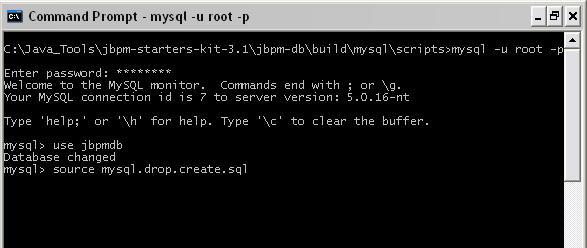
Now you can load the database script for jBPM by executing the following command:
source mysql.drop.create.sql
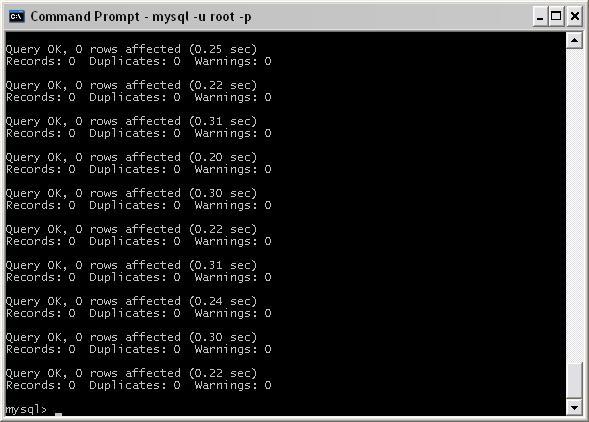
Once the script executes, you should have the folling output in the MySQL command window:
After these steps, there is not yet any data present in the tables. For the jBPM webapp to work, you should at least create some records in the jbpm_id_user table. In order to have exactly the same entries in this table as the default distribution of the starter's kit running on HSQLDB, we suggest to run the script below.
insert into JBPM_ID_USER (ID_, CLASS_, NAME_, EMAIL_, PASSWORD_)
       values ('1', 'U', 'user', '[email protected]', 'user');
insert into JBPM_ID_USER (ID_,CLASS_, NAME_, EMAIL_, PASSWORD_)
       values ('2', 'U', 'manager', '[email protected]', 'manager');
insert into JBPM_ID_USER (ID_,CLASS_, NAME_, EMAIL_, PASSWORD_)
       values ('3', 'U', 'shipper', '[email protected]', 'shipper');
insert into JBPM_ID_USER (ID_,CLASS_, NAME_, EMAIL_, PASSWORD_)
values ('4', 'U', 'admin', '[email protected]', 'admin');Before we can really use our newly created database with the JBoss jBPM default webapp we will have to do some updates to the JBoss jBPM configuration. The location of the server is '${JBPM_SDK_HOME}/jbpm-server'. The first thing we will be doing to update this configuration is create a new datasource that points to our JbpmDB database. In a second step, we will make sure that the default webapp is talking to this datasource and not to the HSQLDB datasource anymore.
<?xml version="1.0" encoding="UTF-8"?>

<datasources>
  <local-tx-datasource>
    <jndi-name>JbpmDS</jndi-name>
    <connection-url>jdbc:postgresql://localhost:5432/JbpmDB</connection-url>
    <driver-class>org.postgresql.Driver</driver-class>
    <user-name>user</user-name>
    <password>password</password>
    <metadata>
      <type-mapping>PostgreSQL 8.1</type-mapping>
    </metadata>
  </local-tx-datasource>
</datasources>
For MySQL, the datasource definition would look as follows:
<?xml version="1.0" encoding="UTF-8"?>

<datasources>
  <local-tx-datasource>
    <jndi-name>JbpmDS</jndi-name>
    <connection-url>jdbc:mysql://localhost:3306/jbpmdb</connection-url>
    <driver-class>com.mysql.jdbc.Driver</driver-class>
    <user-name>root</user-name>
    <password>root</password>
    <metadata>
      <type-mapping>MySQL</type-mapping>
    </metadata>
  </local-tx-datasource>
</datasources>
In order to create a new datasource, you should create a file named e.g. jbpm-ds.xml with the contents shown in the program listing above. Of course it is possible that you have to change some of the values in this file to accommodate for your particular situation. You then simply save this file in the ${JBPM_SDK_HOME}/jbpm-server/server/jbpm/deploy folder. Congratulations, you just created a new DataSource for your JBoss jBPM server. Well, almost... To make things really work you will have to copy the correct JDBC driver to the ${JBPM_SDK_HOME}/jbpm-server/server/jbpm/lib folder. We already used this JDBC driver above when we were installing it in DBVisualizer to be able to browse our newly created database. The file is named 'postgresql-8.1-*.jdbc3.jar' and it can be found in the jdbc subfolder of your PostgreSQL installation folder.
For MySQL, copy the jdbc driver installed from the MySQL ConnectorJ package. The version you need to use is currently the MySQL Connector/J 3.1 available from http://www.mysql.com/products/connector/j/
If you are not using PostgreSQL or MySQL and are wondering how to create your own data source definition for your particular database, you can find sample data source definitions in the JBoss Application Server distribution under the 'docs/examples/jca' folder. if your database has a JDBC driver available for it, you should have no problems using it with jBPM.
Making the default webapp talk to the correct datasource is again not very difficult. The first step in doing this is simply locate the 'jboss-service.xml' file in the folder '${JBPM_SDK_HOME}/jbpm-server/server/jbpm/deploy/jbpm.sar/META-INF'. Change the contents of this file with the contents of the listing below. An attentive reader will notice that the only difference is an exchange of the token 'DefaultDS' by 'JbpmDS'.
<?xml version="1.0" encoding="UTF-8"?>

<server>
  <mbean code="org.jbpm.db.jmx.JbpmService"
         name="jboss.jbpm:name=DefaultJbpm,service=JbpmService"
         description="Default jBPM Service">
    <attribute name="JndiName">java:/jbpm/JbpmConfiguration</attribute>
    <depends>jboss.jca:service=DataSourceBinding,name=JbpmDS</depends>
  </mbean>
</server>
The last thing we have to do to make everything run is a manipulation of the 'jbpm.sar.cfg.jar' file in the '${JBPM_SDK_HOME}/jbpm-server/server/jbpm/deploy/jbpm.sar' folder. You have to extract this file somewhere and open the file named 'hibernate.cfg.xml'. Then replace the section containing the jdbc connection properties. This section should look like shown in the listing below. There are two changes in this file : the hibernate.connection.datasource property should point to the JbpmDS datasource we created as the first step in this section and the hibernate.dialect property should match the PostgreSQL or MySQL dialect.
Below is a sample of the 2 changes required, comment out the version of the dialect you don't need depending on the database you are using. You can get a list of supported database Dialect types from here http://www.hibernate.org/hib_docs/v3/reference/en/html/session-configuration.html#configuration-optional-dialects
<?xml version='1.0' encoding='utf-8'?>

<!DOCTYPE hibernate-configuration PUBLIC
          "-//Hibernate/Hibernate Configuration DTD 3.0//EN"
          "http://hibernate.sourceforge.net/hibernate-configuration-3.0.dtd">

<hibernate-configuration>
  <session-factory>

    <!-- jdbc connection properties -->
    <!-- comment out the dialect not needed! -->
    <property name="hibernate.dialect">org.hibernate.dialect.PostgreSQLDialect</property>
    <property name="hibernate.dialect">org.hibernate.dialect.MySQLDialect</property>
    <property name="hibernate.connection.datasource">java:/JbpmDS</property>

    <!-- other hibernate properties
    <property name="hibernate.show_sql">true</property>
    <property name="hibernate.format_sql">true</property>
    -->

    <!-- ############################################ -->
    <!-- # mapping files with external dependencies # -->
    <!-- ############################################ -->

    ...

  </session-factory>
</hibernate-configuration>
Now we are ready to fire up the server, and look if the webapp works. You will not be able to start any processes yet, as there are no processes deployed yet. To do this we refer to the document on process definition deployment.
In the jbpm.db subproject, you can find:
- An SQL script to create the jBPM 3.0.2 schema (for Hypersonic)
- An SQL script to create the jBPM 3.1 schema (for Hypersonic)
- An SQL script to upgrade from a jBPM 3.0.2 schema to a jBPM 3.1 schema (for Hypersonic)
- The ant scripts to create the schema update
The schema SQL scripts can be found in directory hsqldb/upgrade.scripts.
To run the schema update tool for your database, follow these guidelines:
- Prerequisite: Make sure you installed the jbpm.db project right besides the jbpm project. In the starters-kit, this is automatically the case. If jbpm is installed in a different location, update the jbpm.3.location dir in build.properties accordingly.
- Prerequisite: You should have the proper JDBC driver jar for your database.
-
Update the properties in the build.properties in the root of the jbpm.db project:
- upgrade.hibernate.properties: a properties file that contains the connection properties to your database in hibernate style.
- upgrade.libdir: the directory containing the jdbc driver jars for your database.
- upgrade.old.schema.script: the schema generation script to create the old database schema. (if it already exists, you don't need this property.)
- For creating the old schema and then calculating the differences, run the ant script 'ant upgrade.db.script'
- For only calculating the update script without first loading the old db schema, run the ant script 'ant upgrade.hibernate.schema.update'
- After successfull completion, you'll find the upgrade script in build/database.upgrade.sql
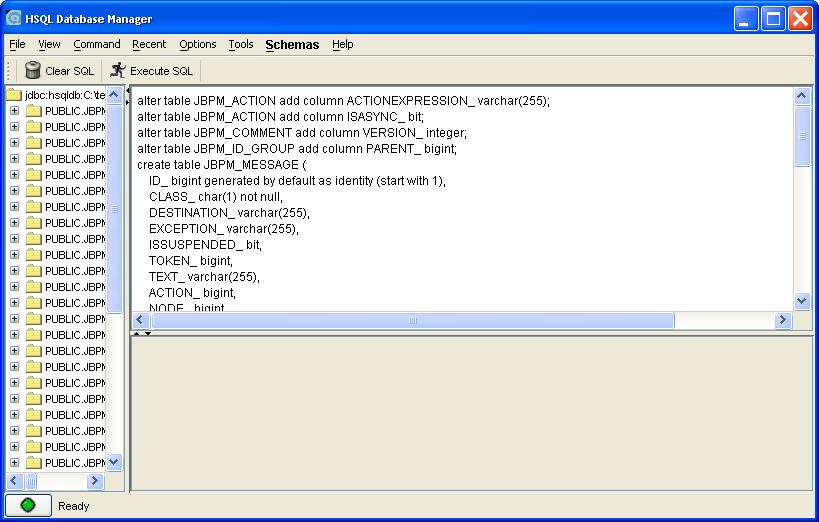
For upgrading from jBPM 3.0.2 to jBPM 3.1, the generated upgrade SQL script (for HSQLDB) is illustrated in the listing below:
# New JBPM_MESSAGE table
create table JBPM_MESSAGE (
  ID_ bigint generated by default as identity (start with 1),
  CLASS_ char(1) not null,
  DESTINATION_ varchar(255),
  EXCEPTION_ varchar(255),
  ISSUSPENDED_ bit,
  TOKEN_ bigint,
  TEXT_ varchar(255),
  ACTION_ bigint,
  NODE_ bigint,
  TRANSITIONNAME_ varchar(255),
  TASKINSTANCE_ bigint,
  primary key (ID_)
);

# Added columns
alter table JBPM_ACTION add column ACTIONEXPRESSION_ varchar(255);
alter table JBPM_ACTION add column ISASYNC_ bit;
alter table JBPM_COMMENT add column VERSION_ integer;
alter table JBPM_ID_GROUP add column PARENT_ bigint;
alter table JBPM_NODE add column ISASYNC_ bit;
alter table JBPM_NODE add column DECISIONEXPRESSION_ varchar(255);
alter table JBPM_NODE add column ENDTASKS_ bit;
alter table JBPM_PROCESSINSTANCE add column VERSION_ integer;
alter table JBPM_PROCESSINSTANCE add column ISSUSPENDED_ bit;
alter table JBPM_RUNTIMEACTION add column VERSION_ integer;
alter table JBPM_SWIMLANE add column ACTORIDEXPRESSION_ varchar(255);
alter table JBPM_SWIMLANE add column POOLEDACTORSEXPRESSION_ varchar(255);
alter table JBPM_TASK add column ISSIGNALLING_ bit;
alter table JBPM_TASK add column ACTORIDEXPRESSION_ varchar(255);
alter table JBPM_TASK add column POOLEDACTORSEXPRESSION_ varchar(255);
alter table JBPM_TASKINSTANCE add column CLASS_ char(1);
alter table JBPM_TASKINSTANCE add column ISSUSPENDED_ bit;
alter table JBPM_TASKINSTANCE add column ISOPEN_ bit;
alter table JBPM_TIMER add column ISSUSPENDED_ bit;
alter table JBPM_TOKEN add column VERSION_ integer;
alter table JBPM_TOKEN add column ISSUSPENDED_ bit;
alter table JBPM_TOKEN add column SUBPROCESSINSTANCE_ bigint;
alter table JBPM_VARIABLEINSTANCE add column TASKINSTANCE_ bigint;

# Added constraints
alter table JBPM_ID_GROUP add constraint FK_ID_GRP_PARENT foreign key (PARENT_) references JBPM_ID_GROUP;
alter table JBPM_MESSAGE add constraint FK_MSG_TOKEN foreign key (TOKEN_) references JBPM_TOKEN;
alter table JBPM_MESSAGE add constraint FK_CMD_NODE foreign key (NODE_) references JBPM_NODE;
alter table JBPM_MESSAGE add constraint FK_CMD_ACTION foreign key (ACTION_) references JBPM_ACTION;
alter table JBPM_MESSAGE add constraint FK_CMD_TASKINST foreign key (TASKINSTANCE_) references JBPM_TASKINSTANCE;
alter table JBPM_TOKEN add constraint FK_TOKEN_SUBPI foreign key (SUBPROCESSINSTANCE_) references JBPM_PROCESSINSTANCE;
alter table JBPM_VARIABLEINSTANCE add constraint FK_VAR_TSKINST foreign key (TASKINSTANCE_) references JBPM_TASKINSTANCE;
Not really crucial for jBPM, but in some situations during development, it can be convenient to open the hypersonic database manager that gives you access to the data in the JBoss hypersonic database.
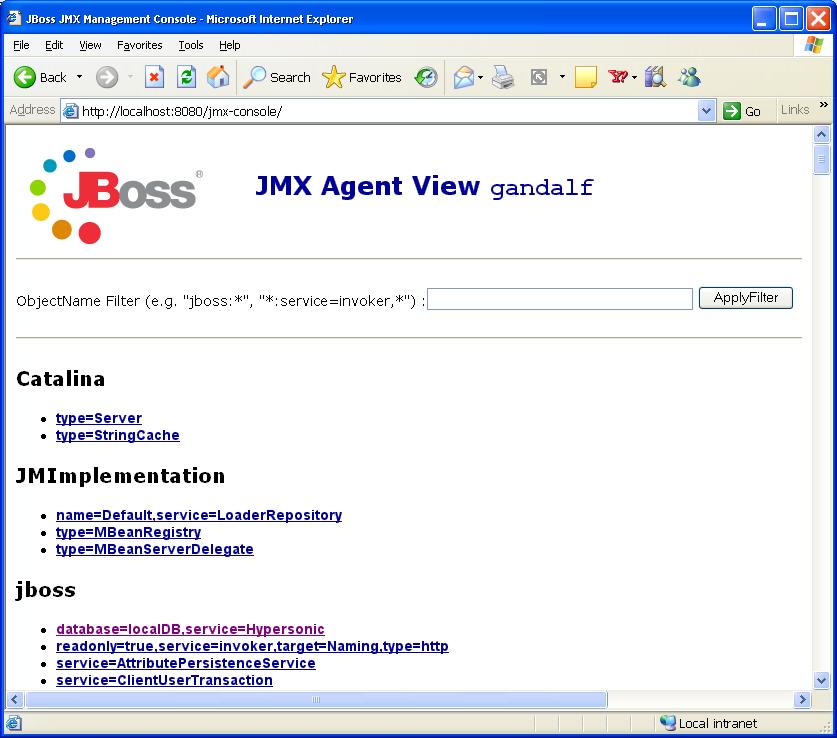
Start by opening a browser and navigating to the jBPM server JMX console. The URL you should use in your browser for doing this is : http://localhost:8080/jmx-console. Of course this will look slightly different if you are running jBPM on another machine or on another port than the default one. A screenshot of the resulting page is shown in the figure below.
If you click on the link 'database=jbpmDB,service=Hypersonic' under the JBoss entries, you will see the JMX MBean view of the HSQLDB database manager. Scrolling a bit down on this page, in the operations section, you will see the 'startDatabaseManager()' operation. This is illustrated in the screenshot below.

Clicking the invoke button will start the HSQLDB Database Manager application. This is a rather harsh database client tool, but it works ok for our purposes of executing this generated script. You may have to ALT-TAB to get to view this application as it may be covered by another window. The figure below shows this application with the above script loaded and ready to execute. Pushing the 'Execute SQL' button will execute the script and effectively update your database.