The Communities Portlet allows Administrators the ability to create and manage communities and their associated pages. Regular users can use the Communities Portlet to join or leave open communities
Log in to the portal as an Administrator
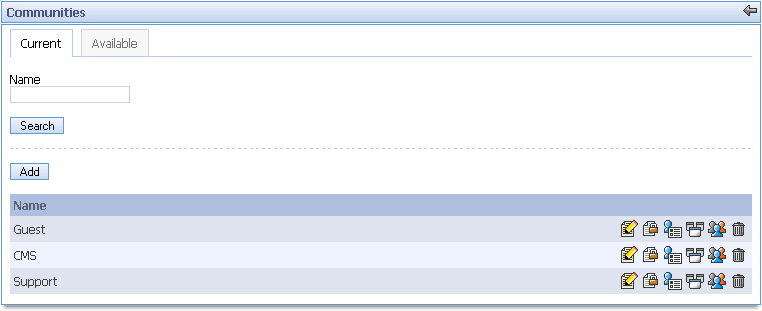
Add the Communities portlet to your page (if it doesn't already exist) by clicking on the Add Content link, searching for "Communities", clicking the Add button next to the portlet, and clicking the Finished button). Click on the Current tab in the Communities portlet. The following screen is displayed.

In the screen above, notice that a listing of the current communities that the user belongs to appears on the bottom of the screen. If you were to click on the Available tab, you would see a listing of all the available communities that exist in the system.
To search for communities on either the Current or Available tab, type a community name in the "Name" input field.
Click Search.
On either the Current or Available tab, click Add.
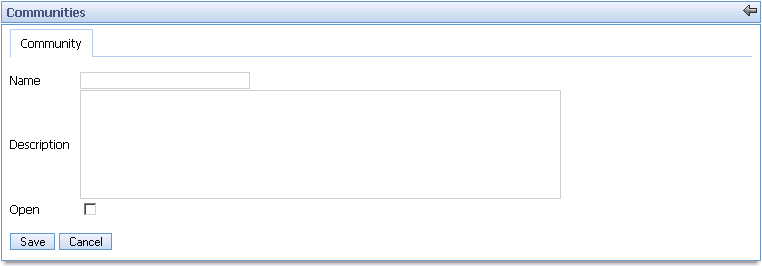
Enter a name for the community in the Name input field.
Optionally, enter a description for the community in the Description text area. Check the Open box if you want users to be able to join and leave this community on their own.

Click Save.
To add additional communities, repeat steps 1-4.
On either the Current or Available tab, locate the community you want to edit. Click the Edit icon (
 ) on the right of the community.
Type changes in the Name input field and, optionally, the Description text area and the Open checkbox.
Click Save.
Without pages, a community is just an empty shell. All portlets in the portal are displayed on pages. They can be thought of as desktops on which you put your portlet applications. The desktops can be shared with other users or they can be restricted for your own personal use. By default, if a user is given the Power User role, that user is given a personal community that only he/she can access, and he/she has permissions to do anything in that community. Under the My Places menu, that community will appear as the user's name.
Click on the Pages icon (
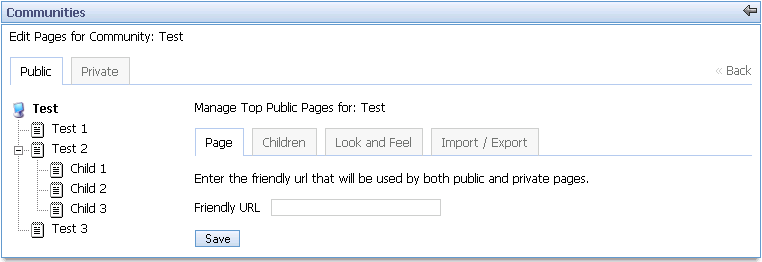
 ) to the right of the community. A screen
similar to the following is displayed.
In the screen above, notice that the pages that belong to the Test community are displayed in a tree structure on the left. Also notice that every page can have child pages. To actually view these pages in the portal, use the My Places menu to navigate to the Test community. The following screen is displayed.

In the screen above, notice that every top level page represented in the tree structure is represented by a tab in the portal. Also, every child page is represented in the Navigation portlet. The Navigation portlet is the only means to navigate to pages that are not at the top level. Therefore, make sure you put an instance of the Navigation portlet on every page that is not top level.
Go back to the Communities portlet, and click on the Pages icon to the right of the community to which you want to add a page.
Decide if you want to add a Public or Private page.
A public page is a page in your community that can be accessed by guests. As long as the guest has the appropriate URL (Friendly URLs will be discussed in the next section), the guest has permission to access any public page.
A private page is a page in your community that can only be accessed by logged in users who are part of your community. If a user is not logged in (i.e., the user is a guest) or if a user does not belong to your community, then the user cannot access your private page.
If you would like to create a public page, make sure the Public tab is selected. If you would like to create a private page, click on the Private tab.
In the left-hand tree structure, click on the node that should be the parent of your new page. If you want to create a top level page, make sure the community name is selected (it has the
 icon to the left of it). If you want to
create a child page, make sure the appropriate parent page is
selected.
icon to the left of it). If you want to
create a child page, make sure the appropriate parent page is
selected.Click on the Children tab.
Type the name of the new page in the Name input field. Optionally, you can change the Type and Hidden settings.
Click on the Save button.
Optionally, you can use the up and down arrows underneath the main form to update the display order of the child pages.
Use the My Places menu to go to your community, and click on the tab for your new page if it's a top level page, or use the Navigation portlet to get to your new page if it is a child page.
Use the Add Content link to add portlets to your new page.
Go back to the Communities portlet, and click on the Pages icon to the right of the community for which you want to edit a page.
In the left-hand tree structure, find the page you want to edit and click on it.
Click on the Page tab.
You now have the option to change the Parent of the current page, rename the current page, change the display language of the current page, change the type of the current page, and change whether the current page is hidden or not. After making your changes, click the Save button.
You can also provide a Friendly URL for this page. Normally, portal URLs are very long and difficult to read because so many parameters are passed in through the URL. However, you can give your page a Friendly URL to make it easier to read and access.
Before you can give your page a Friendly URL, your community must have a Friendly URL. Click on the community name in the left-hand tree structure, click on the Page tab, and put in a Friendly URL for your community (it must start with "/"). Click the Save button.
Now go back to the page you're editing, click on the Page tab, and put in a Friendly URL for your page (it must also start with "/"). Click the Save button.
If everything was done correctly, you can now access your page using the following URL pattern:
http://server-name/web/community-friendly-url/page-friendly-url
If you already have a page in your community that is set up exactly like you want your current page set up, then you can use the Copy Page function. Just select the page that you want to copy from the drop-down next to Copy Page and click the Save button. Your current page will be an exact copy of the page you selected except for the page's name.
An exhaustive discussion of page permissions is provided in Chapter 3. In particular, see section 3.9.3
Go back to the Communities portlet, and click on the Pages icon to the right of the community for which you want to delete a page.
In the left-hand tree structure, find the page you want to delete and click on it.
Click on the Page tab.
Click on the Delete button.
Go back to the Communities portlet, and click on the Pages icon to the right of the community for which you want to manage the look and feel for a page.
In the left-hand tree structure, find the page you want to change the look and feel for and click on it.
Click on the Look and Feel tab.
You now have the option to select a new Theme or Color Scheme by clicking on the desired radio buttons.
Go back to the Communities portlet, and click on the Pages icon to the right of the community for which you want to import/export pages.
Click on the Import / Export tab.
If you click on the Export button, it will export all of the pages, their layouts, their configurations, their look and feel, and their permissions to a LAR file (Liferay ARchive). By default, it uses the current timestamp as the name of the LAR file, but you have the option to change it. After you click the Export button, you will be prompted with a dialog window asking where to save the file.
You can also import a LAR file into your current community. BE VERY CAREFUL, however, because importing a LAR file will overwrite any existing pages with the pages configured in the LAR file. To import a LAR file, click on the Browse button, find the LAR file on your hard drive, click the Open button, and then click the Import button.
Users can either be assigned directly or indirectly to a community. Both methods of assignment will be discussed below.
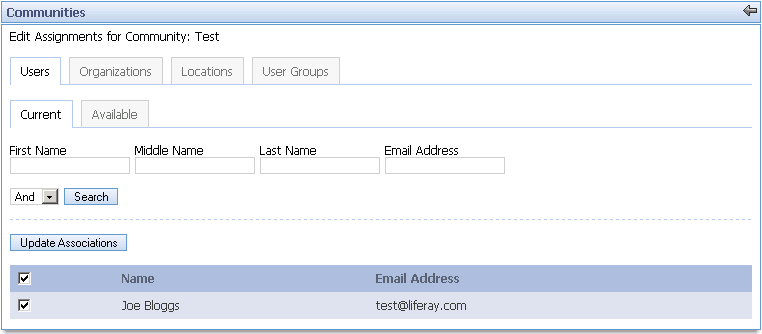
Go to the Communities portlet, and click on the Assign icon to the right of the community for which you want to assign users. The following screen is displayed

When a community is first created, only the user who created the community is assigned to it (in this case, Joe Bloggs). Click on the Available tab.
Use the search form to search for the users that you want to directly assign to this community.
Check the boxes to the left of the users that you want to directly assign to this community.
Click the Update Associations button.
Alternatively, users can directly assign themselves to open communities by joining them. See section 2.5.1 below.
Go to the Communities portlet, and click on the Assign icon to the right of the community for which you want to assign users.
Click on the Available tab.
Click on the Organizations, Locations, or User Groups tab.
Use the search form to search for the organizations/locations/user groups that you want to assign to this community. In other words, all of the members of your selected organizations/locations/user groups will be indirectly assigned to this community via a link. However, for all intents and purposes, the users will function as members of the community.
Check the boxes to the left of the organizations/locations/user groups that you want to assign to this community.
Click the Update Associations button.
Click on the Available tab.
Assuming a community is open, it will have a Join icon (
 ) to the right of the community.
Click on the Join icon.
Assuming that community already has pages configured for it, the My Places menu will now have an entry for the community you just joined. Click on that community's name, and you will be able to navigate to it.
Click on the Current tab.
Assuming there is an open community that you already joined, it will have a Leave icon (
 ) to the right of the community.
Click on the Leave icon.
The community you just left will no longer appear in the My Places menu, and you will no longer have access to it.
