NetBeans System Properties Module Tutorial
This tutorial is intended to demonstrate aspects of the NetBeans Nodes API.
It shows how to do the following:
- how to add a hierarchy of nodes to the Services window
- how to rename and delete nodes
- how to to display subnodes
- how to change the list of nodes
- how to create a property sheet
- how to assign properties
- how to perform other common tasks
Working through this sample is
important because the NetBeans Nodes API is one of the more ubiquitous APIs and reflects
information that exists independently of the nodes. You interact
through an interface to this live information.
Contents
For more information on working with NetBeans Modules modules, see the
NetBeans Development Project home on the NetBeans website. If you have questions, visit the
NetBeans Developer FAQ or use the feedback link
at the top of this page.
Getting to Know the Sample
Before you start writing the module, you have to make sure you have all of the necessary software.
In addition, you might want to play with the sample before building it yourself. Getting to know the
sample lets you know what you are in for during the rest of this tutorial!
Installing the Software
Before you begin, you need to install the following software on your
computer:
- NetBeans IDE 6.0
- Java Standard Development Kit (JDK™) version
5.0 or later
Installing the Sample
In this section, we download and install the sample, so that we can become
acquainted with it before recreating it ourselves.
- Unzip the attached file.
- In the IDE, choose File > Open Project and browse to the folder that contains the unzipped file.
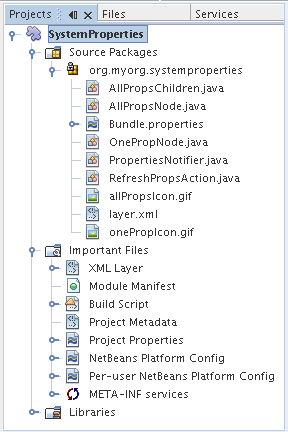
Open the module project. It should look as follows:
- Right-click the project node and choose Install/Reload in Target Platform. The target
platform opens and the module is installed.
Introducing the Sample
In this section, we look at the functionality provided by the module, from
the perspective of an end user. Once we know in detail what the module will provide,
we will be in a better position to build it from scratch.
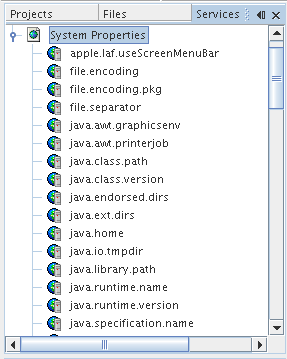
- Open the Services window (Ctrl-5) and notice that you have a new node with a large number (~50) of subnodes,
each labeled according to a key for specific Java properties:
Contextual menu items appear when you
right-click the main node and subnodes. For the subnodes, the Java
runtime's generalized properties are used to configure basic mechanisms such as
search paths for fonts, location of the Java Virtual Machine (JVM), default locale,
and so on. These are typically string keys, similar to name.name.name, and an
associated string value. Values can be queried or set from within the Java language.
In addition, they can be used to set default values at JVM start up. When the System Properties node is
extended, it will display one node for each of the keys, each labeled according to the
key. For example:
- The value java.vm.vendor may display the value Sun Microsystems, Inc.,
for example.
- The value path.separator may display a semicolon, depending on your
configuration.
- The value user.language may display the value English, depending on your
configuration.
- Play with the sample:
- Show the property sheet. Right-click a subnode and choose Properties.
The property sheet is displayed with a single Properties tab,
containing two properties. The first property is labeled Name and
it gives the same name as the node (key), while the other is labeled Value and
displays the string value of the property.
- Rename a property. Click on a subnode and then click it again. This lets you rename a key in
place, while keeping the same value. Alternatively, click
on the Name property in the property sheet, or right-click a subnode and choose Rename.
- Change a value. Click on the Value tab in the property sheet and type in a new value. This
resets the system property to the entered value.
- Add a property. Right click the main System Properties node and choose Add System Property. This lets you add a new system property
to the list.
- Delete a property. Select a property and press Delete. This removes the property.
- Refresh the list. Right click the main System Properties node and choose Refresh. This prompts the module
to recheck the values, refreshing the list as needed.
Introducing the Sources
The System Properties sample consists of main files and supporting files.
Main Files. The module's main files are its Java classes (selected in the illustration below):
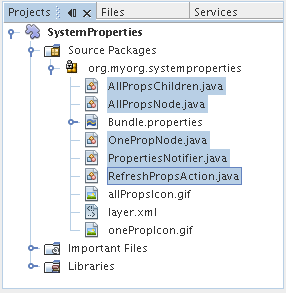
The Java classes are introduced in alphabetical order below:
|
File
|
Description
|
| AllPropsChildren.java |
This children object is responsible for keeping track of the list of nodes underneath
the System Properties node. When first asked for the list, it retrieves all system
properties and asks the node implementation to keep track of all the system
property names. The interface for doing this is a class called Children.
|
| AllPropsNode.java |
This node specifies what children will be under it, and asks to use
AllPropsChildren to keep track of the list of child nodes. The module takes care
of things such as its context menu.
|
| OnePropNode.java |
This is the node representing a single property, and is an AbstractNode. Its
constructor requires that the user supply the key, in the form of a string. For every
system property name, OnePropNode is used to display it. When the user expands
the system properties node, it builds a list of keys, then creates a corresponding
number of OnePropNodes. Each OnePropNode displays a single key, and does not
directly interact with its parent node -- its knowledge is limited to a single system
property and how to deal with it, as well as notifying the PropertiesNotifier
if there are any changes.This design makes it easier to reuse such nodes, including
placing them in other contexts.
|
| PropertiesNotifier.java |
Manages routing events whenever there are changes, including adding, deleting,
or renaming a property, or when a property value has changed.
|
| RefreshPropsAction.java |
This action appears in the pop-up menu under System Properties with the label Refresh.
It forces a refresh to occur, updating the display of information based
on the current state of system properties.
|
Supporting Files. The module's supporting files are in the org.myorg.systemproperties package and
in the Important Files node (selected in the illustration below):
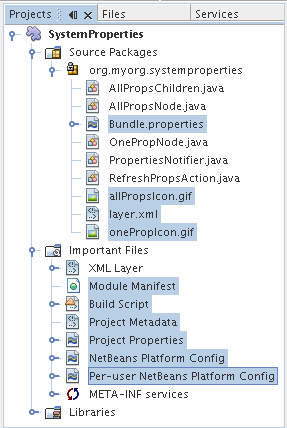
The supporting files in the org.myorg.systemproperties package are introduced in alphabetical order below:
|
File
|
Description
|
| allPropsIcon.gif |
Icon for the System Properties node. |
| Bundle.properties |
This is a standard Java properties file, which uses the syntax Key=Value. Keys are
code names for things that appear in the source code, with values designating those
things which will be displayed to the user.
This file is useful for localization. For example, by creating a properties file such
as Bundle_ja.properties, and filling all the values with Japanese, this module will automatically display
everything in Japanese, if the
user is running the IDE in Japanese mode.
|
| layer.xml |
Registers AllPropsNode.java as a node in Services window.
|
| onePropIcon.gif |
Icon for subnodes.
|
The files in the Important Files node are introduced in the order in which they appear in the Projects window:
|
File
|
Description
|
| Module Manifest |
Declares project as module. |
| Build Script |
Contains Ant targets for building the project.
|
| Project Metadata |
Contains project metadata, such as dependencies, for project.
|
| Project Properties |
Contains project properties. |
| NetBeans Platform Config |
Contains platform properties. |
| Per-user NetBeans Platform Config |
Contains user-specific properties. |
For basic information on each of the Important Files, see the
Introduction to NetBeans Module Development.
Setting Up the Module Project
Before you start writing the module, you have to make sure you
that your project is set up correctly.
Creating the Module Project
In this section, we use the Module Project wizard to create the source structure needed by all
module projects.
- Choose File > New Project. Under Categories, select NetBeans Plug-in Modules. Under projects,
select Module Project and click Next.
- In the Name and Location panel, type System Properties in Project Name.
Change the
Project Location to any directory on your computer, such as c:\mymodules. Leave the Standalone Module radiobutton
selected. Select the Set as Main Project checkbox.
Click Next.
- In the Basic Module Configuration panel, replace yourorghere in Code Name Base with myorg and change "System Properties"
to "systemproperties" so that the whole code name base is org.myorg.systemproperties. Leave System Properties as the Module Display Name.
Leave the location of the localizing bundle and XML layer, so that they will be stored in a
package with the name org.myorg.systemproperties. Click Finish.
The IDE creates the System Properties
project. The project contains all of your sources and
project metadata, such as the project's Ant build script. The project
opens in the IDE. You can view its logical structure in the Projects window (Ctrl-1) and its
file structure in the Files window (Ctrl-2). For example, the Projects window should now look as follows:
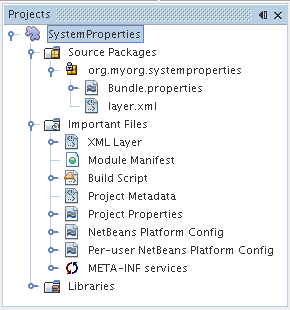
For basic information on each of the files above, see the
Introduction to NetBeans Module Development.
Specifying the Module's Dependencies
Later, you will need to subclass several classes that belong to NetBeans APIs.
Each NetBeans API, provided by a module, has to be declared as a module dependency.
Use the Project Properties dialog box for this purpose, as explained below.
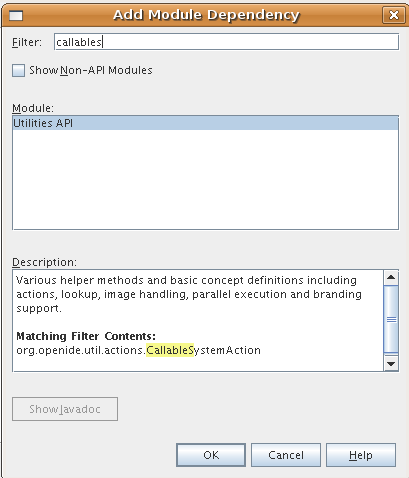
- In the Projects window, right-click the System Properties project and choose Properties.
In the Project Properties dialog box, click Libraries and then click Add... Start typing 'CallableSystemAction',
which is one of the NetBeans API classes you will need later. As you type, notice that the filter narrows,
displaying only those modules that can provide the class that you are typing, as shown below:
- For each of the following APIs, click "Add..." in the Libraries panel,
select the name from the Module list, and then click OK to confirm it:
Click OK to exit the Project Properties dialog box.
- In the Projects window, double-click Project Metadata and note that the APIs you selected have been
declared as Module dependencies.
Creating the Main Files
The meat of the Module is provided by its Java classes. In this section, you will create and examine each of them:
AllPropsNode.java
This Java class specifies what children will be under the main node, and asks to use
AllPropsChildren to keep track of the list of child nodes. The Module takes care
of things such as its context menu.
Do the following:
- Create the file. Right-click the org.myorg.systemproperties node and choose New > File/Folder. Under
Categories, choose Java Classes. Under File Types, choose Java Class.
Click Next and type AllPropsNode in Class Name. Click Finish. The new Java class opens in the Source Editor.
Replace the default code with code found here.
- Understand the file. Here is an explanation of the class:
- public class AllPropsNode extends AbstractNode. AbstractNode is a generic Node subclass. Node is the abstract
class, AbstractNode is the common implementation that can be customized.
- private static ResourceBundle bundle = NbBundle.getBundle(AllPropsNode.class). Loads the Bundle.properties file for all localized text
for this class. The rest of the class uses the variable bundle to get all localized text.
Note that the other classes do something similar.
- Constructor:
- public AllPropsNode. In creating this node, it first calls super -- the constructor
for the super class (AbstractNode). This creates the infrastructure for
AbstractNode, and shows that it is mandatory to supply a child object for its
use. This object represents the list of children of the node, creating a separate class
for clarity: AllPropsChildren.
- setIconBase. Designates the location for the associated icon.
- setName. Sets the internal name. This is usually arbitrary but ideally should be
unique among siblings.
- setDisplayName. Sets the name the user sees. This defaults to the internal name,
but it is better to set it to something localized.
- setShortDescription. Sets the associated tool tip. This is the override to specify
what goes into the node context menu.
- Methods:
PropertiesNotifier.java
This Java class manages routing events whenever there are changes, including adding, deleting,
or renaming a property, or when a property value has changed. You could also see it as a helper routine, very similar
to a JavaBeans component
that has an event set attached to it. However, it is not strictly a JavaBeans component -- there
are no instances of this class -- but its static methods are used like JavaBeans
instance methods.
- Create the file. Right-click the org.myorg.systemproperties node, choose New > Java Class,
and type PropertiesNotifier in Class Name. Click Finish. The new Java class opens in the Source Editor.
Replace the default code with code found here.
- Understand the file. The methods defined for this class are as follows:
- changed. Fires an event to those processes that are listening. Every component that
displays information based on a system property must listen for these events and
update their displays as needed.
- addChangeListener and removeChangeListener. Let components register
themselves as listeners for these events. Processes which have displayed state can
add a ChangeListener to this class. To ensure proper updates, processes that
affect the state call changed.
AllPropsChildren.java
This Java class is responsible for keeping track of the list of nodes underneath
the System Properties node. When first asked for the list, it retrieves all system
properties and asks the node implementation to keep track of all the system
property names. The abstract class doing this is called Children.
In this example, a popular children implementation called Children.Keys is used.
By subclassing Children.Keys, you need not explicitly keep track of
the nodes -- this implementation does that. Instead, you keep track
of a set of keys, which are lighter weight objects. Each key typically represents one
node. You must tell the implementation how to create a
node for each key. You can decide for yourself what type of keys to
use.
In this example, the keys are names of system properties.
- Create the file. Right-click the org.myorg.systemproperties node, choose New > Java Class,
and type AllPropsChildren in Class Name. Click Finish. The new Java class opens in the Source Editor.
Replace the default code with code found here.
- Understand the file. The important methods that should be defined when implementing
Children.Keys include:
- addNotify. Called the first time that a list of
nodes is needed by the platform. An example of this is when the System Properties node
is expanded. When addNotify is called, it calls the helper method refreshList
to determine the keys, then it registers itself with the PropertiesNotifier,
requesting notification of any system property changes. If there is such a change,
the list will be refreshed.
- removeNotify. Called when the user collapses a System Properties node and
starts working on something else. The platform will notice that the list of nodes is
no longer needed, and it will free up the memory that is no longer being used.
Note that momentarily collapsing the node will not trigger this call. When
removeNotify is called, it removes the listener, as it is no longer interested in
receiving notifications. In addition, setKeys is called with an empty set. This method
is defined by Children.Keys for use by the subclasses.
- createNodes. Called by the implementation whenever it needs to construct a
child node. It is passed the key for which it is making a node. It returns either none,
one, or more nodes corresponding to what should be displayed for the key. In this
example, a new instance of one property node is being created, and the system
property name is passed into its constructor.
- refreshList. The System.getProperties call retrieves all of the properties
currently defined in the system. This call goes through all of the property names,
keeping and sorting this list. setKeys is called with the list, enabling the
subnodes to appear, one per system property, sorted by property name.
OnePropNode.java
This Java class provides the AbstractNode implementation for a single property.
Its constructor requires a string key. This class displays a single system property name. When the user expands
the system properties node, it builds a list of keys, then creates a corresponding
number of OnePropNodes. Each OnePropNode displays a single key, and does not
directly interact with its parent node -- its knowledge is limited to a single system
property and how to deal with it, as well as notifying the PropertiesNotifier
if there are any changes. This design makes it easier to reuse such nodes, including
placing them in other contexts.
- Create the file. Right-click the org.myorg.systemproperties node, choose New > Java Class,
and type OnePropNode in Class Name. Click Finish. The new Java class opens in the Source Editor.
Replace the default code with code found here.
- Understand the file. Here is an explanation of the class:
- public class OnePropNode extends AbstractNode. AbstractNode is a generic Node subclass. Node is the abstract
class, AbstractNode is the common implementation that can be customized.
- private static ResourceBundle bundle = NbBundle.getBundle(AllPropsNode.class). Loads the Bundle.properties file for all localized text
for this class. The rest of the class uses the variable bundle to get all localized text.
- Constructor:
- super(Children.LEAF). Tells the node�s hierarchy that this
is a leaf node that will not need to be expanded and will not have any children. It
then stores the key and sets the icon.
- setDefaultAction. Sets what is run by default if the node is double clicked or
similar user actions are performed. In this example, the default action is to pop up
the property sheet.
- super.setName(key). Sets the name of the key. The inherited version is used,
to set the node name (it does not attempt to rename the actual property)..
- setShortDescription. Sets the associated tool tip. This is the override to specify
what goes into the node context menu.
- Methods:
- createSheet. Configures the look of
the property sheet. This creates the list of tabs in the property sheet, along with the
list of properties. createSheet is not called until there is a need to display the list
of properties.
- super.createSheet. Ensures there is a sheet to start with.
- sheet.get (Sheet.PROPERTIES). Checks to see if there is a tab named
Properties. If not, Sheet.createPropertiesSet makes one. Note that Sheet
refers to the entire set of properties for the node, and Sheet.Set is one tab in the
property sheet.
- PropertySupport.Name. Creates a Name property that reflects
the name of the node. The code is already synchronizing the node name with the
system property name.
- ValueProp. Is an inner class, a custom property that is created for this example.
PropertySupport.ReadWrite is the base class for entering and viewing values.
The super call provides a code name for the property as well as a display name and
a tool tip for the user.
- getValue. Looks up the system property.
- setValue. Sets a new value for the
system property and notifies other processes that the value has changed.
The property is added to the property sheet, along with a ChangeListener, which
listens for changes in system properties, which may mean that this specific property
has changed. If true, then the firePropertyChange node fires a change to say that
one of the properties in its property sheet is no longer valid, and checks and updates
should be made accordingly. Note that the name of the property is value, which
matches the internal name assigned when creating ValueProp.
- finalize. Called when the class is destroyed -- whenever this node
is destroyed, the ChangeListener is removed.
- canRename. Returns true, allowing the node to be renamed.
- setName. Called when the node is renamed, such as from the rename action, an inplace
rename from the Explorer, or from the Name property in the property sheet.
This action retrieves all system properties and associated values, removes the key,
adds a new property with a new name and value, and sets the system properties.
This action also notifies all concerned that it has changed, though it does not directly
rename itself (see AllPropsChildren next).
- canDestroy. Gives permission to delete this node.
- destroy. Retrieves system properties, removes its key, sets
properties back, and notifies all concerned of changes. Note that this destroy
method does not remove the node -- it only removes the system property and
notifies interested parties that this property is gone. The node is actually removed
later, by AllPropsChildren. AllPropsChildren realizes this property no longer
exists, and creates a new set of keys that no longer includes this property. Then the
Children.Keys implementation automatically removes that node. This is done to
reflect the actual state of the system.
RefreshPropsAction.java
This Java class provides the "Refresh" action that appears in the pop-up menu under the "System Properties" main node.
It forces a refresh to occur, updating the display of information based
on the current state of system properties. It is a CallableSystemAction and is
always enabled, yet is not sensitive to what is selected. In principle, it could also be placed
as a button in a toolbar.
- Create the file. Right-click the org.myorg.systemproperties node, choose New > Java Class,
and type RefreshPropsAction in Class Name. Click Finish. The new Java class opens in the Source Editor.
Replace the default code with code found here.
- Understand the file. The important methods that should be defined when implementing CallableSystemAction are:
- performAction. Calls PropertiesNotifier.changed to indicate to other classes
and Module components that something about the current set of system properties has changed and
updates are required. For example, a new property may have been added or an existing value may have been changed.
- getName. Gets the name of the action's label from Bundle.properties
- getHelpCtx. Supplies an IDE key for the context help. When building context help
for this Module, this is how you would associate a specific node with a specific help string.
Setting Up the Supporting Files
Once you have coded the main files, you must specify how you want your Module to
impact the filesystem and what labels and texts you want to display to the user. The layer.xml file
and the Bundle.properties file are made for this purpose.
- Add the following entry between the tags in the layer.xml file:
<folder name="UI">
  <folder name="Runtime">
     <file name="org.myorg.systemproperties.AllPropsNode.instance" />
  </folder>
</folder>
- Add the following properties to the Bundle.properties file:
LBL_AllPropsNode=System Properties
HINT_AllPropsNode=Shows all currently set system properties.
LBL_NewProp=System Property
LBL_NewProp_dialog=Create New Property
MSG_NewProp_dialog_key=New property name:
MSG_NewProp_dialog_value=New property value:
HINT_OnePropNode=Represents one system property.
PROP_value=Value
HINT_value=Value of this system property.
LBL_RefreshProps=Refresh
LBL_MyOwnActionProps=My Own Action
- For the icons used to display the nodes, you can use any 16x16 icons you want, so long as they are
named allPropsIcon.gif and onePropIcon.gif, which
is what they are named in the code above. Alternatively,
get the icons from the ZIP file attached to this tutorial.
Note that the setIconBase statements in the constructors of AllPropsNode.java and OnePropNode.java
set the location of the icons.
Building and Installing the Module
Now that you have completed your module, it is time to try it out.
The IDE uses an Ant build script to build and install your module. The build script was created for you
when you created the module project.
- In the Projects window, right-click the System Properties project and choose Install/Reload
in Target Platform.
The module is built and installed in the target IDE or Platform. The target IDE or Platform opens so that you
can try out your new Module. The default target IDE or Platform is the
installation used by the current instance of the development IDE. Note that when you run your Module, you will be using
a temporary test user directory, not the development IDE's user directory.
- In the IDE's Services window (Ctrl-5), you should see the new node, together with its many subnodes:
- Use the module as described in the Introducing the Sample section.
Next Steps
For more information about creating and developing NetBeans Module, see the following resources: