Product Reports section.
Item Reports section.
To view Items by Product Category, select the "Items by Product Category" option. The following screen will appear:
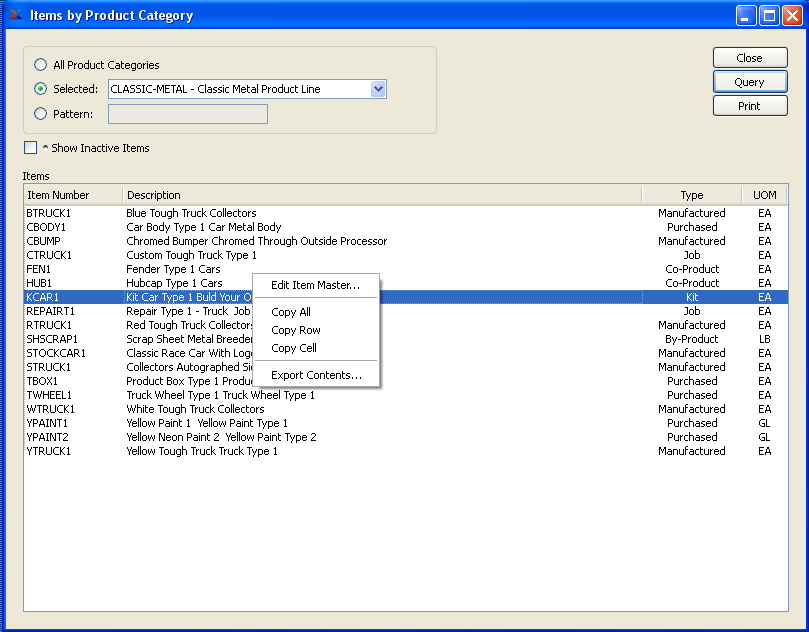
When displaying Items by Product Category, you are presented with the following options:
- All Product Categories
Select to display Items for all Product Categories.
- Selected
Specify Product Category whose Items you want to display.
- Pattern
Enter a Product Category pattern to select a range of Product Categories. Refine your search using Regular Expressions.
- Show Inactive Items
Select to show Inactive Items in the display.
- Items
Display lists Items by Product Category, using the specified parameters.
To the far right of the screen, the following buttons are available:
- CLOSE
Closes the screen, returning you to the application desktop.
- QUERY
Select to generate the display, using the specified parameters.
Runs the report associated with this screen.
To view Items by Class Code, select the "Items by Class Code" option. The following screen will appear:
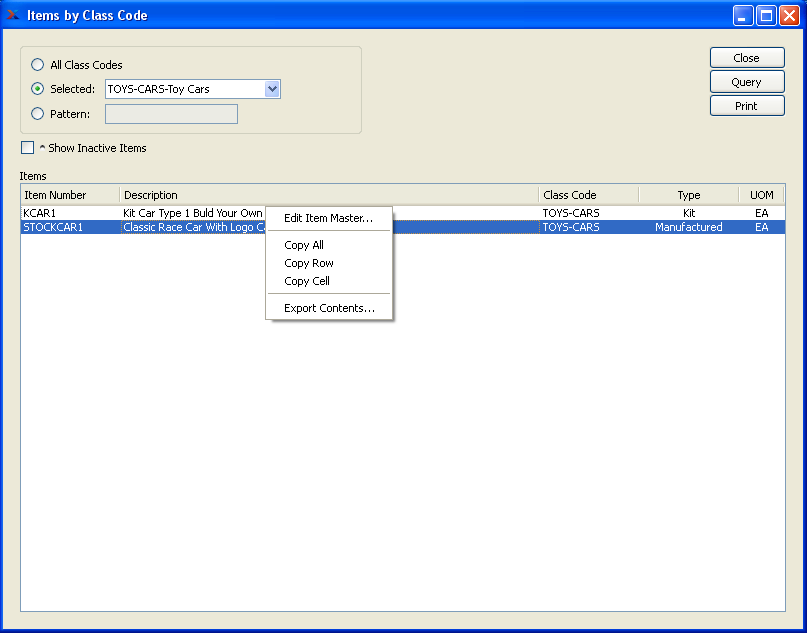
When displaying Items by Class Code, you are presented with the following options:
- All Class Codes
Select to display Items for all Class Codes.
- Selected
Specify Class Code whose Items you want to display.
- Pattern
Enter a Class Code pattern to select a range of Class Codes. Refine your search using Regular Expressions.
- Show Inactive Items
Select to show Inactive Items in the display.
- Items
Display lists Items by Class Code, using the specified parameters.
To the far right of the screen, the following buttons are available:
- CLOSE
Closes the screen, returning you to the application desktop.
- QUERY
Select to generate the display, using the specified parameters.
Runs the report associated with this screen.
To view Items by Characteristic, select the "Items by Characteristic" option. The following screen will appear:
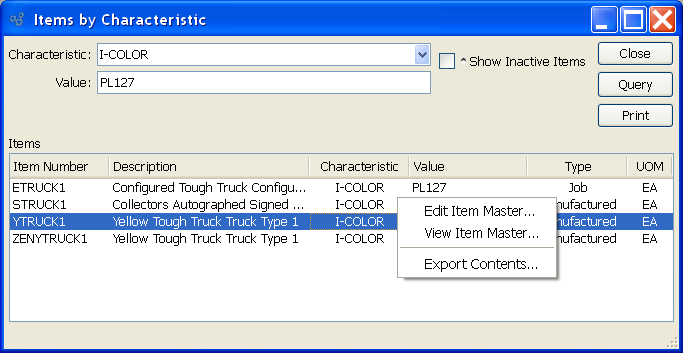
When displaying Items by Characteristic, you are presented with the following options:
- Characteristic
Select a Characteristic from the list of Characteristics designated as being available for use as Item Characteristics.
- Value
Enter the Characteristic value whose associated Items you want to include in the display.
- Show Inactive Items
Select to include inactive Items in the display.
- Items
Display lists Items by Characteristic, using the specified parameters.
To the far right of the screen, the following buttons are available:
- CLOSE
Closes the screen, returning you to the application desktop.
- QUERY
Select to generate the display, using the specified parameters.
Runs the report associated with this screen.
Bills of Materials Reports section.
To view a single level Bill of Materials, select the "Single Level Bill of Materials" option. The following screen will appear:
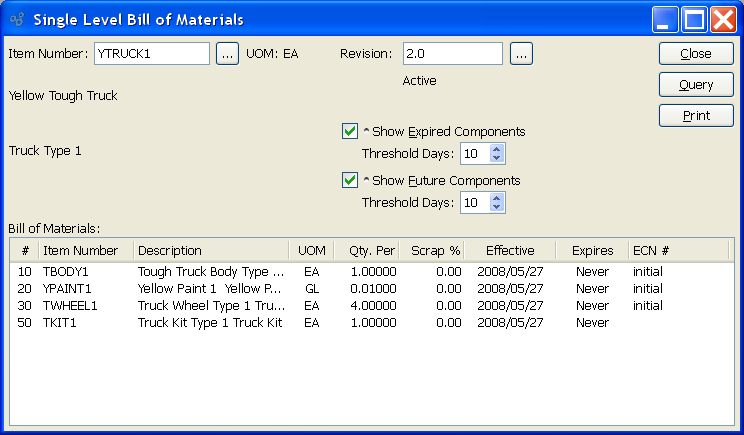
When displaying a single level Bill of Materials, you are presented with the following options:
- Item Number
Enter the Item Number of the manufactured Item you would like to view a single level Bill of Materials for.
- UOM
Inventory Unit of Measure.
- Revision
If Revision Control is enabled at your site, specify the Bill of Materials Revision Number you want to view. If none exists, simply enter a value to create one. The status of the Revision will also be displayed. The following statuses apply to Revisions:
- Active
This is the current, default Revision used for costing and Material Requirements Planning (MRP). Only one Revision can be active at the same time. Active Revisions may be modified. However, once a Revision becomes inactive, it may no longer be changed.
- Show Expired Components
Select to cause expired components to be listed in the "Bill of Materials" display.
- Threshold Days
Select a number using the arrow buttons, or manually enter a value up to a maximum of 999. Components that have been expired from the Bill of Materials within the specified number of days will be included in the display.
- Show Future Components
Select to cause future components to be listed in the "Bill of Materials" display.
- Threshold Days
Select a number using the arrow buttons, or manually enter a value up to a maximum of 999. Components that will be added in future to the Bill of Materials within the specified number of days will be included in the display.
- Bill of Materials
Display lists single level Bill of Materials components, using the specified parameters.
To the far right of the screen, the following buttons are available:
- CLOSE
Closes the screen, returning you to the application desktop.
- QUERY
Select to generate the display, using the specified parameters.
Runs the report associated with this screen.
To view an indented Bill of Materials, select the "Indented Bill of Materials" option. The following screen will appear:
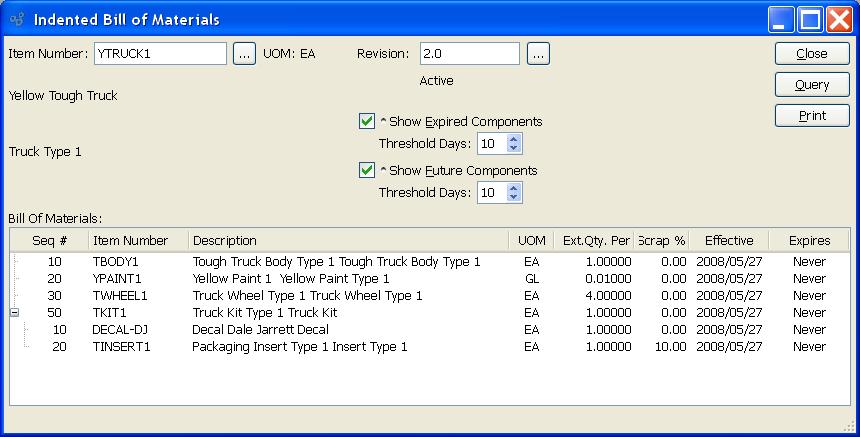
When displaying an indented Bill of Materials, you are presented with the following options:
- Item Number
Enter the Item Number of the manufactured Item you would like to view an indented Bill of Materials for.
- UOM
Inventory Unit of Measure.
- Revision
If Revision Control is enabled at your site, specify the Bill of Materials Revision Number you want to view. If none exists, simply enter a value to create one. The status of the Revision will also be displayed. The following statuses apply to Revisions:
- Active
This is the current, default Revision used for costing and Material Requirements Planning (MRP). Only one Revision can be active at the same time. Active Revisions may be modified. However, once a Revision becomes inactive, it may no longer be changed.
- Show Expired Components
Select to cause expired components to be listed in the "Bill of Materials" display.
- Threshold Days
Select a number using the arrow buttons, or manually enter a value up to a maximum of 999. Components that have been expired from the Bill of Materials within the specified number of days will be included in the display.
- Show Future Components
Select to cause future components to be listed in the "Bill of Materials" display.
- Threshold Days
Select a number using the arrow buttons, or manually enter a value up to a maximum of 999. Components that will be added in future to the Bill of Materials within the specified number of days will be included in the display.
- Bill of Materials
Display lists indented Bill of Materials components, using the specified parameters. The difference between the indented view and the single level view is that the indented view displays all subcomponents if there is a manufactured component listed on the Bill of Materials. To view a component Item's subassembly, select the plus "+" sign in the "Seq #" column to view that detail.
To the far right of the screen, the following buttons are available:
- CLOSE
Closes the screen, returning you to the application desktop.
- QUERY
Select to generate the display, using the specified parameters.
Runs the report associated with this screen.
A summarized Bill of Materials shows all the material requirements for an Item. The components for subassemblies are included in this view; however, the top-level subassemblies themselves are excluded. To view a summarized Bill of Materials, select the "Summarized Bill of Materials" option. The following screen will appear:
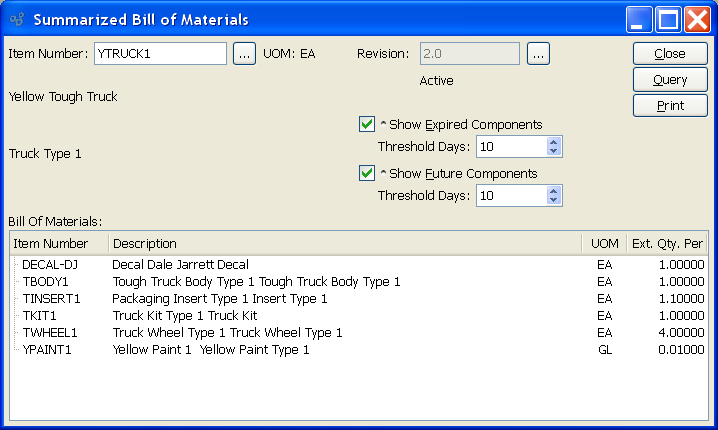
When displaying a summarized Bill of Materials, you are presented with the following options:
- Item Number
Enter the Item Number of the manufactured Item you would like to view a summarized Bill of Materials for.
- UOM
Inventory Unit of Measure.
- Revision
If Revision Control is enabled at your site, specify the Bill of Materials Revision Number you want to view. If none exists, simply enter a value to create one. The status of the Revision will also be displayed. The following statuses apply to Revisions:
- Active
This is the current, default Revision used for costing and Material Requirements Planning (MRP). Only one Revision can be active at the same time. Active Revisions may be modified. However, once a Revision becomes inactive, it may no longer be changed.
- Show Expired Components
Select to cause expired components to be listed in the "Bill of Materials" display. Expired components will display in red font.
- Threshold Days
Select a number using the arrow buttons, or manually enter a value up to a maximum of 999. Components that have been expired from the Bill of Materials within the specified number of days will be included in the display.
- Show Future Components
Select to cause future components to be listed in the "Bill of Materials" display. Future components will display in blue font.
- Threshold Days
Select a number using the arrow buttons, or manually enter a value up to a maximum of 999. Components that will be added in future to the Bill of Materials within the specified number of days will be included in the display.
- Bill of Materials
Display lists summarized Bill of Materials components, using the specified parameters.
To the far right of the screen, the following buttons are available:
- CLOSE
Closes the screen, returning you to the application desktop.
Runs the report associated with this screen.
To view how Bill of Materials component Items correspond sequentially to their associated Bill of Operations, select the "Sequenced Bill of Materials" option. The following screen will appear:
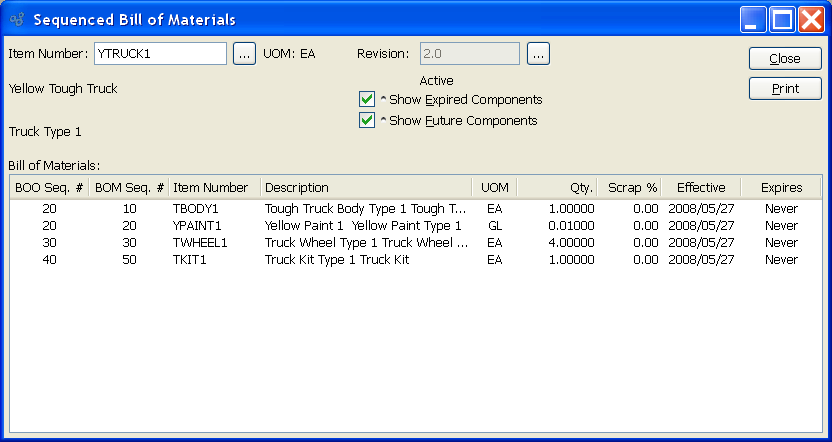
When displaying a sequenced Bill of Materials, you are presented with the following options:
- Item Number
Enter the Item Number of the manufactured Item you would like to view a sequenced Bill of Materials for.
- UOM
Inventory Unit of Measure.
- Revision
If Revision Control is enabled at your site, specify the Bill of Materials Revision Number you want to view. If none exists, simply enter a value to create one. The status of the Revision will also be displayed. The following statuses apply to Revisions:
- Active
This is the current, default Revision used for costing and Material Requirements Planning (MRP). Only one Revision can be active at the same time. Active Revisions may be modified. However, once a Revision becomes inactive, it may no longer be changed.
- Show Expired Components
Select to cause expired components to be listed in the "Bill of Materials" display. Expired components will display in red font.
- Show Future Components
Select to cause future components to be listed in the "Bill of Materials" display. Future components will display in blue font.
- Bill of Materials
Display lists sequenced Bill of Materials components, using the specified parameters.
To the far right of the screen, the following buttons are available:
- CLOSE
Closes the screen, returning you to the application desktop.
Runs the report associated with this screen.
Where used Reports section.
The Single Where Used display will indicate every manufactured Item that directly uses a specified Item as a component Item. To view a display showing parent Items which use a specified component Item, select the "Single Level Where Used" option. The following screen will appear:
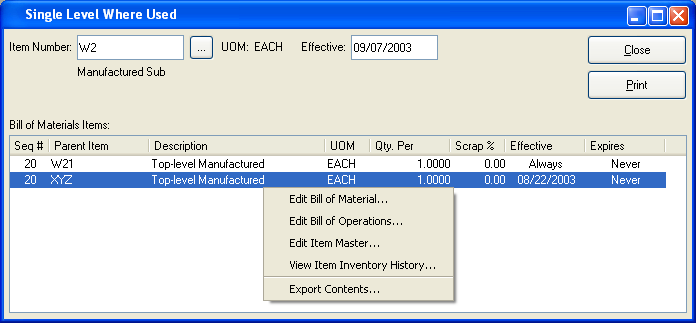
When displaying a view showing parent Items which use a specified component Item, you are presented with the following options:
- Item Number
Enter the Item Number of the Item you would like to display.
- UOM
Inventory Unit of Measure.
- Effective
Indicate the effective date to use when searching through Bill of Material components to determine the selected Item's usage.
- Bill of Materials Items
Display lists parent Items whose Bill of Materials includes the specified component Item, using the specified parameters.
To the far right of the screen, the following buttons are available:
- CLOSE
Closes the screen, returning you to the application desktop.
Runs the report associated with this screen.
The Indented Where Used display will list every top-level manufactured Item that directly uses a specified Item as a component Item—and also any subassemblies which also use the Item as a component. For subassemblies, the associated top-level Items will be displayed in indented fashion. To view an indented display showing parent Items which use a specified component Item, select the "Indented Where Used" option. The following screen will appear:
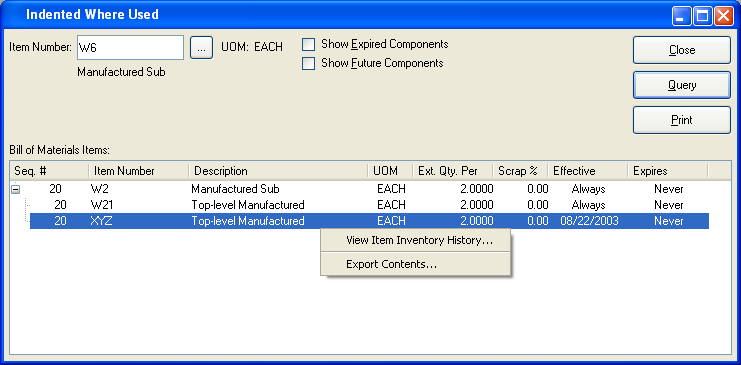
When displaying an indented view of parent Items which use a specified component Item, you are presented with the following options:
- Item Number
Enter the Item Number of the component Item whose parent Items you would like to display.
- UOM
Inventory Unit of Measure.
- Show Expired Components
Select to show expired components.
- Show Future Components
Select to show future components.
- Bill of Materials Items
Display lists an indented view of parent Items whose Bill of Materials includes the specified component Item, using the specified parameters.
To the far right of the screen, the following buttons are available:
- CLOSE
Closes the screen, returning you to the application desktop.
- QUERY
Select to generate the display, using the specified parameters.
Runs the report associated with this screen.
To view an Item's pending Bill of Materials changes, select the "Pending Bill of Materials Changes" option. The following screen will appear:
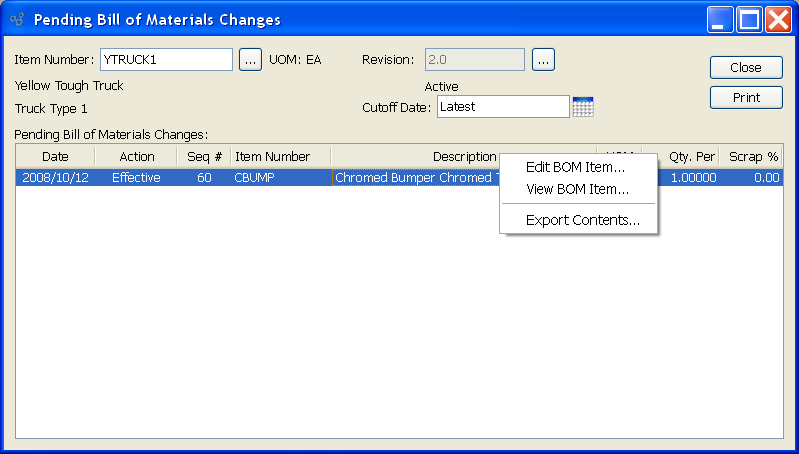
When displaying an Item's pending Bill of Materials changes, you are presented with the following options:
- Item Number
Enter the Item Number of the manufactured Item whose pending Bill of Materials changes you want to view.
- UOM
Inventory Unit of Measure.
- Revision
If Revision Control is enabled at your site, specify the Bill of Materials Revision Number you want to view. If none exists, simply enter a value to create one. The status of the Revision will also be displayed. The following statuses apply to Revisions:
- Active
This is the current, default Revision used for costing and Material Requirements Planning (MRP). Only one Revision can be active at the same time. Active Revisions may be modified. However, once a Revision becomes inactive, it may no longer be changed.
- Cutoff Date
Indicates the last event date to display.
- Pending Bill of Materials Changes
Display lists pending Bill of Materials changes, using the specified parameters.
To the far right of the screen, the following buttons are available:
- CLOSE
Closes the screen, returning you to the application desktop.
Runs the report associated with this screen.
To view a list of Operations performed at a Work Center, select the "Operations by Work Center" option. The following screen will appear:
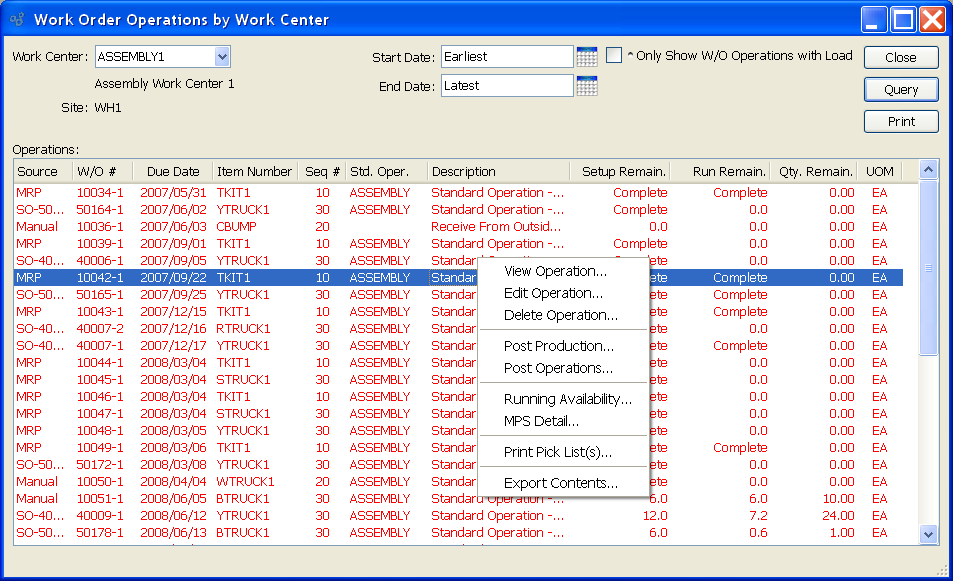
When displaying Operations by Work Center, you are presented with the following options:
- Work Center
Specify Work Center whose Operations you want to display.
- Site
The Site code for the Site where the Work Center is located will display once a Work Center has been selected.
- Operations
Display lists all Operations by Work Center, using the specified parameters.
To the far right of the screen, the following buttons are available:
- CLOSE
Closes the screen, returning you to the application desktop.
Runs the report associated with this screen.
To view a list of Standard Operations performed at a Work Center, select the "Standard Operations by Work Center" option. The following screen will appear:

When displaying Standard Operations by Work Center, you are presented with the following options:
- Work Center
Specify Work Center whose Standard Operations you want to display.
- Site
The Site code for the Site where the Work Center is located will display once a Work Center has been selected.
- Standard Operations
Display lists Standard Operations by Work Center, using the specified parameters.
To the far right of the screen, the following buttons are available:
- CLOSE
Closes the screen, returning you to the application desktop.
Runs the report associated with this screen.
Capacity Units of Measure Reports section.
To view a list of Capacity Units of Measure by Class Code, select the "Capacity UOMs by Class Code" option. The following screen will appear:
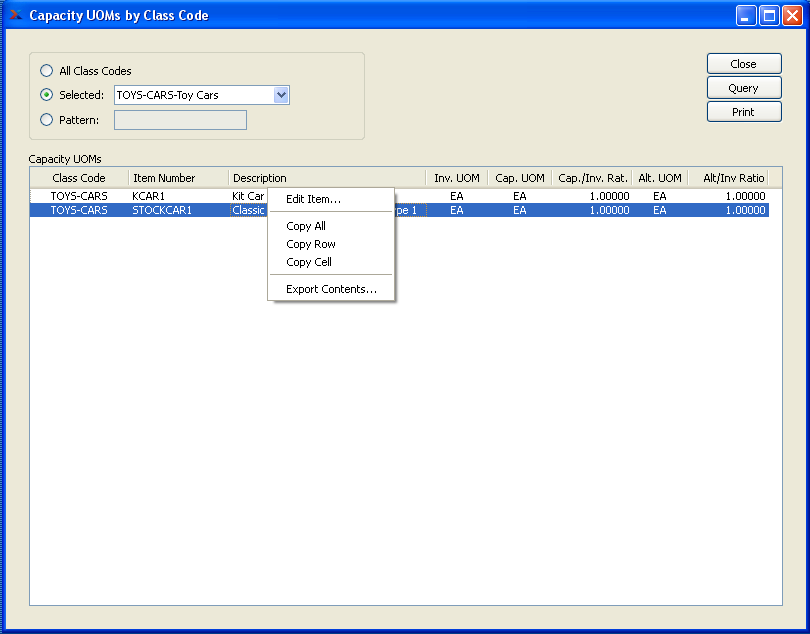
When displaying Capacity UOMs by Class Code, you are presented with the following options:
- All Class Codes
Select to display Capacity UOMs for all Class Codes.
- Selected
Specify Class Code whose Capacity UOMs you want to display.
- Pattern
Enter a Class Code pattern to select a range of Class Codes. Refine your search using Regular Expressions.
- Capacity UOMs
Display lists Capacity UOMs by Class Code, using the specified parameters.
To the far right of the screen, the following buttons are available:
- CLOSE
Closes the screen, returning you to the application desktop.
- QUERY
Select to generate the display, using the specified parameters.
Runs the report associated with this screen.
To view a list of Capacity Units of Measure by Product Category, select the "Capacity UOMs by Product Category" option. The following screen will appear:
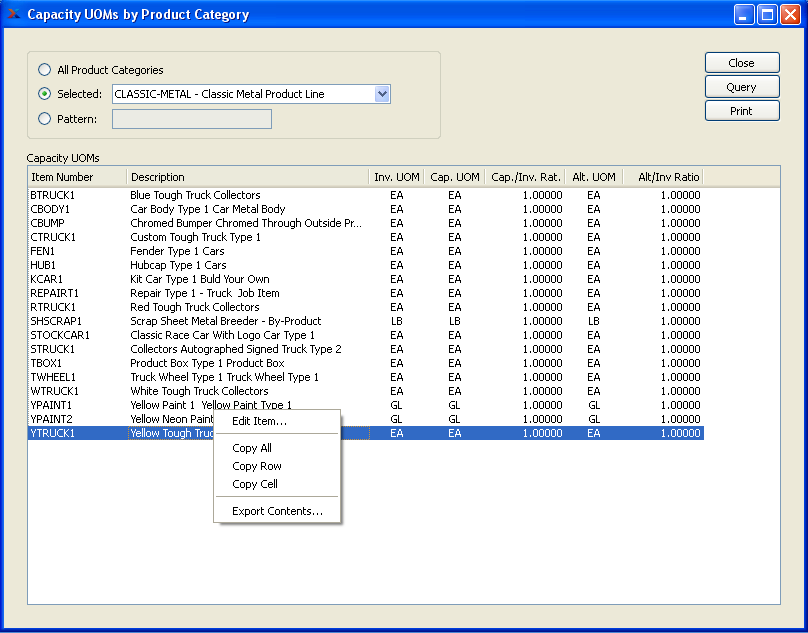
When displaying Capacity UOMs by Product Category, you are presented with the following options:
- All Product Categories
Select to display Capacity UOMs for all Product Categories.
- Selected
Specify Product Category whose Capacity UOMs you want to display.
- Pattern
Enter a Product Category pattern to select a range of Product Categories. Refine your search using Regular Expressions.
- Capacity UOMs
Display lists Capacity UOMs by Product Category, using the specified parameters. The list shows Capacity UOMs for all the Items in the Product Categories specified above.
To the far right of the screen, the following buttons are available:
- CLOSE
Closes the screen, returning you to the application desktop.
- QUERY
Select to generate the display, using the specified parameters.
Runs the report associated with this screen.