A Bill of Operations (BOO) is a sequential list of Operations required to manufacture an Item. In this section we describe the features of Bills of Operations.
To enter a new Bill of Operations, select the "Enter New Bill of Operations" option. The following screen will appear:
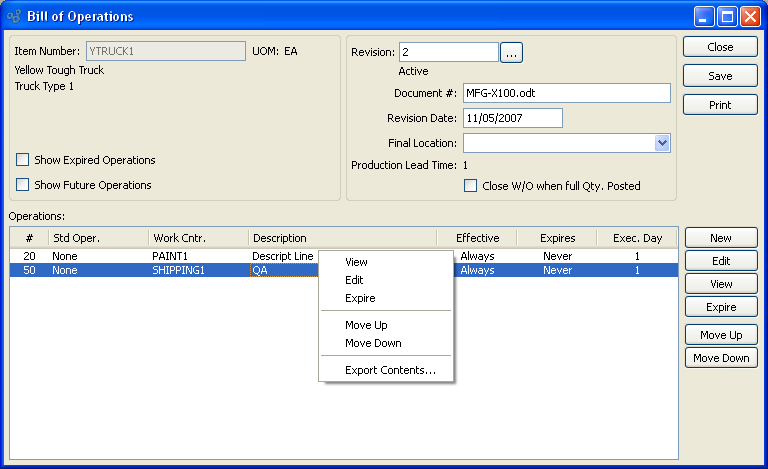
When creating a new Bill of Operations, you are presented with the following options:
- Item Number
Enter the Item Number of the manufactured Item you want to create a Bill of Operations for.
- UOM
Inventory Unit of Measure.
- Show Expired Operations
Select to display expired Operations in the "Bill of Operations" display. Expired Operations are Operations that have been expired from the Bill of Operations.
- Show Future Operations
Select to display future Operations in the "Bill of Operations" display. Future Operations are Operations that will be added to the Bill of Operations at a future point in time.
- Revision
If Revision Control is enabled at your site, specify the Bill of Operations Revision Number you want to view. If none exists, simply enter a value to create one. The status of the Revision will also be displayed. The following statuses apply to Revisions:
- Active
This is the current, default Revision used for costing and Material Requirements Planning (MRP). Only one Revision can be active at the same time. Active Revisions may be modified. However, once a Revision becomes inactive, it may no longer be changed.
Tip
The active Revision becomes inactive when a pending Revision is activated. Inactive Revisions cannot be modified.
- Pending
This is a Revision that has never been used, but is under development or consideration. You may store multiple pending Revisions. When a pending Revision is entered in the "Revision" field, an ACTIVATE button will dynamically appear to the far right of the screen. Select the ACTIVATE button to convert a pending Revision to the active Revision.
- Inactive
This is a formerly active Revision. Inactive Revisions cannot be modified—only viewed. They are stored to provide historical, point-in-time build information, which may be used for various purposes throughout the application. For example, privileged users may select inactive Revisions when processing Work Orders or Purchase Orders. There is no limit to the number of inactive Revisions you may save.
- Document #
If desired, enter a document number to further identify the Bill of Materials.
- Revision Date
Indicates the date of the revision. This field updates every time the Bill of Operations is saved.
Note
Once a revision date has been entered, the date field cannot be erased. The specific date may be updated to reflect subsequent revisions, but the field will never be null as long as the Bill of Materials exists.
- Final Location
Select a final work-in-process (WIP) Location. This is an optional selection which may be used for tracking the Site Locations of finished goods Inventory as it moves through the manufacturing process. The feature applies only to top-level, Multiple Location Control (MLC) Items whose production is posted through Work Order Operations posting. If you choose to track finished MLC goods using this feature, then the final Location is the Location where Inventory will be located when Operations posting for the Work Order is completed. If you do not wish to track WIP Locations for finished MLC goods, then you can ignore this option.
- Production Lead Time
Lead Time: Displays production Lead Time for the specified Item. The production Lead Time value is equal to the maximum Execution Day value specified for listed Operations. Each Operation must have an Execution Day specified. Based on values entered for all listed Operations, whichever Execution Day value is the maximum, that value will be displayed as the production Lead Time for the Bill of Operations.
- Close W/O when full Qty. Posted
Select to automatically close Work Orders when the full Work Order quantity is posted when posting Operations.
- Bill of Operations
Display lists all Operations for the selected Bill of Operations.
To the far right of the screen, the following buttons are available:
- CLOSE
Closes the screen, returning you to the application desktop.
- SAVE
Saves the new Bill of Operations to the master list of Bills of Operations.
- ACTIVATE
Select to activate a pending Revision. This button will only be visible when a pending Revision number is entered in the "Revision" field.
Tip
When you activate a pending Revision, the currently active Revision will become inactive. Inactive Revisions cannot be modified.
Runs the report associated with this screen.
- NEW
Opens screen for creating a new Operation.
- EDIT
Enables you to edit highlighted Operations. The edit screen is the same as that for creating a new Operation—except that when editing, the fields will contain Operation information. Double-clicking on an Operation will also bring you to the editing screen.
- VIEW
Highlight an Operation and then select this button to reach a read-only view of the "Edit" screen.
- EXPIRE
Highlight an Operation and then select this button to expire the Operation, causing it to be hidden from view on the list—unless the "Show Expired Operations" option is specifically chosen.
Tip
If the Operation is expired on the current day, the Operation will still appear as an option when selecting "Used At" Operations on a Bill of Materials (BOM) if done during the same current day. Once a day passes, however, the expired Operation will no longer appear as a "Used At" option on the BOM.
- MOVE UP
Highlight an Operation and then select this button to move the Operation up the Bill of Operations list. Sequence numbers, which are incremented in multiples of ten, are automatically adjusted to reflect the change in position.
- MOVE DOWN
Highlight an Operation and then select this button to move the Operation down the Bill of Operations list. Sequence numbers, which are incremented in multiples of ten, are automatically adjusted to reflect the change in position.
To add a new Operation to a Bill of Operations, select the NEW button. The following screen will appear:
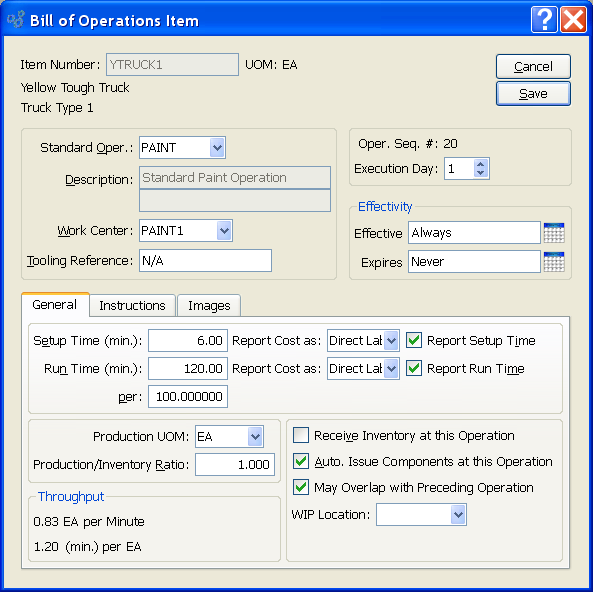
When adding a new Operation to a Bill of Operations, you are presented with the following options:
- Item Number
Displays Item Number specified in "Bill of Operations" screen.
- UOM
Inventory Unit of Measure.
- Standard Oper.
: Select a Standard Operation to use for the Operation, if any.
- Description
Enter a description to further identify the Operation.
- Work Center
Specify Work Center to be used for the specified Operation.
- Tooling Reference
Use this field to briefly describe any tooling required for the Operation. For example, if you are making plastic products, the tooling reference might refer to the mold used to form the plastic.
- Oper. Seq.#
Displays Operation sequence number.
- Execution Day
Select a number using the arrow buttons, or manually enter a value up to a maximum of 99. This feature enables you to schedule Work Order Materials with Work Order Operations. For example, let's say we have an Operation with an Execution Day = 5. This means the Operation is scheduled to begin five days after the start date of the Work Order. Components scheduled with this Operation are due the day before the Operation starts—that is, on day four after the Work Order start date—to ensure they will be available when the Operation is scheduled to begin. If this option is not selected, then the component scheduling will be governed by the start and due dates set on the Work Order header. Based on the values entered for all listed Operations, whichever Execution Day value is the maximum, that value will be displayed as the production Lead Time for the Bill of Operations.
- Effectivity
Specify the operation's effectivity, using the following parameters:
Effective: The system enables you to specify when an operation can be used in a Bill of Materials. For example, the company's engineering department may be working on a new design for an existing Item—but that new design will not be available for use until a given date in the future. In this case, you can specify the "effective" date when the component will be available for use.
Expires: The system also enables you to specify when an operation is planned to be obsoleted from (i.e., no longer used in) a Bill of Materials. As mentioned above, the company's engineering department may be working on a new design for an existing Item—but that new design will not be available for use until a given date in the future. In this case, the old component Item must be marked for "expiration" on a given date. This expiration date will most likely coincide with the effective date of the replacement part. Setting this parameter will instruct the system to stop using the specified component on the date entered into this field.
Note
Standard Operations are intended as initial templates used to set up Bill of Operations (BOO) Items. Any changes made to a Standard Operation will not automatically ripple throughout all your BOO Items that use the Standard Operation.
- Setup Time (min)
Amount entered represents the number of minutes required to set up the Work Center for the Operation.
- Report Cost as (Setup Time)
Specify whether you want to report Setup Costs as "Direct Labor," "Overhead," or "None." Specify the "None" option if you would do not want to track Setup Time as part of the Operation's Cost.
- Report Setup Time
Select to report setup time. Must be selected for labor Costs associated with setup to be tracked in the G/L and elsewhere. If not selected, these Costs will not be reported.
- Run Time (min)
Amount entered represents the number of minutes required to run the Production UOM.
- Report Cost as (Run Time)
Specify whether you want to report Setup Costs as "Direct Labor," "Overhead," or "None." Specify the "None" option if you would do not want to track Setup Time as part of the Operation's Cost.
- Report Run Time
Select to report run time. Must be selected for labor Costs associated with run time to be tracked in the G/L and elsewhere. If not selected, these Costs will not be reported.
Note
When Operations are posted, Inventory transaction records will be posted to the General Ledger if at least one of the Operations in the list of Work Order Operations has either or both of the Inventory handling options selected. If Items are backflushed at an Operation, select the "Auto. Issue Components" option. If finished Items are received into Inventory at an Operation, select the "Receive Inventory" option.
- per
Specify the standard quantity that will be produced during a typical run-time period. The value entered here is equivalent to a run size, batch size, or Economic Order Quantity (EOQ) for this particular Operation. Because Work Order Operations roll into the Actual and Standard Costs for manufactured Items, you should specify a per quantity which accurately reflects your normal batch size for the Operation. Specifying a standard batch size helps ensure your Operations Costs are evenly distributed. For an example of how the batch size can help distribute Costs from Operations, see the following table.
Note
Labor and overhead Costs associated with setup and run times must be reported if they are to be tracked in the G/L and elsewhere. To report setup and run times, select the appropriate boxes in the Operations screen.
Table 1.1. Affect of Batch Size on Manufactured Item Costing
Setup Time (Mins) | Run Time (Mins) | Units in Run ("per") | Total Mins | Mins Per | Cost @ .10c per Min | Material Cost per Unit | Total Mfg. Cost per Run |
|---|---|---|---|---|---|---|---|
60 | 100 | 10 | 160 | 16 | $1.60 | $5.00 | $66.00 |
60 | 1000 | 100 | 1060 | 10.6 | $1.06 | $5.00 | $606.00 |
60 | 10 | 1 | 70 | 70 | $7.00 | $5.00 | $12.00 |
- Production UOM
Select a Unit of Measure (UOM)—or enter a free-form UOM. Specify a UOM to be used optionally when Work Order Operations are posted for the specified Operation. Different Operations in a single Bill of Operations may use different Production UOMs. For example, if you are producing soup, you might mix the soup in one Operation using UOM = BATCH. But when canning the soup, the canning Operation might use UOM = CAN.
Note
When posting Work Order Operations, you are given the option to post Operations using Production UOMs or Inventory UOMs.
- Production/Inventory Ratio
This is the ratio that normalizes quantities to create a Production UOM for use when posting Work Order Operations.
- Receive Inventory at this Operation
Select to indicate that the manufactured Item should be received into Inventory at this Operation. The manufactured Item will be received into Inventory via a Receive from Manufacturing (RM) transaction, when the Operation is posted.
Note
The "Receive Inventory" option may only be selected once per Bill of Operations. Finished Items may only be received into Inventory once in the Operations sequence.
- Auto. Issue Components at this Operation
Issue Components at this Operation: Select to automatically issue components used at this Operation. This setting will only affect component Items whose issue method is either "Pull" or "Mixed". Component Items using the "Push" issue method must be issued to Work Orders using a specific material issue transaction.
- May Overlap with Preceding Operation
Select to allow the Operation to overlap with the preceding Operation. If selected, you are indicating that this Operation may be posted before the preceding Operation is complete. If not selected, the Operation may not be posted before the preceding Operation is complete.
- WIP Location
Select a work-in-process (WIP) Location. This is an optional selection which may be used for tracking the Site Locations of finished goods Inventory as it moves through the manufacturing process. The feature applies only to top-level, Multiple Location Control (MLC) Items whose production is posted through Work Order Operations posting. If you choose to track finished MLC goods using this feature, then the WIP Location entered here is the Location where Inventory will be located when the preceding Operation for the Work Order is posted. A proceeding Operation must exist for the Location entered here to be used. If you do not wish to track WIP Locations for finished MLC goods, then you can ignore this option.
- Throughput
Indicates the number of units, in the given Item's Inventory UOM, that can be produced in a minute—and also the number of minutes that are required to produce 1 unit, expressed in the given Item's Inventory UOM.
To the far right of the screen, the following buttons are available:
- CANCEL
Closes the screen without inserting an Operation into the Bill of Operations, returning you to the previous screen.
- SAVE
Inserts the Operation into the Bill of Operations, automatically assigning it a sequence number.
To associate instructions with an Operation, select the "Instructions" tab. The following screen will appear:
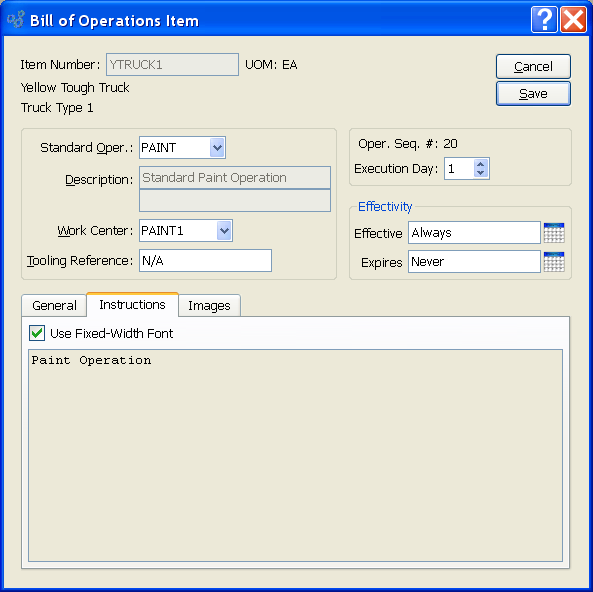
When associating instructions with an Operation, you are presented with the following options:
- Instructions
This is a scrolling text field with word-wrapping for entering instructions related to the Operation.
- Use Fixed-Width Font
Select to display text in the "Instructions" field in fixed-width font. This is a useful feature for displaying tables, matrixes, and other format-driven texts.
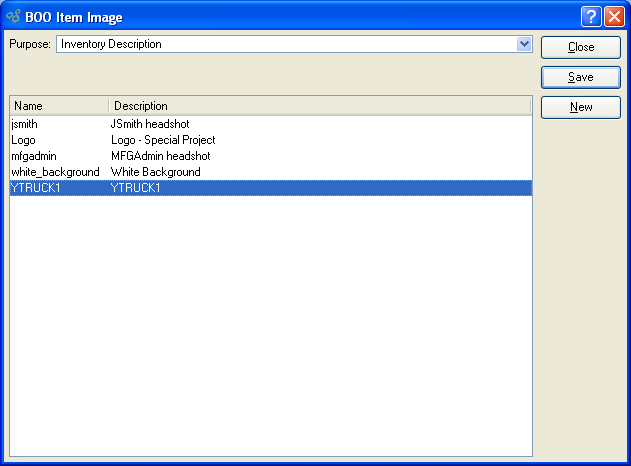
You may associate Images with an Operation, thereby making these Images available to be printed on Routings. To associate an Image with an Operation, select the "Images" tab. The following screen will appear:
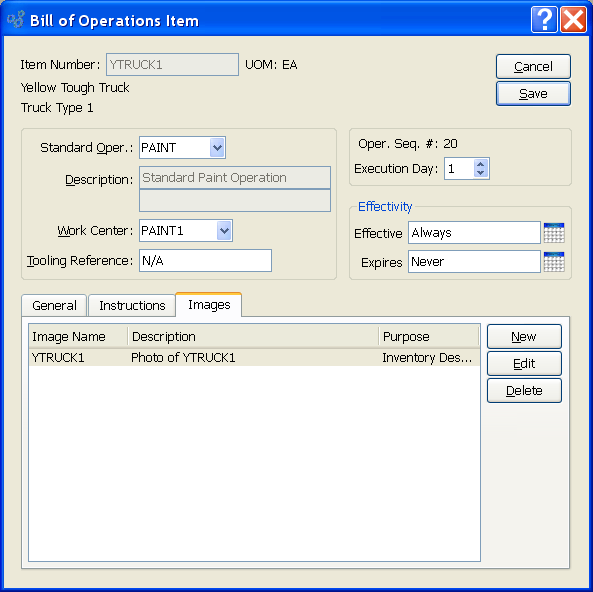
When associating Images with an Operation, you are presented with the following options:
- Images
Display lists stored Images available for association with the specified Operation.
To the far right of the screen, the following buttons are available:
- NEW
Opens screen for adding a new Image to the list of Operation Images.
- EDIT
Enables you to edit highlighted Operation Image definitions. The edit screen is the same as that for creating a new Operation Image definition—except that when editing, the fields will contain Operation Image information. Double-clicking on an Operation Image definition will also bring you to the editing screen.
- DELETE
Highlight an Operation Image definition and then select this button to remove the Item Image from the list.
To add a new Image to the list of Operation Images, select the NEW button. The following screen will appear:
When adding a new Image to the list of Images associated with an Operation, you are presented with the following options:
- Purpose
Select one of the available purposes the Image might serve:
- Inventory Description
Select if the Operation Image describes Inventory.
- Product Description
Select if the Operation Image describes a Product.
- Engineering Reference
Select if the Operation Image serves as an engineering reference.
- Miscellaneous
Select if the Operation Image is a miscellaneous Image.
Note
An Operation may have multiple Images associated with it, but only one Image per purpose.
- Images
Display lists stored Images available for association with the specified Operation.
To the far right of the screen, the following buttons are available:
- CLOSE
Closes the screen, returning you to the previous screen.
- SAVE
Highlight an Image, then select the SAVE button to associate the Image with the specified Operation and purpose.
- NEW
Opens screen for adding a new Image to the master list of stored Images.
To add a new Image to the master list of stored Images, select the NEW button. The following screen will appear:
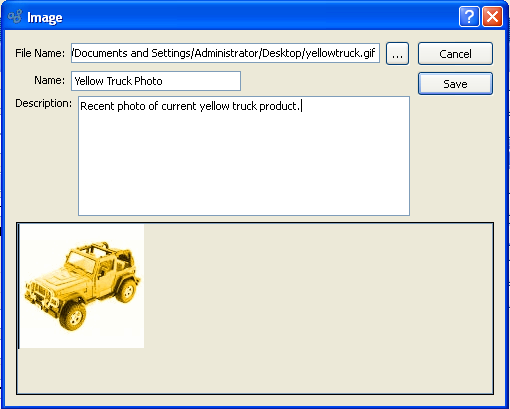
When adding a new Image to the master list of stored Images, you are presented with the following options:
- File Name
Enter the physical directory location of the Image. The browse button enables you to search your system for the physical directory location of the Image file. Once you locate the file, simply select it to have it entered into the "File Name" field.
- Name
Enter a unique name for the Image.
- Description
Enter a description to further identify the Image.
To the far right of the screen, the following buttons are available:
- CANCEL
Closes the screen without adding a new Image to the master list of stored Images.
- SAVE
Creates the Image and adds it to the master list of stored Images.
To access the master list of Bills of Operations, select the "List Bills of Operations" option. The following screen will appear:
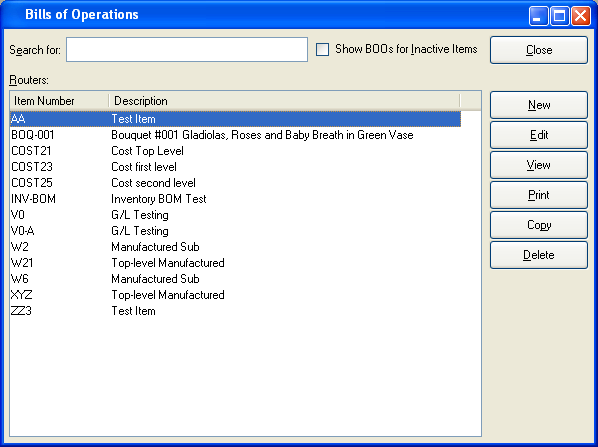
At the top of the screen is a "Search For" field. To search for an Item, begin typing in the search field. As you type, the "Bills of Operations" list will automatically scroll toward the Item Number you are typing. You can also search for Items manually by using the scroll bar to the right of the "Bills of Operations" list. You may also show Bills of Operations for Inactive Items by selecting that option.
To the far right of the screen, the following buttons are available:
- CLOSE
Closes the screen, returning you to the application desktop.
- NEW
Brings up the "Enter New Bill of Operations" screen, described earlier in this chapter. Once a new Bill of Operations is created it appears on the master Bills of Operations list.
- EDIT
Enables you to edit a Bill of Operations. Highlight the Item whose Bill of Operations you want to edit and then hit the EDIT button—or double-click on the Item to enter the edit mode. The edit screen is the same as that for creating a new Bill of Operations—except that when editing, the fields will contain existing information.
- VIEW
Highlight an Item and then select this button to reach a read-only view of the "Edit" screen.
Runs the report associated with this screen.
- COPY
Highlight an Item and then select this button to reach the "Copy" screen, as described in the following section.
- DELETE
Highlight an Item and then select this button to remove the Item from the list.
Tip
You may not delete a Bill of Operations (BOO) if the Item in question has any Revision history. You must make the BOO inactive instead
To make a copy of a Bill of Operations, select the "Copy Bill of Operations" option. The following screen will appear:
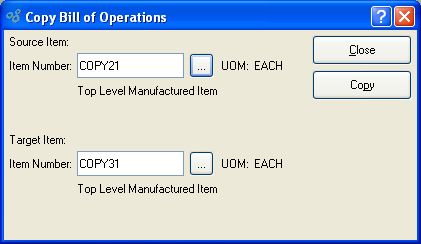
When copying a Bill of Operations, you are presented with the following options:
- Item Number (Source Item)
Enter the Item Number of the manufactured Item whose Bill of Operations you want to copy.
- UOM (Source Item)
Displays Inventory UOM automatically when Item Number is entered into "Item Number" field. The Item description will also appear.
- Item Number (Target Item)
Enter the Item Number of the manufactured Item whose Bill of Materials you wish to create by this copy.
- UOM (Target Item)
Displays Inventory UOM automatically when Item Number is entered into "Item Number" field. The Item description will also appear.
To the far right of the screen, the following buttons are available:
- CLOSE
Closes the screen without executing the copy command, returning you to the application desktop.
- COPY
Executes the copy command.