Products Master Information section.
Units of Measure represent the standard amount in which quantities of an Item are managed (e.g., "EACH," "POUNDS," "GALLONS," etc.). To access the master list of Units of Measure, select the "Units of Measure" option. The following screen will appear.
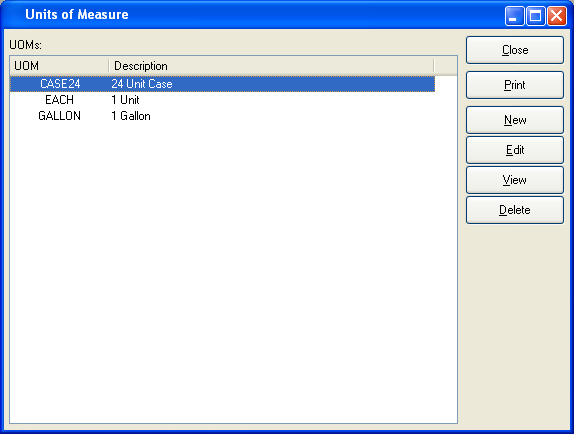
The "Units of Measure" screen displays information on all existing Units of Measure, including Unit of Measure name and description.
Note
Users may also enter free-form UOMs wherever UOM definitions are required—for example, in the Item master. The ability to enter free-form UOMs provides flexibility so that all the UOMs your site requires do not need to be previously added to the UOM master list.
To the far right of the list, the following buttons are available:
- CLOSE
Closes the screen, returning you to the application desktop.
Runs the report associated with this screen.
- NEW
Opens screen for creating a new Unit of Measure.
- EDIT
Enables you to edit highlighted Unit of Measure. The edit screen is the same as that for creating a new Unit of Measure—except that when editing, the fields will contain Unit of Measure information. Double-clicking on a Unit of Measure will also bring you to the editing screen.
- VIEW
Highlight a Unit of Measure and then select this button to reach a read-only view of the "Edit" screen.
- DELETE
Highlight a Unit of Measure and then select this button to remove the Unit of Measure from the list.
To create a new Unit of Measure, select the NEW button. The following screen will appear:
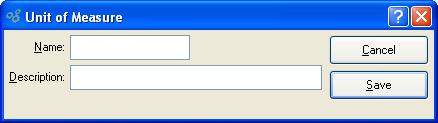
When creating a new Unit of Measure, you are presented with the following options:
- Name
Enter a unique name for the Unit of Measure.
- Description
Enter a description to further identify the Unit of Measure.
- Global Conversion Ratios
Display lists already-defined conversion ratios for the specified Unit of Measure.
To the far right of the screen, the following buttons are available:
- CANCEL
Closes the screen without creating a Unit of Measure, returning you to the previous screen.
- SAVE
Creates the Unit of Measure and adds it to the master list of Units of Measure.
- NEW
Opens screen for creating a new global conversion rate.
- EDIT
Enables you to edit highlighted global conversion rates. The edit screen is the same as that for creating a new global conversion rate—except that when editing, the fields will contain global conversion rate information. Double-clicking on a global conversion rate will also bring you to the editing screen.
- DELETE
Highlight a global conversion rate and then select this button to remove the global conversion rate from the list.
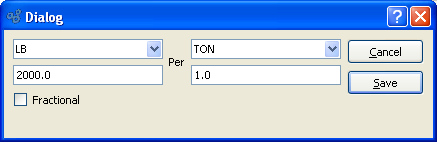
Global conversion ratios enable you to create basic conversions such as inches to feet, pounds to ounces, etc. Once defined here, these conversions may be used throughout the system. The master list of global conversion ratios should include conversions both from and to the specified Unit of Measure (UOM). That is to say, if the conversion from ounces to pounds is defined in the maintenance for pounds, the calculated conversion from pounds to ounces should also appear in the ounces maintenance. Users can add, edit and delete from the list of conversions. However, users should be discouraged from editing or changing a conversion ratio that is being or has been used in a transaction.
To create a new global conversion ratio, select the NEW button. The following screen will appear:
Note
As their name implies, global conversion ratios may be used throughout the system once they are defined in the UOM Master Information.
When creating a new global conversion ratio, you are presented with the following options:
- Source UOM
Select a source UOM from the list of defined UOMs.
- Value
Enter a value for the source UOM to be used in the conversion ratio.
- Per UOM
Select a per UOM from the list of defined UOMs.
- Value
Enter a value for the per UOM to be used in the conversion ratio.
- Fractional
Specify whether Inventory processed using this alternate UOM may be maintained in fractional quantities. If not selected, Inventory using this global conversion ratio may not be maintained in fractional quantities.
To the far right of the screen, the following buttons are available:
- CANCEL
Closes the screen without creating a global conversion ratio, returning you to the previous screen.
- SAVE
Creates the global conversion ratio and adds it to the master list of global conversion ratios.
Specifically used for Inventory control, Class Codes provide a mechanism for categorizing Items regardless of Item Type. To access the master list of Class Codes, select the "Class Codes" option. The following screen will appear.

The Class Codes screen displays information on all existing Class Codes, including Class Code and Class Code description.
To the far right of the list, the following buttons are available:
- CLOSE
Closes the screen, returning you to the application desktop.
Runs the report associated with this screen.
- NEW
Opens screen for creating a new Class Code.
- EDIT
Enables you to edit highlighted Class Code. The edit screen is the same as that for creating a new Class Code—except that when editing, the fields will contain Class Code information. Double-clicking on a Class Code will also bring you to the editing screen.
- VIEW
Highlight a Class Code and then select this button to reach a read-only view of the "Edit" screen.
- DELETE
Highlight a Class Code and then select this button to remove the Class Code from the list.
- DELETE UNUSED
Select to delete all unused Class Codes.
To create a new Class Code, select the NEW button. The following screen will appear:
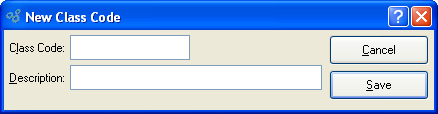
Tip
Create your Class Codes using a logical, hierarchical structure. This will make it easier to retrieve Class Code information in the future.
When creating a new Class Code, you are presented with the following options:
- Class Code
Enter a unique code to identify the Class Code.
- Description
Enter a description to further identify the Class Code.
To the far right of the screen, the following buttons are available:
- CANCEL
Closes the screen without creating a Class Code, returning you to the previous screen.
- SAVE
Creates the Class Code and adds it to the master list of Class Codes.
Items that are sold are assigned a Product Category. To access the master list of Product Categories, select the "Product Category" option. The following screen will appear.
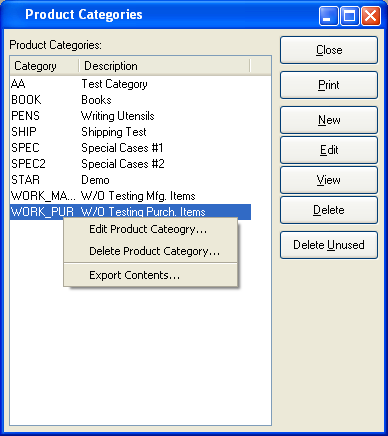
The "Product Categories" screen displays information on all existing Product Categories, including Product Category and Product Category description.
To the far right of the list, the following buttons are available:
- CLOSE
Closes the screen, returning you to the application desktop.
Runs the report associated with this screen.
- NEW
Opens screen for creating a new Product Category.
- EDIT
Enables you to edit highlighted Product Categories. The edit screen is the same as that for creating a new Product Category—except that when editing, the fields will contain Product Category information. Double-clicking on a Product Category will also bring you to the editing screen.
- VIEW
Highlight a Product Category and then select this button to reach a read-only view of the "Edit" screen.
- DELETE
Highlight a Product Category and then select this button to remove the Product Category from the list.
- DELETE UNUSED
Select to delete all unused Product Categories.
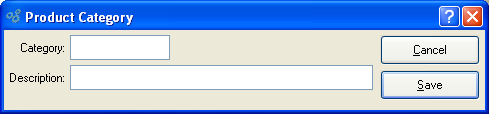
To create a new Product Category, select the NEW button. The following screen will appear:
Tip
Create your Product Categories using a logical, hierarchical structure. This will make it easier to retrieve Product Category information in the future.
When creating a new Product Category, you are presented with the following options:
- Category
Enter a unique code to identify the Product Category.
- Description
Enter a description to further identify the Product Category.
To the far right of the screen, the following buttons are available:
- CANCEL
Closes the screen without creating a Product Category, returning you to the previous screen.
- SAVE
Creates the Product Category and adds it to the master list of Product Categories.
To access the master list of Freight Classes, select the "Freight Classes" option. The following screen will appear.
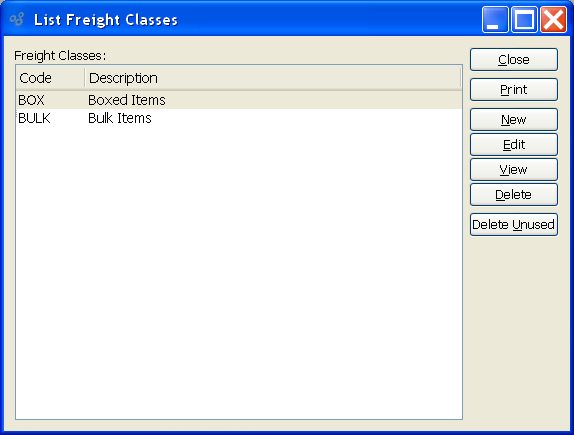
The Freight Classes screen displays information on all existing Freight Classes, including Freight Class and Freight Class description.
To the far right of the list, the following buttons are available:
- CLOSE
Closes the screen, returning you to the application desktop.
Runs the report associated with this screen.
- NEW
Opens screen for creating a new Freight Class.
- EDIT
Enables you to edit highlighted Freight Class. The edit screen is the same as that for creating a new Freight Class—except that when editing, the fields will contain Freight Class information. Double-clicking on a Freight Class will also bring you to the editing screen.
- VIEW
Highlight a Freight Class and then select this button to reach a read-only view of the "Edit" screen.
- DELETE
Highlight a Freight Class and then select this button to remove the Freight Class from the list.
- DELETE UNUSED
Select to delete all unused Freight Classes.
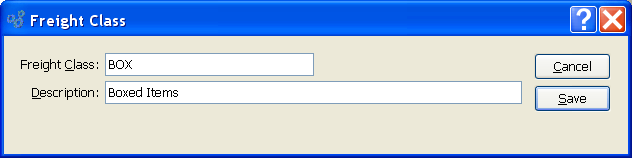
To create a new Freight Class, select the NEW button. The following screen will appear:
Tip
Create your Freight Classes using a logical, hierarchical structure. This will make it easier to retrieve Freight Class information in the future.
When creating a new Freight Class, you are presented with the following options:
- Freight Class
Enter a unique code to identify the Freight Class.
- Description
Enter a description to further identify the Freight Class.
To the far right of the screen, the following buttons are available:
- CANCEL
Closes the screen without creating a Freight Class, returning you to the previous screen.
- SAVE
Creates the Class Code and adds it to the master list of Freight Classes.
Characteristics may be used to create additional layers of information about Items, Customers, CRM Accounts, and more. For example, Characteristics defined on an Item master may be associated with Sales Order Items. And, if the Sales Order leads to the automatic generation of additional Orders (i.e., Work Orders or Purchase Orders), then the subsequent Orders will inherit the parent Sales Order Characteristics.
To access the master list of Characteristics, select the "Characteristics" option. The following screen will appear.
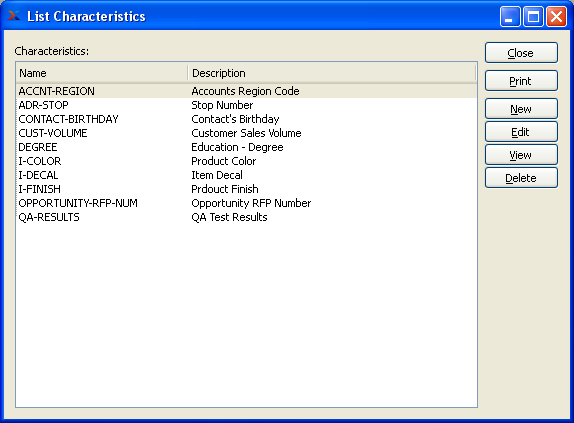
The "Characteristics" screen displays information on all existing Characteristics, including Characteristic name and Characteristic description.
To the far right of the list, the following buttons are available:
- CLOSE
Closes the screen, returning you to the application desktop.
Runs the report associated with this screen.
- NEW
Opens screen for creating a new Characteristic.
- EDIT
Enables you to edit highlighted Characteristics. The edit screen is the same as that for creating a new Characteristic—except that when editing, the fields will contain Characteristic information. Double-clicking on a Characteristic will also bring you to the editing screen.
- VIEW
Highlight a Characteristic and then select this button to reach a read-only view of the "Edit" screen.
- DELETE
Highlight a Characteristic and then select this button to remove the Characteristics from the list.
To create a new Characteristic, select the NEW button. The following screen will appear:
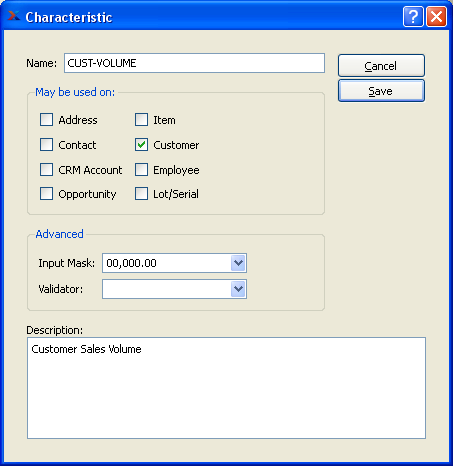
When creating a new Characteristic, you are presented with the following options:
- Name
Enter a unique name for the Characteristic.
- May be used on
Select one of the following Characteristic assignment options:
- Address
Select to make Characteristic available for Address Characteristics.
- Contact
Select to make Characteristic available for Contact Characteristics.
- CRM Account
Select to make Characteristic available for CRM Account Characteristics.
- Opportunity
Select to make Characteristic available for Opportunity Characteristics.
- Item
Select to make Characteristic available for Item Characteristics.
- Customer
Select to make Characteristic available for Customer Characteristics.
- Employee Characteristics
Select to make Characteristic available for Employee Characteristics.
- Lot/Serial
Select to make Characteristic available for Lot/Serial Characteristics.
- Advanced
Select from the following advanced features, if needed. These advanced options are not required, but if used they will enforce greater consistency and control over the values entered for your Characteristics. Typically when using these advanced validation features, you will specify either an input mask or a validator. If you decide to use both at once, they must be coordinated and consistent―otherwise users will experience difficulties when attempting to enter Characteristic values.
- Input Mask
Select from the available options―or manually enter an input mask of your own design. An input mask creates a template to guide users as they enter values for a Characteristic. It is a form of light data validation. For example, if you specify the input mask 00/00/0000, then users will be presented with the following template when they are entering values for the Characteristic : "__/__/____". In this case, users will simply have to fill in the blanks between the separators.
- 00/00/0000
Select this format to prompt users to enter a date format with the pattern shown (e.g., MM/DD/YYYY).
- ### - ### - ####
Select this format to prompt users to enter a numerical format with the pattern shown. This example would be a good match for telephone numbers (e.g., 757-555-1111).
- ### - ## - ####
Select this format to prompt users to enter a numerical format with the pattern shown. This example would be a good match for social security numbers (e.g., 012-34-5678).
- 00,000.00
Select this format to prompt users to enter a price format with the pattern shown.
- Validator
Select from the available options―or manually enter a validator of your own design. A validator is used to strictly enforce the format of data users can enter in a field. If you specify a validator for a Characteristic, then users will have to conform to the format when entering values for the Characteristic. Values which do not conform will not be accepted.
- [Y/N]
Select this boolean validator to require users to enter "Y" or "N" for Yes or No.
- \S+
Select this validator to require users to enter one or more non-white-space characters. So, for example, this validator would accept the value "Inventory" but not "Inventory Availability".
- [1-9]\d{0,3}
Select this validator to require users to enter a number from 1-9999.
- [A-Z]\d{5}[1-9]
Select this validator to require users to enter a value where the first character is A-Z, the next five characters are numbers 0-9, and the last character is a number 1-9. While this pattern may not be very useful for most people, it does illustrate how you can create your own regular expressions to design a validator to meet your own custom needs.
- www\S?(\.com|net|org)
Select this validator to require users to enter a website address (e.g., www.xtuple.com)
- Description
Enter a brief description of the Characteristic.
To the far right of the screen, the following buttons are available:
- CANCEL
Closes the screen without creating a Characteristic, returning you to the previous screen.
- SAVE
Creates the Characteristic and adds it to the master list of Characteristics.
Standard Labor Rates are used to streamline the process of assigning labor Costs to Work Centers. Rates defined here may be accessed from the Work Center screen. To access the master list of Standard Labor Rates, select the "Standard Labor Rates" option. The following screen will appear.
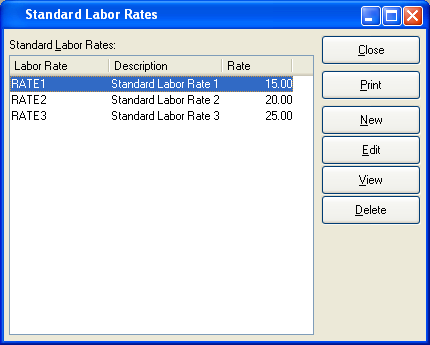
The "Standard Labor Rates" screen displays information on all existing Standard Labor Rates, including labor rate, labor rate description, and labor rate.
To the far right of the list, the following buttons are available:
- CLOSE
Closes the screen, returning you to the application desktop.
Runs the report associated with this screen.
- NEW
Opens screen for creating a new Standard Labor Rate.
- EDIT
Enables you to edit highlighted Standard Labor Rates. The edit screen is the same as that for creating a new Standard Labor Rate —except that when editing, the fields will contain Standard Labor Rate information. Double-clicking on a Standard Labor Rate will also bring you to the editing screen.
- VIEW
Highlight a Standard Labor Rate and then select this button to reach a read-only view of the "Edit" screen.
- DELETE
Highlight a Standard Labor Rate and then select this button to remove the Standard Labor Rate from the list.
To create a new Standard Labor Rate, select the NEW button. The following screen will appear:
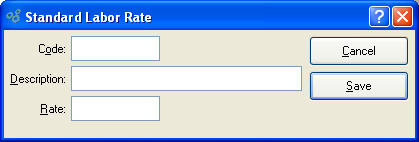
When creating a new labor rate, you are presented with the following options:
- Code
Enter a unique code to identify the Standard Labor Rate.
- Description
Enter a description to further identify the Standard Labor Rate.
- Rate
Amount entered represents dollars per man hour for the specified code.
To the far right of the screen, the following buttons are available:
- CANCEL
Closes the screen without creating a Standard Labor Rate, returning you to the previous screen.
- SAVE
Creates the Standard Labor Rate and adds it to the master list of Standard Labor Rates.
Work Centers are collections of machines or labor that perform a specific task when building a manufactured Item. Work Centers are used by Bills of Operations to determine the amount of available and required manufacturing Capacity to produce the manufactured Item. Work Centers also determine the Cost, in direct labor, overhead, and, optionally, machine overhead, of such production. A single Site may contain multiple Work Centers. To access the master list of Work Centers, select the "Work Centers" option. The following screen will appear.
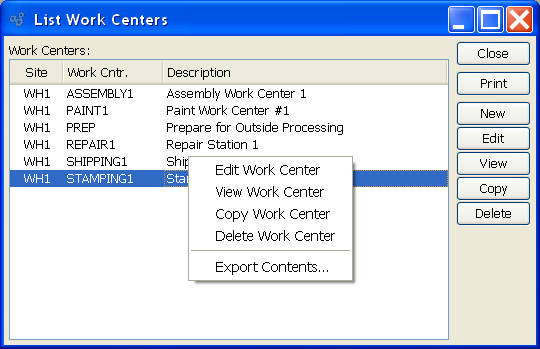
The "Work Centers" screen displays information on all existing Work Centers, including Site Location, Work Center name, number of machines, and Work Center description.
Tip
At least one Site must be entered into the system before a Work Center may be added.
To the far right of the list, the following buttons are available:
- CLOSE
Closes the screen, returning you to the application desktop.
Runs the report associated with this screen.
- NEW
Opens screen for creating a new Work Center.
- EDIT
Enables you to edit highlighted Work Centers. The edit screen is the same as that for creating a new Work Center—except that when editing, the fields will contain Work Center information. Double-clicking on Work Center will also bring you to the editing screen.
- VIEW
Highlight a Work Center and then select this button to reach a read-only view of the "Edit" screen.
- COPY
Highlight a Work Center and then select this button to reach a screen for copying the Work Center master.
- DELETE
Highlight a Work Center and then select this button to remove the Work Center from the list.
To create a new Work Center, select the NEW button. The following screen will appear:
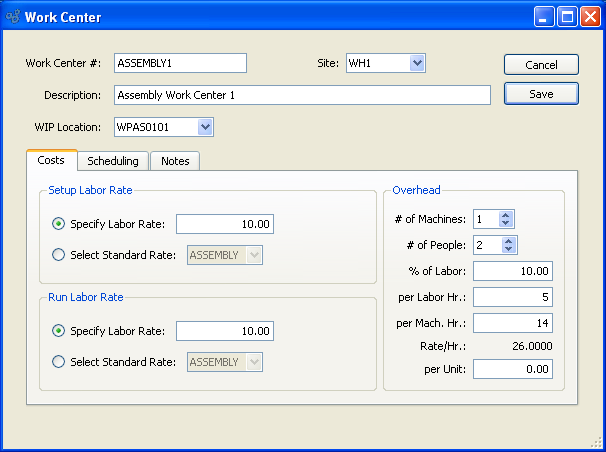
When creating a new Work Center, you are presented with the following options:
- Work Center #
Enter a unique code to identify the Work Center.
- Site
Specify the Site where the Work Center is located.
- Description
Enter a description to further identify the Work Center.
- WIP Location
Select a location that designates where the work center resides.
- Setup Labor Rate
Specify a setup labor rate from the following options:
- Specify Labor Rate
Amount entered represents dollars per man hour that it Costs to set up the Operation that will be performed at the Work Center. You have the choice of entering a specific setup labor rate in this field, or selecting a pre-defined Standard Labor Rate from the list in the succeeding field.
- Select Standard Rate
Select a pre-defined labor rate to be applied to the setup activity assigned to the Work Center. If you determine that none of the Standard Labor Rates apply to the setup activity involved with the Work Center, then you can manually specify a rate in the preceding field.
Tip
To calculate hourly labor rates for a Work Center, multiply the number of people by the labor rate—either the run rate or the setup rate. To calculate all Work Center charges, add overhead Costs to the sum of the labor rates.
- Run Labor Rate
Specify a run labor rate from the following options:
- Specify Labor Rate
Amount entered represents dollars per man hour that it Costs to complete the activity assigned to the Work Center. You have the choice of entering a specific run labor rate in this field, or selecting a pre-defined Standard Labor Rate from the list in the succeeding field.
- Select Standard Rate
Select a pre-defined labor rate to be applied for the activity assigned to the Work Center.
Note
For the purposes of Work Order reporting, Work Centers are set up only once. As a result, the setup labor rate is charged only once per Work Order. The run labor rate, on the other hand, is charged per Item produced. These rates may be adjusted after Work Order explosion using the Maintain Work Order Operations screen.
- Overhead
Specify overhead rates from the following options:
- # of Machines
Select a number using the arrow buttons, or manually enter a value up to a maximum of 99.
- # of People
Select a number using the arrow buttons, or manually enter a value up to a maximum of 1,000. Value entered indicates the multiplier that will be used for man hour calculations.
- Overhead % of Labor
Amount entered represents overhead for this Work Center as a percentage of the hourly run labor rate. The hourly run labor rate is equal to the number of people multiplied by the run labor rate.
- Overhead per Labor Hr.
Amount entered represents overhead for this Work Center as the number of dollars per man hour.
- Overhead per Mach. Hr.
Hr.: Amount entered represents overhead for this Work Center as the number of dollars per machine hour.
- Overhead Rate/Hr.
Displays automatic calculation of the Work Center's overhead Costs, expressed in dollars per hour. Calculation is based on the following formula, using data entered into the Work Center screen:
(overhead % of labor * run labor rate) +
(overhead per labor Hr. * # of People) +
(overhead per mach. hr. * # of machines) = overhead rate/Hr.
- Overhead per Unit
Amount entered represents overhead for this Work Center as the number of dollars per unit produced.
To the far right of the screen, the following buttons are available:
- CANCEL
Closes the screen without creating the Work Center, returning you to the previous screen.
- SAVE
Creates the Work Center and adds it to the master list of Work Centers.
When the scheduling tab is selected, the screen will appear as follows:
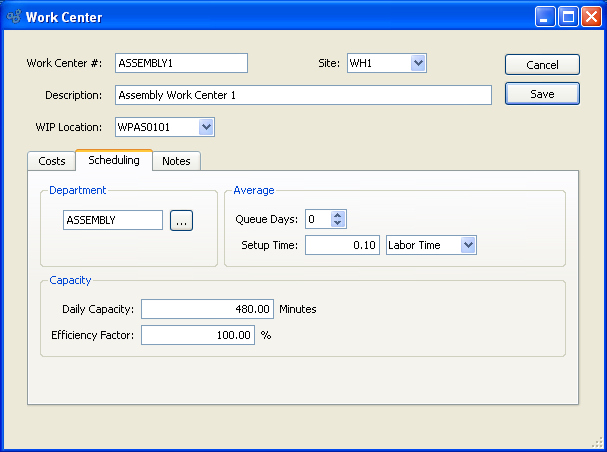
- Department
Specify a Department to be associated with the Work Center. This is an optional setting.
- Average
Specify average times to complete work with the following options:
- Queue Days
Queue Days: Select a number using the arrow buttons, or manually enter a value up to a maximum of 999. Amount entered represents the average number of days between the day a job arrives at the Work Center and the day work begins on the job.
- Setup Time
Setup Time: Amount entered represents the average amount of time required to set up the Work Center in preparation for starting the job. This option also enables you to specify whether setup time relates to labor time or machine time.
- Capacity
Specify capacity available with the following options:
- Daily Capacity
The amount entered indicates the number of minutes worth of production the Work Center is available to perform in one day.
- Efficiency Factor
Amount entered will be multiplied by the daily Capacity to determine the standard Capacity for the Work Center. The standard Capacity value will be used when determining the actual Capacity for this Work Center. The efficiency factor for a Work Center should be developed based on time studies.
When the notes tab is selected, the screen will appear as follows:
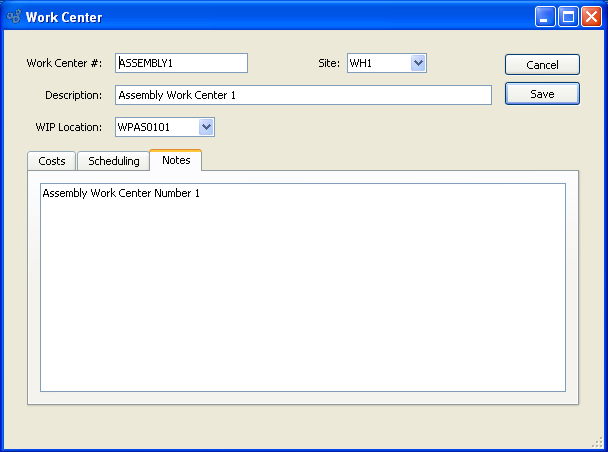
- Notes
This is a scrolling text field with word-wrapping for entering Comments related to the Work Center.
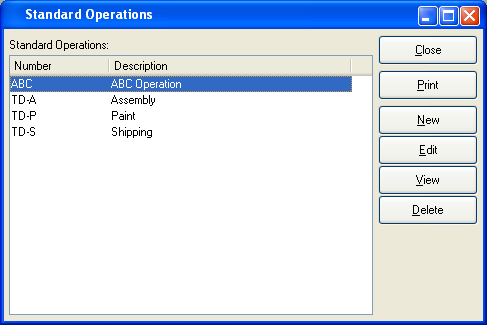
Standard Operations are routine Operations which may occur throughout the manufacturing process at multiple Work Centers. Storing these Operations in the Master Information section streamlines the process of assigning Operations to Bills of Operations. The Operations defined here may be accessed from the Bill of Operations Item screen. To access the master list of Standard Operations, select the "Standard Operations" option. The following screen will appear.
Note
Standard Operations are intended as initial templates used to set up Bill of Operations (BOO) Items. Any changes made to a Standard Operation will not automatically ripple throughout all your BOO Items that use the Standard Operation.
The "Standard Operations" screen displays information on all existing Standard Operations, including Standard Operation number and Standard Operation description.
To the far right of the list, the following buttons are available:
- CLOSE
Closes the screen, returning you to the application desktop.
Runs the report associated with this screen.
- NEW
Opens screen for creating a Standard Operation.
- EDIT
Enables you to edit highlighted Standard Operations. The edit screen is the same as that for creating a new Standard Operation —except that when editing, the fields will contain Standard Operation information. Double-clicking on a Standard Operation will also bring you to the editing screen.
- VIEW
Highlight a Standard Operation and then select this button to reach a read-only view of the "Edit" screen.
- DELETE
Highlight a Standard Operation and then select this button to remove the Standard Operation from the list.
Note
Standard Operations are intended as initial templates used to set up Bill of Operations (BOO) Items. Any changes made to a Standard Operation will not automatically ripple throughout all your BOO Items that use the Standard Operation.
To create a new Standard Operation, select the NEW button. The following screen will appear:
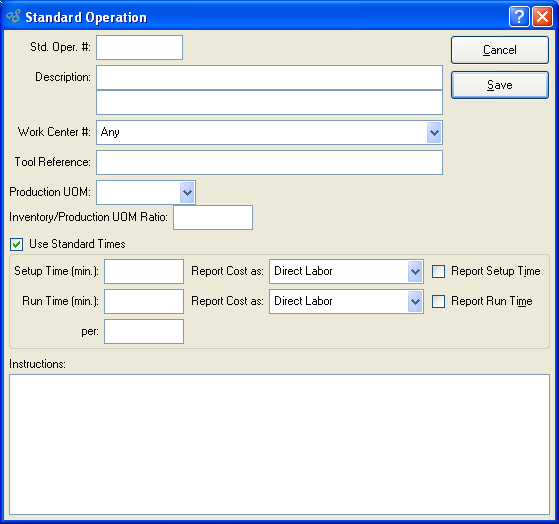
When creating a new Standard Operation, you are presented with the following options:
- Std. Oper. #
Enter a number or code to identify the Standard Operation.
- Description
Enter a description to further identify the Operation.
- Work Center #
Select the Work Center you want to use for the Standard Operation.
- Tool Reference
Use this field to briefly describe any tooling required for the Operation. For example, if you are making plastic products, the tooling reference might refer to the mold used to form the plastic.
- Production UOM
Specify the Unit of Measure to use for the Production UOM—or enter a free-form UOM. Specify a UOM to be used optionally when Work Order Operations are posted for the specified Operation. Operations may be posted using either the Inventory or Production UOM. In addition, different Operations in a single Bill of Operations may use different Production UOMs. For example, if you are producing soup, you might mix the soup in one Operation using UOM = BATCH. But when canning the soup, the canning Operation might use UOM = CAN. If you post Operations using the Production UOM, the Inventory/Production UOM ratio normalizes the posting so that the Inventory impact is recorded using the Inventory UOM.
Note
When posting Work Order Operations, you are given the option to post Operations using Production UOMs or Inventory UOMs.
- Inventory/Production UOM Ratio
When Work Order Operations are posted using the Production UOM, the Inventory/Production UOM ratio normalizes the posting so that the Inventory impact is recorded in the Inventory UOM. The ratio is set up in the same way as the Capacity/Inventory UOM ratio described in Section 2.1, “Enter New Item”.
- Use Standard Times
Select to activate fields for standard times below. Standard times will be associated with the Standard Operation if selected.
Note
Labor and overhead Costs associated with setup and run times must be reported if they are to be tracked in the G/L and elsewhere. To report setup and run times, select the appropriate boxes in the Operation screen.
- Setup Time (min)
Amount entered represents the number of minutes required to set up the Work Center for the Operation.
- Report Cost as (Setup Time)
Specify whether you want to report Setup Costs as "Direct Labor," "Overhead," or "None." Specify the "None" option if you would do not want to track Setup Time as part of the Operation's Cost.
- Report Setup Time
Select to report setup time. Must be selected for labor Costs associated with setup to be tracked in the G/L and elsewhere. If not selected, these Costs will not be reported.
- Run Time (min)
Amount entered represents the number of minutes required to run the Operation.
- per
Specify the standard quantity that will be produced during a typical run-time period. The value entered here is equivalent to a run size, batch size, or Economic Order Quantity (EOQ) for this particular Operation. Because Work Order Operations roll into the Actual and Standard Costs for manufactured Items, you should specify a per quantity which accurately reflects your normal batch size for the Operation. Specifying a standard batch size helps ensure your Operations Costs are evenly distributed.
- Report Cost as (Run Time)
Specify whether you want to report Setup Costs as "Direct Labor," "Overhead," or "None." Specify the "None" option if you would do not want to track Run Time as part of the Operation's Cost.
- Report Run Time
Select to report run time. Must be selected for labor Costs associated with run time to be tracked in the G/L and elsewhere. If not selected, these Costs will not be reported.
- Instructions
This is a scrolling text field with word-wrapping for entering special instructions or Comments related to the Work Center.
To the far right of the screen, the following buttons are available:
- CANCEL
Closes the screen without creating the Standard Operation, returning you to the previous screen.
- SAVE
Creates the Standard Operation and adds it to the master list of Standard Operations.