4.2. RHN Proxy Server Installation Process
The following instructions describe how to run the RHN Proxy Server Installation Process:
Register the newly installed Red Hat Enterprise Linux AS system with Red Hat Network (either the central RHN Servers or your RHN Satellite Server) using the organizational account containing the RHN Proxy Server entitlement with either of these commands: rhn_register for Red Hat Enterprise Linux AS 2.1 Update 5 or up2date --register for Red Hat Enterprise Linux AS 3 Update 3.
Open the RHN Website (or the fully qualified domain name of the Satellite serving the Proxy), log in as the Organization Administrator, navigate to the Systems ⇒ System Entitlements page, and grant the system a Provisioning entitlement.
Click the name of the system and navigate to the System Details ⇒ Channels ⇒ Software subtab. Ensure the system is subscribed to the Red Hat Network Tools channel for its base operating system.
Navigate to the System Details ⇒ Packages ⇒ Install subtab and search for rhncfg. In the resulting list, select all packages and install them.
If you will be enabling secure sockets layer (SSL) encryption on the Proxy and connecting to the central RHN Servers, install the rhns-certs-tools package from the same Red Hat Network Tools channel and use the RHN SSL Maintenance Tool to generate the tar file required later. Refer to the SSL Certificates chapter of the RHN Client Configuration Guide for instructions. If you will be enabling SSL encryption on the Proxy and connecting to an RHN Satellite Server or another RHN Proxy Server with SSL, make sure you have the CA certificate password used for the parent system.
Log into the system through a terminal as root and run the rhn_check command to immediately initiate the scheduled package installation.
Once the packages have been installed, as confirmed through the System Details ⇒ Events tab, prepare the system to accept remote commands and configuration management with the following commands:
mkdir -p /etc/sysconfig/rhn/allowed-actions
mkdir -p /etc/sysconfig/rhn/allowed-actions/script
touch /etc/sysconfig/rhn/allowed-actions/script/run
mkdir -p /etc/sysconfig/rhn/allowed-actions/configfiles
touch /etc/sysconfig/rhn/allowed-actions/configfiles/deploy
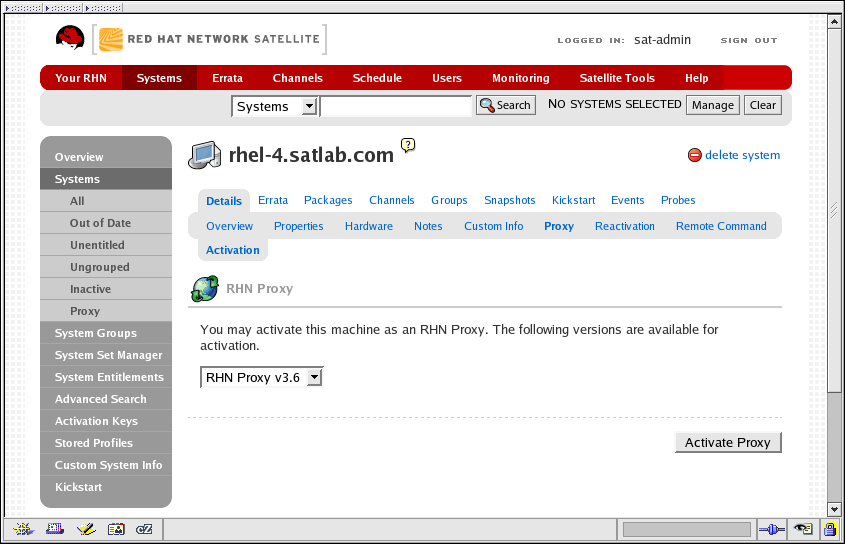
Within the RHN website, navigate to the System Details ⇒ Proxy subtab.

Warning Please note the RHN Proxy Server installation may replace the squid.conf and httpd.conf configuration files on the system to ease upgrades later. If you have edited these files and want to preserve them, they are rotated in place and can be retrieved after installation.
In the System Details ⇒ Proxy subtab, the pulldown menu should indicate your ability to activate the system as an RHN Proxy Server. Ensure the version is properly selected and click Activate Proxy. The Welcome page of the installation appears.
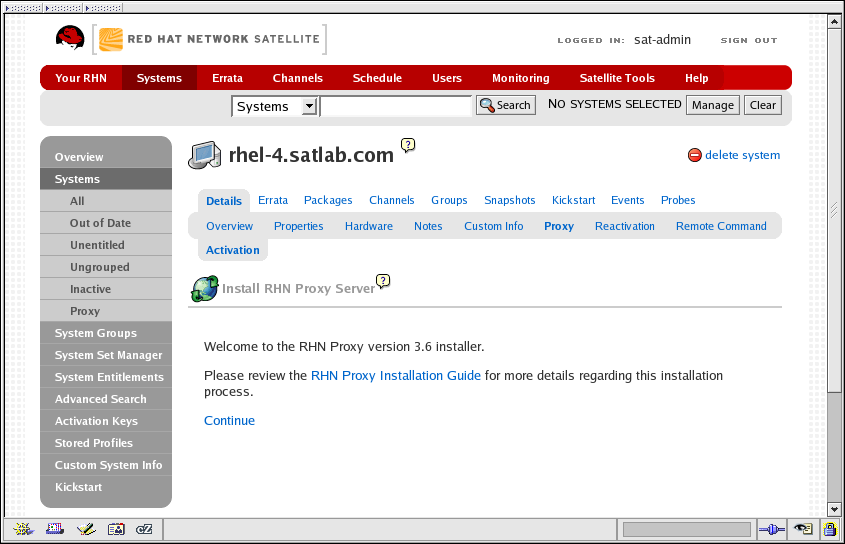
In the Welcome page, you will find notification of any requirements not met by the system. When the system is ready, a continue link appears. Click it to go to the Terms & Conditions page.
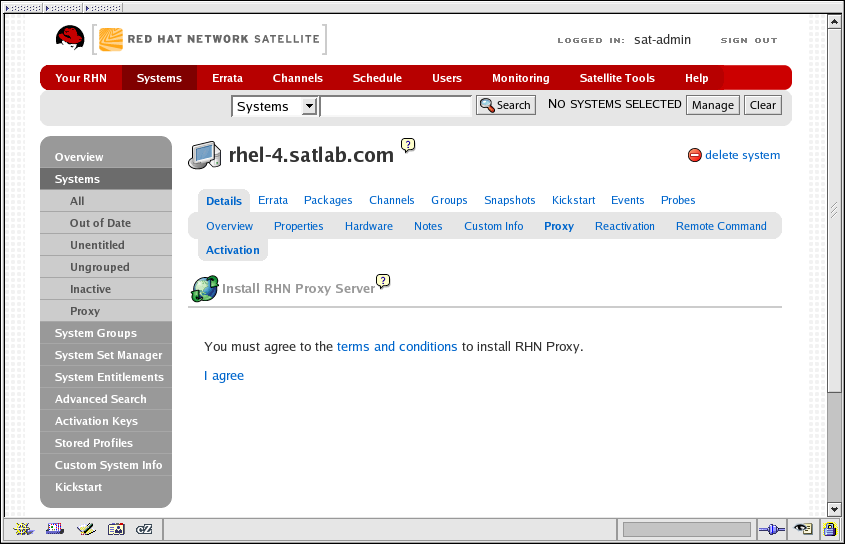
In the Terms & Conditions page, click the terms and conditions link to view the licensing agreement of the RHN Proxy Server. When satisfied, click the I agree link. The Enable Monitoring page appears next.
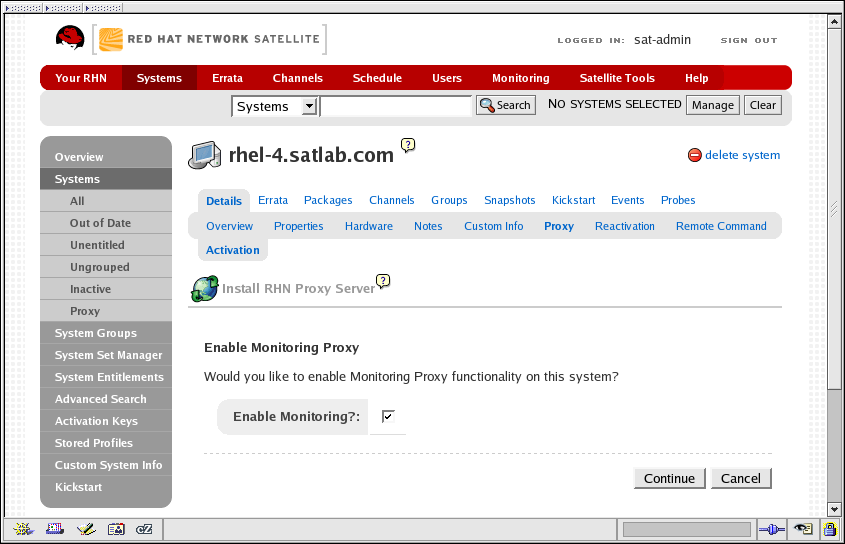
In the Enable Monitoring page, you must decide whether the Proxy will be used to monitor systems served by it. For this to take place, the RHN Proxy Server must meet the requirements identified in Chapter 2 Requirements and be connected to an RHN Satellite Server (or another Proxy connected to a Satellite). To enable monitoring on the Proxy, select the checkbox and click continue. The Configure RHN Proxy Server page appears.
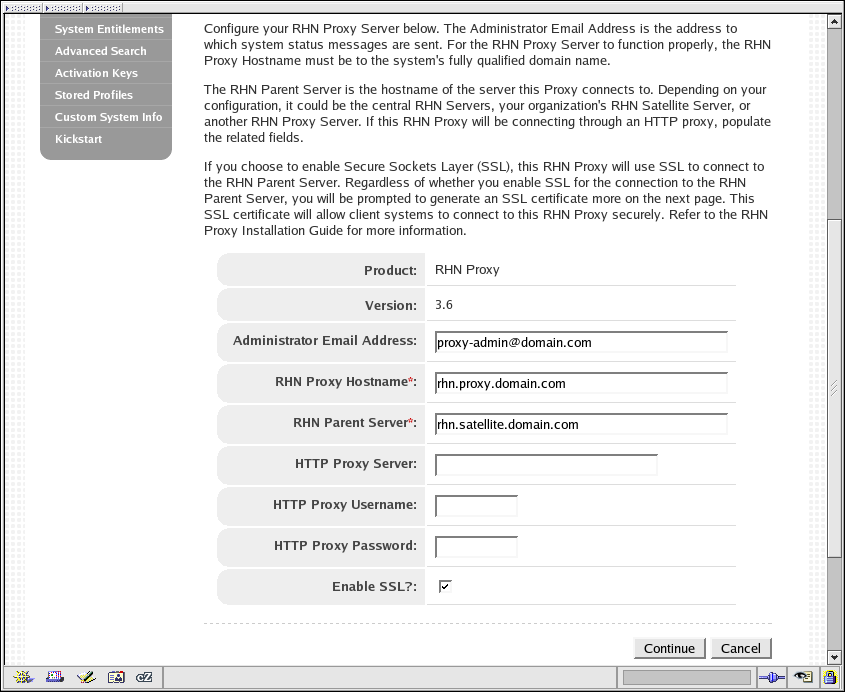
In the Configure RHN Proxy Server page, provide or confirm the entries for all required fields. The Administrator Email Address will receive all mail generated by the Proxy, including sometimes large quantities of error-related tracebacks. To stem this flow, consider establishing mail filters that capture messages with a subject of "RHN TRACEBACK from hostname". To list more than one administrator, enter a comma-separated list of email addresses.
The RHN Proxy Hostname if the fully qualified domain name (FQDN) of the RHN Proxy Server. The RHN Parent Server is the domain name of the server serving the Proxy, either the central RHN Servers, another RHN Proxy Server or an RHN Satellite Server. To connect to the central RHN Servers, include the value xmlrpc.rhn.redhat.com. To connect to a Satellite or another Proxy, enter the parent system's FQDN.
If the RHN Proxy Server will connect through an HTTP proxy, configure it using the associated fields. Note that references to protocol, such as http:// or https:// should not be included in the HTTP Proxy Server field. Insert only the hostname and port in the form hostname:port, such as my.corporate.gateway.example.com:3128.

Tip The installation process affects only the Proxy configuration file: /etc/rhn/rhn.conf. The Red Hat Update Agent (up2date) configuration file, /etc/sysconfig/rhn/up2date, must be updated manually to receive its updates from another server, such as an RHN Satellite Server.
Finally, you must decide whether to enable SSL using the checkbox at the bottom. Red Hat strongly recommends you employ this level of encryption for all traffic to and from the RHN Proxy Server. To select it, however, you must be connecting to the central RHN Servers (which have SSL enabled by default) or to an RHN Satellite Server or RHN Proxy Server that has SSL enabled. Connection to the central RHN Servers requires upload of the certificate tar file mentioned earlier. Connection to a Satellite or another Proxy through SSL requires the CA certificate password used in enabling SSL on the parent system.
If you will not enable SSL during installation, leave this box unchecked and refer to the SSL Certificates chapter of the RHN Client Configuration Guide to learn how to obtain this level of security post install. When finished, click continue. If you enabled SSL and are connecting to a Satellite or another Proxy, the Configure SSL page appears. If you enabled SSL and are connecting to the central RHN servers, the Upload SSL page appears. If you did not enable SSL but did enable Monitoring, skip to the description of the Configure Monitoring page. If you did not enable SSL or Monitoring, skip to the description of the Install Progress page.
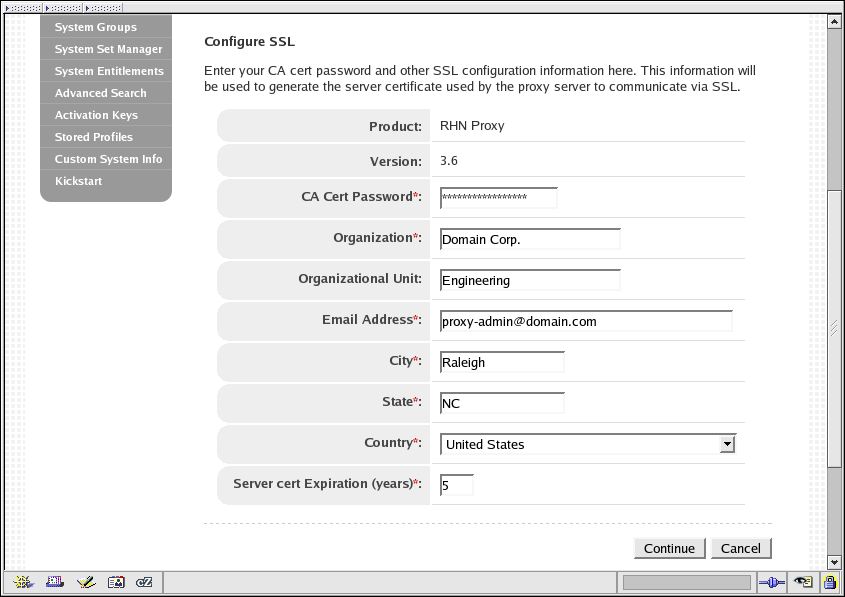
In the Configure SSL page applicable only to a Proxy connecting to an RHN Satellite Server or another RHN Proxy Server with SSL enabled, provide the information needed to generate the server certificate. The most important item is the CA certificate password, which must match the password used while enabling SSL on the parent server. The remaining fields may match the parent server's values but can differ depending on the role of the RHN Proxy Server, for instance reflecting a different geographic location. Similarly, the email address can be the same one provided earlier for the Proxy administrator but can be directed to a particular certificate administrator. Certificate expiration is configurable. As always, ensure the values provided here exist in the backups of information described in Chapter 2 Requirements. Once finished, click continue.
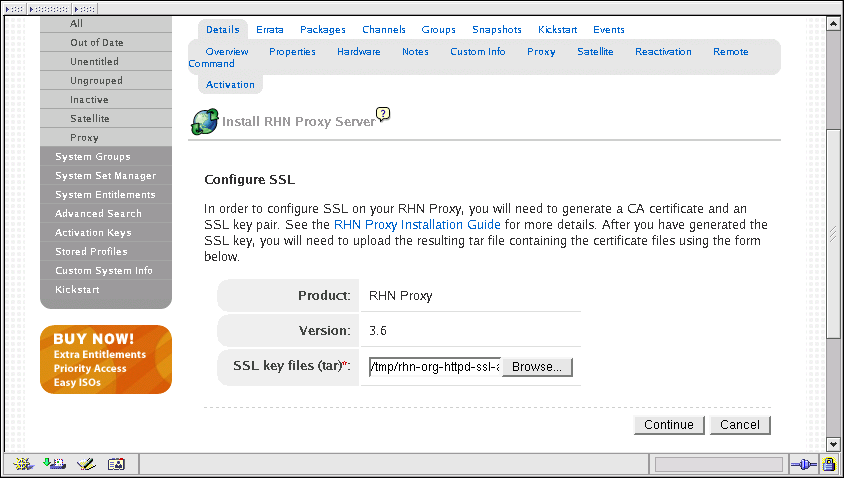
In the Upload SSL page applicable only to a Proxy connecting to the central RHN Servers, locate the tar file created using the RHN SSL Maintenance Tool using the Browse button. It will be named rhn-org-httpd-ssl-archive-MACHINENAME-VERSION.tar with the machine name reflecting the Proxy's hostname. Once located, click continue.
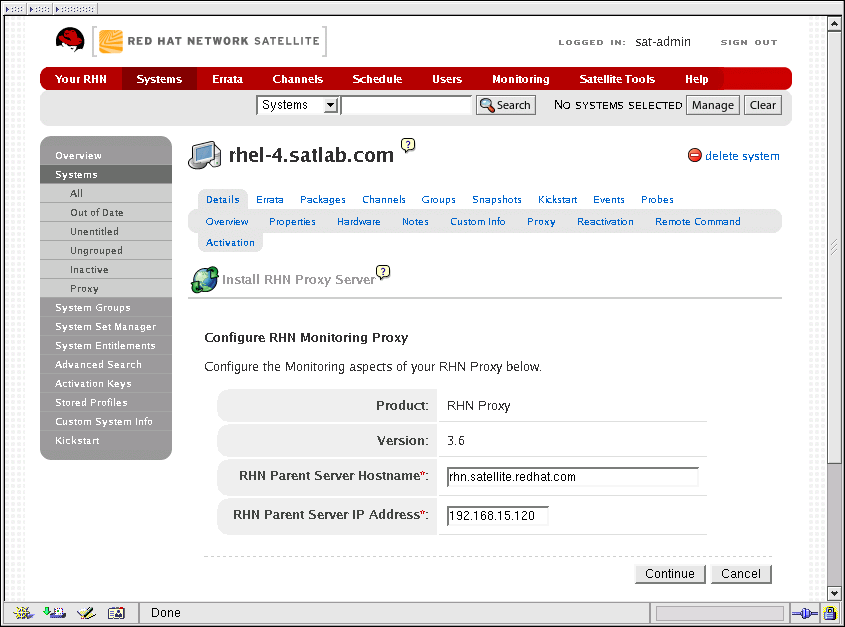
In the Configure Monitoring page, provide or confirm the hostname and IP address of the parent server connected to by the RHN Proxy Server. This must be either an RHN Satellite Server or another Proxy which is in turn connected to a Satellite. You cannot achieve Monitoring through the central RHN Servers. When finished, click continue. The Install Progress page appears.
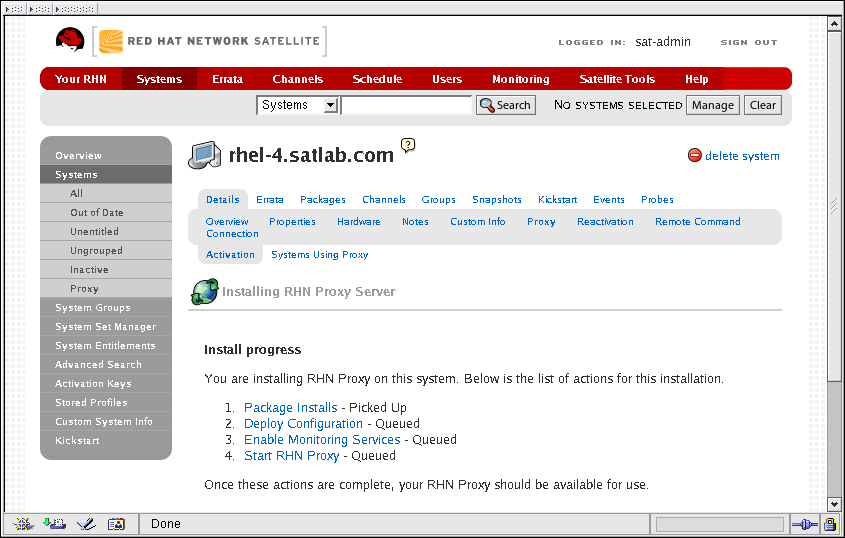
In the Install Progress page, you may monitor the steps of the installation as they take place. Click the link to any step to go to its Action Details page. When a step has been undertaken, its status goes from Queued to Picked Up and then finally to Completed. Like the earlier package installs, you can immediately trigger these steps by running the rhn_check command in a terminal on the system as root. When finished, the Install Progress page will display the message The installation is complete. You may now begin registering systems to be served by the RHN Proxy Server. Refer to the RHN Client Configuration Guide.