Groups
In the object hierarchy under a cluster, you will find Groups.
Groups can be added by selecting CREATE GROUP from the Groups context menu. Once a group has been created, it can also be altered and dropped. This section describes how to create, alter, and drop a group with RHDB Administrator.
In this example, you will create a group called in_store_workers.
A group is an object under a cluster, so to create a group, first expand the cluster under which you wish to create the group (click the + beside the cluster name).
Right-click on Groups and select CREATE GROUP.
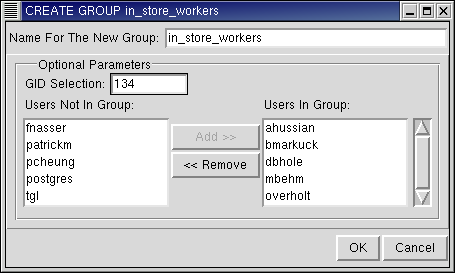
The only required field is the name for the group. Type: in_store_workers
The remaining fields are optional, but ID Selection is used in this example.
The ID Selection allows entry of a group ID. For this example, type: 134
The Users Not In Group and Users In Group boxes control which users are a member of this group. Choose users from the Users Not In Group box and click Add to move those names to the Users In Group box.
Click OK to create the group.
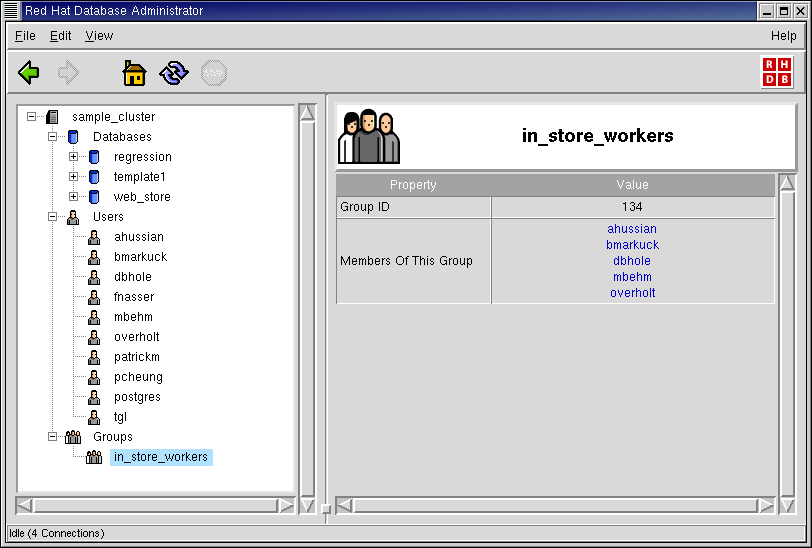
Note that the group in_store_workers has been added under the Groups node in the Tree View.
RHDB Administrator also enables you to perform the following operations on existing groups:
- Altering
To alter a group, right-click on it and select ALTER GROUP. All of the characteristics that you could set with CREATE GROUP (except for Group ID) you can modify with ALTER GROUP.
- Dropping
To drop a group, right-click on it and select DROP GROUP. If View -> Ask For Confirmations is enabled, you are asked to confirm that you want the group dropped; if it is disabled, the group is dropped immediately. This action cannot be undone.
Refer to the Red Hat Database Administrator and User's Guide for more information on password authentication, privilege setup, and group membership.