Indexes
In the object hierarchy under any table, you will find Indexes. In order to facilitate faster searching over a table, PostgreSQL allows creation of index on a table, which helps the database engine find relevant data quickly.
Indexes can be added by selecting CREATE INDEX from the Indexes context menu. Once an index has been created, it can also be altered, commented on, and dropped. This section describes how to create, manage, and drop an index with RHDB Administrator.
In this example, you will create an index called customer_name_index on the table customers.
An index is an object under a table, so to create an index, first expand the user database then the table under which you wish to create the index (click the + beside the database and table names).
Right-click on Indexes and select CREATE INDEX.
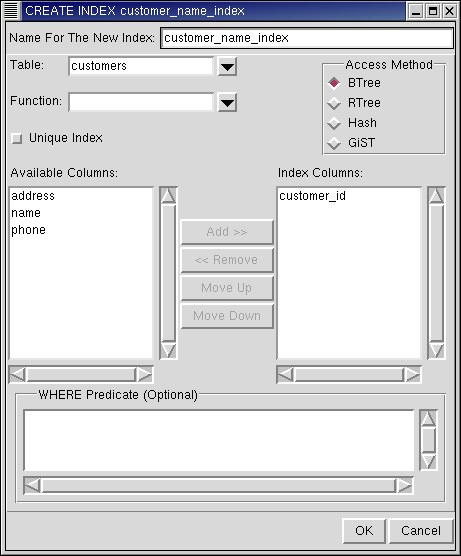
The first field is the name for the index. Type: customer_name_index
Next is the table name. By default, the table on which CREATE INDEX was invoked is selected.
In the Function field, you have the option of specifying a function to be applied to the selected columns. For this example, leave the Function field blank.
In the Access Method, specify the type of index to be used. For this example, select BTree.
Next is the Unique checkbox. If this is checked, the index will be unique. What that means is that each time a value is entered in the selected columns, PostgreSQL will ensure that there is no row in the table with the same corresponding values. For this example, leave Unique unchecked.
The Index Columns box specifies which columns the index will be applied to. You can declare an index on multiple columns by selecting the required columns from Available Columns and clicking Add to move them to Index Columns. For this example, add the column customer_id.
The optional WHERE Predicate field enables you to create a partial clause for the index. For this example, leave WHERE Predicate blank.
Click OK to create the index.
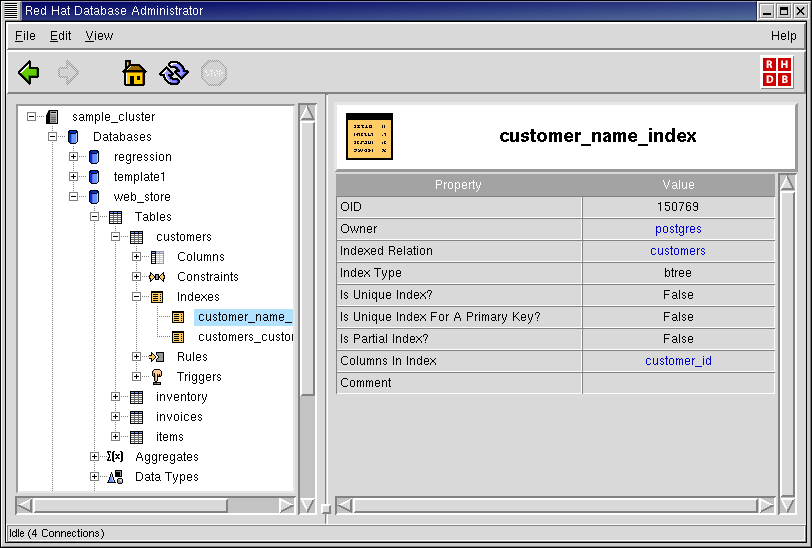
Note that the index customer_index_name has been added under the Indexes node in the Tree View.
RHDB Administrator also enables you to perform the following operations on existing indexes:
- Dropping
To drop an index, right-click on it and select DROP INDEX. If View -> Ask For Confirmations is enabled, you are asked to confirm that you want the index dropped; if it is disabled, the index is dropped immediately. This action cannot be undone.
- Renaming
An index can be renamed once it has been created. To rename an index, right-click on it and select RENAME INDEX. A dialog asks for the new name. Type the new name and click OK.
- Altering Owner
By default, the user creating the index is the owner. However, the owner can later be modified by a superuser. To modify the owner of an index, right-click on the index and select ALTER INDEX OWNER. A dialog asks for the new owner name. Because the owner name can be only one of the users in the cluster, the dialog has a drop down box from which the user can be selected. Once the username is selected, click OK.
- Commenting
PostgreSQL allows commenting on indexes, which makes them easier to identify. To comment on an index, right-click on it and select COMMENT. A dialog asks for the comment. If there is already a comment on the index, this comment is displayed Type the new comment in the edit box and click OK (or press
[Enter] ) to save the comment.
Refer to the Red Hat Database SQL Guide and Reference for more information on functional indexes, indexes with partial clauses, and types.