Tutorial
An excellent way to understand the functionality of a tool is through a tutorial. The following section is a tutorial on how to use RHDB Administrator. Topics to be covered are:
Adding a cluster
Creating a database
Creating a table
Creating a user
Creating a group
Dropping a database.
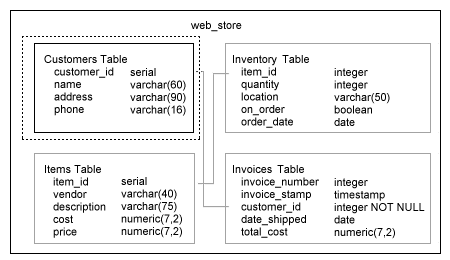
The tutorial will use the following schema, which is a database named web_store containing four tables:
It is assumed that during the installation of Red Hat Database, the post-installer was run, which created the postgres userid and created a database cluster in /var/lib/pgsql/data. It is also assumed that rhdb-admin was started by the superuser postgres.
Adding a Cluster
After you start RHDB Administrator (as described in the Section called Starting RHDB Administrator), the next task is to add a cluster, which is a collection of databases, users, and groups. When Red Hat Database was installed, a cluster was created in /var/lib/pgsql/data, so that will be used as the sample cluster.
Refer to the Red Hat Database Administrator and User's Guide for details on creating a database cluster.
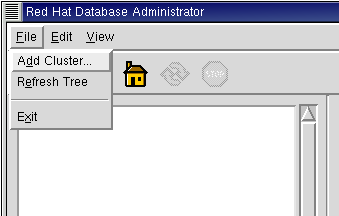
To add the cluster to the tool, select File -> Add Cluster
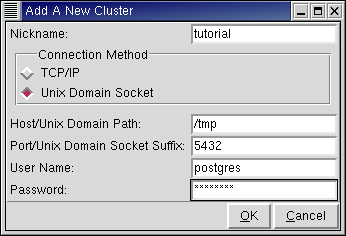
The Add A New Cluster dialog appears. (You could also bring up this dialog by selecting Edit -> Cluster Configuration and clicking Add.) The Nickname entered in this dialog will be displayed in the Tree View. The example uses a nickname of tutorial and connects by Unix domain sockets on the local host with the postgres user ID.
Select OK to add the cluster. The cluster tutorial is now visible in the Tree View.
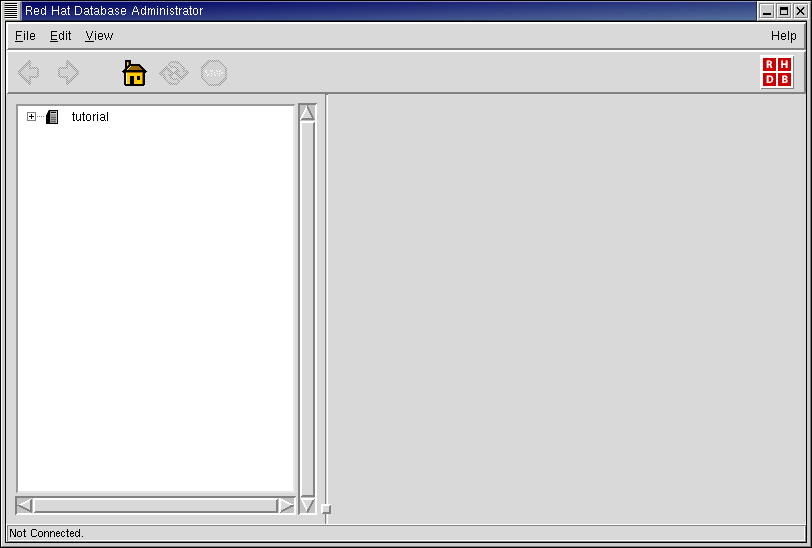
Notice that the Status Bar indicates Not Connected. Although the tutorial cluster is visible in the Tree View, you are not yet connected to it. To display the detailed view for cluster tutorial, select the name tutorial in the Tree View.
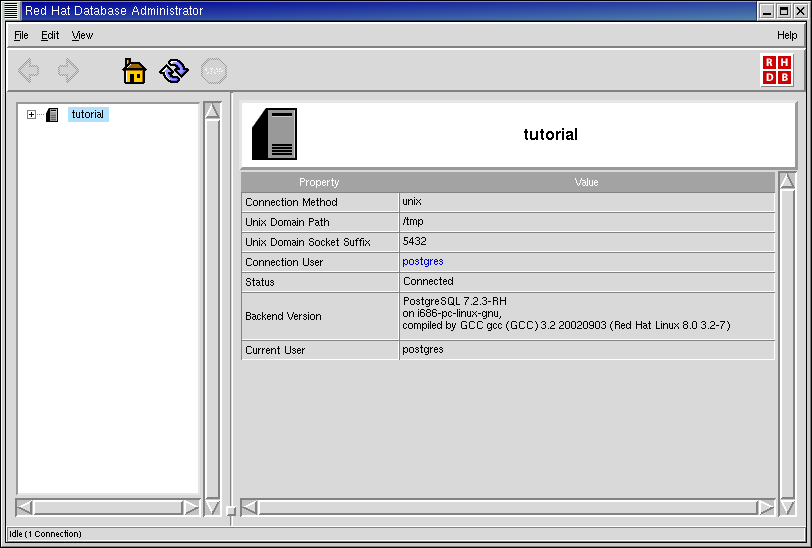
Information about the cluster is detailed in the View Pane. Notice that the Status Bar has been updated to show the connection. Also note that the postmaster must have been started on localhost for the connection to succeed.
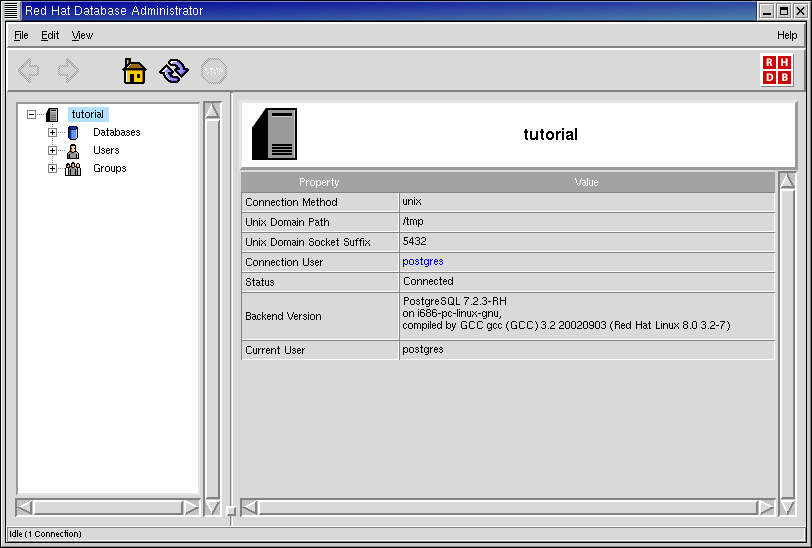
To view the contents of the tutorial cluster,
expand the tutorial node in the Tree View by
clicking the
Creating a Database
In this section of the tutorial, you will create and comment on a database. The database will be named web_store and it will use the default location, template, and encoding.
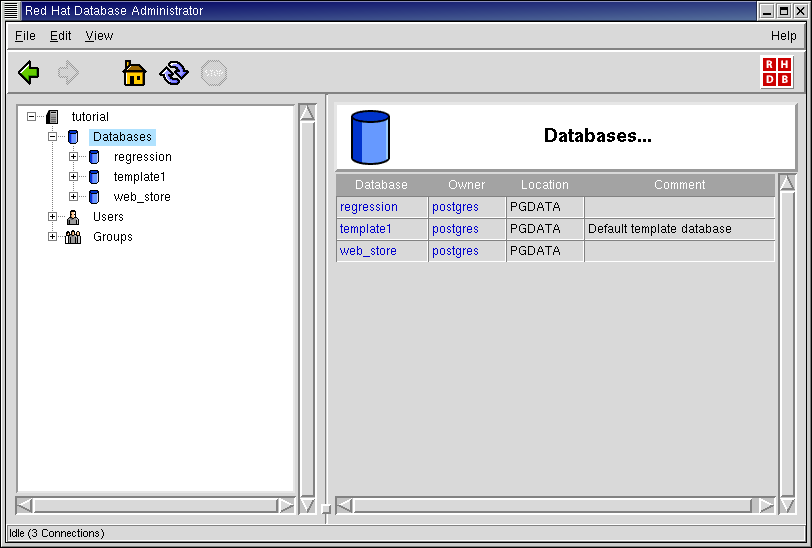
Select Databases in the Tree View to display the Databases Summary. The Summary View for Databases displays the name, owner, location and comment for each database in the cluster. There are two databases in the Database Summary, template1 and regression. The template1 database was created by initdb in the initial creation of the cluster. The regression database was created by the RHDB post-installer (if the rh-postgresql-test package was installed and the "run regression test" option was selected at install time). When the Databases Summary View is displayed, the RHDB Administrator connects to each database listed in the view. The two connections listed on the Status Bar are connections to regression and template1.

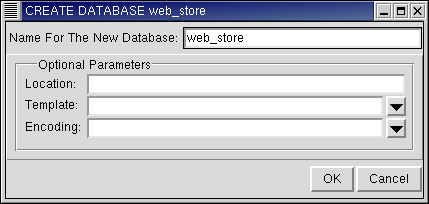
To create the database web_store, right-click on Databases in the Tree View and select CREATE DATABASE.

The CREATE DATABASE dialog is displayed. Type the name for the database to be created in the Name For The New Database entry field: web_store
As mentioned, the defaults will be used for the optional parameters listed in the dialog.
Click OK to create the new database.
Upon successful creation of the database, the Databases Summary View is updated to display the new web_store database. Notice that the Status Bar now has connections to all three databases listed in the Databases Summary View.
It is a good practice to add comments to database objects. Add a comment to the database web_store by right-clicking web_store on the Tree View and selecting COMMENT.
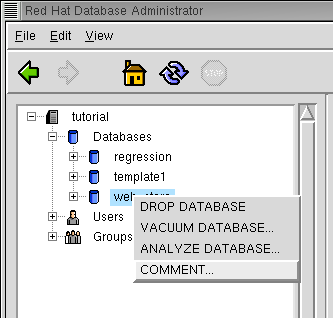
A COMMENT ON DATABASE dialog appears. Type in the Comment field: Tutorial sample database
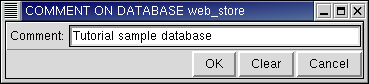
Click OK.
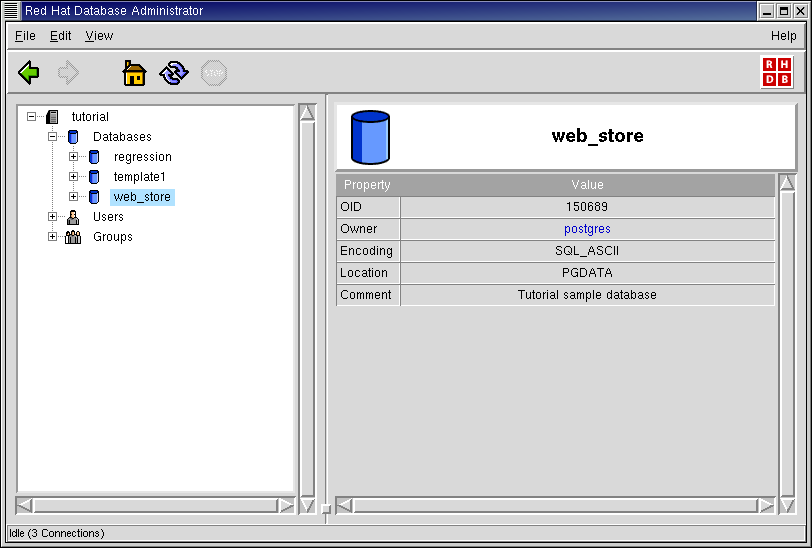
The Databases Summary View updates to include the new comment for database web_store.
To display details about the web_store database, select web_store in the Tree View. The database's object identifier (OID), owner, encoding, location, and comment are listed in the Detailed View.
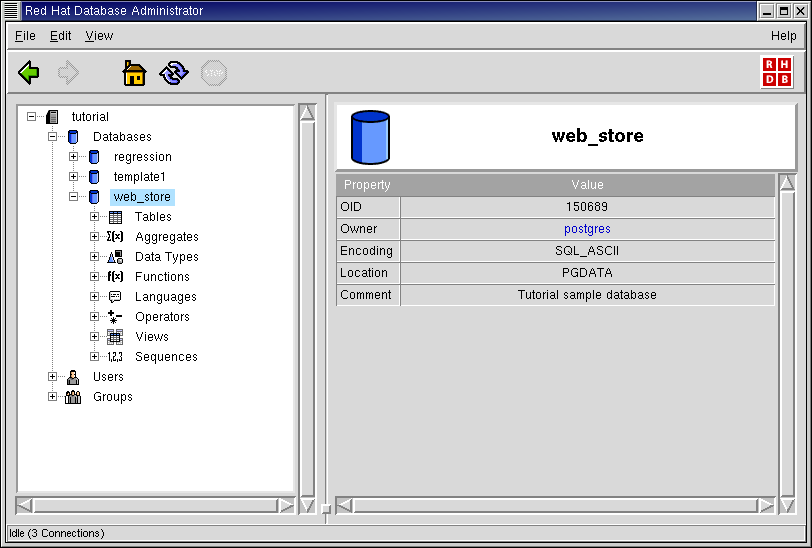
Expand the web_store database Tree View to display the database object classes. Objects listed under Databases are Tables, Aggregates, Data Types, Functions, Languages, Operators, Views, and Sequences.
For more information on creating databases, refer to the CREATE DATABASE section of the Red Hat Database SQL Guide and Reference.
Creating a Table
In this section of the tutorial you will create a table.
To create a table, right-click on Tables listed under web_store. The Table context menu appears. Select CREATE TABLE.

The CREATE TABLE dialog appears. Input for the CREATE TABLE command can be a very complex undertaking, but we will focus on just naming the table and creating columns.
For more information on creating tables, refer to the CREATE TABLE section of the Red Hat Database SQL Guide and Reference.
You will be defining the table customers described at the beginning of the tutorial section, so type the name customers in the Name For The New Table entry box. Add the first column, customer_id with a data type of serial. Type customer_id in the Column Name field and type the data type serial in the Data Type entry field (or select the data type by using the combo box arrow).
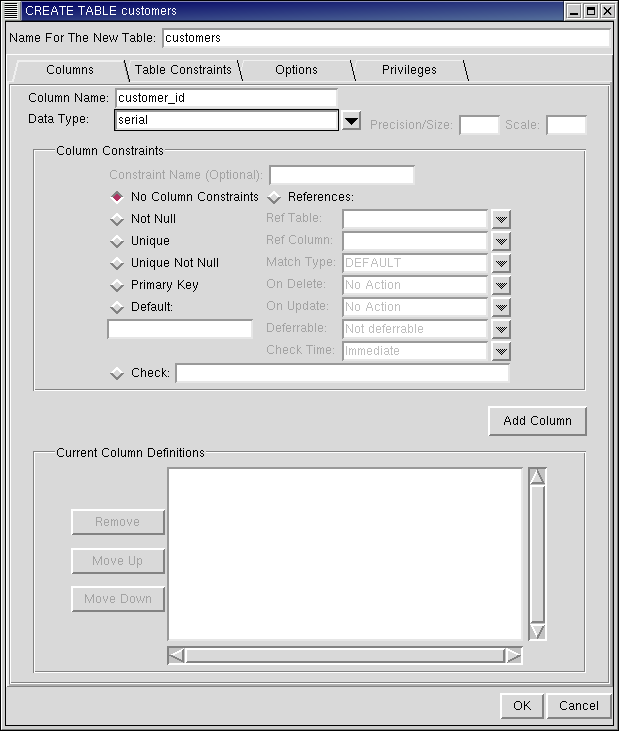
Click Add Column when you are finished. This adds the column to the table definition. Do the same for each column of the table customers as shown in the following figure:
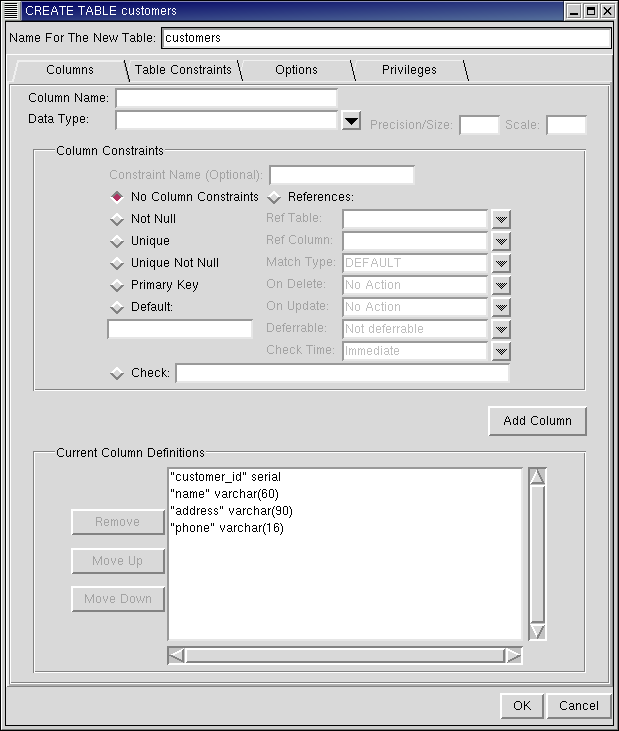
When the last column (phone) has been added to the table definition, click OK to create the table. The Tables Summary View is updated to display the newly created table customers.

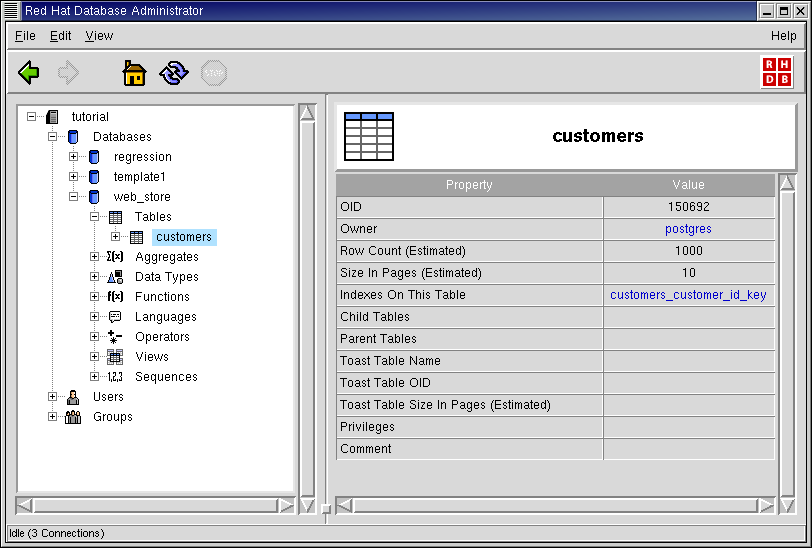
Select the table customers to display the Table Detailed View.
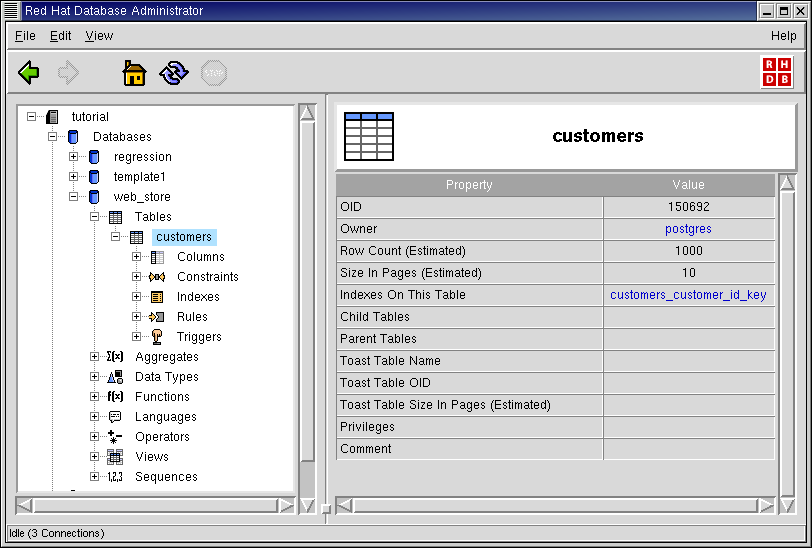
Expanding the customers table node displays the classes of objects associated with the table. Columns, constraints, indexes, rules, and triggers are all defined under a table.
Expand the Columns node of the customers table and select the customer_id column. The Column Detailed View displays information about the definition of that particular column.

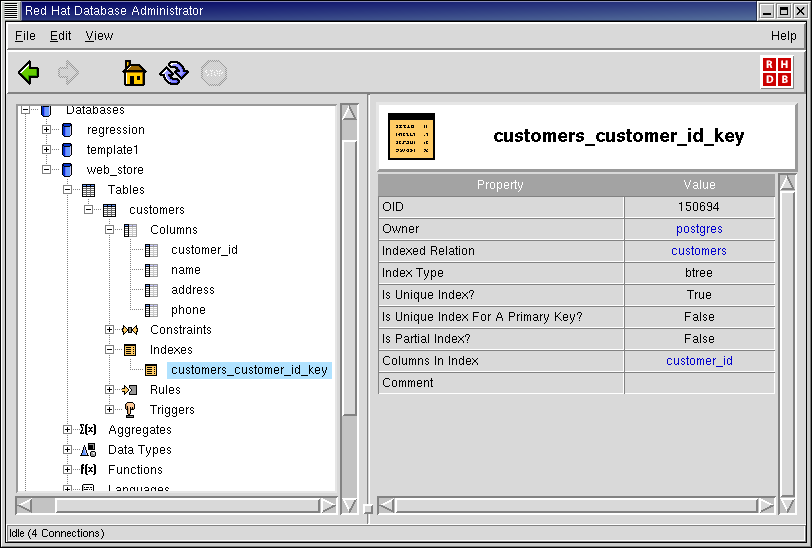
Expand the Indexes node of the customers table and select the customers_customer_id_key index. The View Pane displays information about the definition of this particular index. This index was implicitly created by the use of the serial data type on the customer_id column.
Creating Users and Groups
Creating a database installation is not just about data, it is also about who has access to what data. This section focuses on the creation of users and groups. The concepts behind users and groups are explained in the Red Hat Database Administrator and User's Guide. Refer to that document for more information.
Refer to the CREATE USER section of the Red Hat Database SQL Guide and Reference for more information on creating users.
When Red Hat Database was installed, the user postgres was created. Select Users in the Tree View to display a summary of all the users in the tutorial cluster (in this case, the user postgres).

Click the
To create a user, right-click on Users and select CREATE USER.

The CREATE USER dialog is displayed. Insert information for the new user new_user. Give the user "Create Database" and "Create User" privileges.

Click OK to create the user.
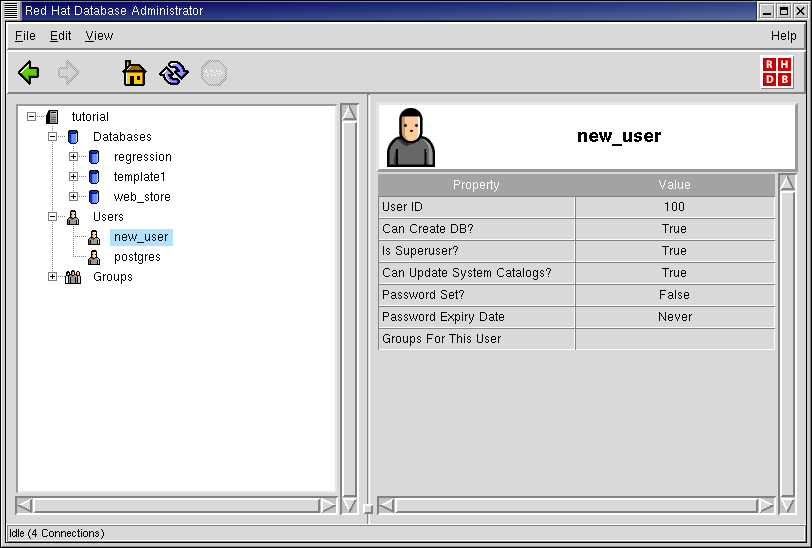
The user new_user has been created and the Tree View and Summary View have been updated accordingly.

To display information about the user, click the new_user node on the Tree View or on the new_user link in the Summary View. Information about this user appears in the View Pane.
Creating Groups
It is common practice to grant privileges to groups of users instead of to each user individually. When Red Hat Database was installed, no groups were defined, so your next step will be to create a group and add some users to it.
Refer to the CREATE GROUP command in the Red Hat Database SQL Guide and Reference for more information on creating groups.

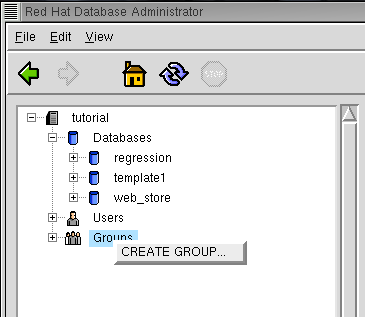
To create a group with users postgres and new_user, right-click on the Groups node and select CREATE GROUP.
The CREATE GROUP dialog is displayed. Insert information for the group new_group. Notice that under Optional Parameters, a list of users defined for the cluster is displayed. Highlight the users you wish to include in the group. In this case, highlight new_user and postgres.
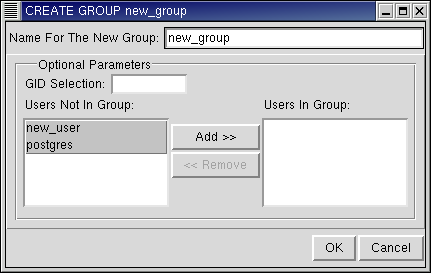
Next, click Add to move the highlighted users to the Users In Group list. The highlighted users are moved.
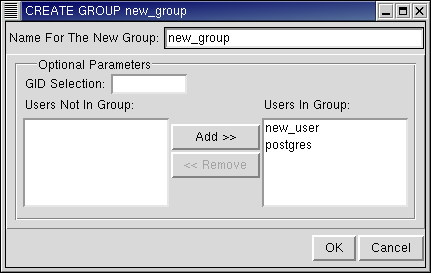
Click OK to create the group.
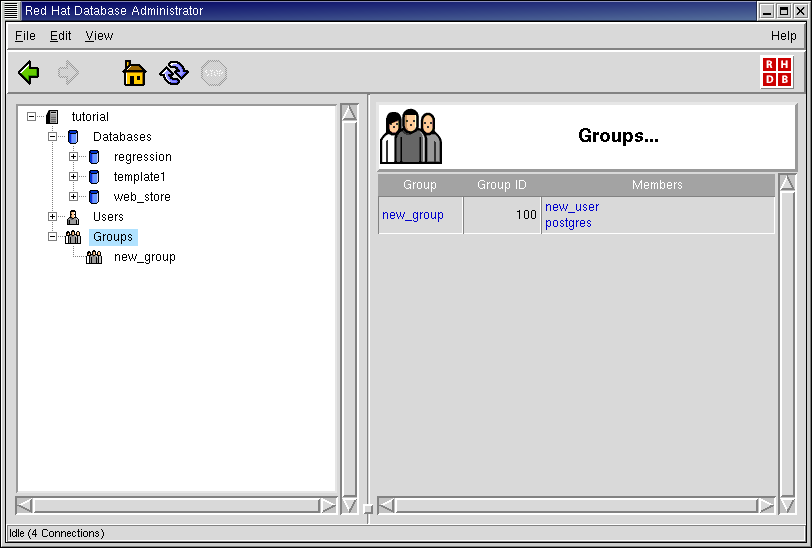
The group new_group has been created and the Tree View and Summary View have been updated accordingly.
Dropping Database Objects
Up to this point, the tutorial has been about creating database objects. Part of administering a database cluster is the deletion (or dropping) of objects. Dropping of objects from within RHDB Administrator is straightforward and consistent. In this section you will drop the database web_store as an example.
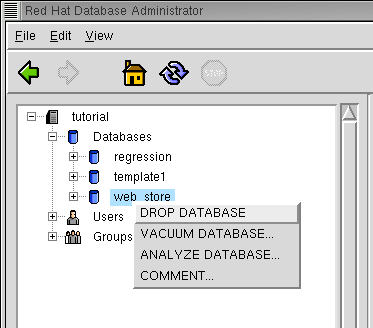
In the Tree View, right-click on the web_store database and select DROP DATABASE.
If View -> Ask For Confirmations is enabled, a confirmation message is displayed; if you want to drop the object, select Yes; otherwise, select No. If View -> Ask For Confirmations is disabled, the database is dropped immediately.

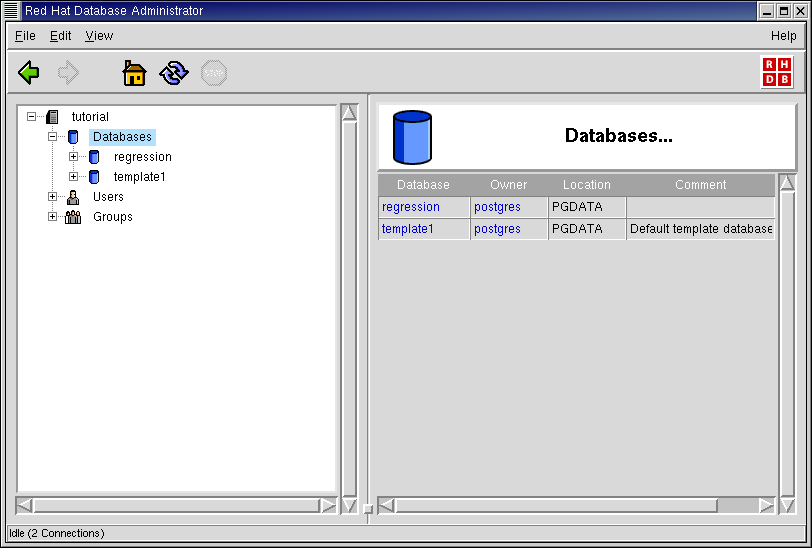
After the object is successfully dropped, the Tree View and Summary View are updated.
For more information about dropping database objects, refer to the DROP commands listed in the Red Hat Database SQL Guide and Reference.