Importing Assets
Assets created outside of Unity must be brought in to Unity by having the file either saved directly into the “Assets” folder of your project, or copied into that folder. For many common formats, you can save your source file directly into your project’s Assets folder and Unity will be able to read it. Unity will notice when you save new changes to the file and will re-import as necessary.
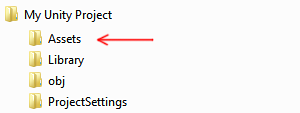
When you create a Unity Project, you are creating a folder - named after your project - which contains the following subfolders:

The Assets folder is where you should save or copy files that you want to use in your project.
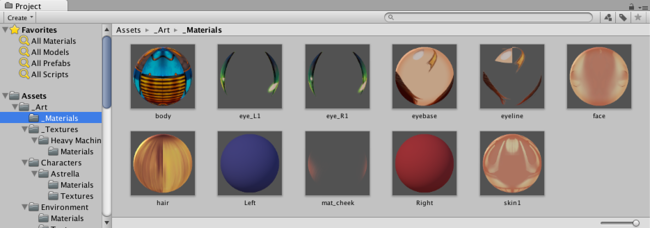
The contents of the Project Window in Unity shows the items in your Assets folder. So if you save or copy a file to your Assets folder, it will be imported and become visible in your Project Window.
Unity will automatically detect files as they are added to Assets folder, or if they are modified. When you put any asset into your Assets folder, you will see the asset appear in your Project View.

If you drag a file into Unity’s Project Window from your computer (eg, from the Finder on Mac, or from Explorer on Windows), it will be copied into your Assets folder, and will appear in the Project window.
The items you see in your Project window represent (in most cases) actual files on your computer, and if you delete them within Unity, you are deleting them from your computer too.

The above image shows an example of a few files and folders inside the Assets folder of a Unity project. You can create as many folders as you like and use them to organise your Assets.
You’ll notice in the image above that there are .meta files listed in the file system, but not visible in Unity’s Project Window. Unity creates these .meta files for each asset and folder, but they are hidden by default, so you may not see them in your Explorer/Finder either.
They contain important information about how the asset is used in the project and they must stay with the asset file they relate to, so if you move or rename an asset file in Explorer/Finder, you must also move/rename the meta file to match.
The simplest way to safely move or rename your assets is to always do it from within Unity’s project folder. This way, Unity will automatically move or rename the corresponding meta file. If you like, you can read more about .meta files and what goes on behind-the-scenes during the import process.
If you want to bring collections of assets into your project, you can use Asset Packages. See Asset Packages for more details.
Some common types of Asset
Image Files
Most common image file types are supported, such as BMP, TIF, TGA, JPG, and PSD. If you save your layered Photoshop (.psd) files into your Assets folder, they will be imported as flattened images. You can find out more about importing images with alpha channels from photoshop, or importing your images as sprites
3D Model Files
If you save your 3D files from most common 3D software packages in their native format (eg, .max, .blend, .mb, .ma) into your Assets folder, they will be imported by calling back to your 3D package’s FBX export plugin (*). Alternatively you can export as FBX from your 3D app into your Unity project. Read more about importing 3D files from your 3D app.
Meshes & Animations
Whichever 3D package you are using, Unity will import the meshes and animations from each file. For a list of applications that are supported by Unity, please see this page.
Your mesh file does not need to have an animation to be imported. If you do use animations, you have your choice of importing all animations from a single file, or importing separate files, each with one animation. For more information about importing animations, please see of the manual.
Audio Files
If you save uncompressed audio files into your Assets folder, they will be imported according to the compression settings specified. Read more about importing audio files.
Other Asset Types
In all cases, your original source file is never modified by Unity, even though within Unity you can often choose between various ways to compress, modify, or otherwise process the asset. The import process reads your source file, and creates a game-ready representation of your asset internally, matching your chosen import settings. If you modify the import settings for an asset, or make a change to the source file in the Asset folder, will cause Unity to re-import the asset again to reflect your new changes.
Note: Importing native 3D formats requires the 3D application to be installed on the same computer as Unity. This is because Unity uses the 3D application’s FBX exporter plug-in to read the file. Alternatively, you can directly export as FBX from your application and save into the Projects folder.
See also: