Hubs are used to manage configuration data and pass it to the collectors. Hubs also take data from the collectors and pass it to the ZeoDB. More hubs can be a more efficient way to manage larger deployments, as they help distribute the computing resources when configuration changes are made. They further remove the potential for configuration changes to be a bottleneck to gathering and processing data.
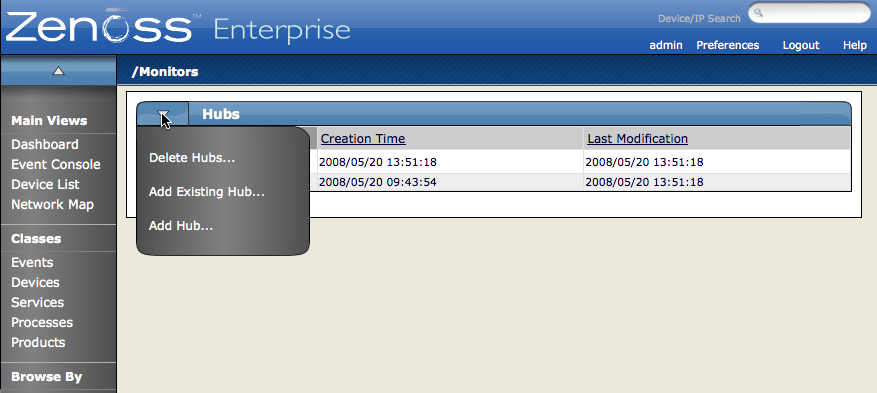
To add a hub, from the main Collectors page, select Add Hub from the table menu.
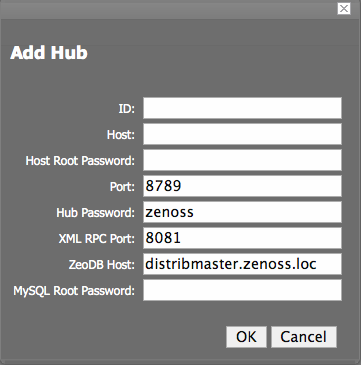
The Add Hub dialog appears:
Use the following fields to define the hub:
ID - Enter a name for the new hub. The name can be any unique combination of letters, digits, and dashes.
Host - Enter the fully qualified domain name, IP address, or resolvable hostname of the server on which the new hub will run.
Host Root Password - Enter the root user password for the server you specified in the Host field.
Port - Enter the port number on which the hub should listen for collectors. The default port is 8789.
Hub Password - Enter the hub password that the collectors will use to log into this hub. The default password is "zenoss."
XML RPC Port - Specify the port on which the hub should listen for xml-rpc requests from the collectors or other API clients.
ZeoDB Host - Specify the server hosting the ZeoDB database (the object database). In most cases, this is the IP address or hostname of the main Zenoss server.
MySQL Root Password - Enter the password for the root MySQL user. If the MySQL root user does not have a password, then leave this field blank.
Click OK. The system displays log output from the creation of the new hub. When fully configured (this may require several minutes), click the link at the bottom of the page to go to the overview page for the new hub.


