Chapter 3
Configuring Directory Databases
Your directory is made up of databases over which you can distribute your directory tree. This chapter describes how to create suffixes, the branch points for your directory tree, and how to create the databases associated with each suffix. This chapter also describes how to create database links to reference databases on remote servers and how to use referrals to point clients to external sources of directory data.
This chapter includes the following sections:
- Creating and Maintaining Suffixes (page 81)
- Creating and Maintaining Databases (page 92)
- Creating and Maintaining Database Links (page 104)
- Using Referrals (page 144)
For conceptual information on distributing your directory data, refer to the Red Hat Directory Server Deployment Guide.
Creating and Maintaining Suffixes
You can store different pieces of your directory tree in different databases and then distribute these databases across multiple servers. Your directory tree contains branch points called nodes. These nodes may be associated with databases. You create nodes using the Directory tab in the Directory Server Console, where you freely edit the entries that appear in your directory tree.
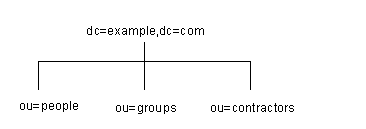
A suffix is a node of your directory tree associated with a particular database. You create these special nodes using the Database tab on the Directory Server Console. For example, a simple directory tree might appear as illustrated in Figure 3-1.
Figure 3-1 A Sample Directory Tree with One Root Suffix

|
The ou=people suffix and all the entries and nodes below it might be stored in one database, the ou=groups suffix on another database, and the ou=contractors suffix on yet another database.
This section describes creating suffixes on your Directory Server and associating them with databases. This section contains procedures for the following:
Creating Suffixes
You can create both root and subsuffixes to organize the contents of your directory tree. A root suffix is the parent of a sub suffix. It can be part of a larger tree you have designed for your Directory Server. A sub suffix is a branch underneath a root suffix. The data for root and subsuffixes are contained by databases.
Your directory might contain more than one root suffix. For example, an ISP might host several websites, one for example.com and one for redhat.com. The ISP would create two root suffixes, one corresponding to the dc=example,dc=com naming context and one corresponding to the dc=redhat,dc=com naming context. The directory tree appears as illustrated in Figure 3-2.
Figure 3-2 A Sample Directory Tree with Two Root Suffixes

|
You can also create root suffixes to exclude portions of your directory tree from search operations. For example, example.com Corporation might want to exclude their European office from a search on the general example.com Corporation directory. To do this, they create two root suffixes. One root suffix corresponds to the general example.com Corporation directory tree, dc=example,dc=com, and one root suffix corresponds to the European branch of their directory tree, l=europe,dc=example,dc=com. From a client application's perspective, the directory tree looks as illustrated in Figure 3-3.
Figure 3-3 A Sample Directory Tree with a Root Suffix Off Limits to Search Operations

|
Searches performed by client applications on the dc=example,dc=com branch of example.com Corporation's directory will not return entries from the l=europe,dc=example,dc=com branch of the directory, as it is a separate root suffix.
If example.com Corporation decides that they want to include the entries in the European branch of their directory tree in general searches, they would make the European branch a sub suffix of the general branch. To do this, they create a root suffix example.com Corporation, dc=example,dc=com, and then create a sub suffix beneath it for their European directory entries, l=europe,dc=example,dc=com. From a client application's perspective, the directory tree would appear as illustrated in Figure 3-4.
Figure 3-4 A Sample Directory Tree with a Sub Suffix

|
This section describes creating root and subsuffixes for your directory using either the Directory Server Console or the command-line. This section contains the following procedures:
- Creating a New Root Suffix Using the Console
- Creating a New Sub Suffix Using the Console
- Creating Root and Sub Suffixes from the Command-Line
Creating a New Root Suffix Using the Console
The following procedure describes creating a suffix and associating it with a database:
- In the Directory Server Console, select the Configuration tab.
- Right-click Data in the left navigation pane, and select New Root Suffix from the pop-up menu.
- Select the "Create associated database automatically" checkbox if you want a database to be created at the same time as the new root suffix.
- If you selected the "Create associated database automatically" checkbox in step 4, enter a unique name for the new database in the "Database name" field.
Creating a New Sub Suffix Using the Console
The following procedure describes creating a sub suffix under an already existing root or sub suffix:
- In the Directory Server Console, select the Configuration tab.
- Under the Data in the left navigation pane, select the suffix under which you want to add a new sub suffix. Right-click the suffix, and select New Sub Suffix from the pop-up menu.
- Select the "Create associated database automatically" checkbox if you want a database to be created at the same time as the new sub suffix.
- If you selected the "Create associated database automatically" checkbox in step 4, enter a unique name for the new database in the "Database name" field.
Creating Root and Sub Suffixes from the Command-Line
Use the ldapmodify command-line utility to add new suffixes to your directory configuration file. The suffix configuration information is stored in the cn=mapping tree,cn=config entry.
For example, you want to add a new root suffix to the configuration file using the ldapmodify utility. First, type the following to change to the directory containing the utility:
cd serverRoot/shared/bin
Then, run ldapmodify, as follows:
ldapmodify -a -h example1 -p 389 -D "cn=directory manager" -w
secret
The ldapmodify utility binds to the server and prepares it to add an entry to the configuration file.
Next, you create the root suffix entry for example.com Corporation, as follows:
dn: cn="dc=example,dc=com",cn=mapping tree,cn=config

objectclass: top

objectclass: extensibleObject

objectclass: nsMappingTree

nsslapd-state: backend

nsslapd-backend: UserData

cn: dc=example,dc=com
To create a sub suffix for groups under this root suffix, you would do an ldapmodify operation to add the following entry:
dn: cn="ou=groups,dc=example,dc=com",cn=mapping tree,cn=config

objectclass: top

objectclass: extensibleObject

objectclass: nsMappingTree

nsslapd-state: backend

nsslapd-backend: GroupData

nsslapd-parent-suffix: "dc=example,dc=com"

cn: ou=groups,dc=example,dc=com
The following table describes the attributes used to configure a suffix entry:
| Attribute Name |
Value |
|---|---|
| dn |
Defines the DN for the suffix. The DN is contained in quotes. The value you enter takes the following form: cn="dc=domain,dc=com",cn=mapping tree, cn=config This attribute is required. |
| cn |
Defines the relative DN (RDN) of the entry. This attribute is required. |
| objectclass |
Tells the server that the entry is root or sub suffix entry. It always takes the value nsMappingTree. This attribute is required. |
| nsslapd-state |
Determines how the suffix handles operations. This attribute takes the following values:
The default value is disabled. |
| nsslapd-referral |
|
| nsslapd-backend |
Gives the name of the database or database link used to process requests. This attribute can be multi-valued, with one database or database link per value. Refer to "Creating and Maintaining Database Links," on page 104, for more information about database links. This attribute is required when the value of the nsslapd-state attribute is set to backend or referral on update. |
| nsslapd-distribution-plugin |
Specifies the shared library to be used with the custom distribution function. This attribute is required only when you have specified more than one database in the nsslapd-backend attribute. Refer to "Creating and Maintaining Databases," on page 92, for more information about the custom distribution function. |
| nsslapd-distribution-funct |
Specifies the name of your custom distribution function. This attribute is required only when you specify more than one database in the nsslapd-backend attribute. Refer to "Creating and Maintaining Databases," on page 92, for more information about the custom distribution function. |
| nsslapd-parent-suffix |
Provides the DN of the parent entry for a sub suffix. By default, this attribute is not present, which means that the suffix is regarded as a root suffix. For example, you want to create a sub suffix o=sales,dc=example,dc=com under the root suffix dc=example,dc=com. Add the following value to the nsslapd-parent-suffix attribute of the sub suffix: nsslapd-parent-suffix: "dc=example,dc=com" |
Maintaining Suffixes
This section describes the following procedures:
- Using Referrals in a Suffix
- Enabling Referrals Only During Update Operations
- Disabling a Suffix
- Deleting a Suffix
Using Referrals in a Suffix
Referrals can be used to point a client application temporarily to a different server. For example, you might add a referral to a suffix so that the suffix points to a different server when the database associated with the suffix is taken off-line for maintenance.
For more information on referrals in general, refer to Red Hat Directory Server Deployment Guide.
- In the Directory Server Console, select the Configuration tab.
- Under Data in the left pane, select the suffix for which you want to add a referral.
- Click the Suffix Settings tab, and select the "Return Referrals for all Operations" radio button.
- Click the Referrals tab. Enter an LDAP URL in the "Enter a new referral" field, or click Construct to be guided through the creation of an LDAP URL.
- Click Add to add the referral to the list.
Enabling Referrals Only During Update Operations
You may want to configure your directory to redirect update and write requests made by client applications to a read-only database.
For example, you can enable referrals for update operations when you have a local copy of the directory data that you do not own. You want the data to be available for searches but not for updates. You do this by enabling referrals only during update requests. When a client application asks to update an entry, the client is referred to the server that owns the data, where the modification request can proceed.
To enable referrals only during update operations:
- In the Directory Server Console, select the Configuration tab.
- Under Data in the left pane, click the suffix for which you want to add a referral.
- Click the Suffix Settings tab, and select the "Return Referrals for Update Operations" radio button.
- Click the Referrals tab. Enter an LDAP URL in the "Enter a new referral" field, or click Construct to be guided through the creation of an LDAP URL.
Disabling a Suffix
Sometimes, you may need to take down a database for maintenance, but the data the database contains is not replicated. Rather than returning a referral, you can disable the suffix responsible for the database.
Once you disable a suffix, the contents of the database related to the suffix are invisible to client applications when they perform LDAP operations such as search, add, and modify.
- In the Directory Server Console, select the Configuration tab.
- Under Data in the left navigation pane, click the suffix you want to disable.
- Click the Suffix Setting tab, and deselect the "Enable this suffix" checkbox.
Deleting a Suffix
The following procedure describes deleting a suffix:
When you delete a suffix, you also delete all database entries and replication information associated with that suffix. |
- In the Directory Server Console, select the Configuration tab.
- Under Data in the left navigation pane, select the suffix you want to delete.
- Select Delete from the Object menu.
- Select "Delete this suffix and all of its subsuffixes" if you want to remove all the suffix and every suffix below it.
Creating and Maintaining Databases
After you create suffixes for organizing your directory data, you create databases to contain your directory data. Databases are used to store your directory data.
This section contains information about creating databases to contain your directory data, deleting databases, using database encryption, and making databases temporarily read-only.
Creating Databases
Directory Server supports the use of multiple databases over which you can distribute your directory tree. There are two ways you can distribute your data across multiple databases:
- The data for each suffix is contained in a separate database. For example, your directory tree appears as follows:
- You add three databases to store the data contained in your separate suffixes, as follows:

- This division of the tree corresponds to three databases, as follows:

- Database one contains the data for ou=people plus the data for dc=example,dc=com, so that clients can conduct searches based at dc=example,dc=com. Database two contains the data for ou=groups, and database three contains the data for ou=contractors.
- Suppose the number of entries in the ou=people branch of your directory tree is so large that you need two databases to store them. In this case, the data contained by ou=people could be distributed across two databases. This is illustrated as follows:

- Database one contains people with names from A-K, and database two contains people with names from L-Z. Database three contains the ou=groups data, and database four contains the ou=contractors data.
- You need to use the custom distribution plug-in to distribute data from a single suffix across multiple databases. Contact Red Hat Professional Services for information on how to create distribution logic for your Directory Server.
Creating a New Database for an Existing Suffix Using the Console
The following procedure describes adding a database to a suffix you have already created:
- In the Directory Server Console, select the Configuration tab.
- In the left pane, expand Data, then click the suffix to which you want to add the new database.
- Right-click the suffix, and select New Database from the pop-up menu.
- This value cannot contain commas, tabs, an equals sign (=), asterisk (*), backslash (\), forward slash (/), plus sign (+), quote (`), double quote ("), or a question mark (?). It can contain numbers; for instance, you might name the new database example2.
- In the "Create database in" field, enter the path to the directory where you want to store the new database. You can also click Browse to locate a directory on your local machine.
serverRoot/slapd-serverID/db
To see the new suffix in the Directory tab, you first need to create a root entry associated with the suffix. Refer to "Creating Directory Entries," on page 49. |
Creating a New Database for a Single Suffix from the Command-Line
Use the ldapmodify command-line utility to add a new database to your directory configuration file. The database configuration information is stored in the cn=ldbm database,cn=plugins,cn=config entry.
For example, you want to add a new database to the server example1. First, type the following to change to the directory containing the ldapmodify utility:
cd serverRoot/shared/bin
Add a new entry to the configuration file by performing an ldapmodify, as follows:
ldapmodify -a -h example1 -p 389 -D "cn=directory manager" -w
secret
The ldapmodify utility binds to the server and prepares it to add an entry to the configuration file.
Next, you create the entry for the new database, as follows:
dn: cn=UserData,cn=ldbm database,cn=plugins,cn=config

objectclass: extensibleObject

objectclass: nsBackendInstance

nsslapd-suffix: ou=people,dc=example,dc=com
The entry added corresponds to a database named UserData that contains the data for the root or sub suffix ou=people,dc=example,dc=com.
To create a root or sub suffix from the command-line, refer to "Creating Root and Sub Suffixes from the Command-Line," on page 86. The database name, given in the DN attribute, must correspond with the value in the nsslapd-backend attribute of the suffix entry.
Adding Multiple Databases for a Single Suffix
You can distribute a single suffix across multiple databases. However, to distribute the suffix, you need to create a custom distribution function to extend the directory. For more information on creating a custom distribution function, contact Red Hat Professional Services.
Once Red Hat Professional Services has helped you create a custom distribution logic plug-in, you need to add it to your directory. The following procedures describe adding distribution logic to a suffix in your directory.
Adding the Custom Distribution Function to a Suffix
The distribution logic is a function declared in a suffix. This function is called for every operation reaching this suffix, including subtree search operations that start above the suffix. You can insert a distribution function into a suffix using both the Console and the command-line.
For information about creating your own custom distribution logic, contact Red Hat Professional Services.
Adding Custom Distribution Using the Console
- In the Directory Server Console, select the Configuration tab.
- Expand Data in the left navigation pane. Select the suffix to which you want to apply your distribution function.
- Select the Databases tab in the right window.
- Click Add to associate additional databases with the suffix.
- Enter the path to your distribution library in the "Distribution library" field, or click Browse to locate a distribution library on your local machine.
- Enter the name of your distribution function in the "Function name" field.
- Click Save to save your changes.
Adding Custom Distribution from the Command-Line
Use the ldapmodify command-line utility to add the following attributes to the suffix entry itself:
nsslapd-backend: Database1

nsslapd-backend: Database2

nsslapd-backend: Database3

nsslapd-distribution-plugin: /full/name/of/a/shared/library

nsslapd-distribution-funct: distribution-function-name
The nsslapd-backend attribute specifies all of the databases associated with this suffix. The nsslapd-distribution-plugin attribute specifies the name of the library that your plug-in uses. The nsslapd-distribution-funct attribute provides the name of the distribution function itself.
For more information about using the ldapmodify command-line utility, refer to "Adding and Modifying Entries Using ldapmodify," on page 60.
Maintaining Directory Databases
This section describes jobs associated with maintaining your directory databases. It includes the following procedures:
- Placing a Database in Read-Only Mode
- Deleting a Database
- Configuring Transaction Logs for Frequent Database Updates
Placing a Database in Read-Only Mode
When a database is in read-only mode, you cannot create, modify, or delete any entries. For example, you must put a database in read-only mode if you are manually initializing a consumer.
If your Directory Server manages multiple databases, you can place all of them into read-only mode at the same time by placing your entire server in read-only mode. For more information, see "Placing the Entire Directory Server in Read-Only Mode," on page 41.
This section includes procedures for the following:
Making a Database Read-Only Using the Console
To place a database in read-only mode from the Directory Server Console:
- In the Directory Server Console, select the Configuration tab.
- Expand Data in the left pane. Expand the suffix containing the database you want to put in read-only mode.
- Select the database you want to put into read-only mode.
- Select the Database Settings tab in the right pane.
- Select the "Database is read-only" checkbox.
- Click Save.
Making a Database Read-Only from the Command-Line
If you want to manually place a database into read-only mode, you must change the read-only attribute, nsslapd-readonly, to on. To do so, use the ldapmodify command-line utility. The nsslapd-readonly attribute for a particular database is located in the cn=database_name,cn=ldbm database,cn=plugins,cn=config entry (where database_name is the name of the database).
Deleting a Database
The following procedure describes deleting a directory database using the Directory Server Console. Deleting a database deletes the configuration information and entries for that database only, not the physical database itself.
- In the Directory Server Console, select the Configuration tab.
- In the left navigation pane, locate the database you want to delete, and select it.
- From the Object menu, select Delete.
Configuring Transaction Logs for Frequent Database Updates
When the server is going to be asked to perform frequent database updates (LDAP adds, modifies, replication), the database transaction log files should be configured to be on a different disk than the primary database files.
This is done with a dse.ldif change. Use the nsslapd-db-logdirectory directive, like this:
nsslapd-db-logdirectory: /home3/exampledb-slapd-01-txnlogs
This directive goes on the same entry that has the dbcache size. Storing these files on a separate physical disk improves performance because the disk heads don't thrash moving between the log files and the data files.
Database Encryption
The Directory Server offers a number of mechanisms to secure access to sensitive data, such as access control rules to prevent unauthorized users from reading certain entries or attributes within entries and SSL to protect data from eavesdropping and tampering on untrusted networks. However, if a copy of the server's database files should fall into the hands of an unauthorized person, they could potentially extract sensitive information from those files. Because information in a database is stored in plain text, some sensitive information, such as government identification numbers or passwords, may not be protected enough by standard access control measures.
For highly sensitive information, this potential for information loss could present a significant security risk. In order to remove that security risk, Directory Server allows portions of its database to be encrypted. Once encrypted, the data are safe even in the event that an attacker has a copy of the server's database files.
Database encryption allows attributes to be encrypted in the database. Both encryption and the encryption cipher are configurable per attribute per backend. When configured, every instance of a particular attribute, even index data, is encrypted for every entry stored in that database.
Indexed attributes may be encrypted, and database encryption is fully compatible with indexing. The contents of the index files that are normally derived from attribute values are also encrypted to prevent an attacker from recovering part or all of the encrypted data from an analysis of the indexes.
Since the server pre-encrypts all index keys before looking up an index for an encrypted attribute, there is some effect on server performance for searches that make use of an encrypted index, but the effect is not serious enough that it is no longer worthwhile to use an index.
Encryption Keys
In order to use database encryption, the server must be configured for SSL and have SSL enabled because database encryption uses the server's SSL encryption key and the same PIN input methods as SSL. The PIN must either be entered manually upon server startup or a PIN file must be used.
Randomly generated symmetric cipher keys are used to encrypt and decrypt attribute data. A separate key is used for each configured cipher. These keys are "wrapped" using the private key from the server's SSL certificate, and the resulting wrapped key is stored within the server's configuration files. The effective strength of the database encryption is never higher than the strength of the server's SSL key used for wrapping. Without access to the server's private key, it is not possible to recover the symmetric keys from the wrapped copies.
Encryption Ciphers
The encryption cipher is configurable on a per-attribute basis and must be selected by the administrator at the time encryption is enabled for an attribute. Configuration can be done through the Console or through the command-line.
The following ciphers are supported:
All ciphers are used in Cipher Block Chaining mode.
Once the encryption cipher is set, it should not be changed without exporting and re-importing the data.
Configuring Database Encryption from the Console
- In the Console, open the Directory Server.
- Open the "Configuration" tab, and select the "Data" node.
- In the "Data" node, select the backend you want to edit, such as dc=example,dc=com.
- Next, select the root you want to edit, such as o=userRoot.
- Select the "Attribute Encryption" tab.
- Hit the "Add Attribute" button, and a list of attributes will appear. Select the attribute you want encrypted. A list will appear; select which encryption cipher you wish to use.
- Repeat step 6 for every attribute you want encrypted. Then hit "Save" to save your changes.
- To delete attributes, select them from the list of encrypted attributes in the Attribute Encryption table, and hit the "Delete" button. When you hit "Save," a dialog box will appear asking if you want to delete the selected attributes. Click on "yes" to continue with the deletion. Any deleted attributes have to be manually re-added after you save.
- Before you save, you can undo any changes and return to the previous configuration by pressing the "Reset" button.
- For existing attribute entries to be encrypted, the information must be exported, then re-imported. See "Exporting and Importing an Encrypted Database," on page 102.
Configuring Database Encryption Using the Command-Line
- Using the ldapmodify command to add database encryption with the AES cipher to the telephoneNumber attribute, add a configuration entry like this:
dn: cn=telephoneNumber,cn=encrypted
attributes,cn=Database1,cn=ldbm database,
cn=plugins,cn=config

objectclass: top

objectclass: nsAttributeEncryption

cn: telephoneNumber

nsEncryptionAlgorithm: AES
- For existing attribute entries to be encrypted, the information must be exported, then re-imported. See "Exporting and Importing an Encrypted Database," on page 102.
For more information on database encryption configuration schema, refer to "Database Attributes under cn=attributeName,cn=encrypted attributes,cn=database_name,cn= ldbm database,cn=plugins,cn=config" in the Red Hat Directory Server Configuration, Command, and File Reference.
Exporting and Importing an Encrypted Database
Exporting and importing encrypted databases is a similar process to exporting and importing regular databases. However, the encrypted information must be decrypted when it is exported to ldif, then re-encrypted when it is imported to the database. Using the -E option when running the db2ldif and ldif2db scripts will decrypt the data on export and re-encrypt it on import.
db2ldif -n Database1 -E -a output.ldif -s "dc=example,dc=com"
-s  "o=userRoot"
ldif2db -n Database1 -E
 -i /opt/redhat-ds/servers/slapd-dirserver/ldif/output.ldif
Creating and Maintaining Database Links
Chaining is a method by which a server contacts other servers on behalf of a client application and then returns the combined results. This method is implemented through the database link. A database link points to data stored remotely. When a client application requests data from a database link, the database link retrieves the data from the remote database and returns it to the client.
The following sections describe how to create and configure a database link. For more general information about chaining, refer to chapter 5, "Designing the Directory Topology," in the Red Hat Directory Server Deployment Guide.
You can create and configure a database link using Directory Server Console or the command-line. The following sections describe the procedures for creating and maintaining a database link:
- Configuring the Chaining Policy
- Creating a New Database Link
- Chaining Using SSL
- Maintaining Database Links
- Database Links and Access Control Evaluation
- Advanced Feature: Tuning Database Link Performance
- Advanced Feature: Configuring Cascading Chaining
For information about monitoring the activity of your database links, refer to "Monitoring Database Link Activity," on page 473.
Configuring the Chaining Policy
These procedures describe configuring how your Directory Server chains requests made by client applications to Directory Servers that contain database links. This chaining policy applies to all database links you create on your Directory Server.
Chaining Component Operations
A component is any functional unit in the server that uses internal operations. For example, plug-ins are considered to be components, as are functions in the front-end. However, a plug-in may actually be comprised of multiple components (for example, the ACI Plug-in).
Some components send internal LDAP requests to the server, expecting to access local data only. For such components, you need to control the chaining policy so that the components can complete their operations successfully. One example is the certificate verification function. If you chain the LDAP request made by the function to check certificates, it implies that you trust the remote server. If the remote server is not trusted, then you have a security problem.
By default, all internal operations are not chained. However, you can override this default by specifying components that you want to chain using the Console or the command-line. By default, no components are allowed to chain.
You must also create an ACI on the remote server to allow the plug-in you specify to perform its operations on the remote server. You create the ACI in the suffix assigned to the database link.
The following table lists component names, the potential side-effects of allowing them to chain internal operations, and the permissions they need in the ACI you create on the remote server:
You cannot chain the following components: When enabling the Referential Integrity Plug-in on servers issuing chaining requests, be sure to analyze your performance resource and time needs as well as your integrity needs. Integrity checks can be time-consuming and draining on memory/CPU. For further information on the limitations surrounding ACIs and chaining, see "ACI Limitations," on page 208. |
Once you have modified the component you allow to chain, you must restart the server in order for the modification to take effect.
The following sections describe how to specify components you want to allow to chain using the Console and from the command-line.
Chaining Component Operations Using the Console
- In the Directory Server Console, select the Configuration tab.
- Expand Data in the left pane, and click Database Link Settings.
- Select the Settings tab in the right window. To add a component to the "Components allowed to chain" list, click Add.
After allowing the component to chain, you must create an ACI in the suffix on the remote server to which the operation will be chained. For example, you would create the following ACI for the Referential Integrity Plug-in:
aci: (targetattr
 "*")(target="ldap:///ou=customers,l=us,dc=example,dc=com")

 (version 3.0; acl "RefInt Access for chaining"; allow

 (read,write,search,compare) userdn = "ldap:///cn=referential

 integrity postoperation,cn=plugins,cn=config";)
Chaining Component Operations from the Command-Line
You can specify components you want to include in chaining using the nsActiveChainingComponents attribute in the cn=config,cn=chaining database,cn=plugins,cn=config entry of the configuration file.
For example, if you want to allow the referential integrity component to chain operations, you add the following to your database link configuration file:
nsActiveChainingComponents: cn=referential integrity
postoperation,

 cn=components,cn=config
Refer to Table 3-2, on page 105,, for a list of the components you can allow to chain.
Once you have modified the nsActiveChainingComponents attribute, you must restart the server for your change to take effect.
After allowing the component to chain, you must create an ACI in the suffix on the remote server to which the operation will be chained. For example, you would create the following ACI for the referential integrity component:
aci: (targetattr
 "*")(target="ldap:///ou=customers,l=us,dc=example,dc=com")

 (version 3.0; acl "RefInt Access for chaining"; allow

 (read,write,search,compare) userdn = "ldap:///cn=referential

 integrity postoperation,cn=plugins,cn=config";)
Chaining LDAP Controls
You can choose not to chain operation requests made by LDAP controls. By default, requests made by the following controls are forwarded to the remote server by the database link:
- Virtual list view (VLV) - This control provides lists of parts of entries rather than returning all entry information.
- Server side sorting - This control sorts entries according to their attribute values.
- Managed DSA - This controls returns smart referrals as entries rather than following the referral. This allows you to change or delete the smart referral itself.
- Loop detection - This control keeps track of the number of times the server chains with another server. When the count reaches a number you configure, a loop is detected, and the client application is notified. For more information about using this control, refer to "Detecting Loops," on page 136.
The following sections describe how to alter the controls that the database link forwards using the Console and from the command-line.
Chaining LDAP Controls Using the Console
- In the Directory Server Console, select the Configuration tab.
- Expand the Data folder in the left pane, and click Database Link Settings.
- Select the Settings tab in the right window. To add an LDAP control to the list, click Add.
- To delete a control from the list, select it from the "LDAP controls forwarded to the remote server" list, and click Delete.
- After making modifications to the components list, a red dot appears on the tab, and the components field name turns gray. Click Save to save your changes.
Chaining LDAP Controls from the Command-Line
You can alter the controls that the database link forwards by changing the nsTransmittedControls attribute of the cn=config,cn=chaining database, cn=plugins,cn=config entry. For example, to forward the virtual list view control, you add the following to your database link entry in the configuration file:
nsTransmittedControls: 2.16.840.1.113730.3.4.9
In addition, if clients of your Directory Server create their own controls and you want their operations to be chained to remote servers, you need to add the OID of the custom control to the nsTransmittedControls attribute.
The LDAP controls you can chain and their OIDs are listed in the following table:
For more information about LDAP controls, refer to the LDAP C-SDK documentation at http://www.redhat.com/docs/manuals/dir-server/.
Creating a New Database Link
The basic configuration of your database link involves providing the following information:
- Suffix information. You create a suffix in your directory tree that is managed by the database link, not a regular database. This suffix corresponds to the suffix on the remote server that contains the data.
- Bind credentials. When the database link binds to a remote server, it impersonates a user. You need to specify the DN and the credentials you want each database link to use to bind with remote servers.
- LDAP URL. You provide the LDAP URL of the remote server to which the database link connects.
- List of failover servers. You can provide a list of alternative servers for the database link to contact in the event of a failure. This configuration item is optional.
The following sections describe creating a new database link from the Directory Server Console as well as the command-line.
Creating a New Database Link Using the Console
To create a new database link using the Directory Server Console:
- In the Directory Server Console, select the Configuration tab.
- Right-click Data in the left navigation pane, and select New Root Suffix or New Sub Suffix from the pop-up menu.
- Enter the name of the suffix on the remote server to which you want to chain in the "New suffix" field.
- In the left pane, right-click the suffix you just created, and select "New Database Link" from the pop-up menu.
- Enter the password used by the database link to bind to the remote server in the "Password" field.
- Select the "Use a secure LDAP connection between servers" checkbox if you want the database link to use SSL to communicate to the remote server.
- Enter the name of the remote server in the "Remote server" field. Enter the server port number used for the bind in the "Remote server port" field. The default port number is 389.
- Enter the name of a failover server in the "Failover Server(s)" field, and specify a port number in the "Port" field. The default port number is 389. Click Add to add the failover server to the list.
- Click OK to create the new database link. Click OK to dismiss the success dialog box that appears after the database link has been created.
Creating a Database Link from the Command-Line
Use the ldapmodify command-line utility to create a new database link from the command-line.
Your new instance must be located in the cn=chaining database,cn=plugins, cn=config entry.
Default configuration attributes are contained in the cn=default config, cn=chaining database,cn=plugins,cn=config entry. These configuration attributes apply to all database links at creation time. Changes to the default configuration only affect new database links. You cannot change the default configuration attributes on existing database links.
Each database link contains its own specific configuration information, which is stored with the database link entry itself, cn=database_link_name,cn=chaining database,cn=plugins,cn=config. For more information about configuration attributes, refer to the Red Hat Directory Server Configuration, Command, and File Reference.
This section contains the following procedures for configuring a database link from the command-line:
- Providing Suffix Information
- Providing Bind Credentials
- Providing an LDAP URL
- Providing a List of Failover Servers
- Summary of Cascading Chaining Configuration Attributes
- Database Link Configuration Example
Providing Suffix Information
Use the nsslapd-suffix attribute to define the suffix managed by your database link. For example, if you want your database link to point to the people information for a remote site of your company, you would enter the following suffix information:
nsslapd-suffix: l=Zanzibar,ou=people,dc=example,dc=com
The suffix information is stored in the cn=database_link_name,cn=chaining database,cn=plugins,cn=config entry.
After creation time, any alterations you make to the nsslapd-suffix attribute occur only after you have restarted the server containing the database link. |
Providing Bind Credentials
For a request from a client application to be chained to a remote server, you can provide special bind credentials for the client application. This gives the remote server the proxied authorization rights needed to chain operations. If you do not specify bind credentials, the database link binds to the remote server as anonymous.
Providing bind credentials involves the following steps:
For example, a client application sends a request to server A. Server A contains a database link that chains the request to a database on server B.

The database link on server A binds to server B using a special user as defined in the nsMultiplexorBindDN attribute and a user password as defined in the nsMultiplexorCredentials attribute. In this example, server A uses the following bind credentials:
nsMultiplexorBindDN: cn=proxy admin,cn=config

nsMultiplexorCredentials: secret

Server B must contain a user entry corresponding to the nsMultiplexorBindDN, and you must set the proxy authentication rights for this user. To set the proxy authorization correctly, you need to set the "proxy" ACI as you would any other ACI.
For more information on ACIs, refer to "Managing Access Control," on page 205. For more information about the proxy authentication control, refer to the C-SDK documentation at http://www.redhat.com/docs/manuals/dir-server/.
Providing an LDAP URL
On the server containing your database link, you have to identify the remote server that the database link connects with using an LDAP URL. Unlike the standard LDAP URL format, the URL of the remote server does not specify a suffix. It takes the following form:
ldap://hostname:portnumber/
You specify the URL of the remote server using the nsFarmServerURL attribute in the cn=database_link_name,cn=chaining database,cn=plugins,cn=config entry of the configuration file. For example, the nsFarmServerURL might appear as follows:
nsFarmServerURL: ldap://example.com:389/
Do not forget to use the trailing slash (/) at the end of the URL.
If you want the database link to connect to the remote server using LDAP over SSL, the LDAP URL of the remote server takes the following form:
ldaps://hostname:portnumber/
For more information about chaining and SSL, refer to "Chaining Using SSL," on page 121.
Providing a List of Failover Servers
You can include additional LDAP URLs for servers to use in the case of failure. To do so, add alternate servers to the nsFarmServerURL attribute, separated by spaces. For example, you might enter the following:
nsFarmServerURL: ldap://example.com us.example.com:389
 africa.example.com:1000/
In this sample LDAP URL, the database link first contacts the server example.com on the standard port to service an operation. If it does not respond, the database link then contacts the server us.example.com on port 389. If this server fails, it then contacts africa.example.com on port 1000.
Summary of Database Link Configuration Attributes
The following table lists the attributes available for configuring a database link. Some of these attributes were discussed in the earlier sections.
Attributes marked with an asterisk (*) can be both global or instance attributes. All instance attributes are defined in the cn=database_link_name,cn=chaining database,cn=plugins,cn=config entry.
The two global configuration attributes are located in the cn=config,cn=chaining database,cn=plugins,cn=config entry. The global attributes are dynamic, meaning any changes you make to them will automatically take effect on all instances of the database link within your directory.
Values defined for a specific database link take precedence over the global attribute value.
| Attributes |
Value |
|---|---|
| *nsTransmittedControls |
Gives the OID of LDAP controls forwarded by the database link to the remote data server. |
| nsslapd-suffix |
The suffix managed by the database link. Any changes you make to this attribute after the entry has been created take effect only after you restart the server containing the database link. |
| nsslapd-timelimit |
Default search time limit for the database link, given in seconds. The default value is 3600 seconds. |
| nsslapd-sizelimit |
Default size limit for the database link, given in number of entries. The default value is 2000 entries. |
| nsFarmServerURL |
Gives the LDAP URL of the remote server (or farm server) that contains the data. This attribute can contain optional servers for failover, separated by spaces. If using cascading chaining, this URL can point to another database link. |
| nsMultiplexorBindDN |
DN of the administrative entry used to communicate with the remote server. The term multiplexor in the name of the attribute means the server which contains the database link and communicates with the remote server. This bind DN cannot be the Directory Manager. If this attribute is not specified, the database link binds as anonymous. |
| nsMultiplexorCredentials |
Password for the administrative user, given in plain text. If no password is provided, it means that users can bind as anonymous. The password is encrypted in the configuration file. |
| nsCheckLocalACI |
Reserved for advanced use only. Controls whether ACIs are evaluated on the database link as well as the remote data server. Takes the values on or off. Changes to this attribute occur only after the server has been restarted. The default value is off. |
| nsProxiedAuthorization |
Reserved for advanced use only. Allows you to disable proxied authorization. A value of off means proxied authorization is disabled. The default value is on. |
| *nsActiveChainingComponents |
Lists the components using chaining. A component is any functional unit in the server. The value of this attribute in the database link instance overrides the value in the global configuration attribute. To disable chaining on a particular database instance, use the value none. The default policy is not to allow chaining. Refer to "Chaining Component Operations," on page 104, for more information. |
| nsReferralOnScopedSearch |
Controls whether referrals are returned by scoped searches. This attribute is for optimizing your directory because returning referrals in response to scoped searches is more efficient. Takes the values on or off. The default value is off. |
| nsHopLimit |
Maximum number of times a request can be forwarded from one database link to another. The default value is 10. |
Database Link Configuration Example
Suppose you have a server within the us.example.com domain that contains the subtree l=Walla Walla,ou=people,dc=example,dc=com on a database and that you want to chain operation requests for l=Zanzibar,ou=people,dc=example,dc=com to a different server in the africa.example.com domain. This operation is illustrated in the following diagram:

First, use the ldapmodify command-line utility to add a database link to server A. Type the following to change to the directory containing the utility:
cd serverRoot/shared/bin
ldapmodify -a -p 389 -D "cn=directory manager" -w secret -h
 us.example.com
Then specify the configuration information for the database link:
dn: cn=DBLink1,cn=chaining database,cn=plugins,cn=config

objectclass: top

objectclass: extensibleObject

objectclass: nsBackendInstance

nsslapd-suffix: l=Zanzibar,ou=people,dc=example,dc=com

nsfarmserverurl: ldap://africa.example.com:389/

nsmultiplexorbinddn: cn=proxy admin,cn=config

nsmultiplexorcredentials: secret

cn: DBLink1

dn: cn="l=Zanzibar,ou=people,dc=example,dc=com",cn=mapping
 tree,cn=config

objectclass: top

objectclass: extensibleObject

objectclass: nsMappingTree

nsslapd-state: backend

nsslapd-backend: DBLink1

nsslapd-parent-suffix: "ou=people,dc=example,dc=com"

cn: l=Zanzibar,ou=people,dc=example,dc=com
In the first section, the nsslapd-suffix attribute contains the suffix on server B to which you want to chain from server A. The nsFarmServerURL attribute contains the LDAP URL of server B.
The second section creates a new suffix, allowing the server to route requests made to the new database link. The cn attribute contains the same suffix specified in the nssalpd-suffix attribute of the database link. The nsslapd-backend attribute contains the name of the database link. The nsslapd-parent-suffix attribute specifies the parent of this new suffix, ou=people,dc=example,dc=com.
Next, you create an administrative user on server B, as follows:
dn: cn=proxy admin,cn=config

objectclass: person

objectclass: organizationalPerson

objectclass: inetOrgPerson

cn: proxy admin

sn: proxy admin

userPassword: secret

description: Entry for use by database links
Do not use the Directory Manager user as the proxy administrative user on the remote server. This creates a security hole. |
Add the following proxy authorization ACI to the l=Zanzibar, ou=people,dc=example,dc=com entry on server B:
aci: (targetattr = "*")(version 3.0; acl "Proxied authorization
for  database links"; allow (proxy) userdn = "ldap:///cn=proxy
 admin,cn=config";)
This ACI gives the proxy admin user read-only access to the data contained on the remote server within the l=Zanzibar,ou=people,dc-example,dc=com subtree only.
When a user binds to a database link, the user's identity is sent to the remote server. Access controls are always evaluated on the remote server. For the user to modify or write data successfully to the remote server, you need to set up the correct access controls on the remote server. For more information about how access controls are evaluated in the context of chained operations, refer to "Database Links and Access Control Evaluation," on page 123. |
Chaining Using SSL
You can configure your database links to communicate with the remote server using SSL. Using SSL to chain involves the following steps:
- For more information on enabling SSL, refer to "Enabling SSL: Summary of Steps," on page 426.
- You specify the LDAP URL in the nsFarmServerURL attribute. For more information about this attribute, see "Providing an LDAP URL," on page 116.
- For example, you might specify the following LDAP URL:
- nsFarmServerURL: ldaps://africa.example.com:636/
- For example, you might specify the following LDAP URL:
- For more information on enabling SSL, refer to "Enabling SSL: Summary of Steps," on page 426.
When you configure the database link and remote server to communicate using SSL, this does not mean that the client application making the operation request must also communicate using SSL. The client can bind using a normal port.
Maintaining Database Links
This section describe how to update and delete existing database links. It contains the following procedures:
Updating Remote Server Authentication Information
To update the bind DN and password used by the database link to connect to the remote server:
- In the Directory Server Console, select the Configuration tab.
- In the left pane, expand Data, and locate the database link you want to update under one of the suffixes. Select the database link.
- In the right navigation pane, click the Authentication tab.
- To update the remote server information, enter a new LDAP URL in the "Remote Server URL" field.
ldap://servername:portnumber/
- Update the bind DN used by the database link to bind with the remote server by entering a new DN in the "Database link bind DN" field.
- Update the password used by the database link to bind with the remote server by entering a new password in the "Database link password" field. Confirm the password by retyping it in the "Confirm database link password" field.
Deleting Database Links
- In the Directory Server Console, select the Configuration tab.
- In the left navigation pane, locate the database link you want to delete, and select it.
- From the Object menu, select Delete.
Database Links and Access Control Evaluation
When a user binds to a server containing a database link, the database link sends the user's identity to the remote server. Access controls are always evaluated on the remote server. Every LDAP operation evaluated on the remote server uses the original identity of the client application passed via the proxied authorization control. Operations succeed on the remote server only if the user has the correct access controls on the subtree contained on the remote server. This means that you need to add the usual access controls to the remote server with a few restrictions:
- For example, role-based or filter-based ACIs need access to the user entry. Because you are accessing the data via database links, only the data in the proxy control can be verified. Consider designing your directory in a way that ensures the user entry is located in the same database as the user's data.
- All access controls based on the IP address or DNS domain of the client may not work since the original domain of the client is lost during chaining.
- The remote server views the client application as being at the same IP address and in the same DNS domain as the database link.
The following restrictions apply to the ACIs you create to use with database links:
- ACIs must be located with any groups they use. If the groups are dynamic, all users in the group must be located with the ACI and the group. If the group is static, it may refer to remote users.
- ACIs must be located with any role definitions they use and with any users intended to have those roles.
- ACIs that refer to values of a user's entry (for example, userattr subject rules) will work if the user is remote.
Though access controls are always evaluated on the remote server, you can also choose to have them evaluated on both the server containing the database link and the remote server. This poses several limitations:
- During access control evaluation, contents of user entries are not necessarily available (for example, if the access control is evaluated on the server containing the database link and the entry is located on a remote server).
- The database link does not necessarily have access to the entries being modified by the client application.
Advanced Feature: Tuning Database Link Performance
The following sections provide information on tuning the performance of your database links through connection and thread management. It contains the following parts:
- Managing Connections to the Remote Server
- Detecting Errors During Normal Processing
- Managing Threaded Operations
Managing Connections to the Remote Server
Each database link maintains a pool of connections to a remote server. You can configure the connections to optimize resources for your directory.
You can change the connection attributes using the Directory Server Console or through the command-line.
Managing Connections to the Remote Server Using the Console
- In the Directory Server Console, select the Configuration tab.
- Expand the Data folder in the left pane and locate the database link you want to change. Click the database link, then click the Limits and Controls tab in the right navigation pane.
- In the Connection Management section, make changes to any of the following fields:
- Maximum TCP connection(s). The maximum number of TCP connections that the database link establishes with the remote server. The default value is 3 connections.
- Bind timeout. Amount of time, in seconds, before the database link's bind attempt times out. The default value is 15 seconds.
- Maximum binds per connection. Maximum number of outstanding bind operations per TCP connection. The default value is 10 outstanding bind operations per connection.
- Time out before abandon (sec). Number of seconds before the server checks to see if a timed-out connection should be abandoned. The default value is 2 seconds.
- Maximum LDAP connection(s). Maximum number of LDAP connections that the database link establishes with the remote server. The default value is 10 connections.
- Maximum bind retries. Number of times a database link attempts to bind to the remote server. A value of 0 indicates that the database link will try to bind only once. The default value is 3 attempts.
- Maximum operations per connection. Maximum number of outstanding operations per LDAP connection. The default value is 10 operations per connection.
- Connection lifetime (sec). How long a connection made between the database link and remote server remains open. You can keep connections between the database link and the remote server open for an unspecified time, or you can close them after a specific period of time.
Managing Connections to the Remote Server from the Command-Line
Use ldapmodify to add connection attributes to your database link entry.
The default connection management attributes are stored in the following entry:
cn=default instance config, cn=chaining
database,cn=plugins,cn=config
The connection management attributes for a specific database link are stored in the following entry:
cn=database_link_name,cn=chaining database,cn=plugins,cn=config
where database_link_name is the name of the database link. The connection management attributes specified in this entry take precedence over the attributes specified in the cn=default instance config entry.
The following table lists the attributes associated with connection management:
For the list of database link configuration attributes, refer to "Database Link Configuration Attributes," on page 117.
Detecting Errors During Normal Processing
You can help protect server performance by detecting errors during the normal chaining operation between the database link and the remote server. The database link has two attributes which work together to determine if the remote server is no longer responding.
The first attribute, nsMaxResponseDelay, sets a maximum duration for an LDAP operation to complete. If the operation takes more than the amount of time specified in this attribute, the database link's server suspects that the remote server is no longer online.
Once the nsMaxResponseDelay period has been met, the database link pings the remote server. During the ping, the database link issues another LDAP request, a simple search request for an object that does not exist in the remote server. The duration of the ping is set using the nsMaxTestResponseDelay.
If the remote server does not respond before the nsMaxTestResponseDelay period has passed, then an error is returned, and the connection is flagged as down. All connections between the database link and remote server will be blocked for 30 seconds, protecting your server from a performance degradation. After 30 seconds, operation requests made by the database link to the remote server continue as normal.
Both attributes are stored in the cn=config,cn=chaining database,cn=plugins,cn=config entry. The following table describes the attributes in more detail:
Managing Threaded Operations
Generally, Directory Server performs best using a limited number of threads for processing operations. A limited number of threads can generally process operations very quickly, preventing the queue of operations waiting for a free thread from growing too long.
However, the database link forwards operations to remote servers for processing. The database link contacts the remote server, forwards the operation, waits for the result, and then sends the result back to the client application. The entire operation can take much longer than a local operation.
While the database link waits for results from the remote server, it can process additional operations. By default, the number of threads used by the server is 20. However, when using database links, you can improve performance by increasing the number of threads available for processing operations. While the local CPU waits for a response from a remote server, it can process other operations rather than stand idle.
To change the number of threads used for processing operations, change the nsslapd-threadnumber global configuration attribute in the cn=config entry. The default thread number is 20. For example, you can increase the thread number to 50 to improve performance. After changing the thread number, restart the server to implement your changes.
Advanced Feature: Configuring Cascading Chaining
You can configure your database link to point to another database link, creating a cascading chaining operation. A cascading chain occurs any time more than one hop is required to access all of the data in a directory tree.
The section contains the following topics:
- Overview of Cascading Chaining
- Configuring Cascading Chaining Defaults Using the Console
- Configuring Cascading Chaining Using the Console
- Configuring Cascading Chaining from the Command-Line
- Summary of Cascading Chaining Configuration Attributes
- Cascading Chaining Configuration Example
Overview of Cascading Chaining
Cascading chaining occurs when more than one hop is required for the directory to process a client application's request.
For example, consider the following scenario:

The client application sends a modify request to server one. Server one contains a database link that forwards the operation to server two, which contains another database link. The database link on server two forwards the operations to server three, which contains the data the clients wants to modify in a database. Two hops are required to access the piece of data the client want to modify.
During a normal operation request, a client binds to the server, and then any ACIs applying to that client are evaluated. With cascading chaining, the client bind request is evaluated on server one, but the ACIs applying to the client are evaluated only after the request has been chained to the destination server, in the above example server two.
Consider the following example scenario. On server A, a directory tree is split as follows:

The root suffix dc=example,dc=com and the ou=people and ou=groups subsuffixes are stored on server A. The l=europe,dc=example,dc=com and ou=groups suffixes are stored in on server B, and the ou=people branch of the l=europe,dc=example,dc=com suffix is stored on server C.
With cascading configured on servers A, B, and C, a client request targeted at the ou=people,l=europe,dc=example,dc=com entry would be routed by the directory as follows:

First, the client binds to server A and chains to server B using Database Link 1. Then server B chains to the target database on server C using Database Link 2 to access the data in the ou=people,l=europe,dc=example,dc=com branch. Because at least two hops are required for the directory to service the client request, this is considered a cascading chain.
Configuring Cascading Chaining Defaults Using the Console
To set cascading chaining defaults for all database links in your Directory Server:
- In the Directory Server Console, select the Configuration tab.
- Expand the Data folder in the left pane, and click Database Link Settings. Click the Default Creation Parameters tab.
- Select the "Check local ACI" checkbox if you want to enable the evaluation of local ACIs on the intermediate database links involved in cascading chaining. If you select this checkbox, you will need to add the appropriate local ACIs to a database on the servers that contain intermediate database links.
- Enter the maximum number of times a database link can point to another database link in the "Maximum hops" field.
Changes made to the default settings of a database link are not applied retroactively. Only the database links created after you have saved changes to the default settings will reflect the changes. |
Configuring Cascading Chaining Using the Console
To configure cascading chaining for a particular set of database links, do the following:
- In the Directory Server Console, select the Configuration tab.
- Expand the Data folder in the left pane, and locate the database link you want to include in a cascading chain. Click the database link, then click the Limits and Controls tab in the right navigation pane.
- Select the "Check local ACI" checkbox if you want to enable the evaluation of local ACIs on the intermediate database links involved in the cascading chain. If you select this checkbox, you may need to add the appropriate local ACIs to the database link.
- Enter the maximum number of times a database link can point to another database link in the "Maximum hops" field.
Configuring Cascading Chaining from the Command-Line
Configuring a cascade of database links through the command-line involves the following steps:
- Pointing one database link to the URL of the server containing the intermediate database link.
- Configuring the intermediate database link or links (in the example, server two) to transmit the Proxy Authorization Control.
- Creating a proxy administrative user ACI on all intermediate database links. To do so, you will need to create a database on each server that contains an intermediate database link.
- Enabling local ACI evaluation on all intermediate database links.
- Creating client ACIs on all intermediate database links and the final destination database.
Pointing to Another Database Link
To create a cascading chain, the nsFarmServerURL attribute of one database link must contain the URL of the server containing another database link. Suppose the database link on the server called example1.com points to a database link on the server called africa.example.com. The cn=database_link_name,cn=chaining database, cn=plugins,cn=config entry of the database link on server one would contain the following:
nsFarmServerURL: ldap://africa.example.com:389
Transmitting the Proxy Authorization Control
By default, a database link does not transmit the Proxy Authorization Control. However, when one database link contacts another, this control is used to transmit information needed by the final destination server. The intermediate database link needs to transmit this control. To configure the database link to transmit the proxy authorization control, add the following to the cn=config,cn=chaining database,cn=plugins,cn=config entry of the intermediate database link:
nsTransmittedControls: 2.16.840.1.113730.3.4.12
The OID value represents the Proxy Authorization Control. For more information about chaining LDAP controls, refer to "Chaining LDAP Controls," on page 108.
Creating the Proxy Administrative User ACI
You need to create an ACI on the server that contains the intermediate database link that checks the rights of the first database link before translating the request to another server. For example, if server two does not check the credentials of server one, then anyone could bind as anonymous and pass a proxy authorization control allowing them more administrative privileges than appropriate.
To prevent this security hole, you need to create an ACI on the server which contains the intermediate database link. To create an ACI, you need to do the following:
- Create a database, if one does not already exist, on the server containing the intermediate database link. This database will contain the admin user entry and the ACI. For information about creating a database, see "Creating Databases," on page 92.
- Create an entry that corresponds to the administrative user in the database.
- Create an ACI for the administrative user that targets the appropriate suffix. This ensures the administrator has access only to the suffix of the database link. Add the following ACI to the administrative user's entry:
aci: (targetattr = "*")(version 3.0; acl "Proxied
authorization  for database links"; allow (proxy) userdn =
"ldap:///cn=proxy  admin,cn=config";)
Enabling Local ACI Evaluation
To confirm that the proxy administrative ACI is used, you need to enable evaluation of local ACIs on all intermediate database links involved in chaining. To do this, add the following attribute to the cn=database_link_name,cn=chaining database,cn=plugins,cn=config entry of each intermediate database link:
nsCheckLocalACI: on
Setting this attribute to on in the cn=default instance config,cn=chaining database,cn=plugins,cn=config entry means that all new database link instances will have the nsCheckLocalACI attribute set to on in their cn=database_link_name,cn=chaining database,cn=plugins,cn=config entry.
Creating Client ACIs
Because you have enabled local ACI evaluation, you need to create the appropriate client application ACIs on all intermediate database links, as well as the final destination database.
To do this on the intermediate database links, you first need to create a database that contains a suffix that represents a root suffix of the final destination suffix.
For example, if you are chaining a client request made to the c=africa,ou=people,dc=example,dc=com suffix on a remote server, all intermediate database links need to contain a database associated with the dc=example,dc=com suffix.
You then need to add any client ACIs to this superior suffix entry. For example, you might add the following
aci: (targetattr = "*")(version 3.0; acl "Client authentication
for  database link users"; allow (all) userdn = "ldap:///uid=*
 ,cn=config";)
This ACI allows client applications that have a uid in the cn=config entry of server one to perform any type of operation on the data below the ou=people,dc=example,dc=com suffix on server three.
Detecting Loops
An LDAP control included with Directory Server prevents loops. When first attempting to chain, the server sets this control to be the maximum number of hops, or chaining connections, allowed. Each subsequent server decrements the count. If a server receives a count of 0, it determines that a loop has been detected and notifies the client application.
The number of hops allowed is defined using the nsHopLimit attribute. If not specified, the default value is 10.
To use the control, add the following OID to the nsTransmittedControl attribute in the cn=config,cn=chaining database,cn=plugins,cn=config entry:
nsTransmittedControl: 1.3.6.1.4.1.1466.29539.12
If the control is not present in the configuration file of each database link, loop detection will not be implemented.
Summary of Cascading Chaining Configuration Attributes
The following table describes the attributes used to configure intermediate database links in a cascading chain:
Cascading Chaining Configuration Example
To create a cascading chain involving three servers as in the diagram below, you have to configure the chaining components on all three servers. This section describes the configuration steps for creating a cascading chain involving three servers and is divided into the following sections:

Configuring Server One
First, use the ldapmodify command-line utility to add a database link to server one. To use the utility, type the following to change to the directory containing the utility:
cd serverRoot/shared/bin
ldapmodify -a -D "cn=directory manager" -w secret -h host -p 389
Then specify the configuration information for the database link, DBLink1, on server one, as follows:
dn: cn=DBLink1,cn=chaining database,cn=plugins,cn=config

objectclass: top

objectclass: extensibleObject

objectclass: nsBackendInstance

nsslapd-suffix: l=Zanzibar,c=africa,ou=people,dc=example,dc=com

nsfarmserverurl: ldap://africa.example.com:389/

nsmultiplexorbinddn: cn=server1 proxy admin,cn=config

nsmultiplexorcredentials: secret

cn: DBLink1

nsCheckLocalACI:off

cn="l=Zanzibar,c=africa,ou=people,dc=example,dc=com",cn=mapping
tree,cn=config

objectclass=nsMappingTree

nsslapd-state=backend

nsslapd-backend=DBLink1

nsslapd-suffix: l=Zanzibar,c=africa,ou=people,dc=example,dc=com

cn: l=Zanzibar,c=africa,ou=people,dc=example,dc=com
The first section creates the entry associated with DBLink1. The second section creates a new suffix, allowing the server to direct requests made to the database link to the correct server. You do not need to configure the nsCheckLocalACI attribute to check local ACIs, as this is only required on the database link, DBLink2, on server two.
Since you want to implement loop detection, you need to specify the OID of the loop detection control in the nsTransmittedControl attribute stored in cn=config,cn=chaining database,cn=plugins,cn=config entry on server one. You specify the OID, as follows:
dn: cn=config,cn=chaining database,cn=plugins,cn=config

changeType: modify

add: nsTransmittedControl

nsTransmittedControl: 1.3.6.1.4.1.1466.29539.12
As the nsTransmittedControl attribute is usually configured by default with the loop detection control OID 1.3.6.1.4.1.1466.29539.12 value, it is wise to check beforehand whether it already exists. If it does exist, you do not need to perform this configuration step.
Configuring Server Two
Next, you create a proxy administrative user on server two. This administrative user will be used to allow server one to bind and authenticate to server two. It is useful to choose a proxy administrative user name which is specific to server one, as it is the proxy administrative user which will allow server one to bind to server two. You create the proxy administrative user, as follows:
dn: cn=server1 proxy admin,cn=config

objectclass: person

objectclass: organizationalPerson

objectclass: inetOrgPerson

cn: server1 proxy admin

sn: server1 proxy admin

userPassword: secret

description: Entry for use by database links
Do not use the Directory Manager or Administrator ID user as the proxy administrative user on the remote server. This creates a security hole. |
Next, you configure the database link, DBLink2, on server two. Using ldapmodify, specify the configuration information for DBLink2, as follows:
dn: cn=DBLink2,cn=chaining database,cn=plugins,cn=config

objectclass: top

objectclass: extensibleObject

objectclass: nsBackendInstance

nsslapd-suffix: l=Zanzibar,c=africa,ou=people,dc=example,dc=com

nsfarmserverurl: ldap://zanz.africa.example.com:389/

nsmultiplexorbinddn: cn=server2 proxy admin,cn=config

nsmultiplexorcredentials: secret

cn: DBLink2

nsCheckLocalACI:on

dn:
cn="l=Zanzibar,c=africa,ou=people,dc=example,dc=com",cn=mapping
tree,cn=config

objectclass: top

objectclass: extensibleObject

objectclass: nsMappingTree

nsslapd-state: backend

nsslapd-backend: DBLink2

nsslapd-parent-suffix:"c=africa,ou=people,dc=example,dc=com"

cn: l=Zanzibar,c=africa,ou=people,dc=example,dc=com
Since database link DBLink2 is the intermediate database link in your cascading chaining configuration, you need to set the nsCheckLocalACI to on to allow the server to check whether it should allow the client and proxy administrative user access to the database link.
The database link on server two must be configured to transmit the proxy authorization control and the loop detection control. To implement the proxy authorization control and the loop detection control, you need to specify both corresponding OIDs. Add the following information to the cn=config,cn=chaining database, cn=plugins,cn=config entry on server two:
dn: cn=config,cn=chaining database,cn=plugins,cn=config

changeType: modify

add: nsTransmittedControl

nsTransmittedControl: 2.16.840.1.113730.3.4.12

nsTransmittedControl: 1.3.6.1.4.1.1466.29539.12
where nsTransmittedControl: 2.16.840.1.113730.3.4.12 is the OID for the proxy authorization control and nsTransmittedControl: 1.3.6.1.4.1.1466.29539.12 is the OID for the loop detection control.
Again, check beforehand whether the loop detection control is already configured, and adapt the above command accordingly.
The next step is to configure your ACIs. On server two, you need to ensure that a suffix exists above the l=Zanzibar,c=africa,ou=people,dc=example,dc=com suffix to allow you to:
- add the database link suffix,
- add a local proxy authorization ACI that will be used to allow server one to connect using the proxy authorization administrative user that will be created on server two, and
- add a local client ACI that allows the client operation to succeed on server two, so that it can be forwarded to server three. This local ACI is needed because you have turned local ACI checking on for the DBLink2 database link.
Both ACIs will be placed on the database that contains the c=africa,ou=people,dc=example,dc=com suffix.
Add the local proxy authorization ACI to the c=africa,ou=people,dc=example,dc=com entry:
aci:(targetattr="*")(target="l=Zanzibar,c=africa,ou=people,

dc=example,dc=com")(version 3.0; acl "Proxied authorization for
 database links"; allow (proxy) userdn = "ldap:///cn=server1
proxy  admin,cn=config";)
Then add the local client ACI that will allow the client operation to succeed on server two, given that ACI checking is turned on. This ACI is the same as the ACI you will create on the destination server to provide access to the l=Zanzibar,c=africa,ou=people,dc=example,dc=com branch. You may decide that you want all users within c=us,ou=people,dc=example,dc=com to have update access to the entries in l=Zanzibar,c=africa,ou=people,dc=example,dc=com on server three. The following ACI is the ACI you would need to create on the c=africa,ou=people,dc=example,dc=com suffix on server two to allow this:
aci:(targetattr="*")(target="l=Zanzibar,c=africa,ou=people,

dc=example,dc=com")(version 3.0; acl "Client authorization for
 database links"; allow (all) userdn =
"ldap:///uid=*,c=us,ou=people,dc=example,dc=com";)
This ACI allows clients that have a uid in c=us,ou=people,dc=example,dc=com on server one to perform any type of operation on the l=Zanzibar,c=africa,ou=people,dc=example,dc=com suffix tree on server three. Should you have users on server two under a different suffix that will require additional rights on server three, you may need to add additional client ACIs on server two.
Configuring Server Three
The final configuration step in our cascading chaining example is to configure server three. First, you create an administrative user on server three for server two to use for proxy authorization:
dn: cn=server2 proxy admin,cn=config

objectclass: person

objectclass: organizationalPerson

objectclass: inetOrgPerson

cn: server2 proxy admin

sn: server2 proxy admin

userPassword: secret

description: Entry for use by database links
Then you need to add the same local proxy authorization ACI to server three as you did on server two. Add the following proxy authorization ACI to the l=Zanzibar,ou=people,dc=example,dc=com entry:
aci: (targetattr = "*")(version 3.0; acl "Proxied authorization
for  database links"; allow (proxy) userdn = "ldap:///cn=server2
proxy  admin,cn=config";)
This ACI gives the server two proxy admin read-only access to the data contained on the remote server, server three, within the l=Zanzibar,ou=people,dc=example,dc=com subtree only.
You then need to create a local client ACI on the l=Zanzibar,ou=people,dc=example,dc=com subtree that corresponds to the original client application. Use the same ACI as the one you created for the client on server two:
aci: (targetattr =
"*")(target="l=Zanzibar,c=africa,ou=people,dc=example,dc=com")(v
ersion 3.0; acl "Client authentication for  database link users";
allow (all) userdn =
"ldap:///uid=*,c=us,ou=people,dc=example,dc=com";)
Once you have completed all these steps, your cascading chaining configuration is set up. This cascading configuration will allow you to bind to server one and modify information in the l=Zanzibar,c=africa,ou=people,dc=example,dc=com branch on server three. Depending on your security needs, you may want to provide more detailed access control.
Using Referrals
You can use referrals to tell client applications which server to contact for a specific piece of information. This redirection occurs when a client application requests a directory entry that does not exist on the local server or when a database has been taken off-line for maintenance. This section contains the following information about referrals:
For conceptual information on how you can use referrals in your directory, see Red Hat Directory Server Deployment Guide.
Setting Default Referrals
Default referrals are returned to client applications that submit operations on a DN not contained within any of the suffixes maintained by your directory. The following procedures describes setting a default referral for your directory using the Console and the command-line utilities.
Setting a Default Referral Using the Console
Set a default referral to your directory, as follows:
- In the Directory Server Console, select the Configuration tab.
- Select the top entry in the navigation tree in the left pane.
- Select the Settings tab in the right pane.
- Enter an LDAP URL in the "Referrals to" text box, and click OK.
For more information about LDAP URLs, refer to Appendix C, "LDAP URLs."
Setting a Default Referral from the Command-Line
Use the ldapmodify command-line utility to add a default referral to the cn=config entry in your directory's configuration file.
For example, to add a new default referral from your Directory Server, dir1.example.com, to a server named dir2.example.com, add a new line to the cn=config entry. First, type the following to change to the directory containing the utility:
cd serverRoot/shared/bin
Then, run the ldapmodify utility, as follows:
ldapmodify -h dir1.example.com -p 389 -D "cn=directory manager"
-w secret
The ldapmodify utility binds to the server and prepares it to change an entry in the configuration file.
Next, you add the default referral to the dir2.example.com server:
dn: cn=config

changetype: modify

replace: nsslapd-referral

nsslapd-referral: ldap://dir2.example.com/
Once you have added the default referral to the cn=config entry of your directory, the directory will return the default referral in response to requests made by client applications. You do not need to restart the server.
Creating Smart Referrals
Smart referrals allow you to map a directory entry or directory tree to a specific LDAP URL. Using smart referrals, you can refer client applications to a specific server or a specific entry on a specific server.
For example, a client application requests the directory entry uid=jdoe,ou=people,dc=example,dc=com. You return a smart referral to the client which points to the entry cn=john doe,o=people,l=europe,dc=example,dc=com on the server directory.europe.example.com.
The way the directory uses smart referrals conforms to the standard specified in RFC 2251 section 4.1.11. For more information, go to http://www.ietf.org/rfc/rfc2251.txt to read the RFC.
The following procedures describe creating smart referrals using both the Console and the command-line utilities.
Creating Smart Referrals Using the Directory Server Console
- In the Directory Server Console, select the Directory tab.
- Browse through the tree in the left navigation pane, and select the entry for which you want to add the referral.
- Right-click the entry, and select Set Smart Referrals.
- Select the "Enable Smart Referral" option to define smart referrals for the selected entry. (Unchecking the option removes all smart referrals from the entry and deletes objectclass: referral.)
- In the "Enter a new Smart Referral" field, enter a referral in the LDAP URL format, and then click Add to add the referral to the list. The LDAP URL to which you want to refer client application requests must be in the following format:
ldap://hostname:portnumber/[optional_dn]
ldap://hostname:portnumber/
- You may also click Construct to be guided through the process of adding a referral.
- To allow a referral to be followed with different authentication, click Authentication, and specify the appropriate DN and password. Keep in mind that this authentication remains valid only until the Console is closed; then, it's reset to the same authentication used to log into the Console.
- The Smart Referral List lists the referrals currently in place for the selected entry. The entire list of referrals is returned to client applications in response to a request when you select "Return Referrals for All Operations" or "Return Referrals for Update Operations" in the Suffix Settings tab, which is available under the Configuration tab.
- To allow a referral to be followed with different authentication, click Authentication, and specify the appropriate DN and password. Keep in mind that this authentication remains valid only until the Console is closed; then, it's reset to the same authentication used to log into the Console.
Creating Smart Referrals from the Command-Line
Use the ldapmodify command-line utility to create smart referrals from the command-line.
To create a smart referral, create the relevant directory entry, and add the Referral object class. This object class allows a single attribute, ref. The ref attribute is expected to contain an LDAP URL.
For example, add the following to return a smart referral for an existing entry, uid=jdoe:
dn: uid=jdoe,ou=people,dc=example,dc=com

objectclass: referral

ref:
ldap://directory.europe.example.com/cn=john%20doe,ou=people,

 l=europe,dc=example,dc=com
Any information after a space in an LDAP URL is ignored by the server. For this reason, you must use %20 instead of spaces in any LDAP URL you intend to use as a referral. |
To add the entry uid=jdoe,ou=people,dc=example,dc=com with a referral to directory.europe.example.com, you would include the following in your LDIF file before importing:
dn: uid=jdoe, ou=people, dc=example,dc=com

objectclass: top

objectclass: person

objectclass: organizationalperson

objectclass: inetOrgPerson

objectclass: referral

cn: john doe

sn: doe

uid: jdoe

ref:
ldap://directory.europe.example.com/cn=john%20doe,ou=people,

 l=europe,dc=example,dc=com
Use the -M option with ldapmodify when there is already a referral in the DN path. For information about the ldapmodify utility, see Red Hat Directory Server Configuration, Command, and File Reference. For more information on smart referrals, see Red Hat Directory Server Deployment Guide.
Creating Suffix Referrals
The following procedure describes creating a referral in a suffix. This means that the suffix processes operations using a referral rather than a database or database link. For more information about referrals, refer to Red Hat Directory Server Deployment Guide.
When a suffix is configured to return referrals, the ACIs contained by the database associated with the suffix are ignored. |
Creating Suffix Referrals Using the Console
To create a suffix referral using the Console:
- In the Directory Server Console, select the Configuration tab.
- Under Data in the left pane, click the suffix to which you want to add a referral.
- In the Suffix Settings tab, select one of the following radio buttons:
- Return Referrals for all Operations. This means that a referral will be returned when this suffix receives any request from a client application.
- Return Referrals for Update Operations. This means a referral will be returned when this suffix receives an update request from a client application. This option is used to redirect update and write requests made by client applications to a read-only database.
- Click the Referrals tab. Enter an LDAP URL in the "Enter a new referral" field, or click Construct to be guided through the creation of an LDAP URL.
Creating Suffix Referrals from the Command-Line
Use the ldapmodify command-line utility to add a suffix referral to an entry in your directory configuration file. The suffix referral information is added to the root or sub suffix entry under the cn=mapping tree,cn=config branch.
For example, to add a new suffix referral to the ou=people,dc=example,dc=com root suffix, you run ldapmodify. First, type the following to change to the directory containing the utility:
cd serverRoot/shared/bin
Then, run ldapmodify, as follows:
ldapmodify -a -h example.com -p 389 -D "cn=directory manager" -w
secret
The ldapmodify utility binds to the server and prepares it to add information to the configuration file.
Next, you add a suffix referral to the ou=people,dc=example,dc=com root suffix, as follows:
dn: cn="ou=people,dc=example,dc=com",cn=mapping tree,cn=config

objectclass: extensibleObject

objectclasss: nsmappingtree

nsslapd-state: referral

nsslapd-referral: ldap://zanzibar.com/
The nsslapd-state attribute is set to referral, meaning that a referral is returned for requests made to this suffix. The nsslapd-referral attribute contains the LDAP URL of the referral returned by the suffix, in this case a referral to the zanzibar.com server.
You can also set the nsslapd-state attribute to referral on update. This means that the database is used for all operations except update requests. When a client application makes an update request to a suffix set to referral on update, the client receives a referral.
For more information about the suffix configuration attributes, refer to Table 3-1, on page 87,.