Product SiteDocumentation Site

12.3. Enabling the EC2 and S3 Compatible Interface

The software that provides AWS API compatibility is installed along with CloudStack. You must enable the services and perform some setup steps prior to using it.
  1. Set the global configuration parameters for each service to true. See Chapter 7, Setting Configuration Parameters.
  2. Create a set of CloudStack service offerings with names that match the Amazon service offerings. You can do this through the CloudStack UI as described in the Administration Guide.

    Warning

    Be sure you have included the Amazon default service offering, m1.small. As well as any EC2 instance types that you will use.
  3. If you did not already do so when you set the configuration parameter in step 1, restart the Management Server.
    # service cloudstack-management restart
The following sections provides details to perform these steps

12.3.1. Enabling the Services

To enable the EC2 and S3 compatible services you need to set the configuration variables enable.ec2.api and enable.s3.api to true. You do not have to enable both at the same time. Enable the ones you need. This can be done via the CloudStack GUI by going in Global Settings or via the API.
The snapshot below shows you how to use the GUI to enable these services
Use the GUI to set the configuration variable to true
Using the CloudStack API, the easiest is to use the so-called integration port on which you can make unauthenticated calls. In Global Settings set the port to 8096 and subsequently call the updateConfiguration method. The following urls shows you how:
            http://localhost:8096/client/api?command=updateConfiguration&name=enable.ec2.api&value=true
            http://localhost:8096/client/api?command=updateConfiguration&name=enable.ec2.api&value=true
Once you have enabled the services, restart the server.

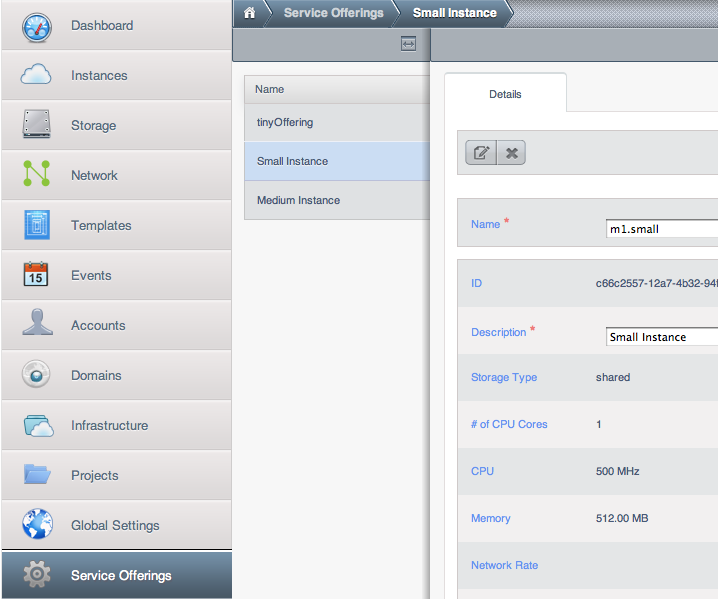
12.3.2. Creating EC2 Compatible Service Offerings

You will also need to define compute service offerings with names compatible with the Amazon EC2 instance types API names (e.g m1.small,m1.large). This can be done via the CloudStack GUI. Go under Service Offerings select Compute offering and either create a new compute offering or modify an existing one, ensuring that the name matches an EC2 instance type API name. The snapshot below shows you how:
Use the GUI to set the name of a compute service offering to an EC2 instance type API name.

12.3.3. Modifying the AWS API Port

Note

(Optional) The AWS API listens for requests on port 7080. If you prefer AWS API to listen on another port, you can change it as follows:
  1. Edit the files /etc/cloudstack/management/server.xml, /etc/cloudstack/management/server-nonssl.xml, and /etc/cloudstack/management/server-ssl.xml.
  2. In each file, find the tag <Service name="Catalina7080">. Under this tag, locate <Connector executor="tomcatThreadPool-internal" port= ....<.
  3. Change the port to whatever port you want to use, then save the files.
  4. Restart the Management Server.
If you re-install CloudStack, you will have to re-enable the services and if need be update the port.