| 7.2. Easy Configuration and Deployment Using the Console | ||
|---|---|---|
 | Chapter 7. JMS Configuration [DRAFT (1.0)] |  |
| 7.2. Easy Configuration and Deployment Using the Console | ||
|---|---|---|
| | Chapter 7. JMS Configuration [DRAFT (1.0)] | |
The fastest way to configure a JMS resource group is to use the console. The overall process is to configure the connection to the JMS server, add any number of connection factories and destinations, and then review and deploy the resource group. The section walks through that process.
![[Warning]](images/warning.png) | Warning |
|---|---|
The console features described here are available in Geronimo starting with version 1.0.1. | |
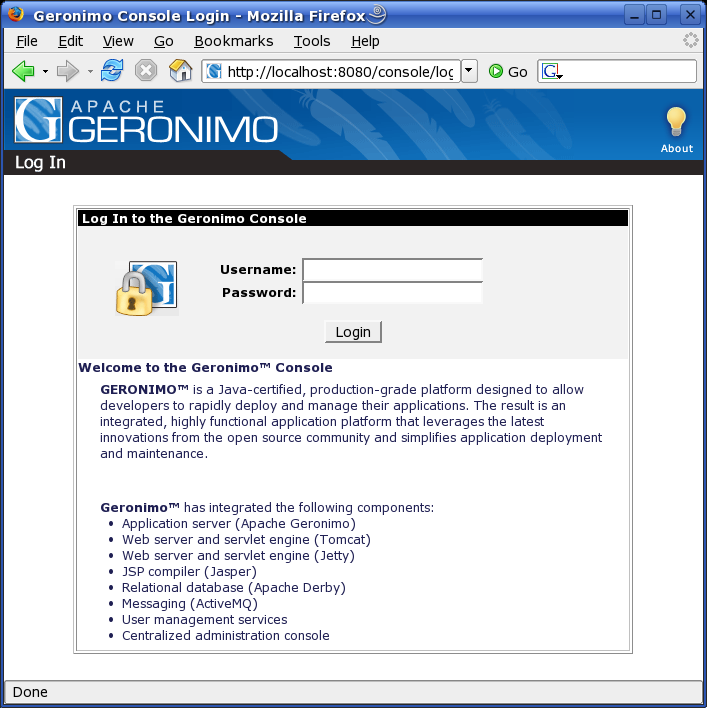
To begin with, start Geronimo and point your browser to the console, which is typically at a URL like http://localhost:8080/console/. This brings up the login screen:
The default login is username "system" and password "manager" (this can be changed in var/security/users.properties and var/security/groups.properties -- for more detail see Chapter 9, Security Configuration [DRAFT (1.0-pre)]).
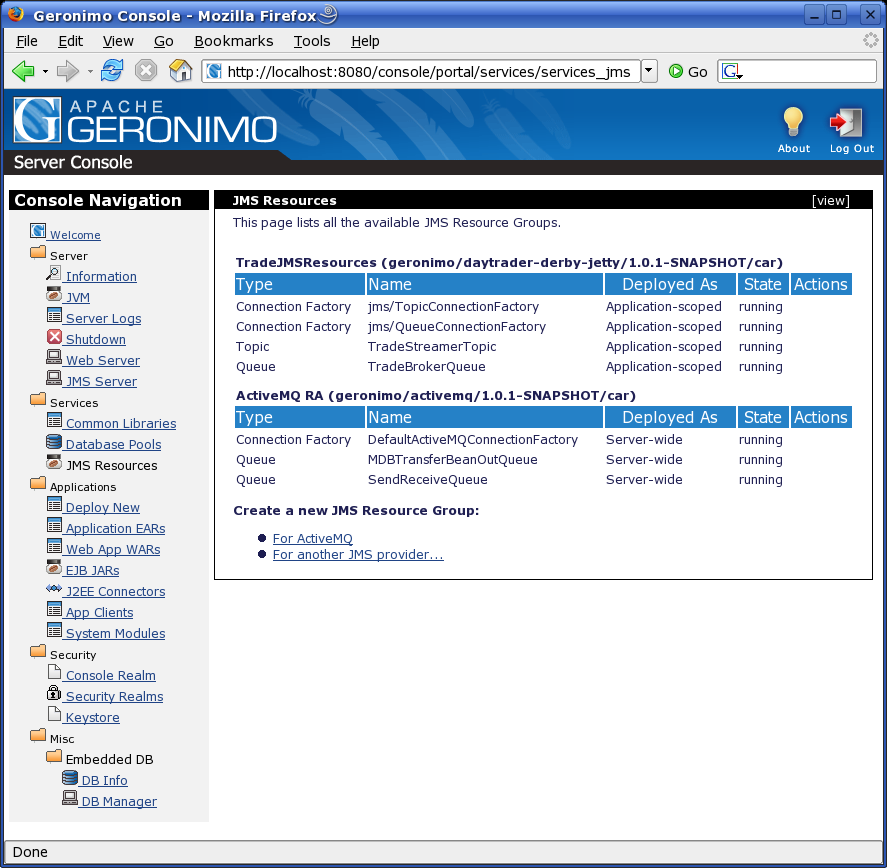
To begin working with JMS resource groups, select the link in the left-side navigation bar:
This screen lists the available JMS resource groups. For each group, it shows the group name followed by the name of the configuration that resource group was deployed in, and then a list of JMS resources (connection factories and destinations) included in that group. From here you can create a new JMS resource group using the links under at the bottom of the screen.
If you select one of the known JMS providers (currently only ActiveMQ), then the console will skip straight to the initial configuration screen. Otherwise, the process begins by selecting a JMS provider.
If you don't select one of the pre-configured JMS providers, you'll need to start by selecting the JMS provider RAR. A JMS server vendor may provider their own RAR, or you may find a third-party RAR know to be able to connect to a particular JMS server product. In either case, the RAR should be installed in the Geronimo repository (e.g. saved to a file such as repository/vendor/rars/some-jms-provider-1.0.rar).
This screen gives you a list of the RAR files in the repository to select from. Pick the RAR file for your JMS provider, and click to advance to the initial configuration screen.
This configuration screen is driven by the configuration parameters for the selected JMS provider RAR, but normally the settings here are used to identify the server to connect to:
The one field that's always present on this screen is:
| Field | Description |
|---|---|
| Resource Group Name | A unique name used to identify this resource group. This is how the group is listed in the console, and it will also be needed by message-driven beans that use this resource group to connect to the JMS server. |
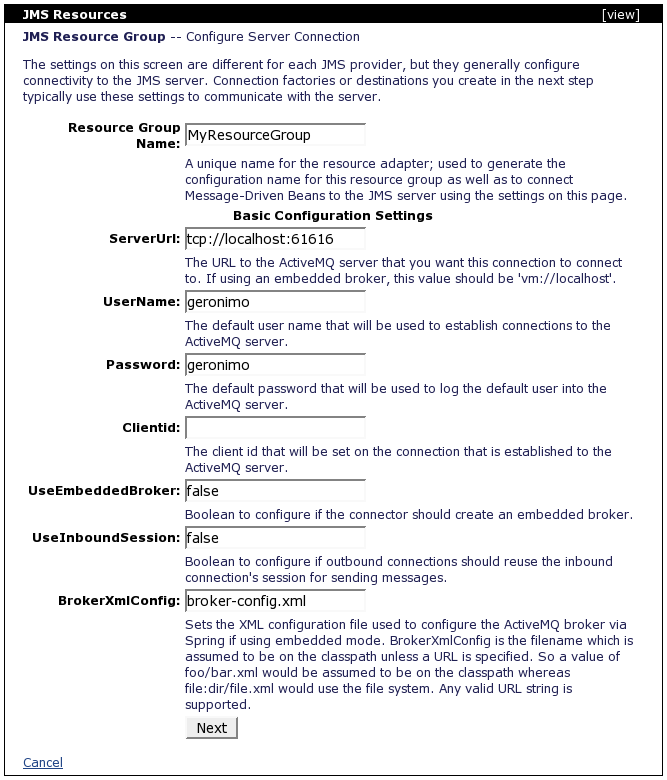
All the other fields on this screen vary according to the selected JMS provider. Figure 7.4, “Console: JMS Resource Group Configuration” shows the settings for ActiveMQ, which is the most common JMS provider used with Geronimo.
From here, click the button to move on to the resource group progress screen.
The configuration settings for this screen for the ActiveMQ JMS provider are:
| Field | Description |
|---|---|
| ServerUrl | The URL used to connect to the JMS server. Normally this is tcp://localhost:61616 though for a custom ActiveMQ server configuration you can change the URL to refer to a different host or port, or even to use a different protocol entirely. |
| UserName | The user name used to connect to the ActiveMQ server. For the ActiveMQ server that runs as part of Geronimo, this is normally geronimo. |
| Password | The password used to connect to the ActiveMQ server. For the ActiveMQ server that runs as part of Geronimo, this is normally geronimo. |
| Clientid | A JMS client ID used for any connections to the ActiveMQ server. Normally it's better not to specify this for the entire resource group (e.g. leave it blank here). |
| UseEmbeddedBroker | If set to true, the resource group will start a new ActiveMQ broker to connect to. Normally this is not what you want since Geronimo already runs a configurable ActiveMQ broker, so this is usually set to the default value of false. |
| UseInboundSession | If true, both inbound and outbound sessions will share a single connection to conserve resources. This is normally not what you want, so this is usually set to the default value of false. |
| BrokerXmlConfig | If UseEmbeddedBroker is set to true, this value identifies an XML configuration file with the configuration settings that the broker should use (otherwise, it is ignored). By default, this file should be on the class path (so any path information would be applied within JARs on the class path, etc.). You may also specify a full URL (e.g. starting with http:// or file:/) to identify a file elsewhere. |
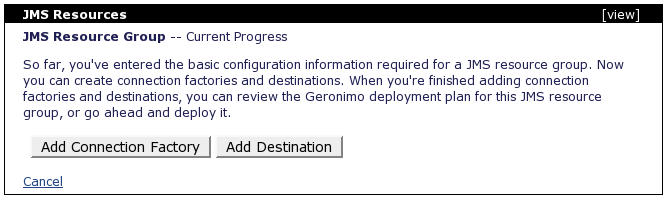
The next screen display the connection factories and destinations created for the resource group so far. The first time you get here, it just displays some help text as nothing has been created yet:
At this point, you can use the or buttons to add resources to the resource group.
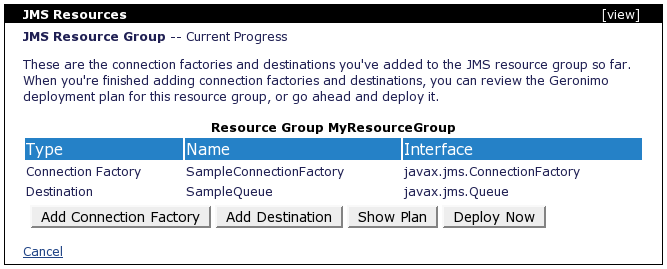
After you create each connection factory or destination, you'll return to this screen and see a list of the progress so far:
The summary shows the resources added to the group so far. In addition to the buttons to add new resources, you can select to see the Geronimo deployment plan for the resource group, or to finalize the resource group and deploy it to the current Geronimo server.
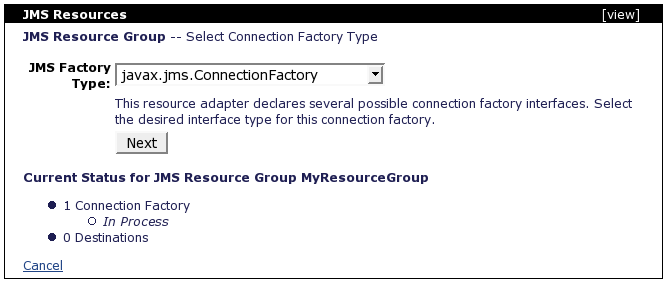
To add a connection factory to the resource group, you must first select the connection factory type. Different JMS providers may support different types of connection factories, but the standard options are:
javax.jms.ConnectionFactory (supports connections to both Topics and Queues)
javax.jms.TopicConnectionFactory (supports connections to Topics only)
javax.jms.QueueConnectionFactory (supports connections to Queues only)
To proceed, select the desired JMS Factory Type and click . This brings up the configuration screen for the selected connection factory type:
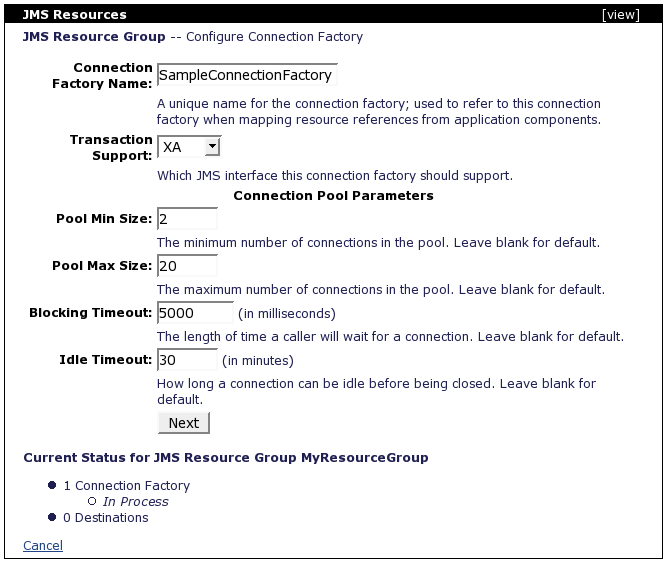
The standard settings here are:
| Field | Description |
|---|---|
| Connection Factory Name | A unique name for this connection factory. Applications that create a resource reference to the connection factory will need to use this name to refer to it. |
| Transaction Support | Defaults to the transaction support declared by the JMS provider's RAR. Normally this should not be changed. |
| Pool Min Size | The smallest number of connections that this connection factory should have open at any time. The default is 0. |
| Pool Max Size | The largest number of connections that this connection factory should have open at any time. If there are more clients than open connections, the pool will grow to its maximum size, and after that some clients will simply wait for a connection to be returned to the pool. The default is 10. |
| Blocking Timeout | How long a client will wait for a connection to become available, if all connections in the pool are in use and the pool is at its maximum size. After this amount of time elapses with no connection available, the client will receive an Exception indicating that no connections are available. The default is 5000 (in other words, 5 seconds). |
| Idle Timeout | If a connection in the pool has gone this long without being used, it will be closed and the pool will shrink. The default is 15 (minutes). |
![[Note]](images/note.png) | Note |
|---|---|
Some JMS providers may offer additional configuration parameters for their connection factories. However, ActiveMQ uses only the standard settings described here. | |
From here, you can click to return to the resource group progress screen (see Section 7.2.2.3, “Create Resource Group Progress”).
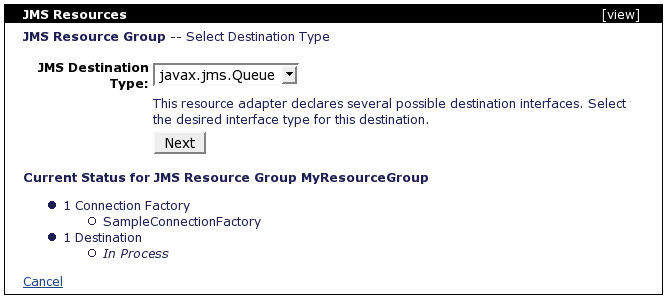
To add a destination to the resource group, you must first select the destination type. The standard options are:
javax.jms.Topic
javax.jms.Queue
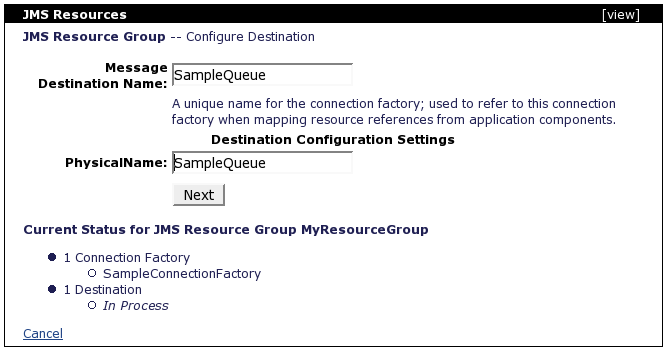
To proceed, select the desired JMS Destination Type and click . This brings up the configuration screen for the selected destination type:
The one field that's always present on this screen is:
| Field | Description |
|---|---|
| Message Destination Name | A unique name used to identify this destination. This will be needed by JMS clients or message-driven beans to send or receive messages using this destination. |
All the other fields on this screen vary according to the selected JMS provider. Figure 7.10, “Console: Configure JMS Destination” shows the additional setting for ActiveMQ, which is the most common JMS provider used with Geronimo.
From here, you can click to return to the resource group progress screen (see Section 7.2.2.3, “Create Resource Group Progress”).
The only destination configuration setting for the ActiveMQ JMS provider is:
| Field | Description |
|---|---|
| PhysicalName | While the Geronimo configuration uses the Message Destination Name to refer to this destination, you can use this setting to actually map that to a destination with a different name in the underlying JMS server. There's not normally any reason to do this, so the PhysicalName is usually set to be the same as the Message Destination Name. It may be helpful if for some reason you don't want to change the deployment plan for an application but you still want to point it to a different underlying destination. |
The JMS features in the console can't update an application or client configuration. However, they can generate a deployment plan that can be used elsewhere to either deploy the resource group with the command-line tools, or to include the plan in an application or client module.
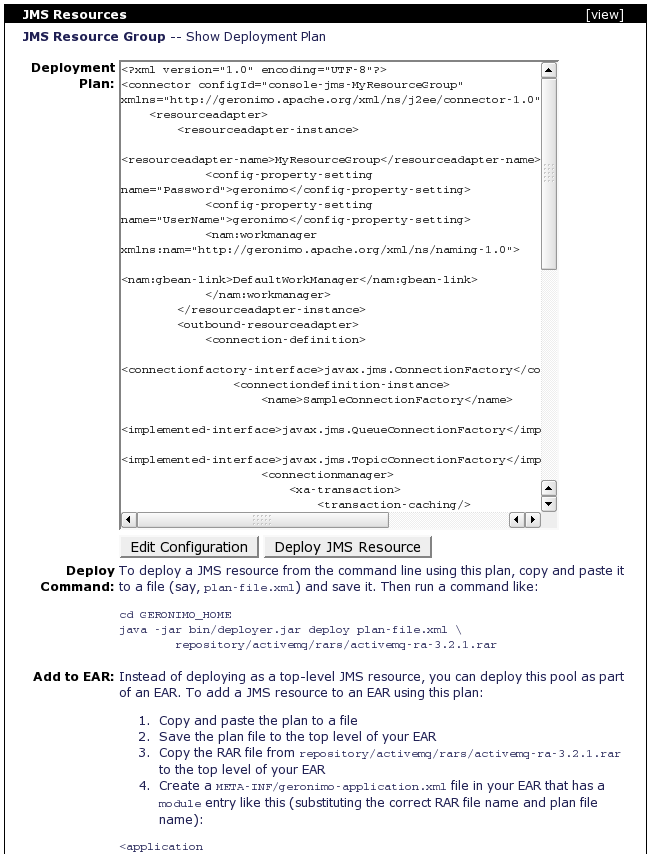
To do this, follow the normal process to create a resource group outlined in Section 7.2.2, “Creating a new JMS Resource Group”. From the progress screen, select the command to to bring up the plan screen:
This screen shows the deployment plan that was generated based on the selections made on the previous screens. It also provides a command that could be used to deploy the resource group on the command line, as well as providing a simple procedure to add the resource group to an EAR as an application-scoped group.
The main step to take from this screen is to copy the entire contents of the Deployment Plan text area (using Ctrl-A or a similar shortcut to be sure). The next three sections discuss the different ways to use this plan.
![[Tip]](images/tip.png) | Tip |
|---|---|
If you plan to deploy more than one resource group in the same server using this plan, be sure to change the configId attribute in the top connector element, as well as the resourceadapter-name, the connectiondefinition-instance name for any connection factories, and the adminobject-instance message-destination-name for any destinations. | |
To deploy via the command-line deploy tool, save the plan to a file on disk. Then that file can be used along with the listed RAR file to deploy the pool. (Note that the RAR file may be different for different JMS providers, but the RAR file displayed on the screen in Figure 7.11, “Console: JMS Resource Group Deployment Plan” is always the correct one based on the way the resource group was configured.)
For example, if the plan was saved as GERONIMO_HOME/jms-resources.xml, and it was a standard resource group using the RAR file activemq/rars/activemq-ra-3.2.1.rar, then a deploy command might look like this:
java -jar GERONIMO_HOME/bin/deployer.jar deploy \
    GERONIMO_HOME/jms-resource.xml \
GERONIMO_HOME/repository/activemq/rars/activemq-ra-3.2.1.rarTo deploy the resource group as part of an EAR, save the plan to a file in the EAR, and copy the RAR file into the EAR as well. Again, note that the RAR file may be different for different JMS providers, but the RAR file displayed on the screen in Figure 7.11, “Console: JMS Resource Group Deployment Plan” is always the correct one based on the way the resource group was configured.
The next step is to create or update the J2EE deployment descriptor and Geronimo EAR deployment plan to include the new module. The Geronimo deployment plan will also use an alt-dd element to indicate that the deployment plan for the RAR is actually in the EAR but not in the RAR file itself. For full details on this procedure, see Section 7.3.2.2, “Application-Scoped Deployment”.
To deploy the resource group as part of an application client module, you'll need to copy the plan content into the client deployment plan, and refer to the correct RAR file from the client deployment plan as well. Again, note that the RAR file may be different for different JMS providers, but the RAR file displayed on the screen in Figure 7.11, “Console: JMS Resource Group Deployment Plan” is always the correct one based on the way the resource group was configured.
For full details on this procedure, see Section 7.3.2.3, “Client-Scoped Deployment”.
| |  | |
| Chapter 7. JMS Configuration [DRAFT (1.0)] |  | 7.3. Manual Configuration and Deployment |