Relevant to Blender v2.31
Surfaces are actually an extension of NURBS curves. In Blender they are a separate ObData type.
Whereas a curve produces only one-dimensional interpolation, Surfaces have a second extra dimension. The first dimension is U, as for curves, and the second is V. A two-dimensional grid of control points defines the form for these NURBS surfaces.
Use Surfaces to create and revise fluid curved surfaces. Surfaces can be cyclical in both directions, allowing you to easily create a 'donut' shape, and they can be drawn as 'solids' in EditMode (zbuffered, with OpenGL lighting). This makes working with surfaces quite easy.
Note
Currently Blender has a basic tool set for Surfaces, with limited Ability to create holes and melt surfaces. Future versions will contain increased functionality in these areas.
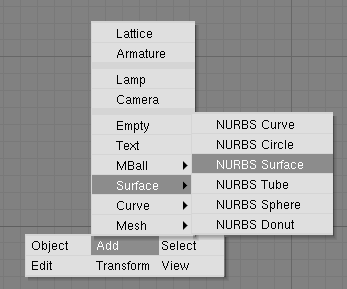
You can take one of the various surface 'primitives' from the ADD menu as a starting point (Figure 9.20, “Add surface menu.”). Note that you can choose 'Curve' and 'Circle' from the 'surface' menu! This is possible because NURBS curves are intrinsically NURBS Surfaces, simply having one dimension neglected.
Note
A NURBS 'true' curve and a NURBS 'surface' curve are not interchangeable, as you'll see as you follow the extruding process below and the skinning section further on.
When you add a 'surface' curve you can create a true
surface simply by extruding the entire curve (EKEY).
Each edge of a surface can then be extruded as you wish to form the model.
Use
CKEY to make the U or V direction cyclic.
Be sure to set the 'knots' to Uniform or
Endpoint with one of the pre-sets from the
EditButtons Curve Tools panel.
When working with surfaces, it is handy to always work on a complete column or row of vertices. Blender provides a selection tool for this: SHIFT-R, "Select Row". Starting from the last selected vertex, a complete row of vertices is extend selected in the 'U' or 'V' direction. Choose Select Row again with the same vertex to toggle between the 'U' of 'V' selection.
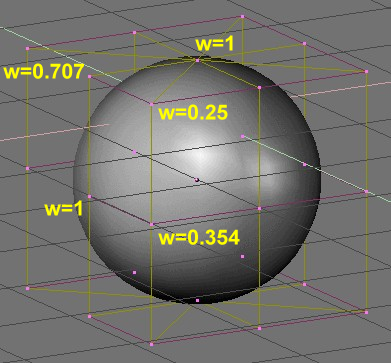
NURBS can create pure shapes such as circles, cylinders, and spheres (but note that a Bézier circle is not a pure circle.) To create pure circles, globes, or cylinders, you must set the weights of the vertices. This is not intuitive, and you should read more on NURBS before trying this.
Basically, to produce a circular arc from a curve
with three control points, the end points must have a unitary weight, while
the weight of the central control point must be equal to one-half the cosine of
half the angle between the segments joining
the points. Figure 9.21, “A sphere surface” shows this for a globe.
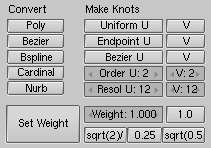
Three standard
numbers are included as presets in the EditButtons
Curve Tools panel (Figure 9.22, “Pre-set weights”).
Note
To read the weight of a selected vertex, press the NKEY.


