Relevant to Blender v2.31
Glass and tranparent materials are generally tricky to render because they exhibit refraction; that is, the bending of light rays due to the different optical density, or index of refraction of the various materials. Unfortunately, to fully account for refraction a ray tracer is mandatory. Still, we can produce convincing results in Blender using EnvMaps and advanced Texturing techniques.
Consider a scene with some basic geometries, including a cube, a cone, a sphere, and a torus. As a first example we will make the sphere look like a solid ball of glass and, as a second example, that same sphere will become a glass bubble.
To create this effect, we need to make the light appear to bend as it passes through the sphere, since we would expect objects behind the solid glass sphere to appear heavily warped, as if through a very thick lens. On the other hand, the hollow glass sphere's center should be almost transparent while the sides should deflect light.
1. To begin, we set up an environment map for the sphere's material just as we did for the ball in the previous section, with an empty which locates the EnvMap's perspective at the center of the sphere.
2. To fake Refraction we'll tweak the output mapping with the
ofsZ,
sizeX, sizeY,
sizeZ
and Col sliders to
warp the map in a way that creates the effect of refraction.
To do so, use the settings in Figure 11.36, “Envmap settings to fake refraction.”.
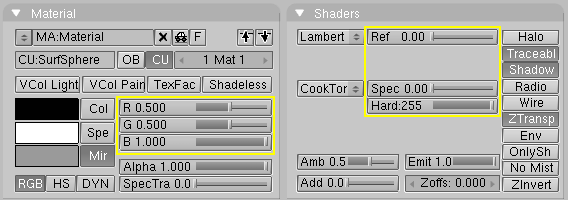
3. Select the Mir RGB material sliders and
lower the
R and G a bit to give
the texture a blue tint. (Our experience with the idiosyncrasies of Blender's
handling of
mirror colors dictates this unintuitive approach when
combining
environment-mapped reflections and refractions in a single
material.)
4. Turn the Ref slider all the way down.
(Figure 11.37, “Material settings”).
You should now have produced a blue-tinted refraction of the
environment.
5. Shiny
glass also needs a reflection map, so we'll place the
same texture into
another texture channel. Press the Add,
Col,
and Emit buttons, and use the
Refl button for
the coordinates. Make the material Color
black and turn
Emit all the way up. (Figure 11.38, “Reflection Map”).
6. This changes our first texture considerably.
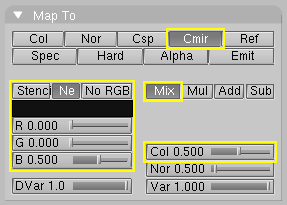
In order to return the refraction texture to a nice blue
tint, we have to add a new texture, leaving the texture type
set
to None. Select the Mix
and Cmir
buttons, and set the Col slider about
halfway up. Click
the Neg button and set the texture input
RGB sliders to a
dark blue (Figure 11.39, “Final touches”).
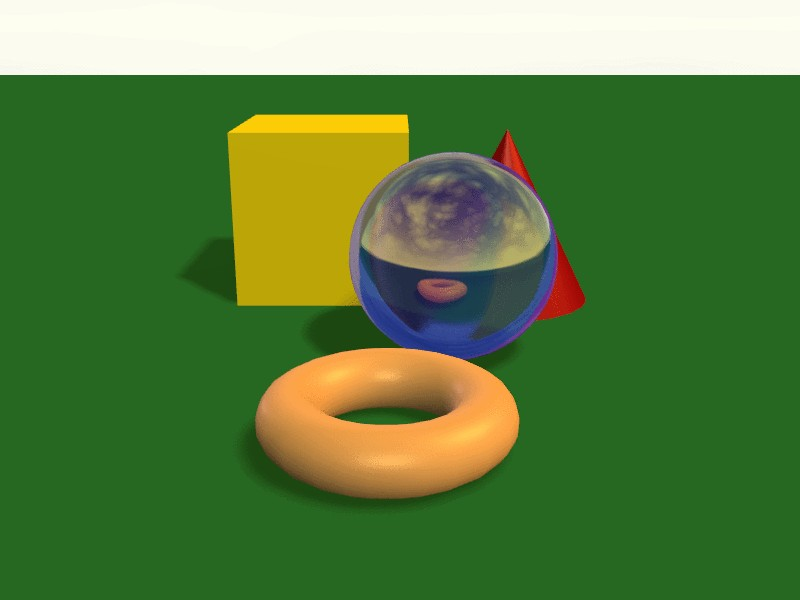
The final result should look like Figure 11.40, “Rendering”. The refraction effect is most noticeable when the scene is animated.
The procedure we've described above works fine for a solid lump of glass, but how do we produce the appearance of hollow glass, like a vase?
Thin glass has strong refraction only where it slopes away
from the
eye at a steep angle. We can easily mimic this effect by using
Blender's Blend texture to control the
object's
transparency, as well as another transparency texture to keep
the bright
highlights visible.
1. Add a new texture to the material. Select
Blend as the
type and select the Sphere option.
2. Return to the
material buttons. Select Nor as the mapping
type, and
disable the X and Y axes in the input coordinates.
3. Mix the
texture with Alpha, then move the
Alpha material
slider to 0.0 and set the ZTransp
option
(Figure 11.41, “Setting transparency.”).
This produces the effect of nice transparency as the surface
angles toward the eye,
but we want the bright environment-mapped reflections to show
up on
those otherwise-transparent areas. For example, if you look at
glass windows, you
will see that bright light reflecting from the surface is
visible, preventing you from seeing through a pane that would otherwise be
transparent. We can produce this effect easily by selecting
the environment-mapped
reflection texture in the material window and enabling the
Alpha option (Figure 11.42, “Setting Reflections”).
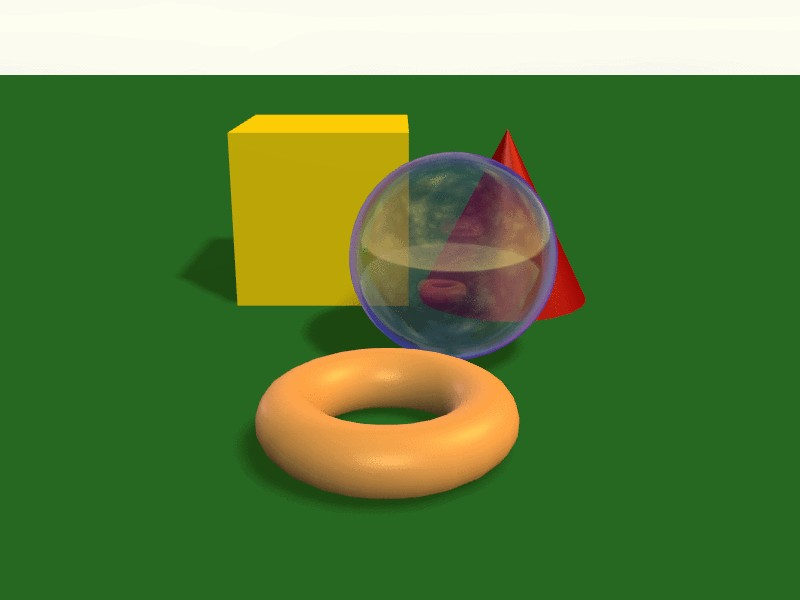
That's all there is to it. The result should look like Figure 11.43, “Hollow Glass”.


