CloverETL Server Project
From the CloverETL perspective, select → → .
CloverETL Server Project wizard will open and it will guide you through the creation of the server project.
Connection to CloverETL Server
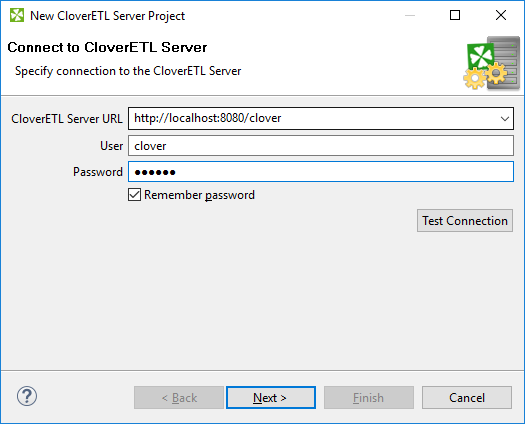
The first step is to create working connection to the CloverETL Server. Fill in CloverETL Server URL, User, and Password.

Figure 21.4. CloverETL Server Project Wizard - Server Connection
You can verify validity of the connection using the button.
![[Tip]](figures/tip.png) | Tip |
|---|---|
You can use Remember password check box to save the password in your PC. |
Once connection to the CloverETL Server is established, continue with the next step. This step has different dialogs for CloverETL Server and CloverETL Cluster.
The Sandbox on CloverETL Server
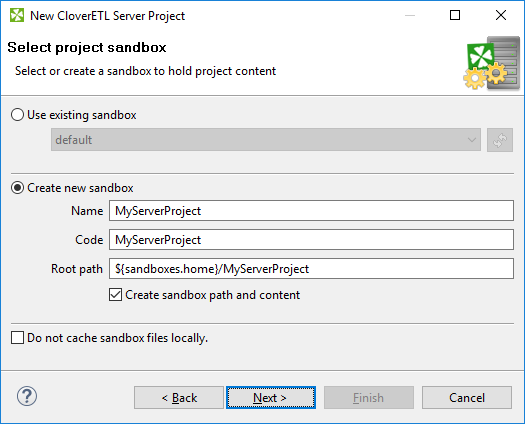
The second step of the wizard is to select an existing or create a new CloverETL Server sandbox. The sandbox will correspond to the project.

Figure 21.5. CloverETL Server Project Wizard - Sandbox Selection
Use an existing sandbox or create a new one. In case you decide to create a new sandbox, the form is similar to the one present in CloverETL Server web interface. Refer to the CloverETL Server manual for further description on sandbox properties.
To create a project which only has data on the remote server, tick Do not cache sandbox files locally checkbox. This type of server project is known as RSE Server Project. In CloverETL 4.1.x and earlier, this project type was the only one available.
![[Note]](figures/note.png) | Note |
|---|---|
One sandbox can be connected to a single workspace project only. |
Press the Next button to create a new sandbox.
Next step: Specify Project Name
Sandbox on CloverETL Cluster
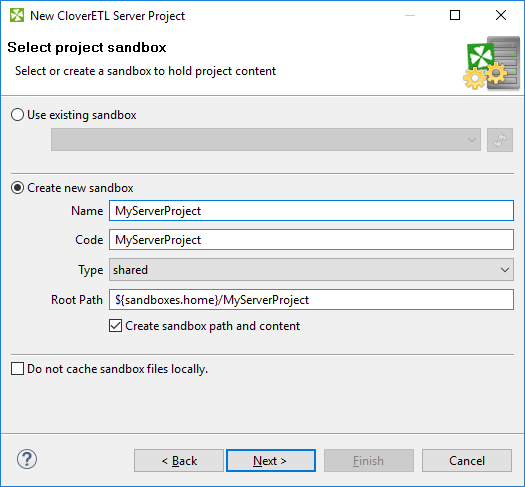
When using CloverETL Server deployed in cluster, the form for sandbox creation is different. Again, refer to the CloverETL Server manual for a description of sandbox types and their specific properties.

Figure 21.6. CloverETL Server Project Wizard - Clustered Sandbox Creation
![[Note]](figures/note.png) | Note |
|---|---|
In clustered environment, the |
Specify Project Name
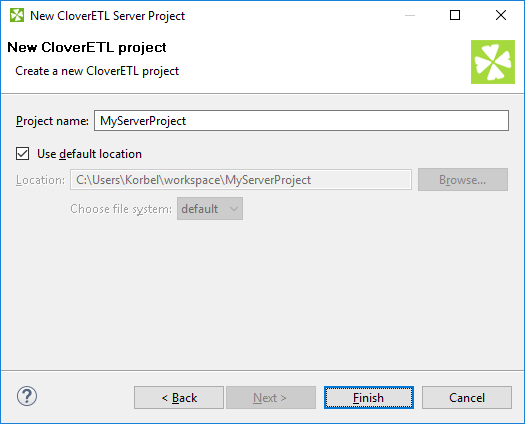
The last step is to specify a name of the new CloverETL Server project. Keep the other values (Location, and File system) unchanged.

Figure 21.7. Giving a Name to the New CloverETL Server Project
After clicking the , CloverETL Server project will be created.