Internal Database Connections
| Creating Internal Database Connections |
| Externalizing Internal Database Connections |
| Exporting Internal Database Connections |
Internal database connections are part of a graph, they are contained in it and can be seen in its source tab.
Creating Internal Database Connections
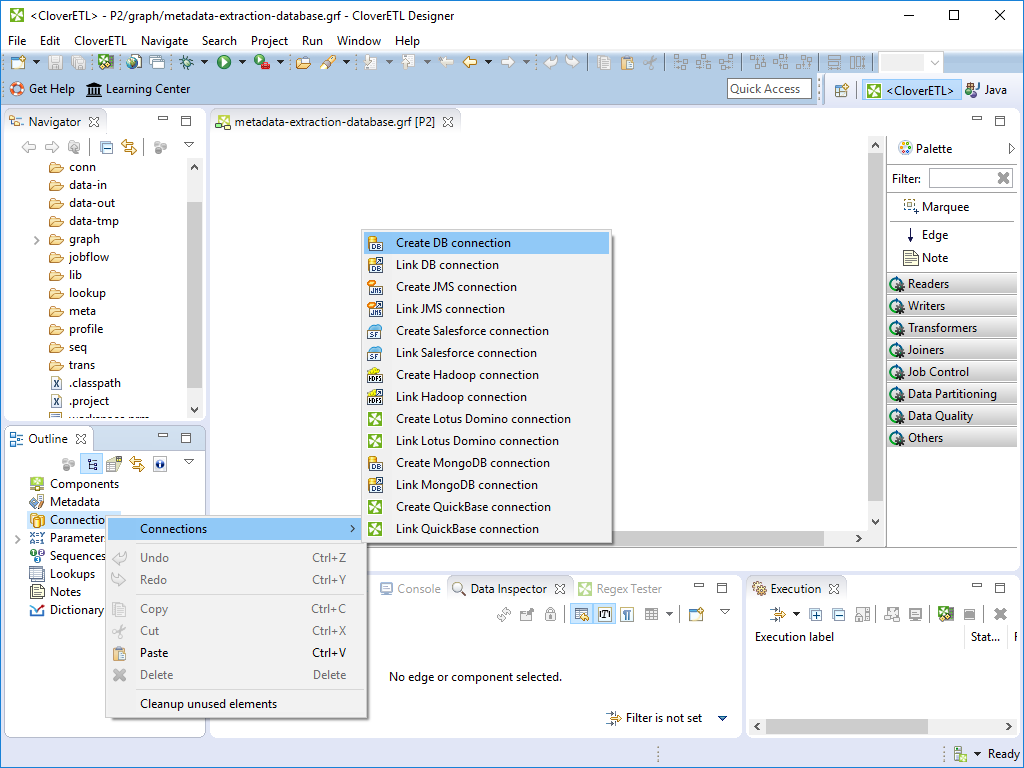
To create an internal database connection, right-click Connections and select → .
 |
Figure 33.1. Creating Internal Database Connection
A dialog with Database connection properties opens. You can also open this dialog by selecting some DB connection item in the Outline pane and pressing Enter.
See Database Connection Properties for detailed information about how a database connection should be created and configured.
When all attributes of the connection have been set, you can validate your connection by clicking the button.
After clicking , your internal database connection has been created. The new internal database connection is a part of a graph.
Externalizing Internal Database Connections
Each internal database connection can be externalized - converted to the external one. Thus, you would be able to use the same database connection for more graphs - more graphs would share the connection.
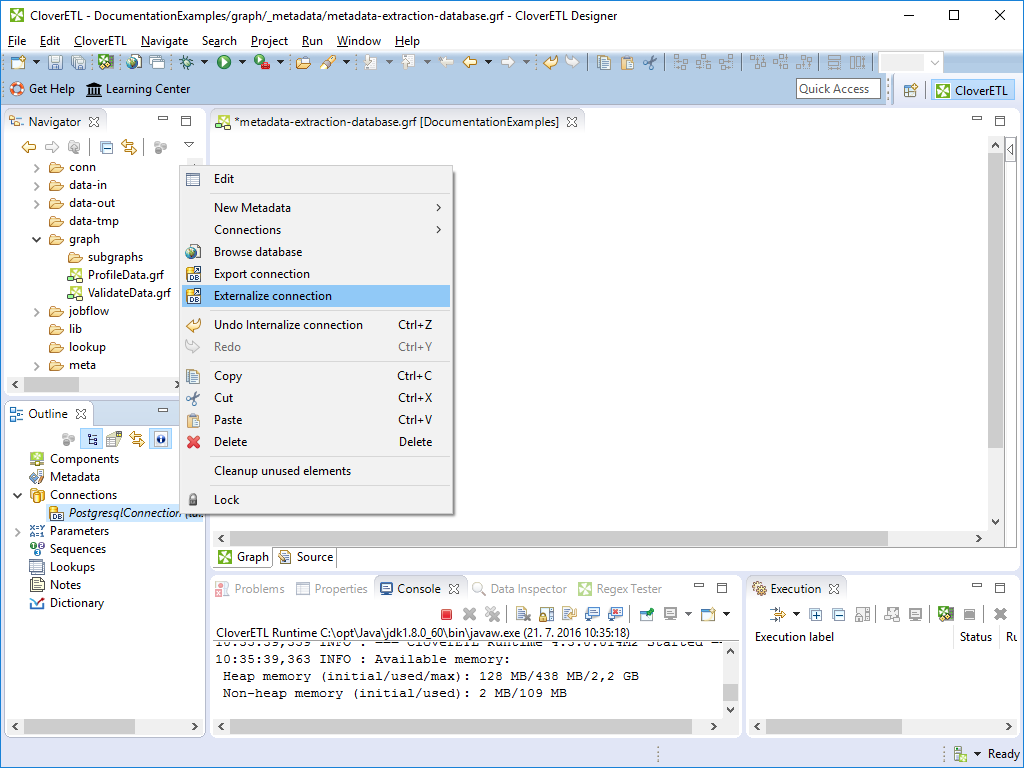
You can externalize an internal connection
by right-clicking the internal connection item in the
Outline pane and selecting
Externalize connection from the context menu.
A new window will open.
The dialog offers the conn folder of your project as the
location for this new external (shared) connection configuration file.
A configuration file name is created from the database connection name and it can be changed. If a file with the same name exists, choose a different file name. Externalization is completed using the button.
After that, the internal connection item disappears from the
Outline pane Connections
group; but at the same location, there appears already linked the
newly created external (shared) connection configuration file.
The same configuration file appears in the conn subfolder of the project.
The file can be seen in the Navigator pane.
Externalizing Multiple Connections
You can externalize multiple internal connection items at once.
To do this, select them in the Outline pane.
Right-click and select Externalize connection from the context menu.
A new window will open in which the conn folder of
your project will be offered as the location for the first of the
selected internal connection items.
Finally, click .
The same window will open for each of the selected connection items until they are all externalized. The name of any configuration file can be changed. If you want or if the file with the same name already exists, you can change the offered name of any connection configuration file.
You can choose adjacent connection items when you press Shift and move the Down Cursor or the Up Cursor key. If you want to choose non-adjacent items, use Ctrl+ at each of the desired connection items instead.
The same is valid for both the database and JMS connections.
 |
Figure 33.2. Externalizing Internal Database Connection
After that, the internal file disappears from the Outline pane connections folder; but at the same location, a newly created configuration file appears.
The same configuration file appears in the
conn subfolder in the
Navigator pane.
Exporting Internal Database Connections
Exporting is similar to externalizing an internal database connection. You create a connection configuration file that is outside the graph in the same way as an externalized connection, but such a file is no longer linked to the original graph. Subsequently, you can use such a file in other graphs as an external (shared) connection configuration file as mentioned in the previous sections.
You can export an internal database connection into an external
(shared) one by right-clicking one of the internal database
connection items in the Outline pane and
selecting from the context menu.
The conn folder of the
corresponding project will be offered for the newly created external file.
You can also give the file any other name than the offered one.
Click the button to create the file.
After that, the Outline pane connection
folder remains the same, but in the conn folder
in the Navigator pane the newly created
connection configuration file appears.
You can even export more selected internal database connections in a similar way as it is described in the previous section about externalizing.