Salesforce Connections
Salesforce connection allows you to connect to Salesforce. The connection is required by components reading from and writing to Salesforce.
Creating Salesforce Connection
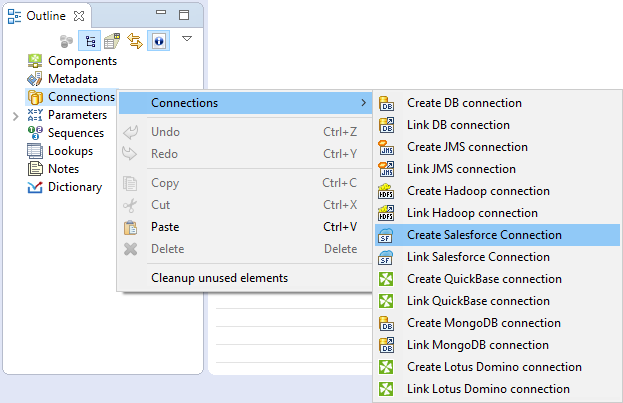
To create a Salesforce connection, right click Connections in Outline and choose → .

Figure 33.18. Creating Salesforce Connection
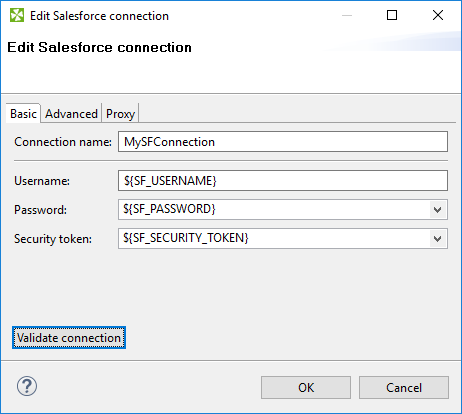
In Salesforce Connection Dialog, fill in Username, Password, and Security token.

Figure 33.19. Salesforce Connection Dialog
Username is your Salesforce username.
Password is password to your Salesforce account.
Security token is a security token for an external application. You can acquire a new security token in Salesforce web gui: → → → .
You can use Secure Graph Parameters to specify password and security token.

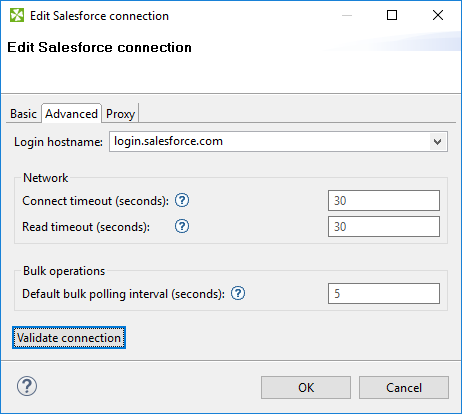
Figure 33.20. Salesforce Connection Dialog II
Login hostname is a URL of Salesforce service.
The default value is login.salesforce.com.
Connect timeout (seconds) is timeout for creating the Salesforce connection. The default value is 30.
Read timeout (seconds) is timeout for subsequent network operations. The default value is 30.
Default bulk polling interval (seconds) is time between requests for results of the asynchronous calls. This configuration can be overridden in configuration of Salesforce components. Lower value means faster response but more API calls.
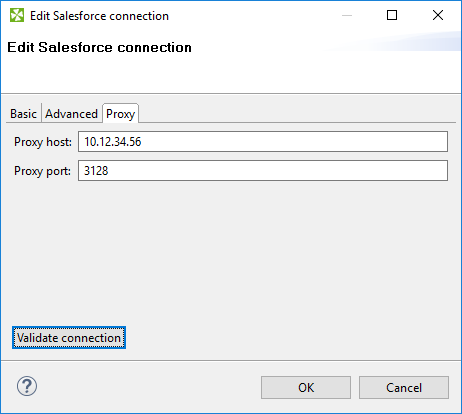
If you need to use proxy, it can be configured on Proxy tab. In Salesforce connection, only an anonymous proxy is supported.

Figure 33.21. Salesforce Connection Dialog III
Use Validate connection to validate the connection.
Use OK to save the configuration.
Important Details
Salesforce edition
Using Salesforce connections requires Integration via web service API Salesforce feature. Make sure your Salesforce edition supports the API integration.
Limits on Connections
If you design a graph, you should know that there is a limit on number of requests and on number of concurrent requests. These limits depend on Salesforce edition you use. See Salesforce documentation for details on these limits.
Salesforce and Java 1.7
If you use Salesforce components with Java 1.7, you should enable TLS version 1.2. To enable TLSv1.2 in Designer add parameter at the end of CloverETLDesigner.ini file under -vmargs line.
-Dhttps.protocols=TLSv1,TLSv1.1,TLSv1.2
Add the same parameter to container hosting CloverETL Server or to CloverETL Runtime.
If you did not configure it properly, you can encounter an error message similar to the following one:
Failed to parse detail:  START_TAG seen ...</sf:exceptionMessage><sf:upgradeURL>...
@1:752 due to: com.sforce.ws.ConnectionException: unable to find end tag at:
START_TAG seen ...</sf:exceptionMessage><sf:upgradeURL>... @1:752
SSL hostname verification fails of Weblogic
Salesforce server's certificate has CN=*.salesforce.com. It causes that SSL hostname verification fails on Weblogic.
Possible solutions are:
Disable SSL Hostname verification by adding following parameters to container hosting CloverETL Server.
  -Dweblogic.security.SSL.ignoreHostnameVerification=true
  -Dweblogic.nodemanager.sslHostNameVerificationEnabled=false
Configure
weblogic.security.utils.SSLWLSWildcardHostnameVerifieras a hostname verifier. See http://serverfault.com/questions/503751/certificate-verification-error-when-sending-a-service-request-from-weblogic.Use Sun http handler instead of weblogic's one. Add following parameter to container hosting CloverETL Server.
-DUseSunHttpHandler=true
Solutions above work with supported Weblogic versions except Weblogic 10. If you use Weblogic 10, use following properties:
  -DUseSunHttpHandler=true
  -Dssl.SocketFactory.provider=sun.security.ssl.SSLSocketFactoryImpl
  -Dssl.ServerSocketFactory.provider=sun.security.ssl.SSLSocketFactoryImpl
See also:
| SalesforceReader |
| SalesforceBulkReader |
| SalesforceWriter |
| SalesforceBulkWriter |
| SalesforceWaveWriter |
| Extracting Metadata from Salesforce |