Caution
This documentation is for EF Core. For EF6.x and earlier release see http://msdn.com/data/ef.
ASP.NET Core Application to New Database
In this walkthrough, you will build an ASP.NET Core MVC application that performs basic data access using Entity Framework. You will use migrations to create the database from your model.
In this article:
Tip
You can view this article’s sample on GitHub.
Create a new project
- Open Visual Studio 2015
- From the left menu select
- Select the ASP.NET Core Web Application (.NET Core) project template
- Enter EFGetStarted.AspNetCore.NewDb as the name and click OK
- Wait for the New ASP.NET Core Web Application dialog to appear
- Select the Web Application template and ensure that Authentication is set to No Authentication
- Click OK
Caution
If you use Individual User Accounts instead of None for Authentication then an Entity Framework model will be added to your project in Models\IdentityModel.cs. Using the techniques you will learn in this walkthrough, you can choose to add a second model, or extend this existing model to contain your entity classes.
Install Entity Framework
To use EF Core, install the package for the database provider(s) you want to target. This walkthrough uses SQL Server. For a list of available providers see Database Providers.
- Run
Install-Package Microsoft.EntityFrameworkCore.SqlServer
Note
In ASP.NET Core projects the Install-Package command will complete quickly and the package installation will occur in the background. You will see (Restoring...) appear next to References in Solution Explorer while the install occurs.
Later in this walkthrough we will also be using some Entity Framework commands to maintain the database. So we will install the commands package as well.
- Run
Install-Package Microsoft.EntityFrameworkCore.Tools –Pre - Open project.json
- Locate the
toolssection and add theefcommand as shown below
1 2 3 4 5 | "tools": {
"Microsoft.EntityFrameworkCore.Tools": "1.0.0-preview2-final",
"Microsoft.AspNetCore.Razor.Tools": "1.0.0-preview2-final",
"Microsoft.AspNetCore.Server.IISIntegration.Tools": "1.0.0-preview2-final",
},
|
Create your model
Now it’s time to define a context and entity classes that make up your model.
- Right-click on the project in Solution Explorer and select
- Enter Models as the name of the folder
- Right-click on the Models folder and select
- From the left menu select
- Select the Class item template
- Enter Model.cs as the name and click OK
- Replace the contents of the file with the following code
1 2 3 4 5 6 7 8 9 10 11 12 13 14 15 16 17 18 19 20 21 22 23 24 25 26 27 28 29 30 31 32 33 | using Microsoft.EntityFrameworkCore;
using System.Collections.Generic;
namespace EFGetStarted.AspNetCore.NewDb.Models
{
public class BloggingContext : DbContext
{
public BloggingContext(DbContextOptions<BloggingContext> options)
: base(options)
{ }
public DbSet<Blog> Blogs { get; set; }
public DbSet<Post> Posts { get; set; }
}
public class Blog
{
public int BlogId { get; set; }
public string Url { get; set; }
public List<Post> Posts { get; set; }
}
public class Post
{
public int PostId { get; set; }
public string Title { get; set; }
public string Content { get; set; }
public int BlogId { get; set; }
public Blog Blog { get; set; }
}
}
|
Note
In a real application you would typically put each class from your model in a separate file. For the sake of simplicity, we are putting all the classes in one file for this tutorial.
Register your context with dependency injection
The concept of dependency injection is central to ASP.NET Core. Services (such as BloggingContext) are registered with dependency injection during application startup. Components that require these services (such as your MVC controllers) are then provided these services via constructor parameters or properties. For more information on dependency injection see the Dependency Injection article on the ASP.NET site.
In order for our MVC controllers to make use of BloggingContext we are going to register it as a service.
- Open Startup.cs
- Add the following
usingstatements at the start of the file
1 2 | using EFGetStarted.AspNetCore.NewDb.Models;
using Microsoft.EntityFrameworkCore;
|
Now we can use the AddDbContext method to register it as a service.
- Locate the
ConfigureServicesmethod- Add the lines that are highlighted in the following code
1 2 3 4 | public void ConfigureServices(IServiceCollection services)
{
var connection = @"Server=(localdb)\mssqllocaldb;Database=EFGetStarted.AspNetCore.NewDb;Trusted_Connection=True;";
services.AddDbContext<BloggingContext>(options => options.UseSqlServer(connection));
|
Create your database
Now that you have a model, you can use migrations to create a database for you.
- Run
Add-Migration MyFirstMigrationto scaffold a migration to create the initial set of tables for your model. - Run
Update-Databaseto apply the new migration to the database. Because your database doesn’t exist yet, it will be created for you before the migration is applied.
Tip
If you make future changes to your model, you can use the Add-Migration command to scaffold a new migration to make the corresponding schema changes to the database. Once you have checked the scaffolded code (and made any required changes), you can use the Update-Database command to apply the changes to the database.
EF uses a __EFMigrationsHistory table in the database to keep track of which migrations have already been applied to the database.
Create a controller
Next, we’ll add an MVC controller that will use EF to query and save data.
- Right-click on the Controllers folder in Solution Explorer and select
- From the left menu select
- Select the Class item template
- Enter BlogsController.cs as the name and click OK
- Replace the contents of the file with the following code
1 2 3 4 5 6 7 8 9 10 11 12 13 14 15 16 17 18 19 20 21 22 23 24 25 26 27 28 29 30 31 32 33 34 35 36 37 38 39 40 41 | using EFGetStarted.AspNetCore.NewDb.Models;
using Microsoft.AspNetCore.Mvc;
using System.Linq;
namespace EFGetStarted.AspNetCore.NewDb.Controllers
{
public class BlogsController : Controller
{
private BloggingContext _context;
public BlogsController(BloggingContext context)
{
_context = context;
}
public IActionResult Index()
{
return View(_context.Blogs.ToList());
}
public IActionResult Create()
{
return View();
}
[HttpPost]
[ValidateAntiForgeryToken]
public IActionResult Create(Blog blog)
{
if (ModelState.IsValid)
{
_context.Blogs.Add(blog);
_context.SaveChanges();
return RedirectToAction("Index");
}
return View(blog);
}
}
}
|
You’ll notice that the controller takes a BloggingContext as a constructor parameter. ASP.NET dependency injection will take care of passing an instance of BloggingContext into your controller.
The controller contains an Index action, which displays all blogs in the database, and a Create action, which inserts a new blogs into the database.
Create views
Now that we have a controller it’s time to add the views that will make up the user interface.
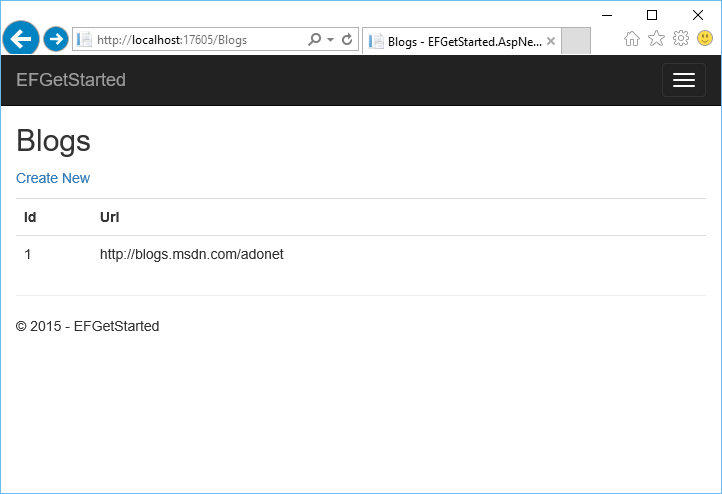
We’ll start with the view for our Index action, that displays all blogs.
- Right-click on the Views folder in Solution Explorer and select
- Enter Blogs as the name of the folder
- Right-click on the Blogs folder and select
- From the left menu select
- Select the MVC View Page item template
- Enter Index.cshtml as the name and click Add
- Replace the contents of the file with the following code
1 2 3 4 5 6 7 8 9 10 11 12 13 14 15 16 17 18 19 20 21 22 23 24 25 26 27 28 29 30 | @model IEnumerable<EFGetStarted.AspNetCore.NewDb.Models.Blog>
@{
ViewBag.Title = "Blogs";
}
<h2>Blogs</h2>
<p>
<a asp-controller="Blogs" asp-action="Create">Create New</a>
</p>
<table class="table">
<tr>
<th>Id</th>
<th>Url</th>
</tr>
@foreach (var item in Model)
{
<tr>
<td>
@Html.DisplayFor(modelItem => item.BlogId)
</td>
<td>
@Html.DisplayFor(modelItem => item.Url)
</td>
</tr>
}
</table>
|
We’ll also add a view for the Create action, which allows the user to enter details for a new blog.
- Right-click on the Blogs folder and select
- From the left menu select
- Select the MVC View Page item template
- Enter Create.cshtml as the name and click Add
- Replace the contents of the file with the following code
1 2 3 4 5 6 7 8 9 10 11 12 13 14 15 16 17 18 19 20 21 22 23 24 25 | @model EFGetStarted.AspNetCore.NewDb.Models.Blog
@{
ViewBag.Title = "New Blog";
}
<h2>@ViewData["Title"]</h2>
<form asp-controller="Blogs" asp-action="Create" method="post" class="form-horizontal" role="form">
<div class="form-horizontal">
<div asp-validation-summary="All" class="text-danger"></div>
<div class="form-group">
<label asp-for="Url" class="col-md-2 control-label"></label>
<div class="col-md-10">
<input asp-for="Url" class="form-control" />
<span asp-validation-for="Url" class="text-danger"></span>
</div>
</div>
<div class="form-group">
<div class="col-md-offset-2 col-md-10">
<input type="submit" value="Create" class="btn btn-default" />
</div>
</div>
</div>
</form>
|
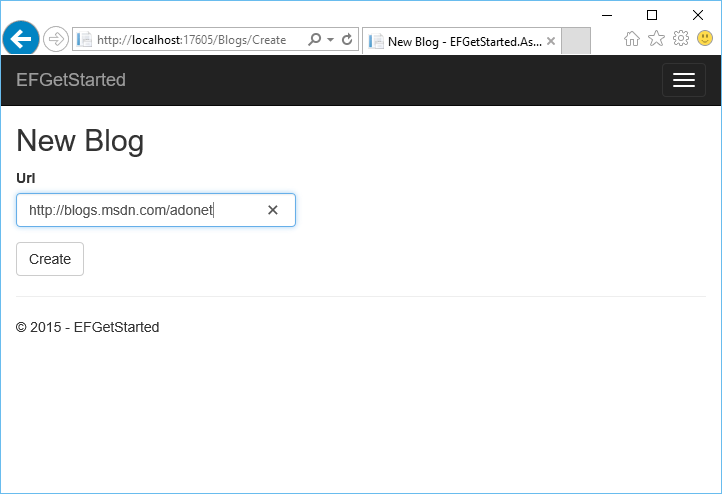
Run the application
You can now run the application to see it in action.
- The application will build and open in a web browser
- Navigate to /Blogs
- Click Create New
- Enter a Url for the new blog and click Create