Caution
This documentation is for EF Core. For EF6.x and earlier release see http://msdn.com/data/ef.
Local SQLite on UWP
In this walkthrough, you will build a Universal Windows Platform (UWP) application that performs basic data access against a local SQLite database using Entity Framework.
Caution
Avoid using anonymous types in LINQ queries on UWP. Deploying a UWP application to the app store requires your application to be compiled with .NET Native. Queries with anonymous types have poor performance on .NET Native or may crash the application.
In this article:
Tip
You can view this article’s sample on GitHub.
Prerequisites
- The following items are required to complete this walkthrough:
- Windows 10
- Visual Studio 2015 Update 3
- The latest version of Windows 10 Developer Tools
Create a new project
- Open Visual Studio 2015
- From the left menu select
- Select the Blank App (Universal Windows) project template
- Give the project a name and click OK
Upgrade Microsoft.NETCore.UniversalWindowsPlatform
Depending on your version of Visual Studio, the template may have generated your project with an old version of .NET Core for UWP.
EF Core requires Microsoft.NETCore.UniversalWindowsPlatform version 5.2.2 or greater.
- Run
Update-Package Microsoft.NETCore.UniversalWindowsPlatform
Install Entity Framework
To use EF Core, install the package for the database provider(s) you want to target. This walkthrough uses SQLite. For a list of available providers see Database Providers.
- Run
Install-Package Microsoft.EntityFrameworkCore.Sqlite
Later in this walkthrough we will also be using some Entity Framework commands to maintain the database. So we will install the commands package as well.
- Run
Install-Package Microsoft.EntityFrameworkCore.Tools –Pre
Create your model
Now it’s time to define a context and entity classes that make up your model.
- Enter Model.cs as the name and click OK
- Replace the contents of the file with the following code
1 2 3 4 5 6 7 8 9 10 11 12 13 14 15 16 17 18 19 20 21 22 23 24 25 26 27 28 29 30 31 32 33 34 | using Microsoft.EntityFrameworkCore;
using System.Collections.Generic;
namespace EFGetStarted.UWP
{
public class BloggingContext : DbContext
{
public DbSet<Blog> Blogs { get; set; }
public DbSet<Post> Posts { get; set; }
protected override void OnConfiguring(DbContextOptionsBuilder optionsBuilder)
{
optionsBuilder.UseSqlite("Filename=Blogging.db");
}
}
public class Blog
{
public int BlogId { get; set; }
public string Url { get; set; }
public List<Post> Posts { get; set; }
}
public class Post
{
public int PostId { get; set; }
public string Title { get; set; }
public string Content { get; set; }
public int BlogId { get; set; }
public Blog Blog { get; set; }
}
}
|
Tip
In a real application you would put each class in a separate file and put the connection string in the App.Config file and read it out using ConfigurationManager. For the sake of simplicity, we are putting everything in a single code file for this tutorial.
Create your database
Warning
Known Issue in Preview 2
Using EF Tools on UWP projects does not work without manually adding binding redirects.
- From the left menu select
- Give the file the name “App.config”
- Add the following contents to the file
<configuration>
  <runtime>
    <assemblyBinding xmlns="urn:schemas-microsoft-com:asm.v1">
      <dependentAssembly>
        <assemblyIdentity name="System.IO.FileSystem.Primitives" publicKeyToken="b03f5f7f11d50a3a" culture="neutral" />
        <bindingRedirect oldVersion="4.0.0.0" newVersion="4.0.1.0"/>
      </dependentAssembly>
      <dependentAssembly>
        <assemblyIdentity name="System.Threading.Overlapped" publicKeyToken="b03f5f7f11d50a3a" culture="neutral" />
        <bindingRedirect oldVersion="4.0.0.0" newVersion="4.0.1.0"/>
      </dependentAssembly>
      <dependentAssembly>
        <assemblyIdentity name="System.ComponentModel.Annotations" publicKeyToken="b03f5f7f11d50a3a" culture="neutral" />
        <bindingRedirect oldVersion="4.1.0.0" newVersion="4.0.0.0"/>
      </dependentAssembly>
    </assemblyBinding>
  </runtime>
</configuration>
See Issue #5471 for more details.
Now that you have a model, you can use migrations to create a database for you.
- Run
Add-Migration MyFirstMigrationto scaffold a migration to create the initial set of tables for your model.
Since we want the database to be created on the device that the app runs on, we will add some code to apply any pending migrations to the local database on application startup. The first time that the app runs, this will take care of creating the local database for us.
- Right-click on App.xaml in Solution Explorer and select View Code
- Add the highlighted using to the start of the file
1 2 3 4 5 6 | using Microsoft.EntityFrameworkCore;
using System;
using System.Collections.Generic;
using System.IO;
using System.Linq;
using System.Runtime.InteropServices.WindowsRuntime;
|
- Add the highlighted code to apply any pending migrations
1 2 3 4 5 6 7 8 9 10 | public App()
{
this.InitializeComponent();
this.Suspending += OnSuspending;
using (var db = new BloggingContext())
{
db.Database.Migrate();
}
}
|
Tip
If you make future changes to your model, you can use the Add-Migration command to scaffold a new migration to apply the corresponding changes to the database. Any pending migrations will be applied to the local database on each device when the application starts.
EF uses a __EFMigrationsHistory table in the database to keep track of which migrations have already been applied to the database.
Use your model
You can now use your model to perform data access.
- Open MainPage.xaml
- Add the page load handler and UI content highlighted below
1 2 3 4 5 6 7 8 9 10 11 12 13 14 15 16 17 18 19 20 21 22 23 24 | <Page
x:Class="EFGetStarted.UWP.MainPage"
xmlns="http://schemas.microsoft.com/winfx/2006/xaml/presentation"
xmlns:x="http://schemas.microsoft.com/winfx/2006/xaml"
xmlns:local="using:EFGetStarted.UWP"
xmlns:d="http://schemas.microsoft.com/expression/blend/2008"
xmlns:mc="http://schemas.openxmlformats.org/markup-compatibility/2006"
mc:Ignorable="d"
Loaded="Page_Loaded">
<Grid Background="{ThemeResource ApplicationPageBackgroundThemeBrush}">
<StackPanel>
<TextBox Name="NewBlogUrl"></TextBox>
<Button Click="Add_Click">Add</Button>
<ListView Name="Blogs">
<ListView.ItemTemplate>
<DataTemplate>
<TextBlock Text="{Binding Url}" />
</DataTemplate>
</ListView.ItemTemplate>
</ListView>
</StackPanel>
</Grid>
</Page>
|
Now we’ll add code to wire up the UI with the database
- Right-click MainPage.xaml in Solution Explorer and select View Code
- Add the highlighted code from the following listing
1 2 3 4 5 6 7 8 9 10 11 12 13 14 15 16 17 18 19 20 21 22 23 24 25 26 27 | public sealed partial class MainPage : Page
{
public MainPage()
{
this.InitializeComponent();
}
private void Page_Loaded(object sender, RoutedEventArgs e)
{
using (var db = new BloggingContext())
{
Blogs.ItemsSource = db.Blogs.ToList();
}
}
private void Add_Click(object sender, RoutedEventArgs e)
{
using (var db = new BloggingContext())
{
var blog = new Blog { Url = NewBlogUrl.Text };
db.Blogs.Add(blog);
db.SaveChanges();
Blogs.ItemsSource = db.Blogs.ToList();
}
}
}
|
You can now run the application to see it in action.
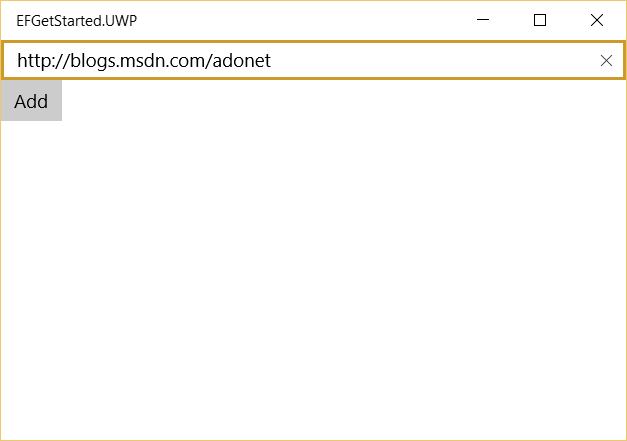
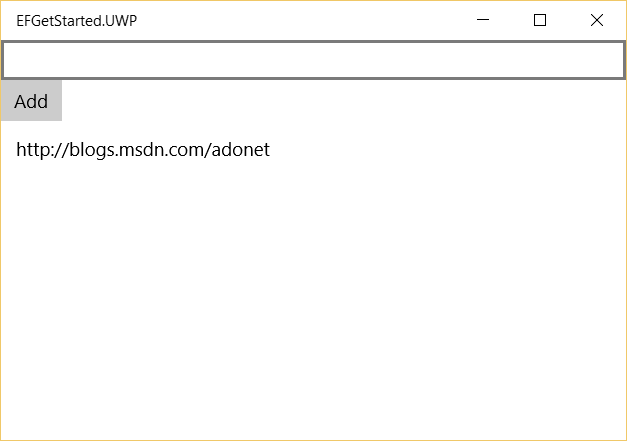
- The application will build and launch
- Enter a URL and click the Add button
Next steps
Tada! You now have a simple UWP app running Entity Framework.
Check out the numerous articles in this documentation to learn more about Entity Framework’s features.