| Creating a New Project with Gtkmm Support | ||
|---|---|---|
|
|
Appendix J. Using gtkmm with Visual Studio 2005 | |
| Creating a New Project with Gtkmm Support | ||
|---|---|---|
|
|
Appendix J. Using gtkmm with Visual Studio 2005 | |
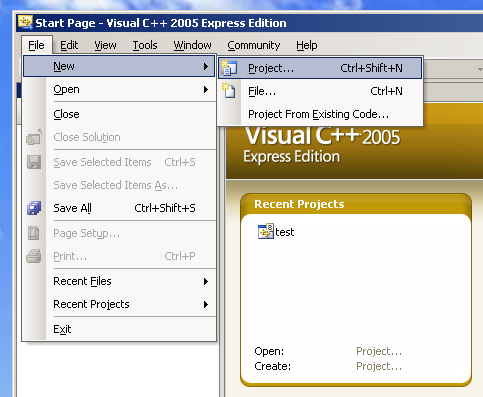
First, create a new project in Visual Studio by Selecting New
Project in the File menu as shown in Figure J.1, “Selecting New Project from the menu.”. From the New
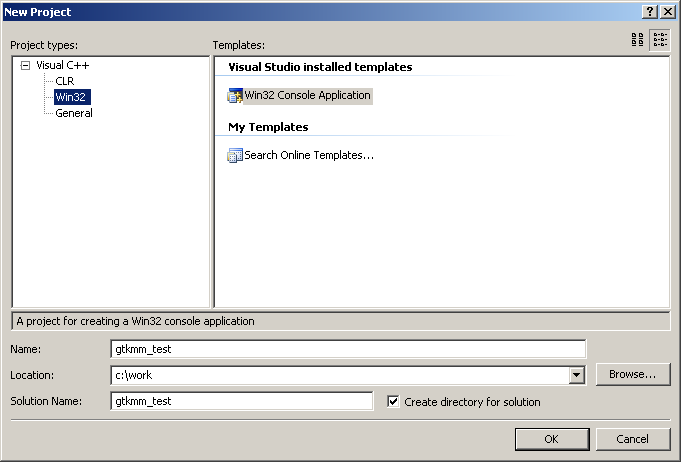
Project window, make sure to select Win32 and
Console Application as shown in Figure J.2, “Selecting Win32 Console Application.”. Also, give your project a name
and a location. For this example, the name of the project is
gtkmm_test and the location is
C:\work.
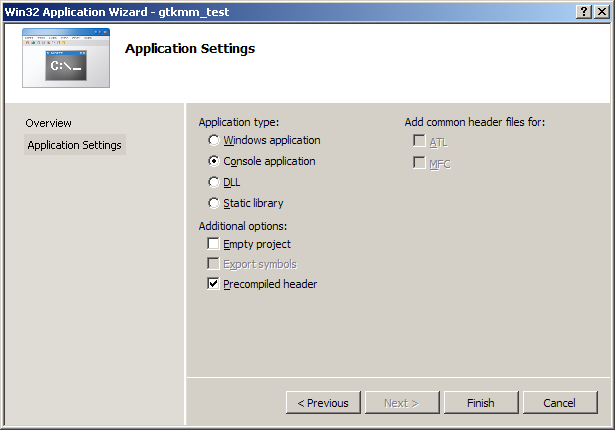
Clicking Finish will create for you a new native Win32
console project. Now we need to modify this project to use Gtkmm.
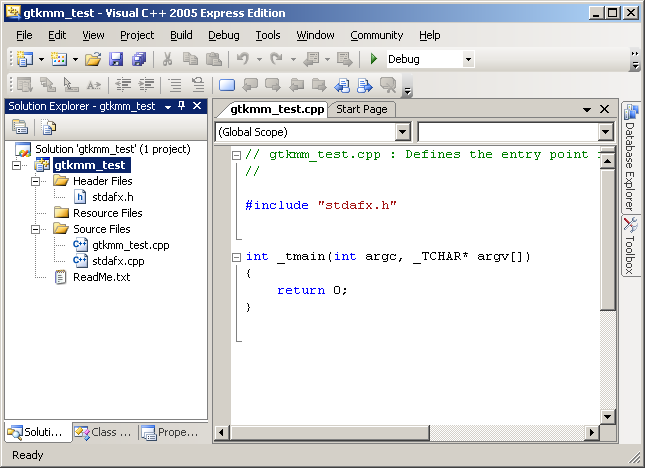
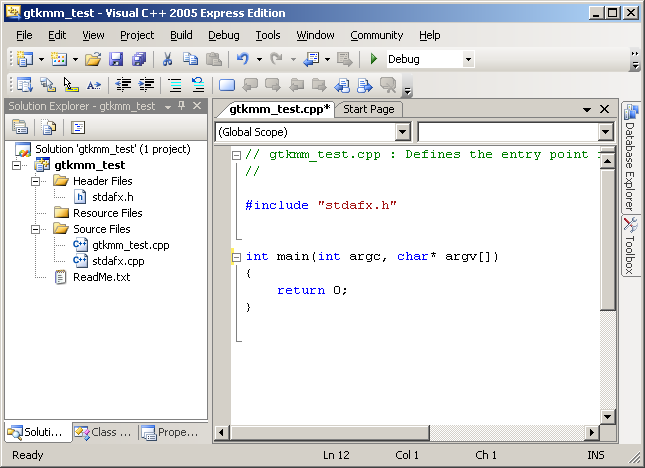
The first order of business for this new project is to correct the
main() function. Visual Studio wants to use a translated
main function called _tmain(). This is fine, but will
give you a non-portable project, and one of the goals of gtkmm is to
provide a framework for portable applications. That being said, remove
_tmain() and replace it with good old fashioned
main(), just like mom used to make.
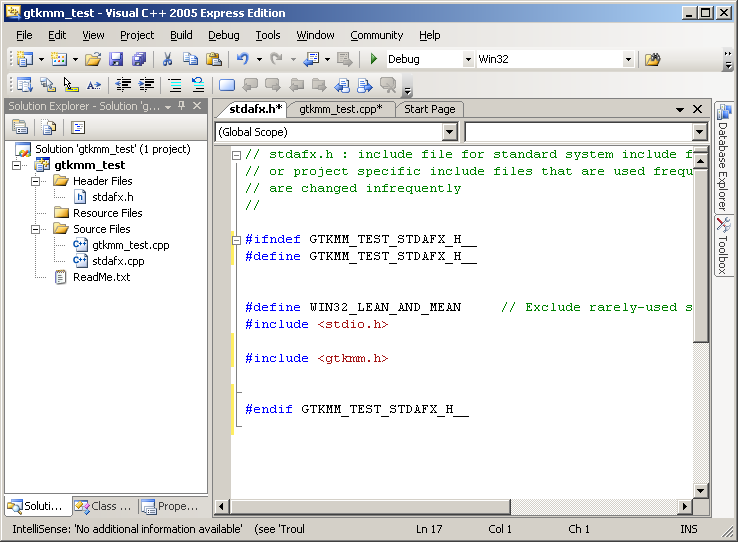
The next thing to alter is the stdafx.h precompiled
header file. At the time of this writing, many Windows programmers are
familiar with the concept of precompiled headers. However, many Unix
programmers are not, as precompiled header support was only recently added
to GCC (in version 3.4) and is still not used in most open source projects.
Unix programmers may be tempted to just disable precompiled headers
altogether, but think carefully before doing this. Proper use of precompiled
headers provides a much improved compile time when using gtkmm, and will
save you many hours over the course of a project.
Figure J.6, “Corrected stdafx.h header file.” shows how to change the default stdafx.h to be more portable, and also shows the include line for the gtkmm.h header file. The portability changes include removing the #pragma once line and replacing it with a standard #ifdef include guard as well as removing the tchar.h include. It is advisable to put all of your gtkmm related headers (e.g.: libglademm.h, libxml++, etc.) in this file as opposed to other files as this will greatly speed up the compilation of your project.
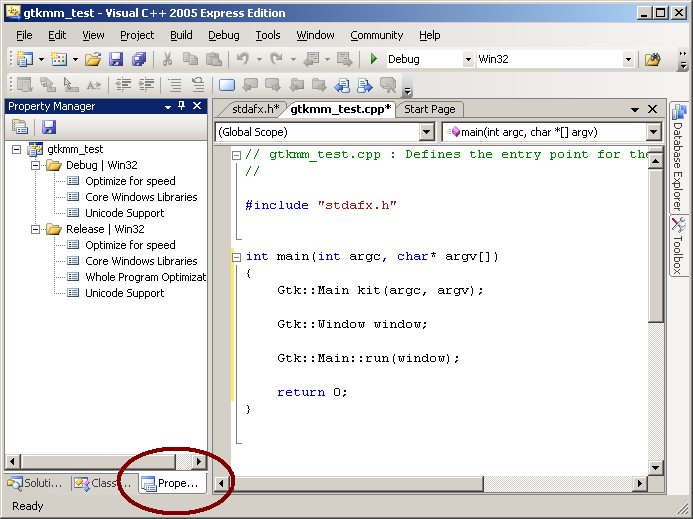
Next, add the contents of a simple gtkmm program to the
main() function. The example shown in the figure below is
the one from Chapter 3, Basics
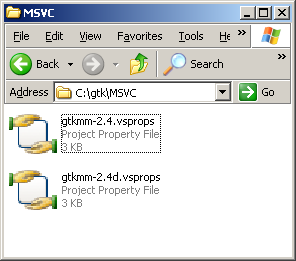
The next step is to add the MSVC Property files which come with the gtkmm
distribution. As of the 2005 version, Visual Studio supports the use of
property files for adding settings to a project. Property files can contain
build settings of all kinds (e.g.: defines, include paths, link paths, and
libraries) and make it easy to build against 3rd party packages. When a
property file is added to a project, the project inherits all the build
settings which the property file specifies. To keep your project portable
(portable in the relative path vs. fixed path sense), you will want to copy
the property files from the gtkmm distribution (commonly
C:\Gtk\MSVC\) to the directory which contains your
project (in our case C:\work\gtkmm_test\).
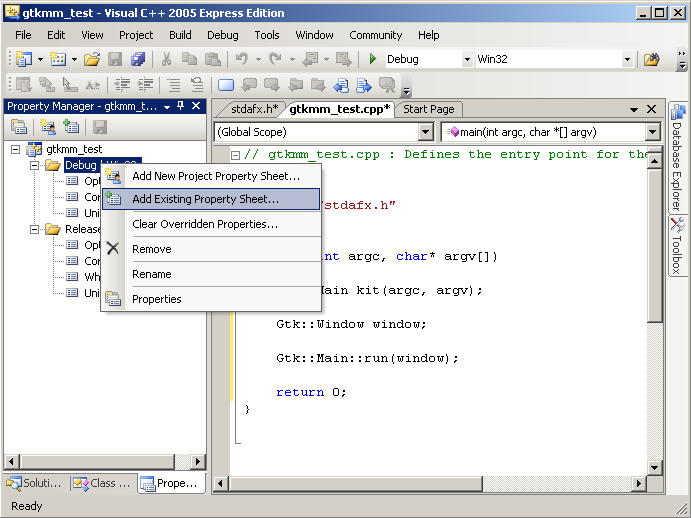
Next, add the property files to your project. Do this by clicking the
Property Manager tab of your Solution explorer as
indicated in Figure J.9, “Property Manager (left) with Property Manager tab circled.”.
Right-Click on the Debug | Win32 folder and select
Add Existing Property Sheet. From the file browser,
select the file gtkmm-2.4.
Next, Right-Click on the d.vspropsRelease | Win32 folder and again
select Add Existing Property Sheet. From the file
browser, this time select the file gtkmm-2.4.vsprops.
When you are done, the Property Manager should look like the one in Figure J.11, “Property manager with gtkmm property files added.”.
At this point we're almost done. The last part is to change a few settings
in the Project Properties page. The easiest way to get to
this page is to right-click on the project name in the Solution Explorer and
click the Properties menu item as shown in Figure J.12, “Opening the Project Properties.”.
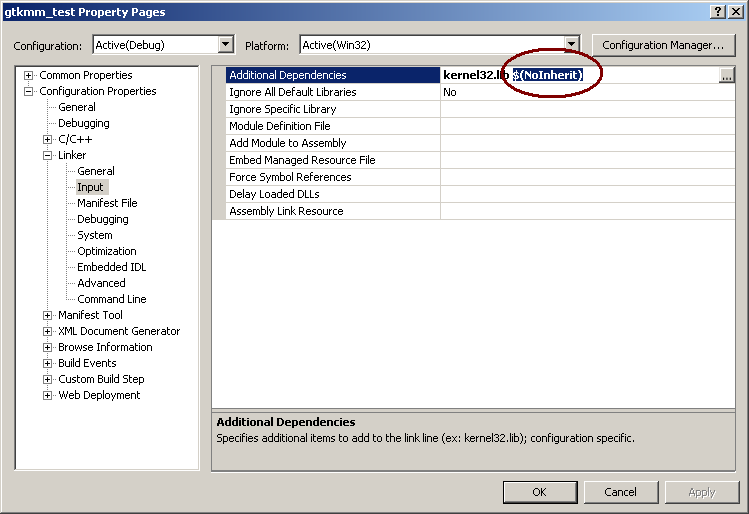
The first thing to do is remove the $(NoInherit) option
from the linker settings as shown in Figure J.13, “Removing the $(NoInherit) flag.”. Get to the linker page using
the tree on the left. Open Configuration Properties, then
Linker, then click on Input. Now
remove the $(NoInherit) token from the
Additional Dependencies line. Make sure to do this in
both Debug and Release modes.
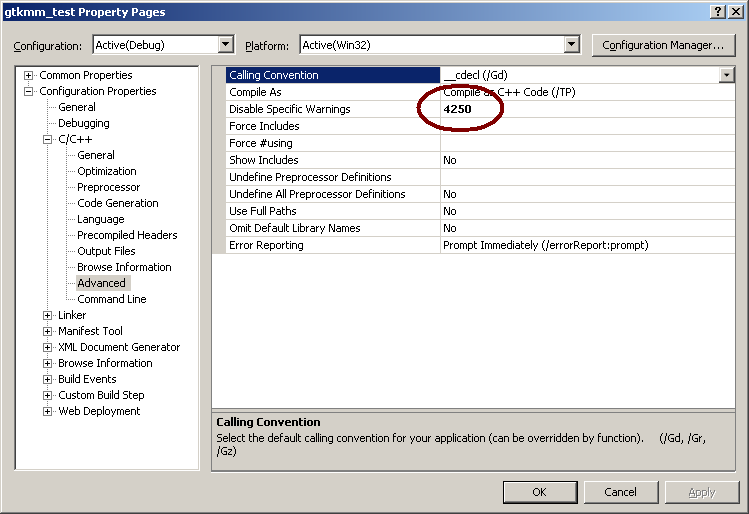
At this point your application will build and run. However, The gtkmm
headers will cause a harmless warning during the build. Fortunately, this
warning can be disabled from the same Project Settings dialog. In the tree
on the left of the dialog, open Configuration Properties,
then C/C++, then click Advanced. Now
type 4250 in the Disable Specific
Warnings field as shown in Figure J.14, “Disabling warning 4250.”. Make sure to make
this change in both Release and Debug
modes. Press Ok when done.
If you build and run your application now, you will see a simple Gtk+ window
appear with nothing on it. Your application will also pop up a console
window with it. The console window is quite valuable for debugging a gtkmm
application because many Gtk+ warnings will print to this console and
nowhere else (unlike the OutputDebugString() or
TRACE() functions which Windows programmers are familiar
with).
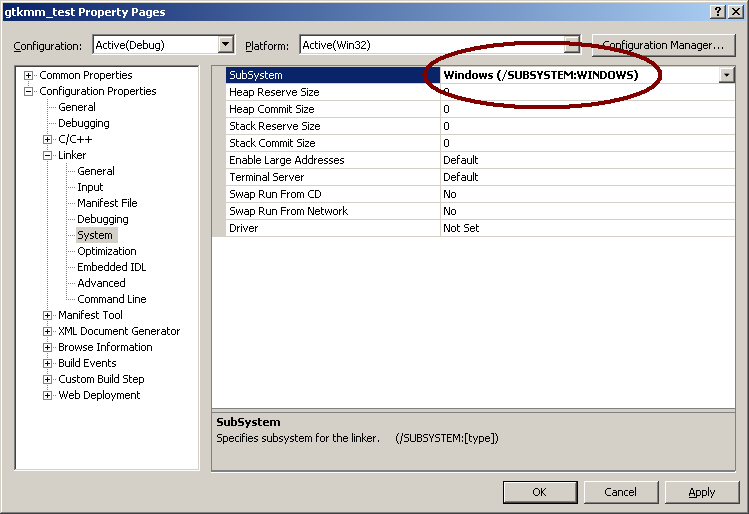
When you release your application however, you will probably want to have it
not pop up the console. This requires two small changes
to the linker settings. From the tree on the left of the properties page,
open Configuration Properties, then
Linker, then System. Now change the
value of the Subsystem field from
CONSOLE to WINDOWS as shown in Figure J.15, “Setting the Subsystem to Windows to disable the console.”. This will disable
the creation of the console window when your app starts. When you do this,
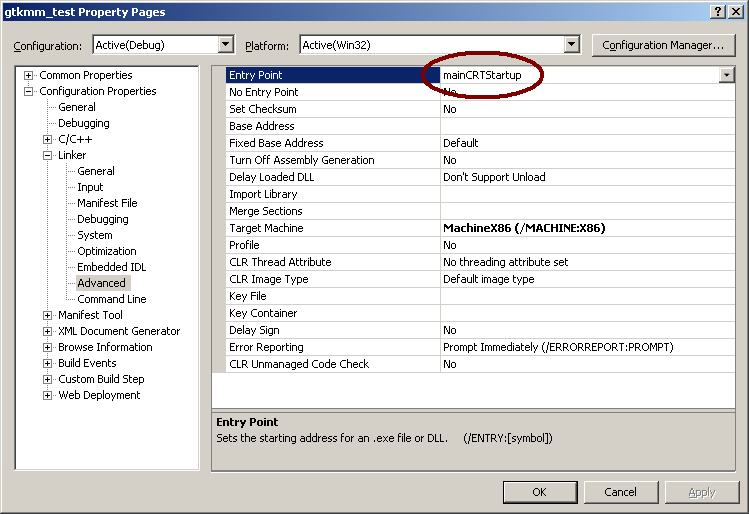
you also have to change the entry point of your application. From the tree
on the left, select Advanced then change the
Entry Point field to read
mainCRTStartup (make sure to use the proper case) as
shown in Figure J.16, “Setting the correct entry point symbol for Windows programs using main().”.
Some users have found it convenient to leave the console active in Debug
mode and disabled in Release mode. Others will want to have it the same in
both modes. It is completely up to the preference of the developer. Press
Ok when done.
That's all there is to it. After this initial setup, your gtkmm app can be edited, built, and run just like any other Visual Studio project.
|
|
||
| Installing gtkmm |