Put the IPCop CD in the IPCop PC's CD-ROM drive. If necessary, put the IPCop bootable floppy in the floppy drive. Press the reset button to start the boot sequence. If the IPCop PC does not boot, check the BIOS boot parameters.
Soon the boot up screen, below, will appear. If it does not appear, check that your monitor is connected to the video port on the target machine, is powered on and that you have booted from the CD or floppy drive.

This screen contains a warning that all your existing data will be destroyed.
At this point you may just press the Enter key, or enter one of the three installation options “nopcmcia”, “nousb” or “nousborpcmcia”. The installation options will restrict the devices that the IPCop installation process detects. Use these options only if the standard installation runs into trouble identifying PCMCIA or USB devices attached to the target machine. You may also eject the IPCop media and reboot to abort the installation.

During boot up many kernel informational messages will scroll by.
These can be ignored unless a hardware problem is detected. If an error is detected, the boot may stop.
After a few seconds, the language selection screen will appear.

At this time Afrikaans, Brazilian Portuguese, Czech, Danish, Dutch, English, Finnish, French, German, Greek, Hungarian, Italian, Norwegian, Polish, Portuguese, Slovak, Spanish, Spanish Latino, Swedish, Turkish, and Vietnamese are available.
Note: On this and all other installation screens, the mouse is ignored. To move the cursor around the screen, use the Tab key and the keyboard arrow keys. To select an item, press the Space key. To accept the language choice, press the Enter key.
From this point on, in the install, all dialogs, menus and web pages will appear in your chosen language.
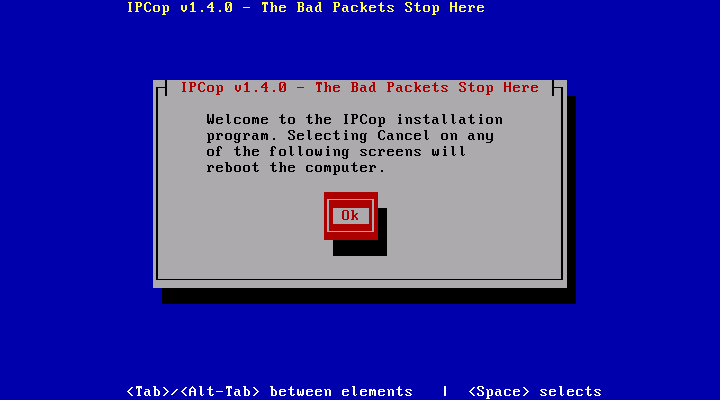
The next screen simply informs you of how to abort the installation. “Select the and press the Enter key.”
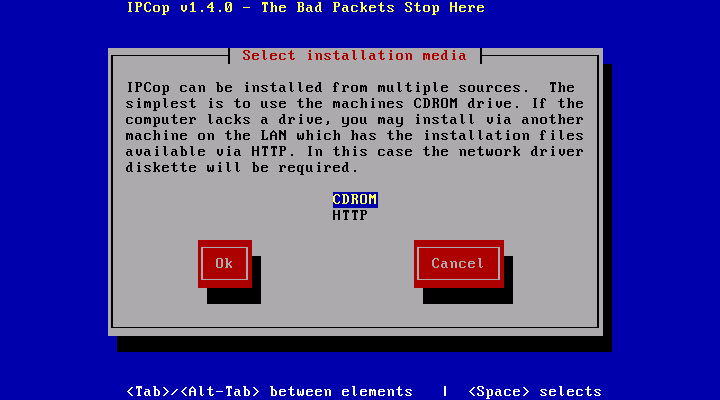
The next dialog box lets you choose the installation media. Since you are installing from CD-ROM, select it, tab to the button and press the Enter key.
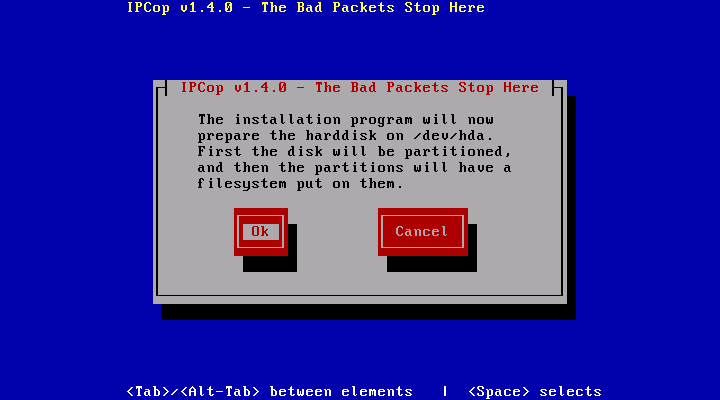
Your final warning appears next.
After you select and press Enter on this screen all of the data on your hard drive will be erased. To abort the installation, select and press the Enter key.

Next IPCop will format and partition your hard drive. Then it will install all its files.
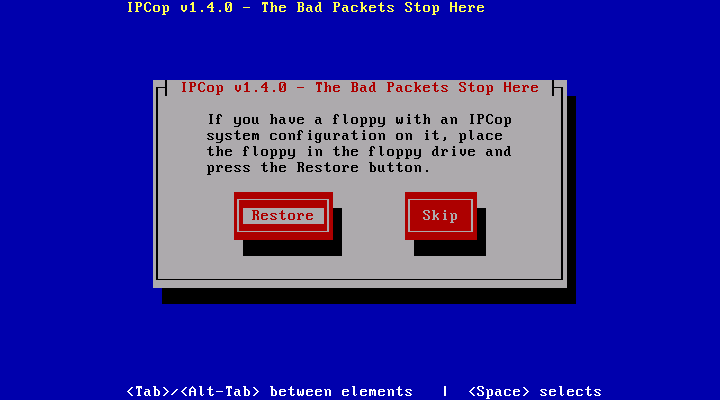
At this point, you have the option of restoring files from an IPCop backup floppy.
To do the restore, place the backup floppy in the floppy disk drive and select and press the Enter key. Otherwise, select and press the Enter key.
If you are upgrading from a 1.2.0 or later version of IPCop, insert an IPCop backup floppy in your floppy disk drive. This facility is also intended to recover damaged IPCop installations. In fact, after setting up IPCop to your satisfaction, using the web interface, take a backup. If there is a failure, reinstall IPCop using the procedure you used to do the initial installation, and during the install, insert the backup floppy disk, and respond to this prompt. IPCop configuration will be restored.
If you restore from floppy, you will not have to respond to any more dialogs. After the old configuration is restored, the install process will skip to the Installation Complete dialog, below.
Next IPCop will begin setting up your GREEN (local) network interface. You can allow IPCop to probe your network card, and automatically select driver parameters. Select the button and press Enter to have IPCop probe your hardware. Select the button and press Enter to manually select a NIC card or specify parameters information you collected from the manufacturer's driver floppy or the manufacturer's web page.

If you specify above, the following screen will appear:

Select your GREEN Ethernet NIC from the list.
If you select
the following screen will appear.
Enter the object module for the driver you require.
Each driver may require extra installation parameters.
Unfortunately, these are driver dependent.
The sample, below, is for a NE 2000 driver.
Like most ISA drivers, it needs both its IO address,
io=, and IRQ,
irq=, specified.

If you specify , above, the following screen will appear:
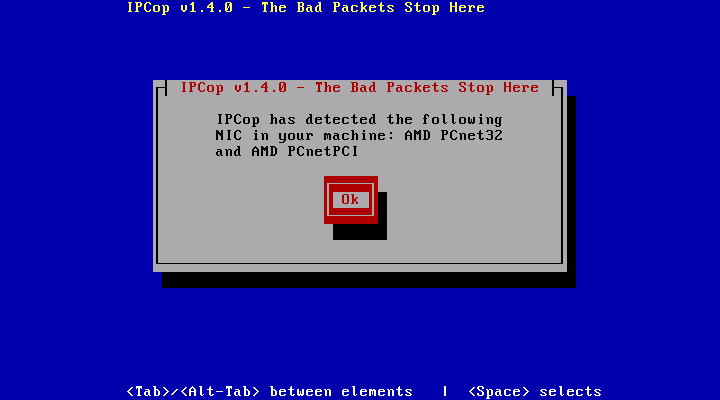
Your NIC card's manufacturer may not appear. IPCop identifies NICs based on the chip manufacturer, not the card manufacturer. This can be ignored.
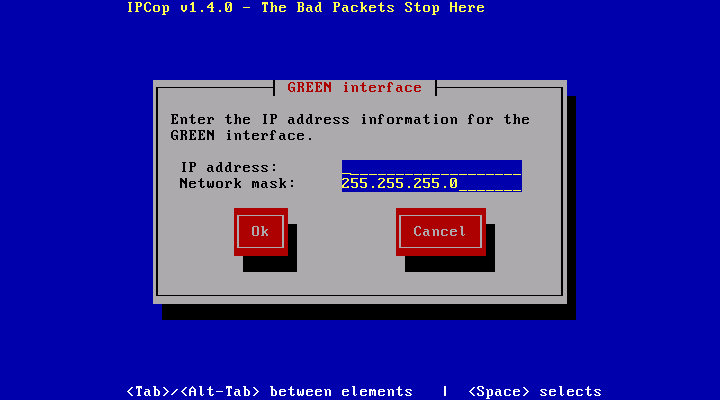
IPCop will now configure its internal network address, the GREEN interface.
This is an address on the network discussed in Decide On Your Local Network Address, above. Usually, this will be either GREEN address 1, i.e. 192.168.1.1; or GREEN address 254, i.e. 192.168.1.254. Although any address on your GREEN network will do. IPCop will automatically set your Network mask based on your IP address, but you can modify it if you need to.
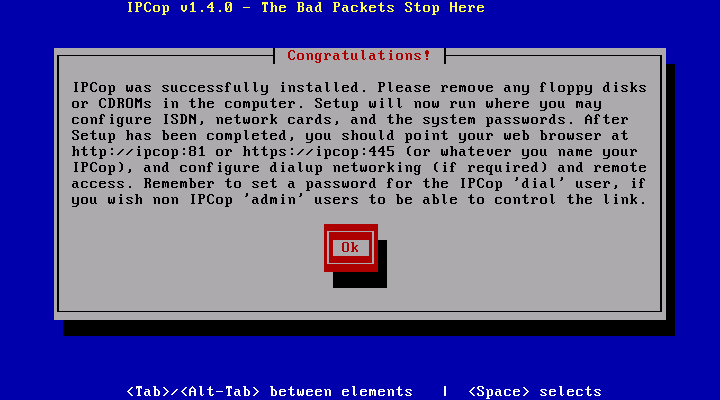
All of IPCop has now been installed on your hard drive. The following screen will appear. Remove the IPCop CD from your CD drive and, if present, the bootable floppy from the floppy drive. Select to continue.
IPCop will continue with the setup command automatically.
From this point on the Installation process is identical no matter which media was used for the initial boot. Please continue with the Initial Configuration Section, below.