The Available Panels
Go back to the documentation index
- HelloPanel
- CheckedHelloPanel
- InfoPanel and HTMLInfoPanel
- LicencePanel and HTMLLicencePanel
- PacksPanel
- ImgPacksPanel
- TreePacksPanel
- TargetPanel
- DefaultTargetPanel
- InstallPanel
- XInfoPanel
- FinishPanel
- SimpleFinishPanel
- ShortcutPanel
- UserInputPanel
- CompilePanel
- ProcessPanel
- JDKPathPanel
- SelectPrinterPanel
- DataCheckPanel
- SummaryPanel
- InstallationGroupPanel
- UserPathPanel
In this section I will introduce the various panels available in IzPack. The usage for most is pretty simple and described right here. The more elaborate ones are explained in more detail in the Advanced Features chapter or in their own chapter. The panels are listed by their class name. This is the name that must be used with the classname attribute. Please be aware that the classname is Case-Sensitive, meaning that if the case from the install.xml and the founded class file differs the installation will break. In this last case, the installer will Throw an IllegalArgumentException in the compiler if the declared class name in the xml file differs in case from the founded class file.
HelloPanel
This panel welcomes the user by displaying the project name, the version, the URL as well as the authors.
CheckedHelloPanel
This panel welcomes the user also by displaying the project name, the version, the URL as well as the authors.
Additonal on windows the registry will be scanned for an entry which determines that the product is already installed. If so, a dialog will be shown which ask whether to install a second version of the product or not. If you use this panel do not forget to add the registry feature into your installation.
InfoPanel and HTMLInfoPanel
This is a kind of 'README' panel. It presents text of any length. The text is specified by the (HTML)InfoPanel.info resource. Starting from IzPack 3.7.0, variables substitution is allowed. To add an image to the HTMLInfoPanel you simply need to add a ressource to your install.xml with an ID decided by you, then you can call this image by refering it by this same ID.
In install.xml:
<resources>
  <res src="logo.jpg" id="GHGHGH"/>
  .....
and in file.html:
<img src="GHGHGH" />
LicencePanel and HTMLLicencePanel
Note:* There is a mistake in the name - it should be LicensePanel. In France the word is Licence ... and one of my diploma is a 'Licence' so ...:* -)
Adding images to HTMLLicencePanel works exactly the same way as with HTMLInfoPanel.
These panels can prompt the user to acknowledge a license agreement. They block unless the user selects the 'agree' option. To specify the license agreement text you have to use the `` (HTML)LicencePanel.licence`` resource.
PacksPanel
Allows the user to select the packs he wants to install. This panel also allows grouping of packs. Look at InstallationGroupPanel description to get more details.
ImgPacksPanel
This is the same as above, but for each pack a different picture is shown to the user. The pictures are specified using the packImgId attribute for each pack in the installer XML. The initial image will be the image of the first pack that has a packImgId. The image is updated each time the user (de)selects a pack that has a packImgId. Of course it's up to you to specify an image for each pack in your installation with a unique packImgId. For instance if you have 2 packs core and documentation (in this order), and you assign both packs a packImgId that is identical to the pack's name then the resource for core will be core and the resource for documentation will be documentation. The initially shown image will be the resource core. The supported image formats depend on what your client's JVM supports, but starting from J2SE 1.3, GIF, JPEG and PNG are supported.
TreePacksPanel
This panel is very similar to PacksPanel, but instead of simple list of available packs, the tree-like list is constructed. By using the parent attribute of pack element, one can specify the hierarchy of the tree. This panel supports grouping just like PacksPanel does.
example
<installation version="1.0">
   (...)
    <panels>
        (...)
        <panel classname="TreePacksPanel"/>
        (...)
    </panels>

    <packs>
        <pack name="Base"
            required="yes">
            (...)
        </pack>
        <pack name="Themes"
            required="no">
            (...)
        </pack>
        <pack name="Black"
            parent="Themes"
            required="no">
            (...)
        </pack>
        <pack name="Red"
            parent="Themes"
            required="no">
            (...)
        </pack>
    </packs>
</installation>
The result tree contains Base element with no children, and Themes with two children named Black and Red.
TargetPanel
This panel allows the user to select the installation path. It can be customized with the following resources (they are text files containing the path) :
- TargetPanel.dir.f where f stands for the family (mac, macosx, windows, unix)
- TargetPanel.dir : the directory name, instead of the software to install name
- TargetPanel.dir.d where d is a "dynamic" name, as returned by the JavaTM virtual machine. You should write the name in lowercase and replace the spaces with underscores. For instance, you might want a different setting for Solaris and GNU/Linux which are both Unix-like systems. The resources would be TargetPanel.dir.sunos, TargetPanel.dir.linux. You should have a Unix-resource in case it wouldn't work though.
DefaultTargetPanel
The default installation directory is specified as in the TargetPanel (using identical names (TargetPanel... not DefaultTargetPanel...), but will not allow the user to change the installation path. It can be used when software must be installed in a specific location.
InstallPanel
You should always have this one as it launches the installation process !
XInfoPanel
A panel showing text parsed by the variable substitutor. The text can be specified through the XInfoPanel.info resource. This panel can be useful when you have to show information after the installation process is completed (for instance if the text contains the target path).
FinishPanel
A ending panel, able to write automated installer information. For details see the chapter on 'Advanced Features'.
SimpleFinishPanel
Same as FinishPanel, but without the automated installer features. It is aimed at making the life easier for end-users who will never encounter the automated installer extra feature.
ShortcutPanel
This panel is used to create desktop shortcuts. For details on using the ShortcutPanel see the chapter 'Desktop Shortcuts'.
UserInputPanel
This panel allows you to prompt the user for data. What the user is prompted for is specified using an XML file which is included as a resource to the installer.
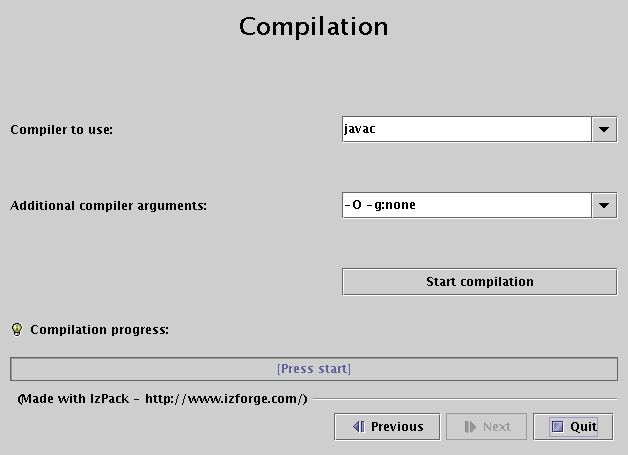
CompilePanel
This panel allows you to compile just installed Java sourcecode. The details for the compilation are specified using the resource CompilePanel.Spec.xml. The XML file has the following format:
<compilation>
  <global>
    <compiler>
      <choice value="$JAVA_HOME/bin/javac" />
      <choice value="jikes" />
    </compiler>
    <arguments>
      <choice value="-O -g:none" />
      <choice value="-O" />
      <choice value="-g" />
      <choice value="" />
    </arguments>
  </global>
  <jobs>
    <classpath add="$INSTALL_PATH/src/classes/" />
    <job name="optional name">
      <directory name="$INSTALL_PATH/src/classes/xyz" />
    </job>
    <job name="another job">
      <packdepency name="some package name" />
      <classpath sub="$INSTALL_PATH/" />
      <directory name="$INSTALL_PATH/src/classes/abc" />
      <file name="$INSTALL_PATH/some/file.java" />
    </job>
  </jobs>
</compilation>
In theory, jobs can be nested but this has not been tested at all. A change to the classpath within a job only affects this job and nested jobs. The classpath should be specified before any files or directories.
The user can change the compiler to use and choose from some default compilation options before compilation is started.
ProcessPanel
This panel allows you to execute arbitrary files after installation. The details for the compilation are specified using the resource ProcessPanel.Spec.xml.
The XML file has the following format:
<processing>
  <job name="do xyz">
    <os family="windows" />
    <executefile name="$INSTALL_PATH/scripts/xyz.bat">
      <arg>doit</arg><arg>$variable</arg>
    </executefile>
  </job>
  <job name="do xyz">
    <os family="unix" />
    <executefile name="$INSTALL_PATH/scripts/xyz.sh">
      <arg>doit</arg><arg>$variable</arg>
    </executefile>
  </job>
</processing>
Each job may have an <os> attribute.
<executeclass> - Execute Java Classes
It is also possible to execute Java classes from this panel. Here's what this feature author (Alex Bradley) says:
> i've been able to work around my requirements by extending the ProcessPanelWorker functionality to run user-specified classes. i've extended the DTD of the `` ProcessPanel.Spec.xml`` to include a new element:
<executeclass name="classname">
<args..../>
</executeclass>
> i've also added a new sub-class of Processable called executeclass. This will run a user-specified class in the context of the installer JVM with a single method :
run( AbstractUIProcessHandler handler, String[] args]);
> It can do everything i need and more. In particular, it allows me to write a process extension and still be able to provide feedback to the user through the feedback panel, and to add new functionality to the installer, after its been built.
To use the executeclass facility, you will need to create a jar file with your class and then add it to the installer with the The Jar Merging Element.
<executeForPack> - Only execute the job for certain packs
This can be be used to run the job only if the pack is enabled. For example, the batch file will if either the Sources or Executables packs are selected at install time.
<processing>
 <job name="List files">
  <executeForPack name="Sources"/>
  <executeForPack name="Executables"/>
  <os family="windows" />
  <executefile name="$INSTALL_PATH\batch\ListFiles.bat" />
 </job>
</processing>
<logfiledir> - Output of the processPanel saved to a log
New with version 3.7 is the possibility to tee output that is written to the ProcessPanel's textarea into an optional logfile. Using this feature is pretty much straightforward, you only have to add a line in ProcessPanel.Spec.xml that will tell IzPack the location, where the logfile should be stored.
Variable substitution is performed, so you can use $INSTALL_PATH as example.
The name of the logfile is not (yet) configurable but should fit in most cases. It will be named
Install_V<$APP_VER>_<YYYY>-<MM>-<DD>_<hh>-<mm>-<ss>_<RandomId>.log
Here's an example:
<processing>
  <logfiledir>$INSTALL_PATH</logfiledir>
  <job name="do xyz">
    <os family="windows" />
    <executefile name="$INSTALL_PATH/scripts/xyz.bat">
      <arg>doit</arg><arg>$variable</arg>
    </executefile>
</processing>
This will generate a logfile named e.g. Install_V1.3_2004-11-08_19-22-20_43423.log located in $INSTALL_PATH.
ProcessPanelWorker will write all output that is directed to stdout and stderr to this file if ProcessPanel.Spec.xml contains the logfiledir entry.
Please note that this one file is used for storing the complete output of all jobs and not a file for each job that is run.
JDKPathPanel
This panel allows the user to select a JDK path. The variable JAVA_HOME does not point to a JDK, else to a JRE also the environment variable points to a JDK. This is not a bug, this is the behavior of the VM. But some products needs a JDK, for that this panel can be used. There is not only a selection of the path else a validation. The validation will be done with the file JDKPath/lib/tools.jar. If JAVA_HOME points to the VM which is placed in the JDK, the directory will be used as default (JAVA_HOME/..). If there is the variable
JDKPathPanel.skipIfValid
defined with the value "yes", the panel will be skiped if the path is valid. Additional it is possible to make a version control. If one or both variables
JDKPathPanel.minVersion
JDKPathPanel.maxVersion
are defined, only a JDK will be accepted which has a version in the range of it. The detection is a little bit pragmatically, therefor it is possible, that the detection can fail at some VMs. The values in the install.xml should be like
<variables>
  <variable name="JDKPathPanel.minVersion" value="1.4.1" />
  <variable name="JDKPathPanel.maxVersion" value="1.4.99" />
  <variable name="JDKPathPanel.skipIfValid" value="yes" />
</variables>
If all is valid, the panels isValidated method sets the variable
JDKPath
to the chosen path. Be aware, this variable exist not until the JDKPanel was quitted once. At a secound activation, the default will be the last selection.
SelectPrinterPanel
This panel will look at the local printers installed and propose a list box with all of them. Once chosen, the variable $SELECTED_PRINTER is set to the user choice.
DataCheckPanel
DataCheckPanel is not for inclusion in an actuall install, but is a debugging resource for developers writing custom panels or code to be included in IzPack. It creates a list of all the variables in InstallData, their values and a list of all packs, indicating which are selected. This list is printed to the console and appears in a scrollable text area on the panel. Put the panel in wherever you want to see any variables in InstallData or a listing of the packs with a line like this in the <panels> section of install.xml:
<panel classname="DataCheckPanel" />
It will automatically give you a full list of all the variables and packs whenever the panel is made active.
SummaryPanel
This panel gives a summary of all shown panels. The best place for it is just infront of the InstallPanel. Normaly it contains a warning that this is the last panel before installation. The panel contains a scrollable HTML text area to display the summary. The informations are collected from each panel by calling the methods getSummaryCaption and getSummaryBody. getSummaryCaption is implemented in IzPanel with a panel name default text. getSummaryBody has to be implemented in all panels which should be presented in the summary. If the secound method is not implemented, no summary of this panel will be shown.
Additional it is possible to log the contents of the summary panel into a HTML file.
InstallationGroupPanel
This Panel groups the pack together. A panel which displays the available installGroups found on the packs to allow the user to select a subset of the packs based on the pack installGroups attribute. This panel will be skipped if there are no pack elements with an installGroups attribute. For example
<installation version="1.0">
   (...)
    <panels>
        (...)
        <panel classname="InstallationGroupPanel"/>
        <panel classname="PacksPanel"/>
        (...)
    </panels>

    <packs>
        <pack name="Base"
            installGroups="Group1"
            required="yes">
            (...)
        </pack>
        <pack name="Docs"
            installGroups="Group1,Group2"
            required="no">
            (...)
        </pack>
        <pack name="Sources"
            installGroups="Group3,Group2"
            required="no">
            (...)
        </pack>
    </packs>
</installation>
In above example when InstallationGroupPanel is displayed, it contains three radios named Group1, Group2 and Group3. Depending on what user selects, the respective Packs will be displayed in PacksPanel. InstallationGroupPanel will look for a description corresponding to the key "InstallationGroupPanel.description.Group1", "InstallationGroupPanel.description.Group2" etc in installation langpacks and variables and displays this description for each of the Group_i.
You may also define a sortKey in the variables section of the installer.xml to define an alternative sorting. The default sorting is based on the Group Name.
Here is an example for alternative sorting of groups:
(...)
<variables>
   (...)
    <variable
    name="InstallationGroupPanel.sortKey.Group2" value="A"/>
    <variable
    name="InstallationGroupPanel.sortKey.Group1" value="B"/>
    <variable
    name="InstallationGroupPanel.sortKey.Group3" value="C"/>
</variables>
(...)
By default, your group name (and description) are displayed as-is in the installer. If you want them to be localized, add localized names to your packsLang.xml resources. The string ID has to be InstallationGroupPanel.group.```group_name``.
Here is an example to localize groups into French (these lines have to be put in your packsLang.xml_fra resource) :
<str id="InstallationGroupPanel.group.Core" txt="Noyau de l'application" />
<str id="InstallationGroupPanel.description.Core" txt="Fichiers principaux, indispensables au fonctionnement de l'application" />
<str id="InstallationGroupPanel.group.Samples" txt="Fichiers d'exemple" />
<str id="InstallationGroupPanel.description.Samples" txt="Fichiers d'exemples" />
If you want to add html markup to those strings, add .html at the end of the string id (after the group name).
UserPathPanel
This panel allows the user to select a path similar to the installation path. Like the installation path, this panel will allow the directory to be created if it does not already exist. It can also be pre-loaded with a path and set to only display if a certain pack is selected using the following variables:
<variable name="UserPathPanelVariable" value="@{default.dest.dir.sql}"/>
<variable name="UserPathPanelDependsName" value="Install Database Server"/>
Final path selection can be accessed using the variable "UserPathPanelVariable".
Messages for the UserPathPanel can be customized by creating a custom lang pack and overriding the following values (attribute values wrapped for readability):
<str id="UserPathPanel.required" txt="The chosen directory should exist."/>
<str id="UserPathPanel.info" txt="Select the path: "/>
<str id="UserPathPanel.browse" txt="Browse"/>
<str id="UserPathPanel.exists_warn" txt="The directory already exists!
            Are you sure you want to install here and possibly overwrite existing files?"/>
<str id="UserPathPanel.empty_target" txt="You have not specified a target
            location! Is this correct?"/>
<str id="UserPathPanel.createdir" txt="The target directory will be created: " />
<str id="UserPathPanel.nodir"  txt="This file is not a directory! Please
            choose a directory!"/>
<str id="UserPathPanel.notwritable" txt="This directory can not be written!
            Please choose another directory!"/>
Go back to the documentation index