JavaFX for Swing Developers
4 Leveraging Applications with Media Features
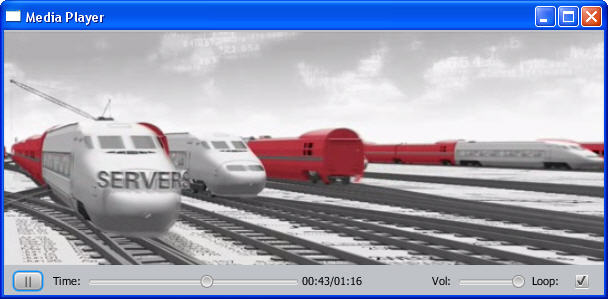
In this chapter you review a Media Player application that plays a video file and has controls typical for a video player such as a start/pause button, sliders to show playback progress and adjust volume, and a check box that turns repeat on.
For the purpose of this chapter, get familiar with the javafx.scene.media package that enables developers to create media applications.
About Media Integration
Any JavaFX media application can be built using the following key classes:
-
Mediaclass: Represents a media resource -
MediaPlayerclass: Provides the controls for playing the specified resource -
MediaViewclass: Provides a view of the media resource played by a MediaPlayer object
Because the MediaView class is a subclass of the Node class, the MediaView object can be added to a JavaFX scene. This is the principal factor that provides a foundation for integration of the JavaFX media functionality into desktop and web applications. Now that you know how to embed the JavaFX scene into Swing applications, you can further leverage your applications by integrating the Media Player component. You can animate the MediaView object, transform it, and apply effects to it, just as you can with any other node. In this way, you can support numerous creative tasks.
Building the Media Player Application
The Incorporating Media Assets Into JavaFX Applications document provides step-by-step instructions on how to create the EmbeddedMediaPlayer application. It also provides the Netbeans project source. Follow the detailed instructions to build the application or download the source project using the link on the sidebar.
The MediaPlayer application discussed in this chapter is based on the EmbeddedMediaPlayer application but is slightly improved as follows:
-
As a best programming practice, the application uses an external CSS file.
-
The control bar contains the
Loopcheck box to turn repeat on.
The application window is shown in Figure 4-1.
Figure 4-1 Media Player Application Window

Description of "Figure 4-1 Media Player Application Window"
You can modify the EmbeddeMediaPlayer project or save its copy with a different name and modify the new project.
Skinning the Application with CSS
To skin the application with CSS, first create the mediaplayer.css file and save it in the folder with the source files of your application. Add the style rules shown in Example 4-1.
Example 4-1
#mediaControl {
    -fx-background-color: #bfc2c7;
}
#mediaViewPane {
    -fx-background-color: black;;
}
Next, open the MediaControl.java file and remove from the MediaControl constructor the lines shown in Example 4-2.
Example 4-2
setStyle("-fx-background-color: #bfc2c7;");
mvPane.setStyle("-fx-background-color: black;");
Then modify the MediaControl constructor by adding the lines shown in bold in Example 4-3.
Adding a New Control to the Control Bar
Adding a new control to the control bar requires only a few steps. In the section where you define the MediaControl class instance variables, remove the definition of the repeat variable shown in Example 4-4.
In the MediaControl class, remove the code that used the repeat instance variable shown in Example 4-5.
Now add the class variable repeatBox as shown in Example 4-6.
Add a label and the check box to the control bar of your Media Player. Place the following code in the MediaControl constructor after the lines that added the volumeSlider to the bar, as shown in Example 4-7.
Example 4-7
mediaBar.getChildren().add(volumeSlider);

Label repeatLabel = new Label("  Loop: ");
repeatLabel.setPrefWidth(50);
repeatLabel.setMinWidth(25);
mediaBar.getChildren().add(repeatLabel);

repeatBox = new CheckBox();
repeatBox.setSelected(true);
mediaBar.getChildren().add(repeatBox);

setBottom(mediaBar);
Implement the logic of using the check box in the setOnEndOfMedia method, as shown in Example 4-8.
Example 4-8
mp.setOnEndOfMedia(new Runnable() {

    public void run() {
        if (repeatBox.isSelected()) {
            mp.seek(mp.getStartTime());
        } else {
            playButton.setText(">");
            stopRequested = true;
            atEndOfMedia = true;

        }
    }
});
You can view the source files and download the MediaPlayer.zip file with the NetBeans project.
To enable the Media Player access a remote media resource when running from behind a firewall, provide the proxy settings in the following format: -Dhttp.proxyHost=yourproxyhost.com -Dhttp.proxyPort=portNumber. In this example, yourproxyhost.com is your proxy and portNumber is a port number to use.
 Irina has written tutorials and technical articles on Java and JavaFX technologies. She lives in St. Petersburg, Russia. In her spare time, she enjoys swing dancing, playing piano, and reading.
