Each portlet in the portal page can be interacted with individually. Let's interact with a couple of portlets, and see the results. Click on the minimize icon on the "Greeting" portlet. The portlet is then minimized (Figure 5):
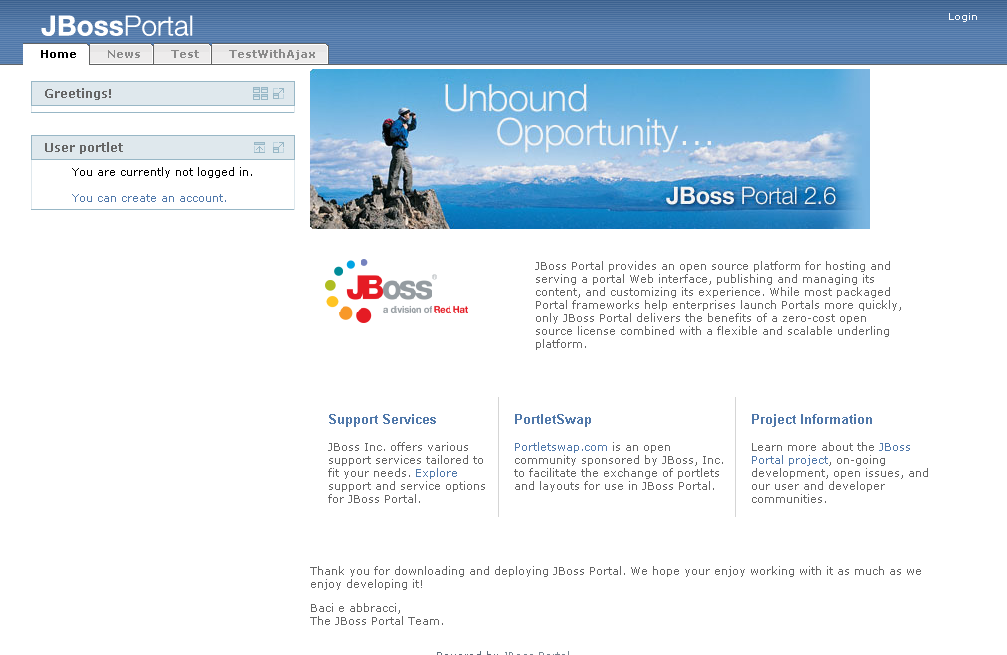 |
Figure 5. Default page with portlet minimized.
Click on the maximize button for that same portlet, and it now takes the entire page (Figure 6). Click on the "resize" icon to return the portlet to its starting size.
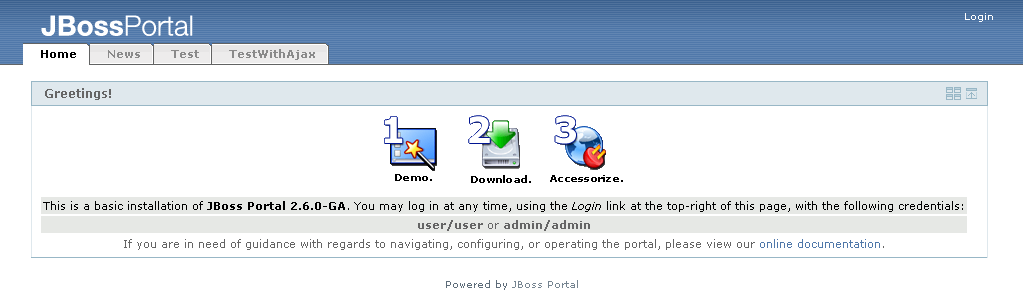 |
Figure 6. Portal with portlet maximized.
Let's create a user for the portal. Click on the "You can create an account." link in the user portlet. The create user view now shows in the user portlet. Enter the information as shown in Figure 7 (password is starter). Once you have clicked "New user registration" button, the default view will show (Figure 8).
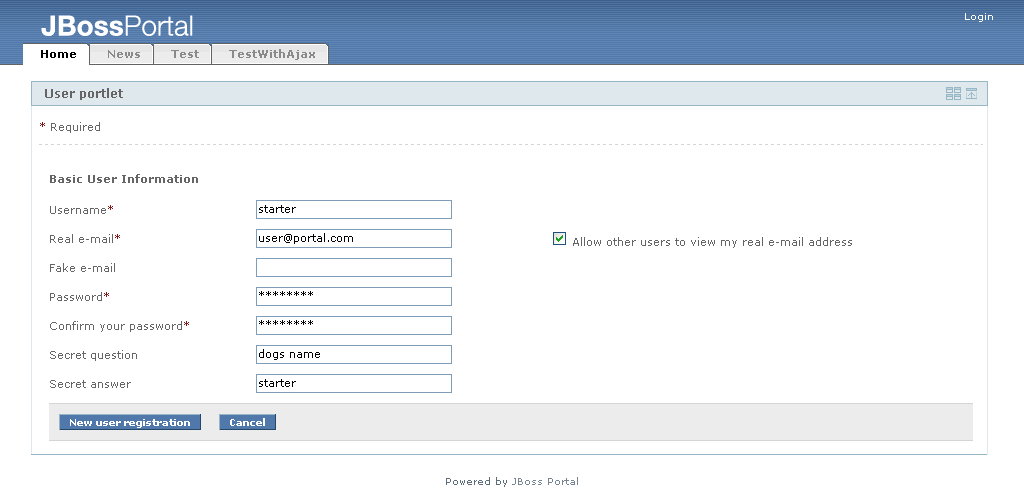 |
Figure 7. The Create user view in the user portlet.
 |
Figure 8. The default view after registering a new user.
This example models a user enrolling themselves in the portal security repository, and at this point the user could login and would have the default security role for the portal. Administrators can also control user administration from the Admin portion of the portal for more advanced user enrollment options. This will be covered in a later section.
Now, click "Login". The login page will show (Figure 9). Log in with username and password of "admin"
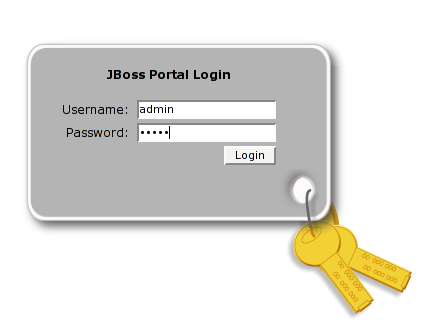 |
Figure 9. Portal login page.
Click "Login", and the portal will now show us a link to the Admin portal (top-right) (Figure 10).
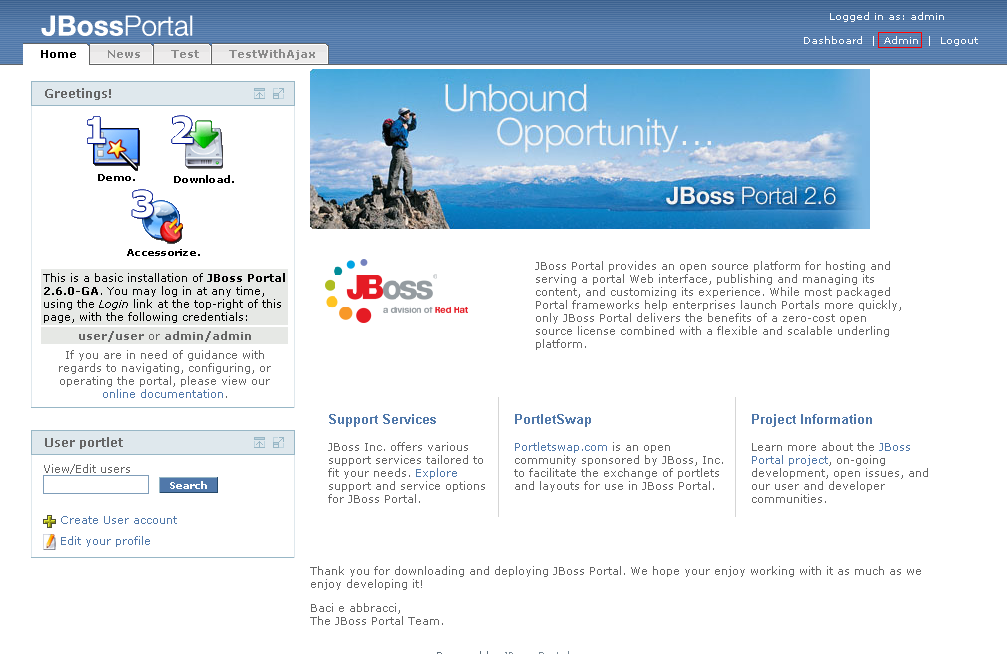 |
Figure 10. default portal page for administrator.
Now that we are logged in, there is a portal page available for the content management and portal administration. Click on the "Admin" link, and then on the "CMS" tab. The CMS Admin portal page displays (Figure 11).
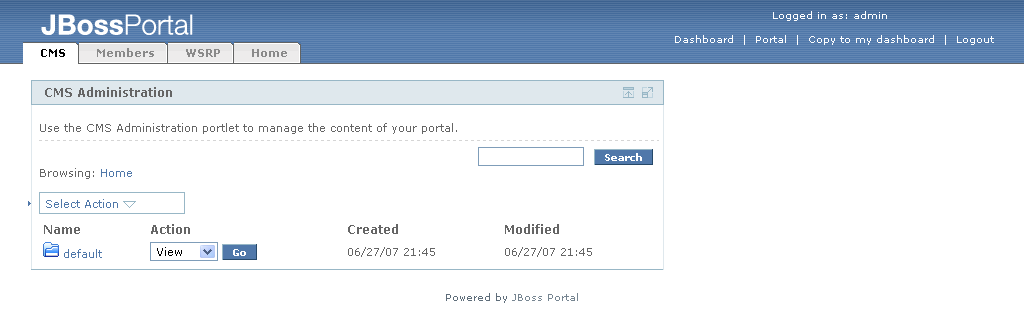 |
Figure 11. CMS Admin portal page.
The content management portlet allows users to create/delete files and folders, edit text/HTML files, and batch upload files. These files are then viewable through the content view portlet. HTML files can refer to other HTML files through the directory structure in the CMS. Different groups or departments in an organization can have their own area (directory structure) for the files/HTML pages they want to share on the Portal. Let's batch upload a set of HTML pages with images and style sheets. Mouse-over the "Select Action" dropdown menu, and click on the upload archive link. The upload archive view shows (Figure 12).
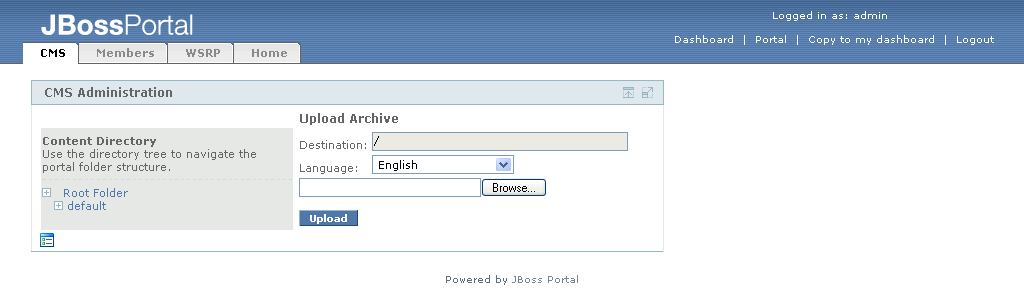 |
Figure 12. Upload Archive view.
Note
Please use the quickstart.zip for the batch upload. You may also download it from here .You can choose the destination folder for the upload by selecting a folder from the tree control on the left side of the portlet. Then you can select the language of the files being uploaded from the drop down list. Finally, click "Browse" to find the file you want to upload (Figure 13).
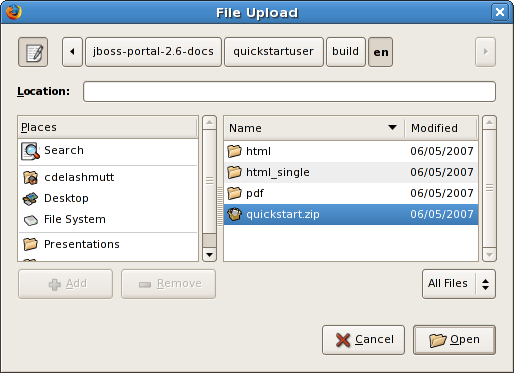 |
Figure 13. Choose file to batch upload.
Click on the quickstart.zip that you downloaded earlier (see note above) and select "Open". Finally, click the "Upload" button. The quickstart.zip file will be uploaded, extracted into the content repository, and the files and directories will now appear in the content management structure (see the new "quickstart" directory in Figure 14).
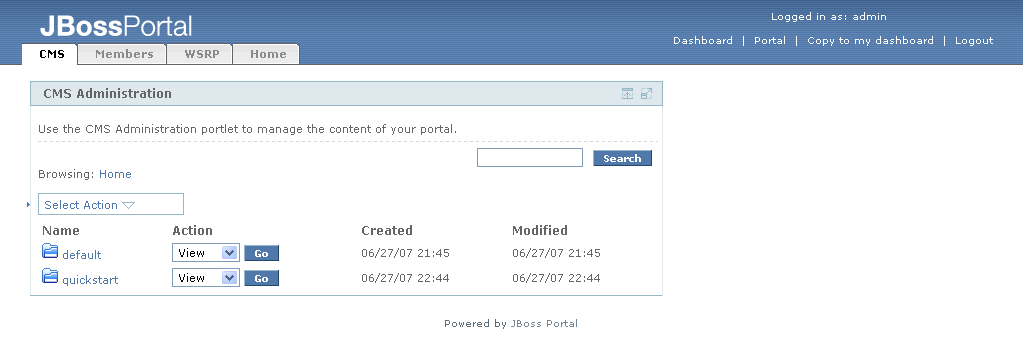 |
Figure 14. New quickstart directory shows in content management repository.
Click on the quickstart link to see the HTML files and sub-directories that were uploaded (Figure 15). Click on the "Home" link from the breadcrumbs at the top of the portlet to return to the top directory of the content manager repository (back to Figure 14).
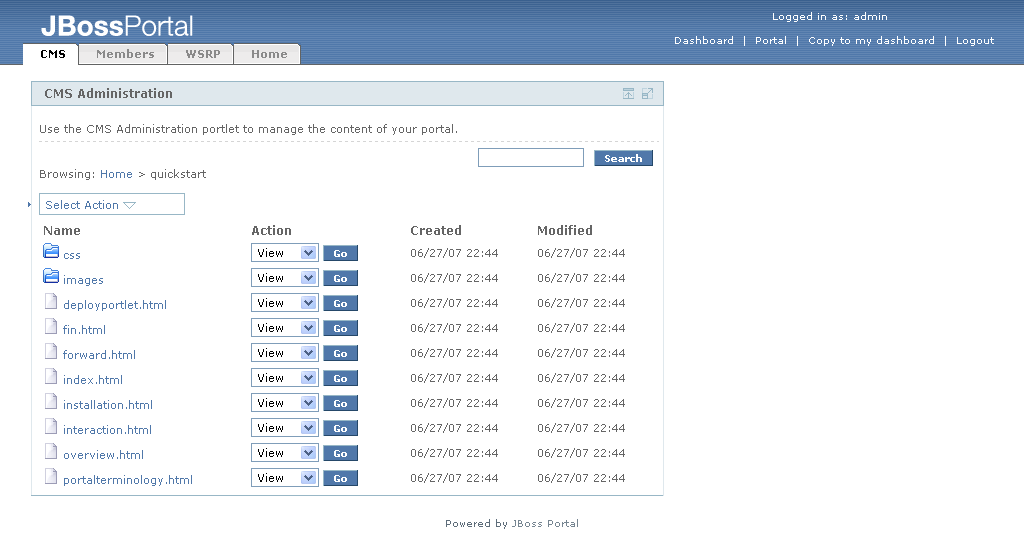 |
Figure 15. HTML files and sub-directories that were uploaded intoquickstart directory shows in content management repository.
Let's edit the default page to contain a link to our new pages. Clicking on the default link, we can see two directories, as well as three HTML files (Figure 16).
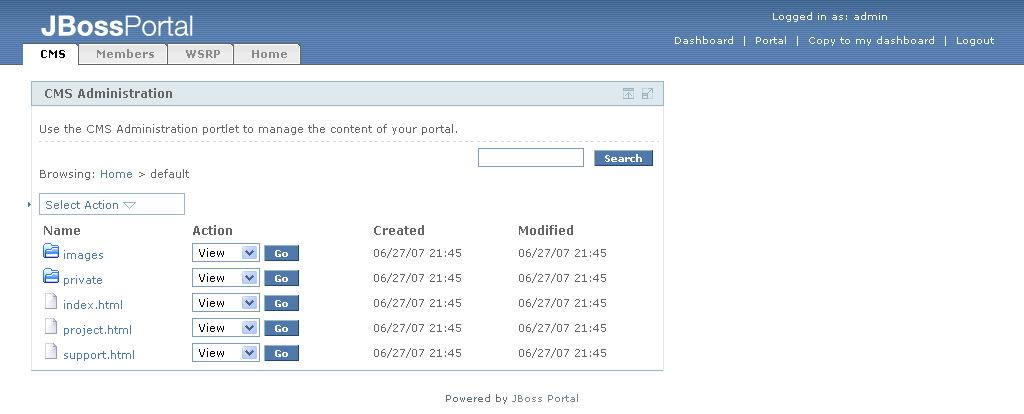 |
Figure 16. Default directory listing.
Click on the index.html link. The file browser will show the versions of this file (Figure 17).
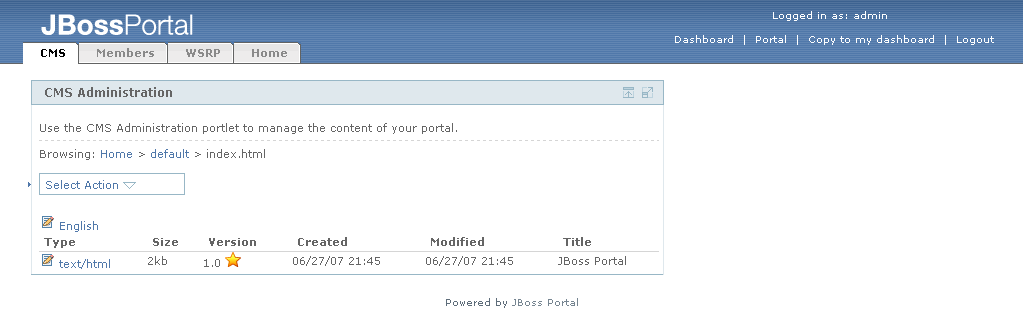 |
Figure 17. Version view for index.html.
To edit this HTML file, click on the "text/html" link. The WYSIWYG editor view will appear (Figures 18). Note: The WYSIWYG editor is dependent on browser. Some browsers show a box to enter HTML.
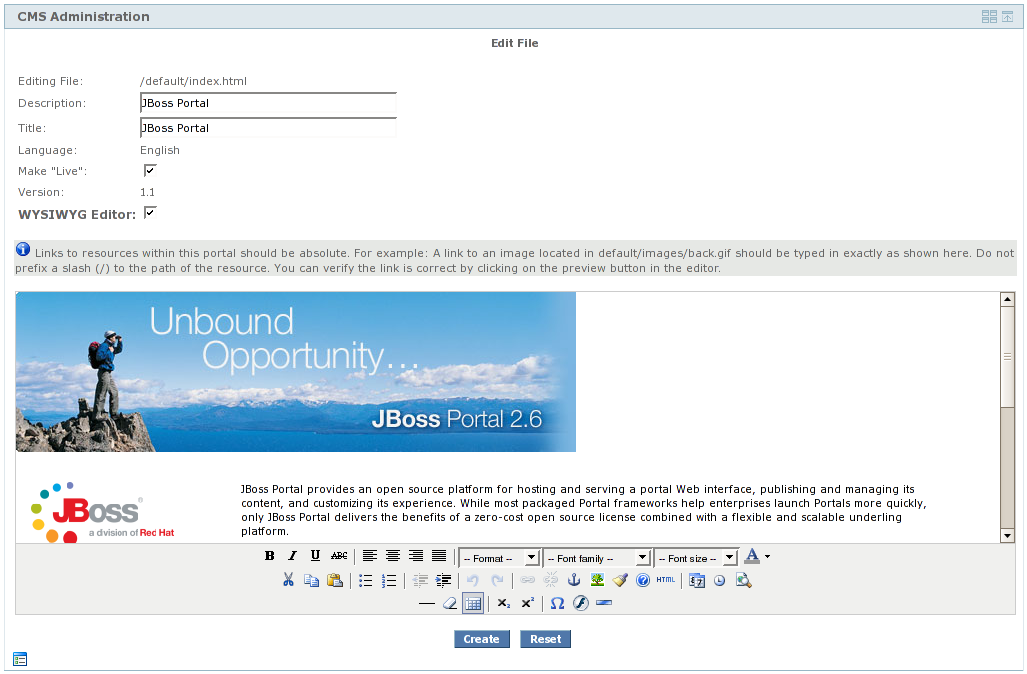 |
Figure 18. Content editor view.
HTML pages can be edited through this view. Let's change this page to point to our uploaded pages. Change the section title next to the PortletSwap table cell from "Project Information" to "Quickstart Guide" and change the text following the link below that to "to see the Quickstart guide for JBoss Portal.". The updated text is in Figure 19.
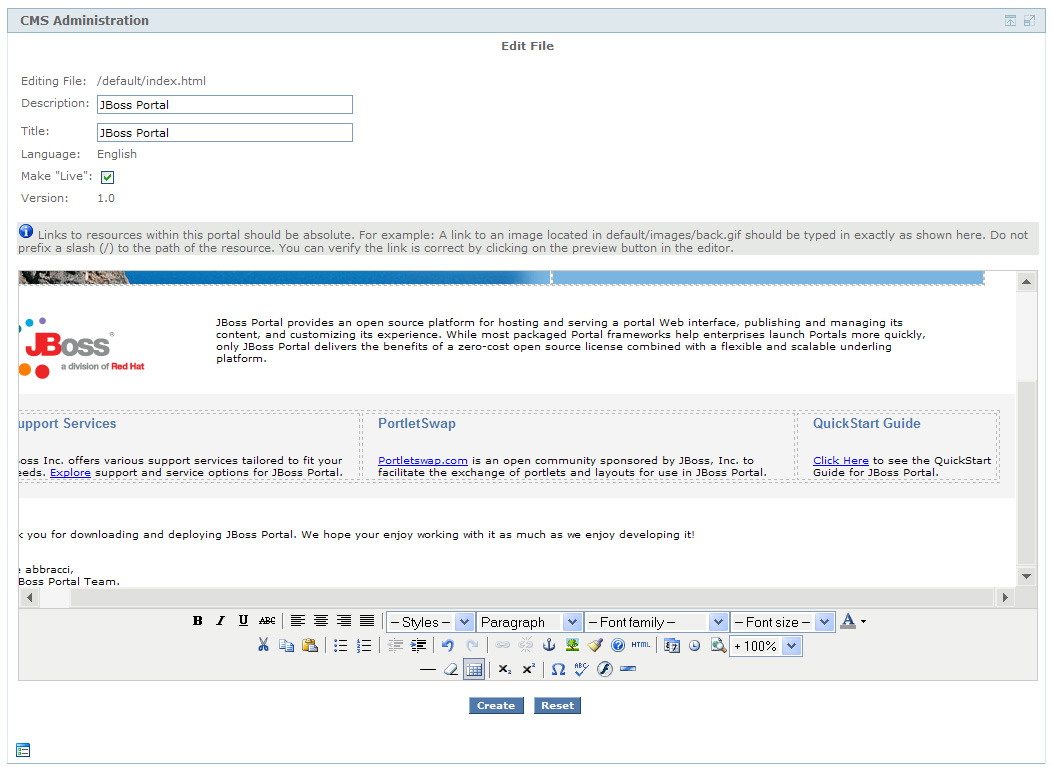 |
Figure 19. Updated text in HTML page.
Now let's update the link to point to the index.html page in the quickstart directory. Click on the "Click here" link under Portal Documentation, then on the edit link button (it looks like a chain). The insert/edit link window appears. Change the Link URL to "quickstart/index.html" (Figure 20).
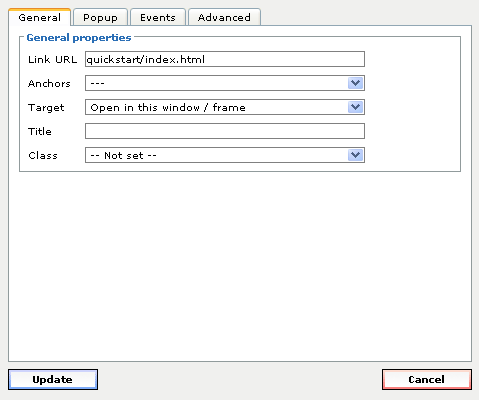 |
Figure 20. Insert/edit link window with updated link URL
Click "Update" button to save the updated link. Then click "Create" button at the bottom of the portlet window to create the new version of the HTML file. The CMS Administration view shows again with the new 1.1 version shown (Figure 21). The star icon next to the version number shows this is the live version.
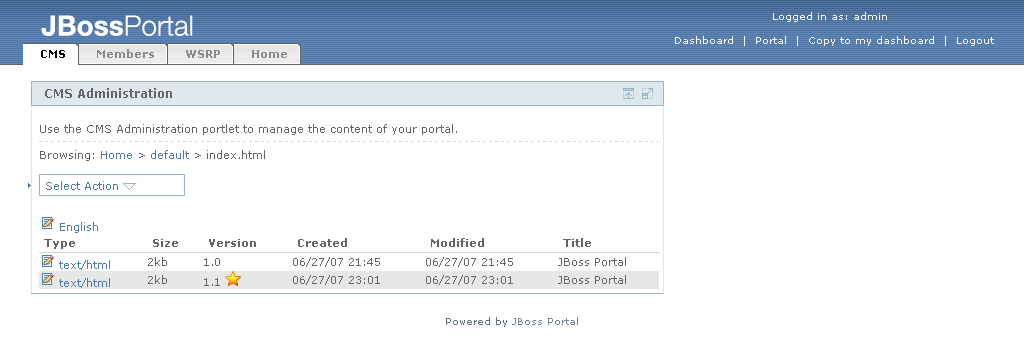 |
Figure 21. File browser with new version of index.html.
Click on the "Portal" link in the upper right corner of the browser page to see the changes we have made. The content view portlet shows the updated version of the index.html page we edited above (Figure 22).
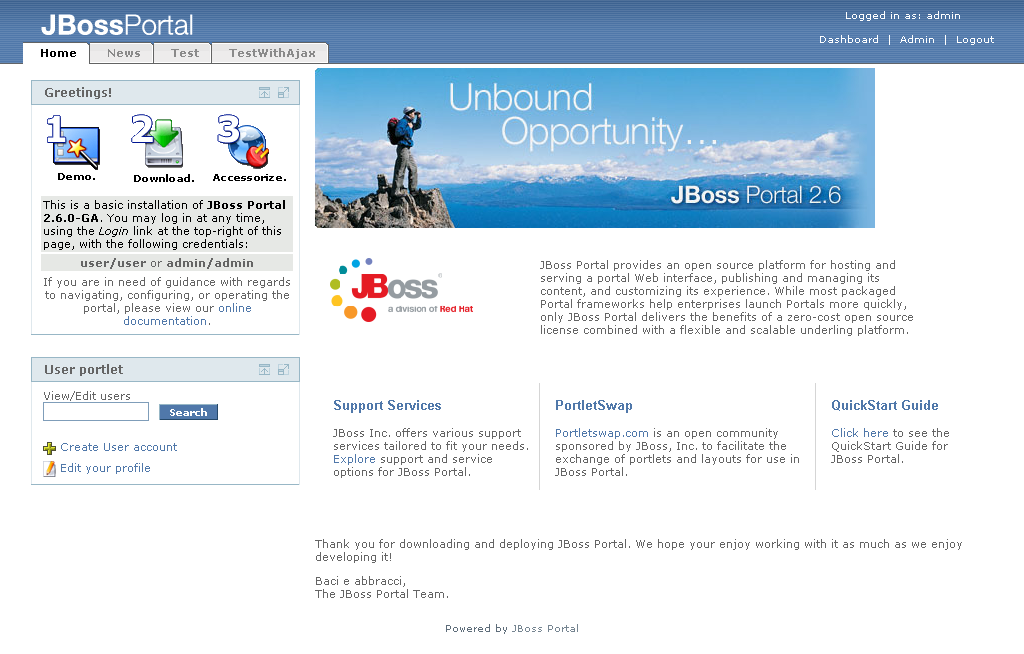 |
Figure 22. Content view portlet with the updated default page.
Click on the "Click here" link that was updated to go to the new uploaded content (Figure 23).
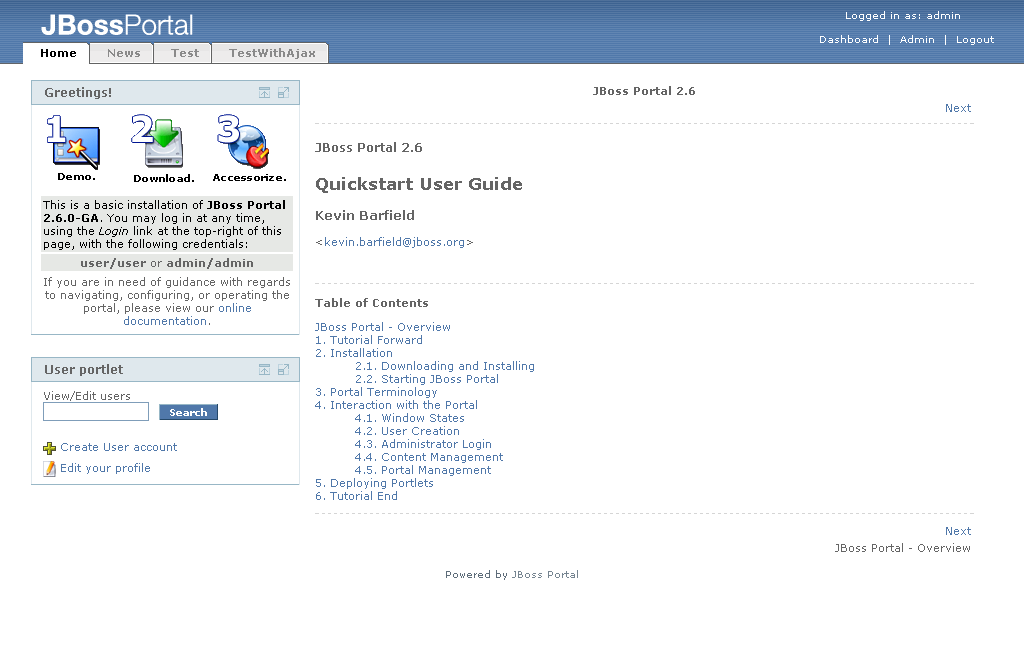 |
Figure 23. Content view portlet with docs page shown.
The links on the quickstart HTML page that you uploaded will go to the other pages that were uploaded to the content repository with it. Try them out to see for yourself.
Click on the Admin link in the upper right of the browser page. From this Admin Portal, you should have access to the CMS, Members, WSRP and Portal management interfaces. (Figure 24).
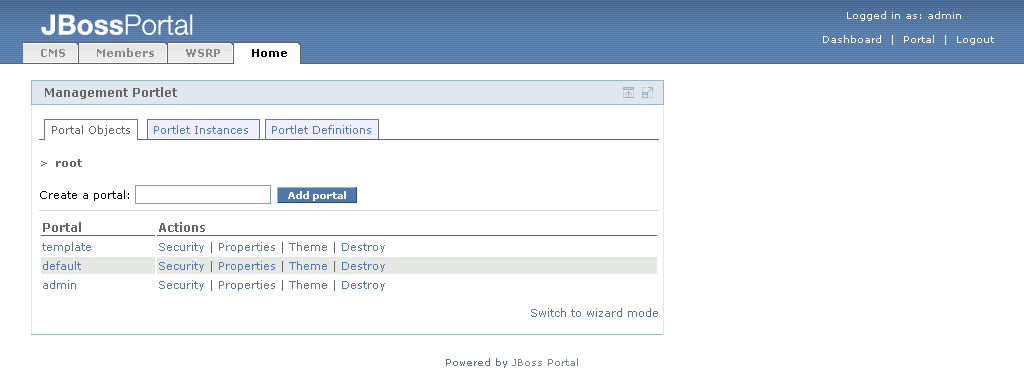 |
Figure 24. Admin portal page.
Click the "Members" tab to access the member management page. Click on the "Search" button to see all of the users currently enrolled in the portal security repository (Figure 25).
 |
Figure 25. User portlet with user list view.
The starter user we created is shown in the list. Click on the "Roles" link next to the starter user to see the available roles (Figure 26).
 |
Figure 26. User portlet with available roles view.
Add the "Administrators" role to this user by selecting it from the "Available roles" list box and clicking the "Add Roles" button. Click the "Assign roles" button to apply the new roles list to the user. This brings us back to the User portlet menu view (Figure 27).
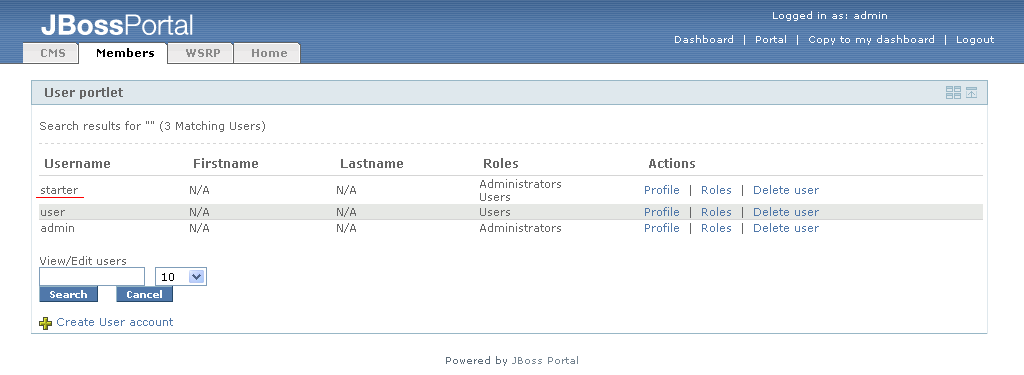 |
Figure 27. User portlet menu view.
Now let's look at the user profile for the starter user. Click on the "Profile" link next to the starter user. The user profile view appears (Figure 28).
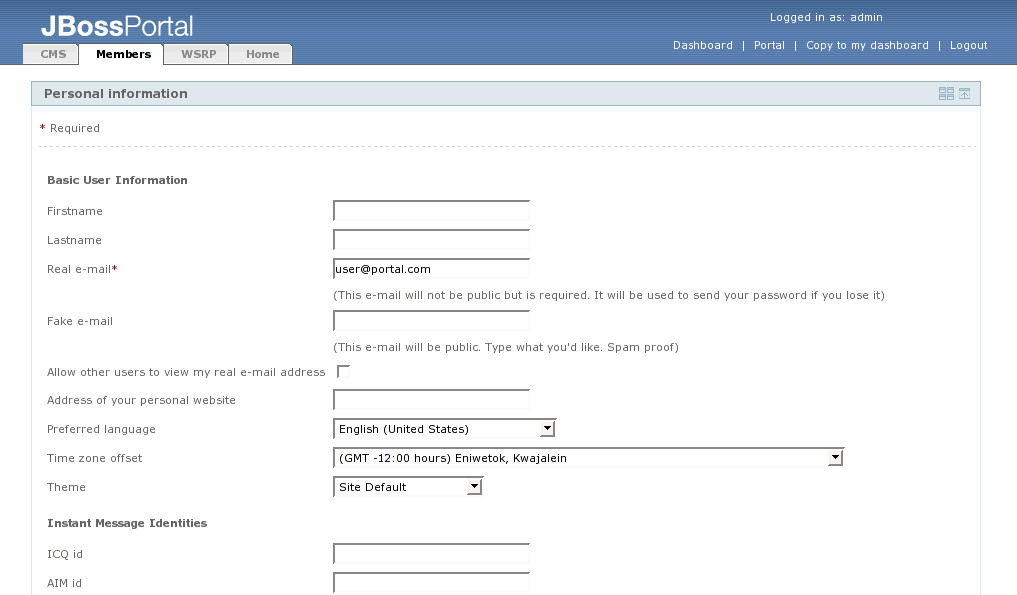 |
Figure 28. User profile view.
This shows all of the fields available in the user profile. Enter the first name of "starter" and click the "Save changes" button. The Member management page is displayed now (Figure 29).
 |
Figure 29. Member management portal page default view.
Now, let's explore the management portlet, by clicking on the "Home" tab. This portlet shows a view of the portals, portal pages and portlet instances (Figure 30).
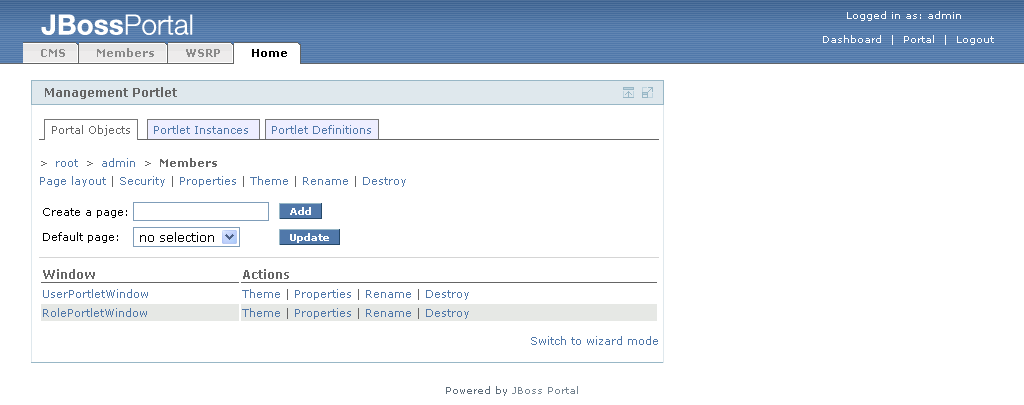 |
Figure 30. Management portlet page view.
Let's create a new portal page. Click on the "root" breadcrumb link below the "Portal Objects" tab then choose "default" portal. Enter "Starter" in the text field next to the "Create a page:" label. Your portal page view should match the following figure (Figure 31).
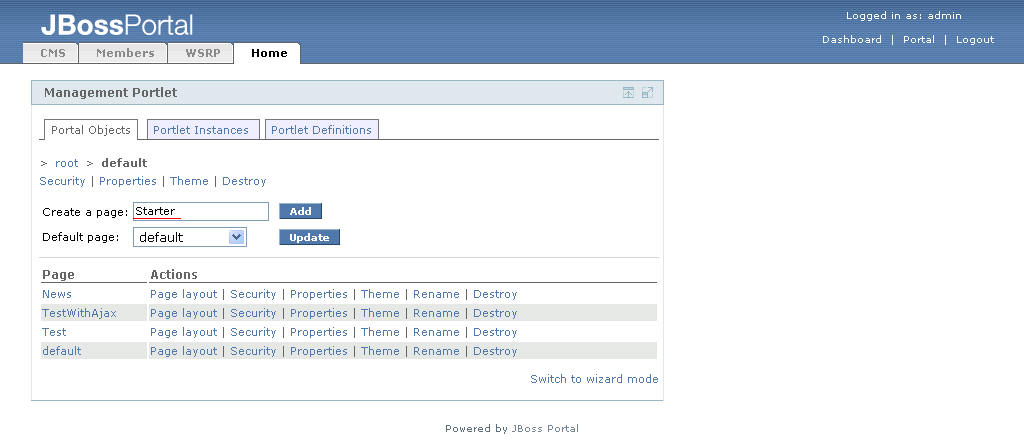 |
Figure 31. Management portlet add page view.
Click the "Add" button to create the new page. We now see the "Starter" page in the list of portal pages (Figure 32).
 |
Figure 32. Starter portal page has been added.
Now let's add some portlet instances to the portal page. Click on "Page layout" link of the "Starter" entry in the Management Portlet, and the details for that portal page are shown (Figure 33).
 |
Figure 33. Management portlet for Starter portal page.
First, let's add a weather portlet. We know this is portlet, so we can leave the "Content Type" drop-down set to "portlet". It's a good idea to give the new portlet window a name instead of relying on the portal to generate one for you, so enter "weather" in the "Window Name" field. In the list labeled "Select a portlet instance to associate to this window", select the "WeatherPortletInstance" portlet instance and click the "Select" button. You can verify that you have the proper portlet instance selected by viewing the details that show up below the Portlet Instance list at the bottom of the portlet (Figure 34).
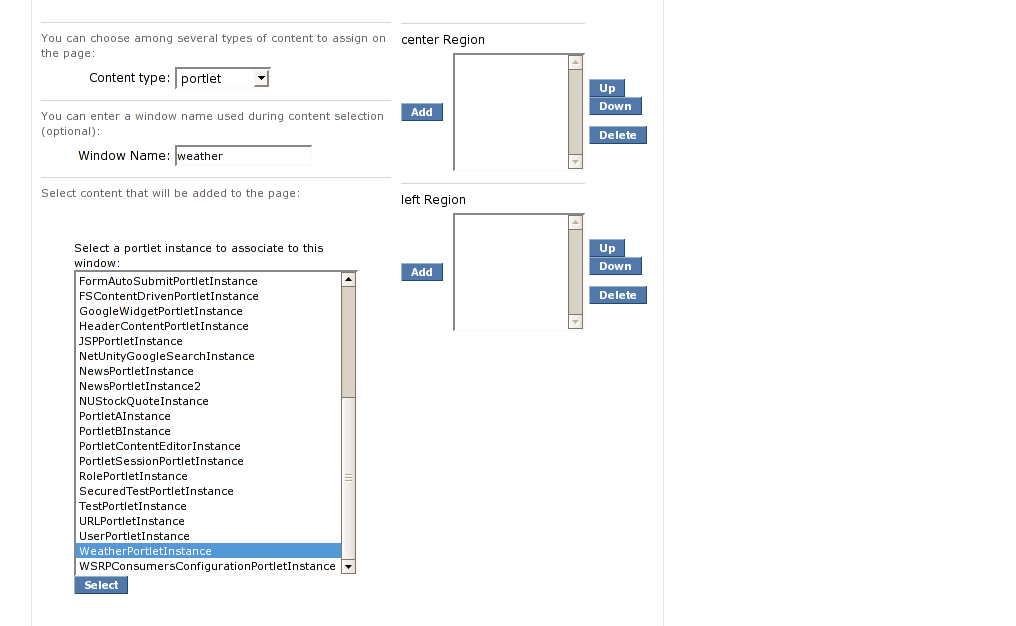 |
Figure 34. Choosing the "WeatherPorletInstance" portlet instance from the list.
Scroll up to the list box that is labeled "center Region". Click the "Add" button to the left of that list box. The "weather" portlet instance is now shown under the "center Region" (Figure 35).
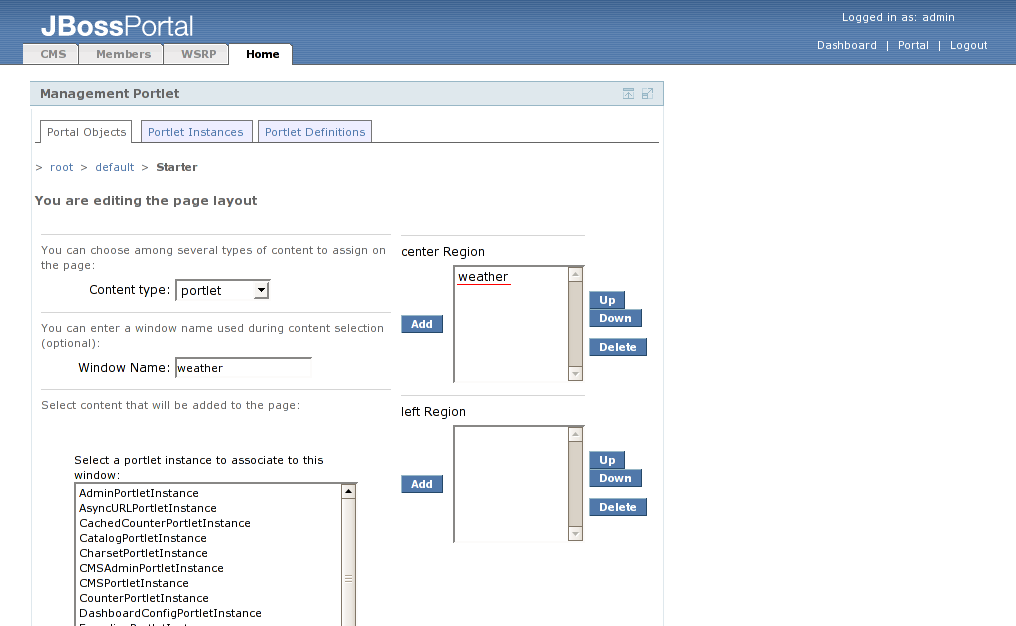 |
Figure 35. Weather portlet instance is added.
Lets change the theme for the weather portlet window we just added so that the weather portlet window doesn't display any decorations. Click on the "default" link in the breadcrumbs below the "Portal Objects" tab, then choose the "Starter" link. Click on the "theme" action link next to the "weather" window. Let's set the Window Renderer, Decoration Renderer, and Portlet Renderer to "emptyRenderer" (Figure 36).
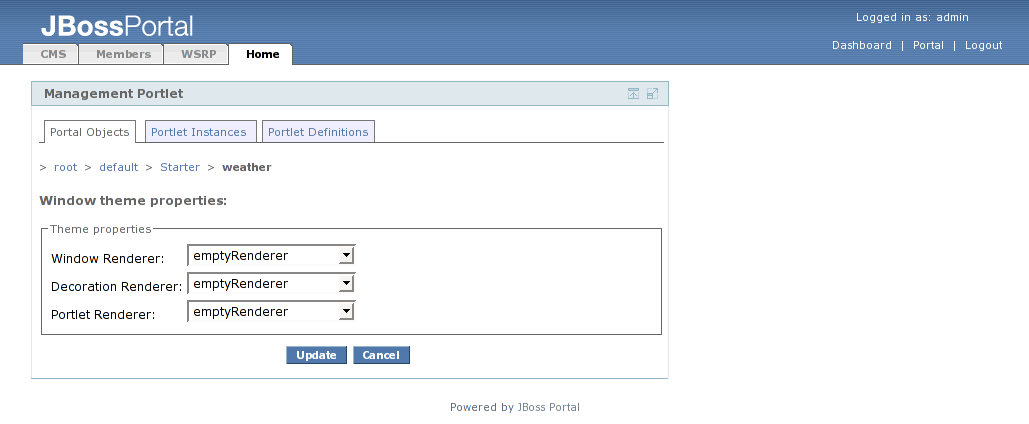 |
Figure 36. Theme details for the weather portlet instance.
Click the "Update" button to apply the theme changes. Finally, let's take a look at security in the Management Portlet. Click on the "Starter" page in the breadcrumbs below the "Portal Objects" tab. Next click the "Security" link which is just below the breadcrumbs links, and the list of available roles and actions is shown for the "Starter" portal page.(Figure 37).
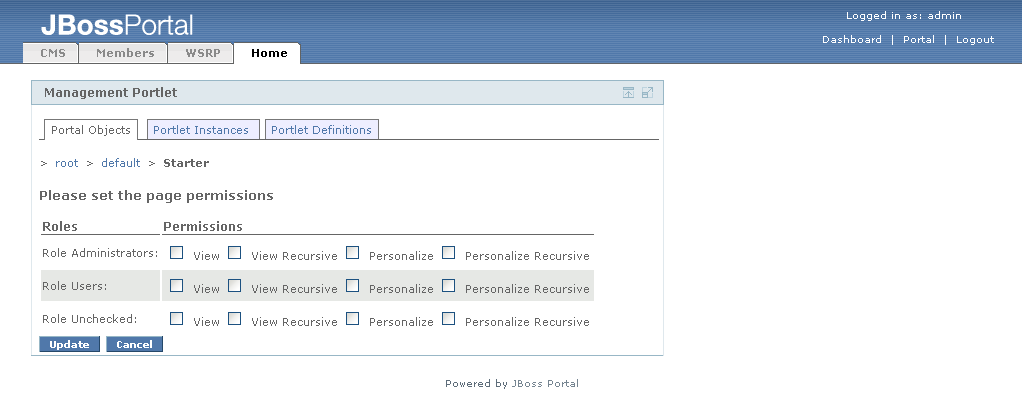 |
Figure 37. Security for the "Starter" portal page.
Let's take a look at the Starter portal page we created. Click on the "Portal" link, and then the "Starter" tab at the top to go to the "Starter" portal page (Figure 38).
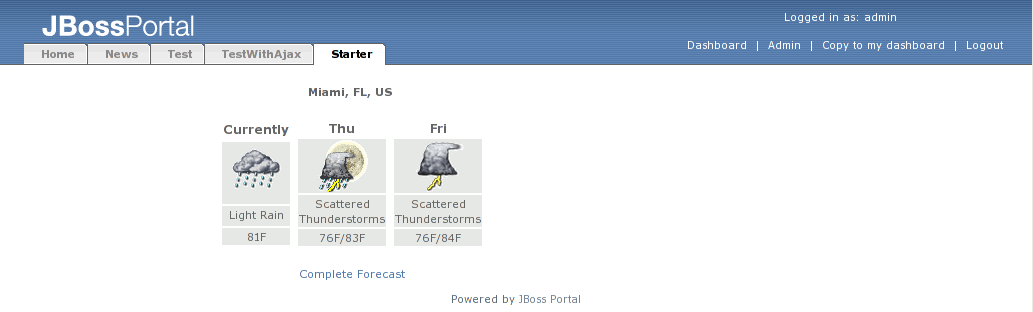 |
Figure 38. The Starter portal page.