Table of Contents
Click Insert/Edit Image (
 ).
).Enter a URL or click Browse Server.
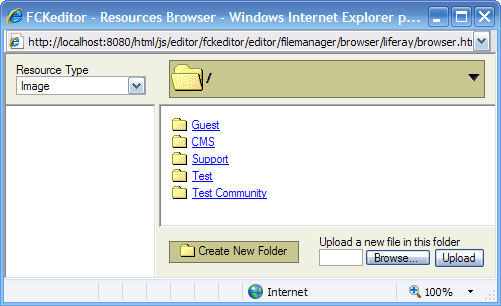
If Browse Server is selected, choose a community where the image will be stored in.
Click Create New Folder to add images to. Any folders and images that are added here will be placed in the Image Gallery. The Image Gallery provides a centralized repository for images to be stored and given a unique URL.
Type the name of the new folder and click OK.
Click on the newly created folder to add an image to it.
Click Browse and select an image.
Click Upload to add the image to the folder.
Click on the image and click OK to add the image to the document.
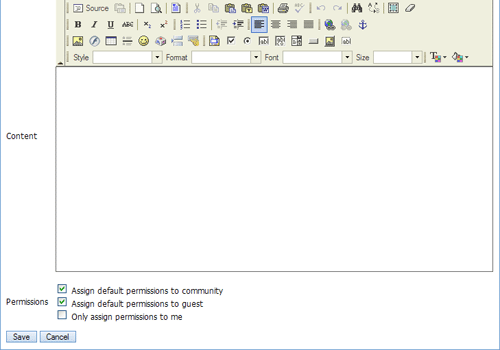
Click Save to save the updates.

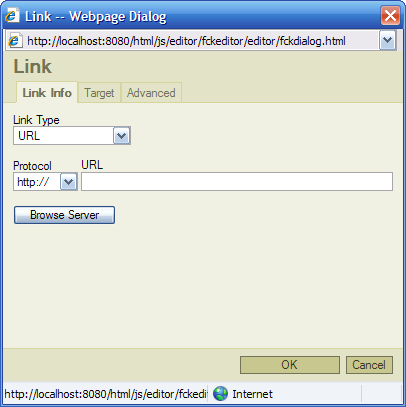
Select text to link.
Click Insert/Edit link (
 ).
).You can add an URL directly or you can click Browse Server.
If Browse Server is selected, in the Resource Type menu you have the option to link it with a document, image, or page.
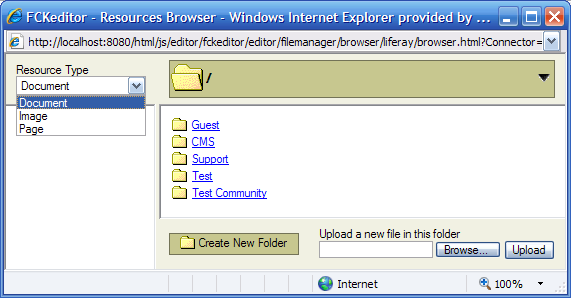
In the Resource Type menu select Document.
To link to a new document, select a community where document will be stored in.
Click Create New Folder. Any documents added here will be placed in the Document Library.
Enter the name of the new folder.
Click on the newly created folder to add a document to it.
Click Browse and locate document.
Click Upload to add the document to the folder.
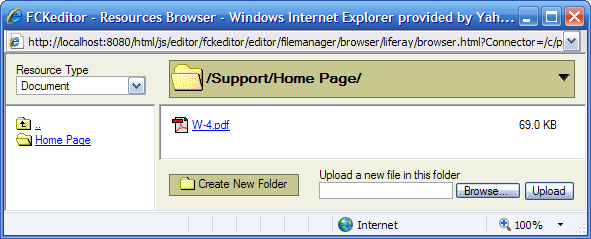
Click on the document and click OK to link the document with the selected text.
In the Resource Type menu select Page.
Select the community where the page is located in.
The FCKeditor will show a site structure. Click on the page that you want to link the selected text to.
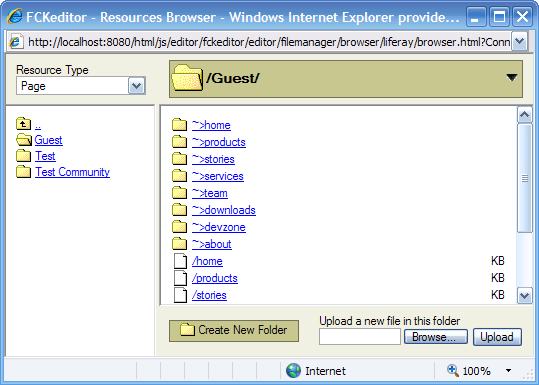
Click OK.
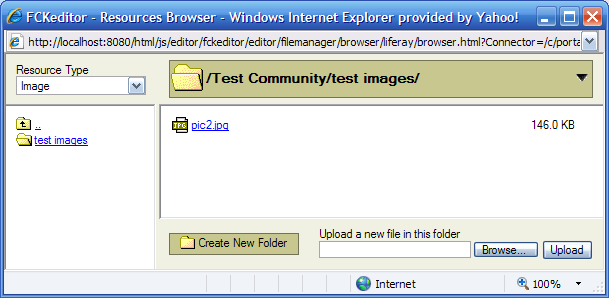
In the Resource Type menu select Image.
Select the community where the image is located in or will be stored in.
If the image is stored in the system, click on theimage to link with the selected text and click OK.
To link to a new image, select a folder to upload the image to or click Create New Folder to add a new folder to place the image in. Any images added here will be placed in the Document Library. If using an existing folder, skip to Step 8.
Enter the name of the new folder.
Click on the newly created folder to add an image to it.
Click Browse and locate the image.
Click Upload to add the image to the folder.
Click on the image and click OK to link the image with the selected text.