Here are the steps to creating a new mpich.nt project with MS Developer Studio 6 after you have installed mpich.nt:
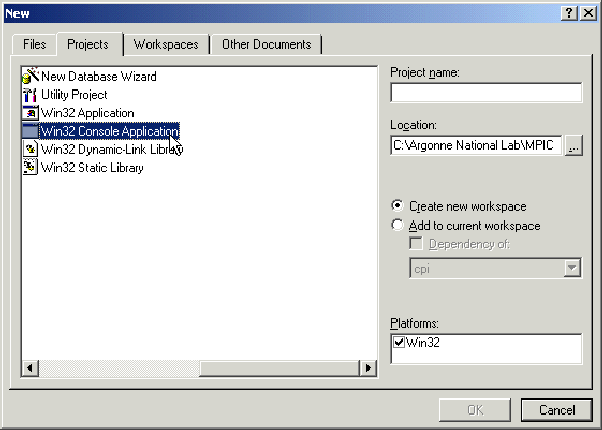
3. Finish the new project wizard.
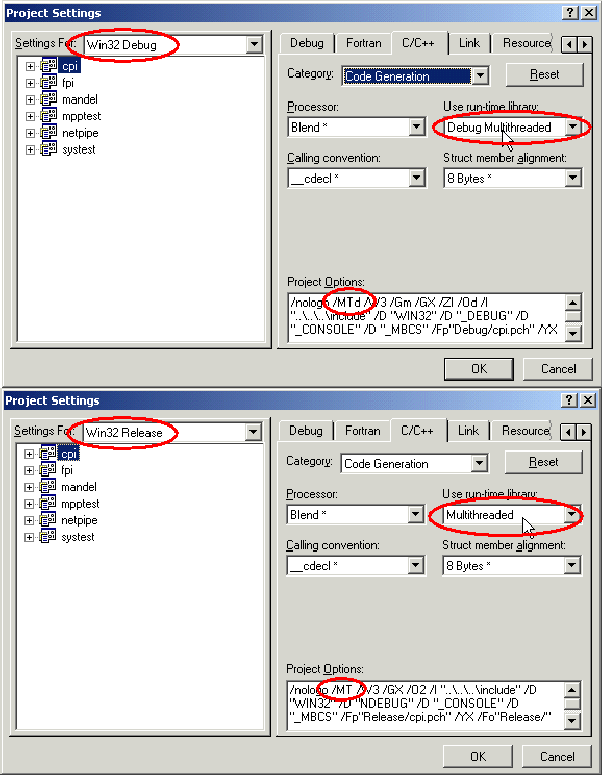
4. Go to Project->Settings or hit Alt F7 to bring up the project settings dialog box.
5. Change the settings to use the multithreaded libraries.
Change the settings for both Debug and Release targets. See figure 6
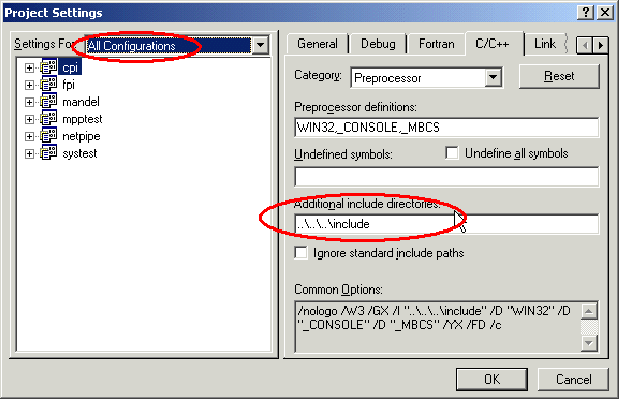
6. Set the include path for all target configurations: This should be
Program Files
MPICH
SDK
include.
See figure 7
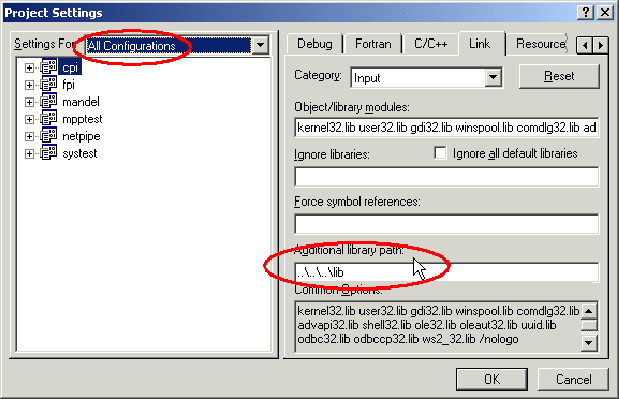
7. Set the lib path for all target configurations: This should be
Program Files
MPICH
SDK
lib.
See figure 8
8. Add the ws2_32.lib library to all configurations
(This is the Microsoft Winsock2 library. It's in your default library path).
Add mpich.lib to the release target and mpichd.lib to the debug target.
See figure 9

9. Close the project settings dialog box.
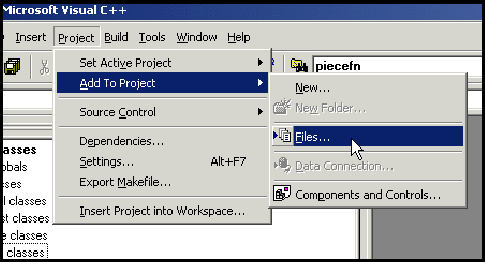
10. Add your source files to the project. See figure 10
11. Build