Binding Beans and Data in a Desktop Application
This guide is an introduction to the support in NetBeans IDE 6.0 for beans
binding and data binding in Java desktop applications.
Software and Files Needed for the Tutorial
For this tutorial you need to have the following software installed on your computer:
- NetBeans IDE 6.0.
- Java Standard Development Kit (JDK) version 5.0 or 6.0.
Introduction: Beans Binding in NetBeans IDE 6.0
Until the release of the beans binding library, it was somewhat cumbersome
to connect UI components to databases or to keep values of component
properties in sync. For example, displaying data from a standard database
in a JTable required the manual creation of utility classes to handle the connection
between the database and the JTable. And keeping values
of different bean properties in sync (such as the value of a JTextField with
the rendering of a visual bean) required hand-coding of listeners and
event handlers.
The beans binding library simplifies and standardizes all of this. You can merely write a
few lines of code to establish which properties of which components need to be
kept in sync, and the beans binding library handles the rest. In the NetBeans IDE, beans
binding features are integrated in the GUI Builder, so you can quickly get
the behavior of your application coded soon after you have established the visual
design.
This guide is an overview of the main aspects of beans binding in the IDE.
For a concrete example of many of these features, you can try the
Building a Java Desktop Database Application tutorial.
Binding Properties to Other Properties
At its most basic, beans binding is a way to connect bean properties without
using event listening and handling code.
To illustrate the concept of beans binding and how the IDE supports it,
we will do a simple example where a user can adjust a slider to
change a numerical value in a text field.
To set up the example:
- In the IDE, choose, File > New Project.
- Select the Java category and select the Java Application template.
Click Next.
- In the Name and Location page of the wizard, perform the following operations:
- Type NumberSlider as the project name.
- Leave the Set As Main Project checkbox selected.
- Clear the Create Main Class checkbox.
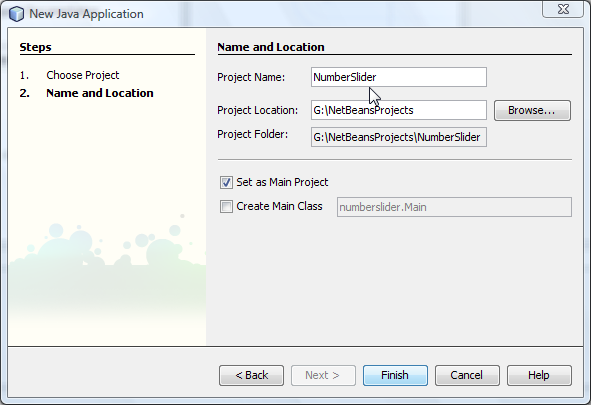
- Click Finish to exit the wizard and set up the project.
- In the Projects window, right-click the NumberSlider project node
and choose New > JFrame Form.
(If JFrame Form is not available in the New menu, choose Other.
Then in the New File wizard, select the Swing GUI Forms category and
select the JFrame Form template.)
- In the Name and Location page of the wizard, perform the following operations:
- Type NumberSliderFrame for the class name.
- Type numberslider for the package name.
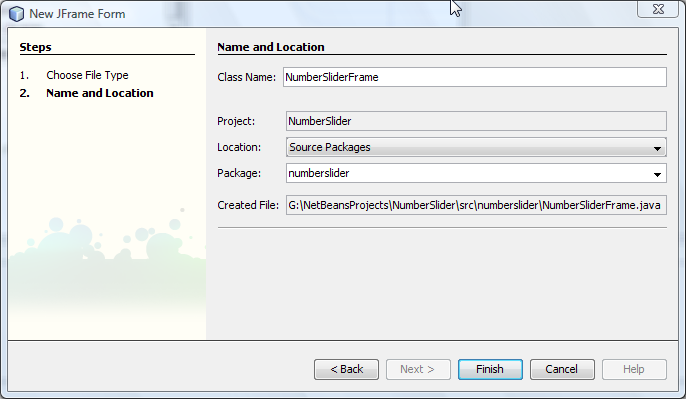
- Click Finish to exit the wizard and create the form.
NumberSliderForm.java should open in design mode in the editing area.
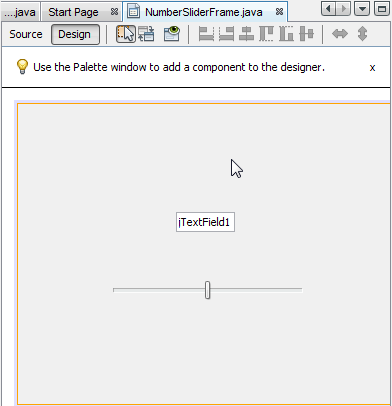
- From the Swing Controls section of the Palette, drag a
slider component into the design area. (If the Palette window is not open,
choose Window > Palette.)
- From the Palette, drag a text field component to the design area.
The resulting form might look something like the screenshot below. However,
positioning is not important for purposes of this example.
Source and Target
Now that we have set up the example, we are ready to create the
binding. However, first we need to determine which component will
be the source of the binding and which will be the target.
The binding source component is where a value for the property first originates.
When binding in the GUI Editor, you initiate a binding on the target and
then you declare the source in the Bind dialog box.
In this case, since the JSlider comes with a default range of values,
we will use it as the source.
Note: Bindings can be two-way (read/write), so that changes in
the target are automatically reflected in the source. However,
the direction of the initial binding is always from the source to the
target. See the information on
Update Mode in the Advanced Binding Configuration
section.
To bind the slider to the text field:
- Right-click the text field component and choose Bind > text to
open the Bind dialog box.
- From the Binding Source combo box, select jSlider1.
- From the Binding Expression combo box, select value int
as shown in the image below.

- Click OK.
You have just bound the value bean property of the slider to
the text value of the text field.
In the design area, the text field should show the value 50. This value reflects the fact that the slider is in the middle
position and the default range of values for the slider is from 0 to 100.
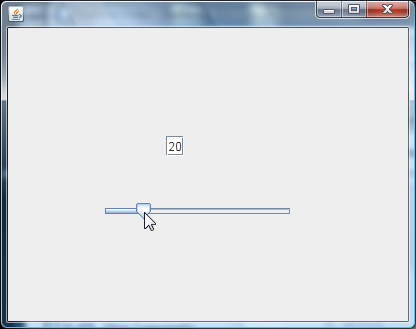
You can now run the application and see the binding in action.
To run the project:
- Choose Run > Run Main Project.
- In the Run Project dialog box, click OK to accept
numberslider.NumberSliderForm as the main class.
The applications should start in a separate window. Adjust the slider
in the running application and watch the value change in the text field.
Advanced Binding Configuration
The example above shows a straightforward binding with some default behaviors.
But sometimes you might want or need to configure your binding differently. If
that is the case, you can use the Advanced tab of the Binding dialog box.
The Advanced tab of the dialog box contains the following fields:
- Name. Enables you to create a name for the binding,
which gives you more flexibility for managing your bindings. The name is added to
the constructor of the binding and can be referenced with the binding's getName()
method.
- Update Mode. Specifies the way that the properties are kept synchronized.
The possible values are:
- Always sync (read/write). Whenever a change is made to either
the source or the target, the other is updated.
- Only read from source (read only). The target is only updated
the first time the source value is set. Changes that are made to the
source are updated in the target. Changes made to the target are not updated in
the source.
- Read from source once (read once). The target is only updated
when the target and source are initially bound.
- Update Source When (available only to the text property of JTextField and
JTextArea components). Enables you to select the frequency with which
the properties are synchronized.
- Ignore Adjusting (available to the value property of JSlider;
to the selectedElement property of JTable and JList;
and to the selectedElements property of JTable and JList).
If this checkbox is selected, any changes made to one
property are not propagated to the other property until the user is finished making the
change. For example, when the application's user drags a slider, the value
of the property to which the slider's value property is bound is only
updated once the user releases the mouse button.
- Converter. If your binding involves properties with different data
types, you can specify code that converts values between the types.
The beans binding library handles many commonly needed conversions, but you might
need to provide your own converters for other combinations of property types.
Such converters need to extend the org.jdesktop.beansbinding.Converter
class.
The Converter drop-down list is populated with any converters that have
been added as beans
to your form. You can also add the conversion code directly by
clicking the ellipsis (...) button, and selecting Custom Code from the
Select Converter Property Using drop-down list.
- Validator. Enables you to specify code to validate a change in the target
property value before propagating that change back to the source property.
For example, you can use a validator to make sure that an integer property value
is within a specific range.
Validators need to extend the
org.jdesktop.beansbinding.Validator class.
The Validator drop-down list is populated with any validators that have
been added as beans
to your form. You can also add the validation code directly by
clicking the ellipsis (...) button, and selecting Custom Code from the
Select Validator Property Using drop-down list.
- Null Source Value. Enables you to specify a different value to use if
the source property has a null value when the binding is attempted.
This field corresponds with the setSourceNullValue() method
of the org.jdesktop.beansbinding.Binding class.
- Unreadable Source Value. Enables you to specify a different value to use if
the binding expression cannot be resolved when the binding is attempted.
This field corresponds with the setSourceUnreadableValue() method
of the org.jdesktop.beansbinding.Binding class.
Note: To better understand the classes and methods mentioned above, you can
access the beans binding Javadoc documentation directly
from the IDE. Choose Help > Javadoc References > Beans Binding. In the browser
window that opens, click the org.jdesktop.beansbinding link to access
documentation for those classes.
Binding Data to Components
Once you have created a new Java form and added components to the form,
you can generate code to bind those components to data. The IDE makes
it easy to bind data to Swing JTable, JList, and JComboBox components.
Before binding a component to data from a database, you need to have done the following things:
- Connected to a database in the IDE.
- Added the component to a form in the GUI Builder.
- Created classes that represent the database tables to which you want to
bind. Steps on creating the entity classes for binding data to a component
are given below.
Creating Entity Classes
To create entity classes to represent the database that is to be bound to the JTable:
- In the Projects window, right-click your project and choose
New > Other, select the Persistence category, and select the
Entity Classes from Database template.
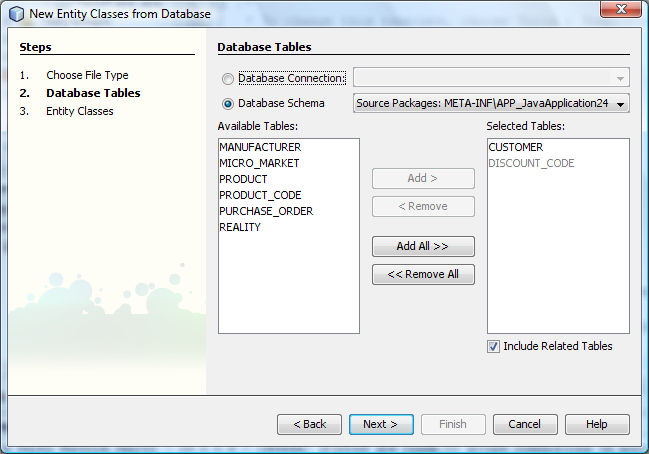
- In the Database Tables page of the wizard, select the
database connection.
- Once the Available Tables column is populated, select the tables
that you want to use in your application and click Add to move them to
the Selected Tables column. Click Next.
- In the Entity Classes page of the wizard, make sure the
Generate Named Query Annotations for Persistent Fields dialog
box is selected.
- Make any customizations that you want to make to the
names of the generated classes and their location.
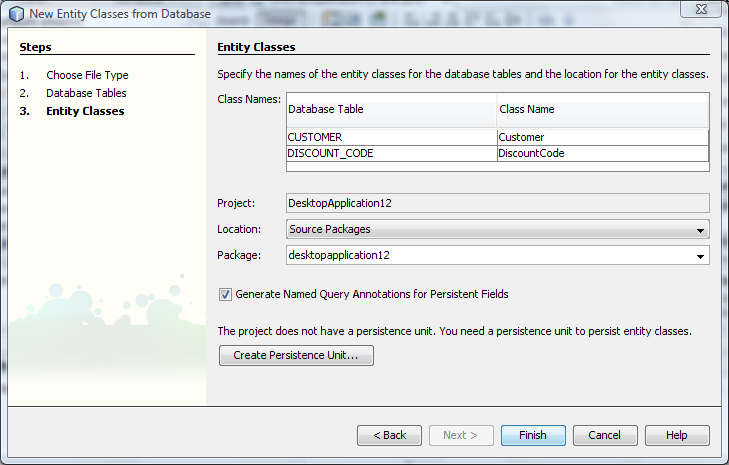
- Click Create Persistence Unit.
- In the Create Persistence Unit dialog box, make sure of the following things:
- That the selected Persistence Library is TopLink.
- That the selected Table Generation Strategy is "None".
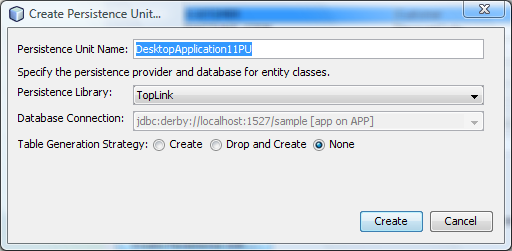
- Click Finish.
You should see nodes for the entity classes in the Projects window.
Binding Components to the Beans That Represent the Data
To bind the data to a JTable component:
- Right-click the component in the GUI Builder and choose Bind > elements.
- Click Import Data to Form. From the Import Data to Form dialog box,
select the database table to which you want to bind your components.
Click OK.
- From the Binding Source combo box, select the item that represents the
result list of the entity class. For example, if the entity class is called,
Customer.java, the list object would be generated as customerList.
- Leave the Binding Expression value as null.
- If there are any database columns that you want to appear in the JTable,
select those columns in the Selected list and move them to the Available list.
- Select the Advanced tab
to further configure the binding. For example,
you can specify a validator or converter, or you can specify behavior
if the binding source is null or unreadable.
- Click OK.
To bind the data to a JList component:
- Right-click the component in the GUI Builder and choose Bind > elements.
- Click Import Data to Form. From the Import Data to Form dialog box,
select the database table to which you want to bind your components.
Click OK.
- From the Binding Source combo box, select the item that represents the
result list of the entity class. For example, if the entity class is called,
Customer.java, the list object would be generated as customerList.
- Leave the Binding Expression value as null.
- In the Display Expression drop-down list, select the property that represents
the database column that contains the values that you want to display in the
list.
- Select the Advanced tab
to further configure the binding.
- Click OK.
Note: You can also use the New Java Desktop Application wizard to
quickly create a whole working application that has CRUD (create, read,
update, and delete) features. However, it is better to generate all
the entity classes in advance to ensure that all relations among
the entities are correctly covered by the generated classes.
Special Binding Properties
Where necessary, the beans binding library provides special synthetic
properties for some Swing components that are missing from the components
themselves. These properties represent things, such as a table's selected row,
that are useful to bind to other properties.
Below is a list of the synthetic properties added by the beans binding libraries:
| Component |
Property |
Description |
| AbstractButton |
selected |
The selected state of a button. |
| JComboBox |
selectedItem |
The selected item of a JComboBox. |
| JSlider |
value |
The value of a JSlider; notifies of all changes. |
| value_IGNORE_ADJUSTING |
Same as "value" but does not notify of change while the slider is adjusting its value. |
| JList |
selectedElement |
The selected element of a JList; notifies of all changes.
If there is a JListBinding with the JList as the target,
the selected element is reported as an element from the
binding's source list. Otherwise, the selected element is
reported as an object from the list's model. If nothing is
selected, the property evaluates to null. |
| selectedElements |
A list containing the selected elements of a JList; notifies
of all changes. If there is a JListBinding with the JList as the
target, the selected elements are reported as elements from the
binding's source list. Otherwise, the selected elements are
reported as objects from the list's model. If nothing is
selected, the property evaluates to an empty list. |
| selectedElement_IGNORE_ADJUSTING |
Same as "selectedElement" but does not notify of change
while the list selection is being updated. |
| selectedElements_IGNORE_ADJUSTING |
Same as "selectedElements" but does not notify of change
while the list selection is being updated. |
| JTable |
selectedElement |
The selected element of a JTable; notifies of all changes.
If there is a JTableBinding with the JTable as the target, the
selected element is reported as an element from the binding's
source list. Otherwise, the selected element is reported as a
map where the keys are composed of the string "column" plus the
column index and the values are the model values for that
column. Example:
{column0=column0value, column1=column1value, ...}
If nothing is selected, the property evaluates to null. |
| selectedElements |
A list containing the selected elements of a JTable;
notifies of all changes. If there is a JTableBinding with the
JTable as the target, the selected elements are reported as
elements from the binding's source list. Otherwise, each
selected element is reported as a map where the keys are
composed of the string "column" plus the column index and
the values are the model values for that column. Example:
{column0=column0value, column1=column1value, ...}
If nothing is selected, the property evaluates to an empty list.
|
| selectedElement_IGNORE_ADJUSTING |
Same as "selectedElement" but does notify of change while
the table selection is being updated. |
| selectedElements_IGNORE_ADJUSTING |
Same as "selectedElements" but does not notify of change
while the table selection is being updated. |
| JTextComponent (including its sub-classes JTextField, JTextArea, and JEditorPane) |
text |
The text property of a JTextComponent; notifies of all
changes (including typing). |
| text_ON_FOCUS_LOST |
The text property of a JTextComponent; notifies of change
only when focus is lost on the component.
|
| text_ON_ACTION_OR_FOCUS_LOST |
The text property of a JTextComponent; notifies of change
only when the component notifies of actionPerformed or when
focus is lost on the component.
|
See Also
For a more general introduction to using the
IDE's GUI Builder, see GUI Building in NetBeans IDE.
To see how you can use the Java Desktop Application project template to
build a database application with a Master/Detail view, see Building a Java Desktop Database Application.
For more information on Beans Binding, see the
Beans Binding project page on java.net.
For general information on JavaBeans components, see the
Beans trail of the Java Tutorial.