Securing Web Services Using the SAML or UserNameToken Profiles
Contributed and maintained by Bob May
November 2007 [Revision number: V1-3]
This publication is applicable to the full NetBeans IDE 6.0 release
This tutorial illustrates how you can enable SAML-based and UserNameToken-based authentication between a web service client and a web service provider using the bundled Access Manager along with the integrated support for the WS-Security standard in Application Server's web services client and server-side containers.
Expected duration: 40 minutes
Contents
Tutorial Requirements
NetBeans IDE 6.0 comes bundled with all the necessary runtimes to enable you to start developing secure, identity-enabled web services clients and providers. These runtimes include:
- Java Application Server SDK Update 3 Beta
- Sun Java System Access Manager 7.1 and Policy Agent 2.2 for Web Services
Before you proceed, make sure you review the requirements in this section.
Prerequisites
This tutorial assumes that you have some basic knowledge of, or programming experience
with, Java and Web Services technologies.
Software Needed for This Tutorial
Before you begin, you need to install the following software on your computer:
- NetBeans IDE 6.0
Select the Full Download option.
- Sun Java System Access Manager 7.1- As obtained from the Java Application Platform SDK Update 2 or later.(download)
top
Installing the Sun Java System Access Manager
If you have already installed and configured the Access Manager in the past, please check your userdir and if it exists, delete the file
[Your_Userdir]/AccessManager/AMConfig_opt_SUNWappserver_domains)domain1_applications_j2ee-modules_amserver_
before you begin a fresh installation.
To install the Sun Java System Access Manager, you must first esnure that you have installed the full NetBeans IDE. Next,
- Obtain the Java Application Platform SDK Update 2 or later from http://java.sun.com/javaee/downloads/index.jsp.
- Run the Java SDK installer, specifying an installation directory of your choice, and accepting the default options.
- Choose Add-Ons that include the Sun Java System Access Manager.
- Continue to run the Installer, when it finishes, start the Server and select Finish.
- Start the IDE.
- In the Services tab, select the Servers node. right-click the Servers node and choose Add Server from the pop-up menu.. The Add Server Instance dialog opens.
- Click Next. The Platform Location Folder page opens.
- In the Platform Location field, use the Browse button to navigate to and select the directory containing the Java Application Platform SDK you have just installed.
- Click Finish.
- The Sun Java System Access Manager appears as a node in the Services Tab under the Application Server you have just installed. You must start the Application Server to begin working with Sun Java System Access Manager.
top
Verifying the Configuration of the Access Manager Installation
- In the Services window, expand the Sun Java System Access Managers node.
- You are then redirected to the Login page, which is displayed immediately on successive logins. You can login into the Sun Java System Access Manager.The Log In page opens, indicating that Access Manager server is running.
You need to configure the Access Manager to run properly. It is configured by default when you first start the Glassfish Server you obtained from the SDK, but you can reconfigure it later, if needed. For further information, check the [your_SDKGlassfish_location]/addons/README.html file.
top
Configuring the Tutorial Environment
- Start the IDE.
- To verify that the Sun Java System Application Server is configured in the IDE, click the Runtime tab and expand the Servers node.
- If the Servers node does not contain a Sun Java System Application Server 9 node, follow the steps in Adding an Application Server.
- In the Runtime window, expand the Servers node, right-click the Sun Java System Application Server 9 node and choose Start from the pop-up menu.
Wait until the following message appears in the Output window:
Application server startup complete.
When the server is running, the IDE displays a green arrow badge on the Sun Java System Application Server 9 node.
Note: If the Start option is not available, your server is already running.
top
Creating the Tutorial Projects
Two tutorial projects are StockQuoteServer and StockQuoteClient.
To create the StockQuoteServer project:
- From the IDE's main menu, choose File > New Project.
- In the Categories list, expand the Samples node, then select the Identity Blueprints node.
- In the Projects list, select Stock Service.
- Click Next.
- Accept the default Project Name (StockQuoteServer) and optionally change the Project Location.
- Click Finish.
To create the StockQuoteClient project:
- From the IDE's main menu, choose File > New Project.
- In the Categories list, expand the Samples node, then select the Identity Blueprints node.
- In the Projects list, select Stock Client.
- Click Next.
- Accept the default values for Project Name (Stock Client) and Project Location.
- Click Finish.
The Projects window now contains a Stock Client project node.
top
Securing Web Services: Using the SAML-HolderOfKey Security Mechanism
In this scenario, we are using the SAML-HolderOfKey security profile without the response being signed but using the default key store. To do this, we will first edit the token profile for the Access Manager and then configure the web service provider and client.
To edit the SAML-HolderOfKey profile:
- In the Runtime window, expand the Sun Java System Access Managers node, then expand the Default Instance and the Profiles nodes.
- Select the SAML-HolderOfKey node
- Right-click and choose Edit.
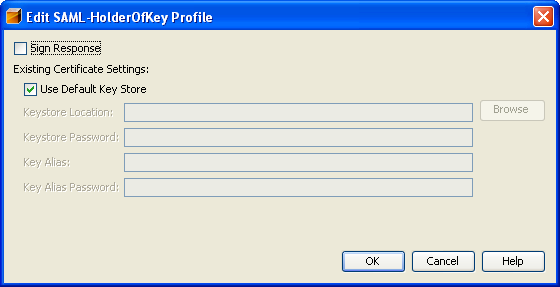
The Edit SAML-HolderOfKey Profile dialog box opens.
- Clear the Sign Response checkbox.
- Locate Existing Certificate Settings, and confirm the Use Default Key Store checkbox selected.
- Click OK.
To configure the web service client:
- In the Projects window, expand the StockQuoteClient node and the Web Service References node.
- Locate the Web Service References node, right-click the StockService node and choose Edit Web Service Attributes from the pop-up menu.
The Web Service Client Security Configuration dialog box opens.
- Select the Enable Message Level Security checkbox.
- Locate Security Mechanism from the Request drop-down list, select SAML-HolderOfKey.
- Locate Existing Certificate Settings. Confirm that the Use Default Key Store checkbox is selected.
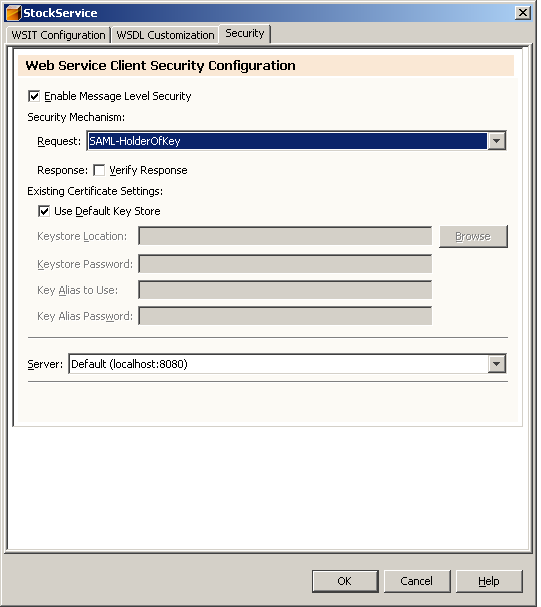
- Click OK.
You can now proceed to deploying and running the sample by following the instructions in Deploying and Running the Project.
top
Securing Web Services: Using the UserNameToken Security Mechanism
In this scenario, you use the UserNameToken security profile with signed response and use the default key store. To do this, you first edit the token profile for the Access Manager and then configure the web service provider and client.
To edit the UserNameToken profile:
- In the Runtime window, expand the Sun Java System Access Managers node, then expand the Default Instance and the Profiles nodes.
- Select the UserNameToken node, then right-click and choose Edit.
The Edit UserNameToken Profile dialog box opens.
- Locate Existing Certificate Settings, and confirm that the Use Default Key Store checkbox selected.
- Locate Username Token Profile Info. Click the Add button to add a UserNameToken record for the web service client.
The Add User dialog box opens.
- In the Username field, type sherry, in the Password field, type mypw, and click OK.
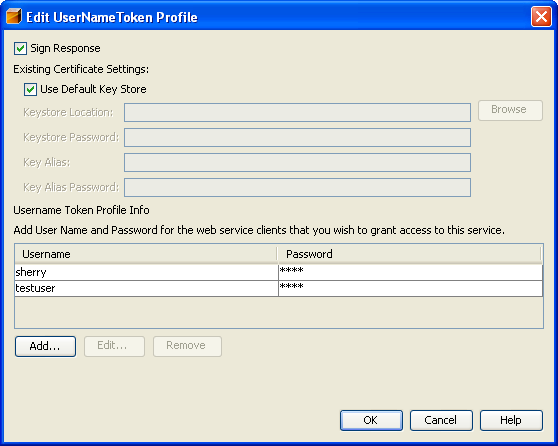
- Click OK to close the Edit UserNameToken Profile dialog box.
To configure the web service provider:
- In the Projects window, expand the StockServer node and the Web Services node.
- Locate the Web Services node. Right-click the stockservice node and choose Edit Web Service Attributes from the pop-up menu.
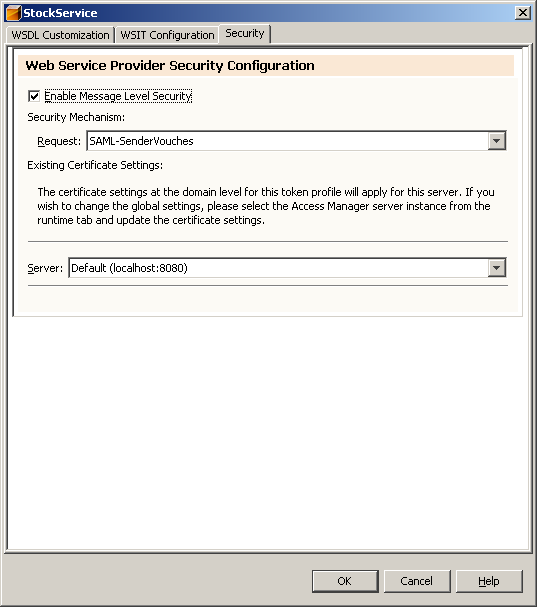
The Web Service Provider Security Configuration dialog box opens.
- Select the Enable Message Level Security checkbox.
- Locate Security Mechanism, from the Request drop-down list, select UserNameToken.
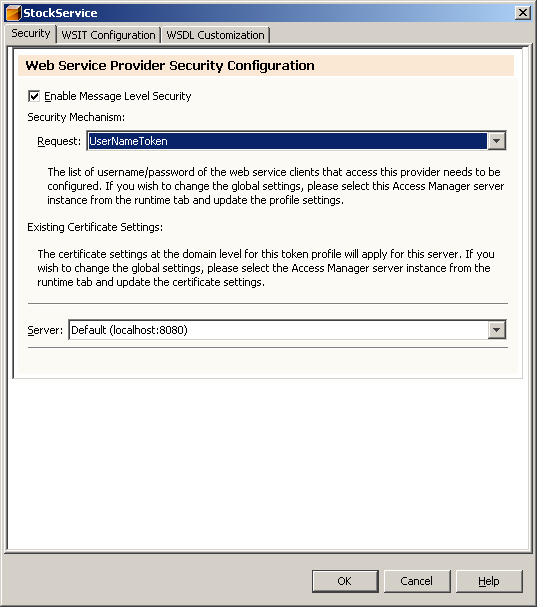
- Click OK.
To configure the web service client:
- In the Projects window, expand the StockClient node and the Web Service References node.
- Locate the Web Service References node. Right-click the Stock service node and choose Edit Web Service Attributes from the pop-up menu.
The Web Service Client Security Configuration dialog box opens.
- Select the Enable Message Level Security checkbox.
- Locate Security Mechanism from the Request drop-down list, select UserNameToken.
- In the Username field, type sherry and in the Password field, type mypw.
- Select the Verify Response checkbox.
- Locate Existing Certificate Settings, and confirm that the Use Default Key Store checkbox selected.
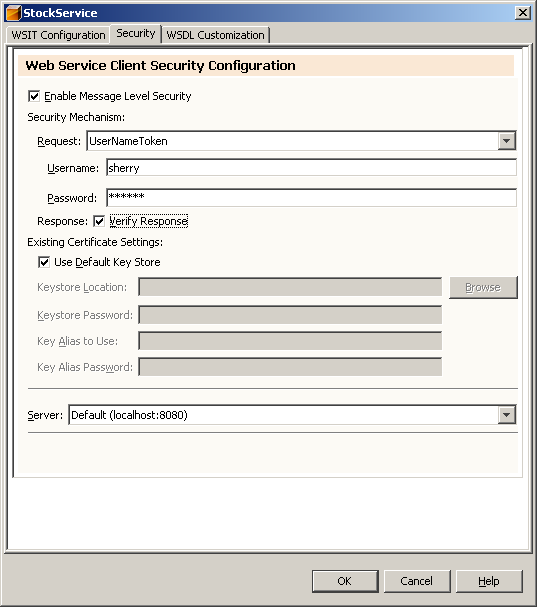
- Click OK.
You can now proceed to deploying and running the sample by following the instructions in Deploying and Running the Project.
top
Deploying and Running the Project
- In the Projects window, right-click the
StockQuoteService project node and choose Deploy Project.
The IDE does the following:
- Starts the application server if it is not already started.
- Builds the
StockQuoteService project. You can see the build results in the Output window.
- Deploys server.war to the Application Server.
- In the Projects window, right-click the StockQuoteClient project node and choose Run Project.
The IDE does the following:
- Builds the StockQuoteClient project. You can see the build results in the Output window.
- Deploys client.war to the Application Server.
- Opens the application in the browser
- Confirm that the URL field always displays:
http://localhost:8080/stockquoteclient/
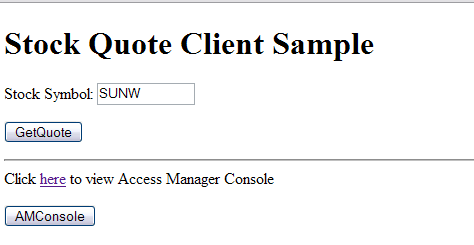
- Click Submit.
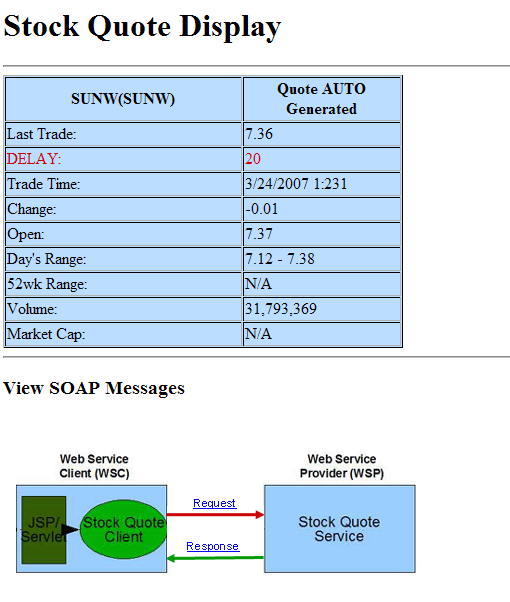
You can click on the "View SOAP Messages" part of the display to see SOAP messages associated with this request.
top
Exploring the Log Files
The instructions in this section are optional. Use these instructions to view the changes in the log files.
- Before you proceed to the next step, enable the most granular logging level.
Follow the instructions in Changing the Security Level on the Application Server.
- In the Projects window, right-click the StockQuoteClient project node and choose Run Project from the pop-up menu.
- Open the Application Server log file (server.log) in the following directory: application-server-installation-directory\domains\domain1\logs.
If you accepted the default values during installation, the window displays the C:\Sun\AppServer\domains\domain1\logs directory.
- Notice the changes in the log file.
The log file is edited to show that the modules are is using the methods defined in the configuration panels.
Samples of sections of the modified log file are available from the following links..
top
Additional Configuration Tasks
This section provides information about additional configuration tasks that you might want to perform.
top
Configuration Information for Application Server Not Installed on Port 8080
If the installation of the Sun Java System Application Server was performed on a port other than 8080, you must perform the additional configuration steps, as follows:
- In the Projects window, expand StockQuoteClient > Web Pages > WEB-INF and wsdl, and open the stock.wsdl file in the editor.
- Click the Source button to switch to the Source view of the file.
- Scroll to the bottom of the file and locate the following line:
<soap:address location="http://localhost:8080/stockservice/stockservice" xmlns:soap12="http://schemas.xmlsoap.org/wsdl/soap12/"/>
- Replace the 8080 value with the port number where the Application Server is installed.
- Save your changes and close the file.
top
Changing the Security Level on the Application Server
- In the Runtime window, right-click the Sun Java System Application Server 9 node and choose View Admin Console.
- Type admin for the username and adminadmin for the password.
- In the left navigation frame, click the Application Server link.
- In the right frame, click the Logging tab and then click the Log Levels tab.
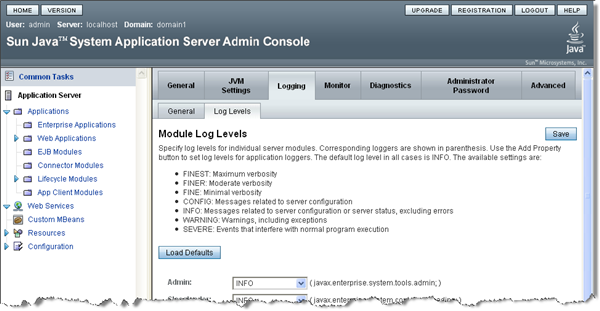
- Scroll to the bottom of the page and set the Security to FINEST.
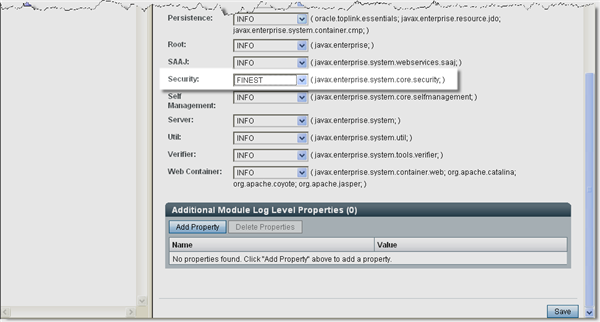
- Click the Save button and log out.
top
References
top
Summary
In this tutorial, we have learned how to enable SAML-based and UserNameToken-based authentication between a web service client and a web service provider. To do this, we have
top
Next Steps
-
To learn more about Identity Management, see the appropriate help topics in the NetBeans IDE.
-
To send comments and suggestions, obtain support, and stay informed of the latest
changes to the NetBeans IDE development features, join the [email protected]
mailing list.
top

