NetBeans Mobility 6.0 CDC Development Quick Start Guide
Introduction
CDC application are designed to run on mobile and embedded devices with at least 2MB of memory. This configuration supports
a more feature-rich JVM than MIDP-based mobile phones, which typically have 128 to 512KB
of memory and use the Connected Limited Device Configuration (CLDC).
This document takes you through the basics of using NetBeans IDE to create
a Java Platform, Micro Edition (Java ME platform), Connected Device Configuration
(CDC) application. We show you four different ways to create a Java ME CDC project
that displays a simple form in a device emulator, one for each available profile. We also show an additional way using the NSICom CrEme VM for Windows CE. This document is
designed to get you creating applications as quickly as possible.
Contents
Requirements
You must have the NetBeans 6.0 Mobility or Full edition (download)
installed before you can start Java ME CDC development. The Client/Server sections
require the Full Edition for Web Services support. If you installed only the
Mobility Edition, you need to download the following plugins from the Update
center (Tools > Plugins):
- Web Applications
- Web Services
- Sun Java System Application Server
- Sun Java Toolkit for CDC or other CDC emulator platform installed. See Adding Emulator
Platforms, below for more information.
Adding Emulator Platforms
The NetBeans Mobility Pack supports the following emulator platforms:
- Sun Java Toolkit for CDC 1.0
- Ricoh Embedded Software Architecture Emulator 1.14c
- UIQ SDK 3
- Sony Ericsson M600 and P990 devices
- Nokia Series 80 Platform SDK for Symbian OS, for Java, Personal Profile
Instructions for adding emulator platforms are listed in the NetBeans
Mobility Pack for CDC 5.5.1 Installation Guide and work for the 6.0 IDE as well.
Creating a CDC Application
In this section we create a CDC application project for each available
profile and, for the Personal and AGUI platforms, create a GUI for the application
using the IDE's GUI Builder.
The Profiles described are:
Creating a New CDC Application - Foundation Profile
Here we create a CDC Application, or Xlet,
for the Foundation Profile using the Ricoh Embedded Software Architecture
Emulator 1.14c.
- Choose File > New Project (Ctrl+Shift+N). Under Categories, select
Mobility. Under Projects, select the CDC Application template. Click Next.
- In the Name and Location panel, name the project MyRicohApplication
and specify a location for the project on your computer. Leave the Create
Main Class check box selected. Click Next.
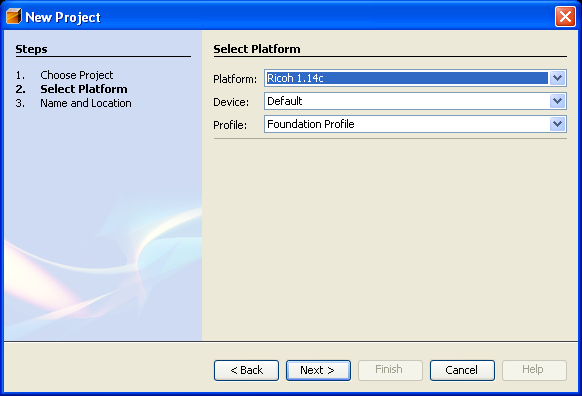
- In the Select Platform Page, choose Ricoh 1.14c.
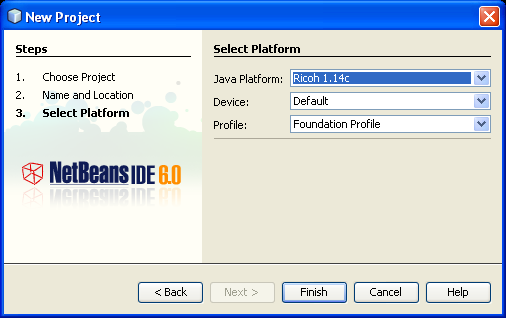
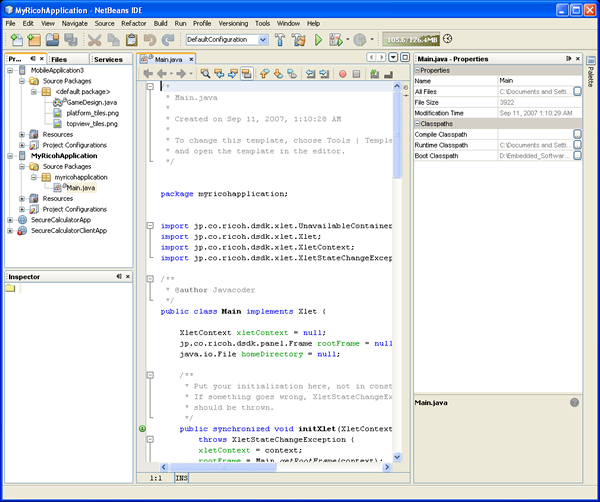
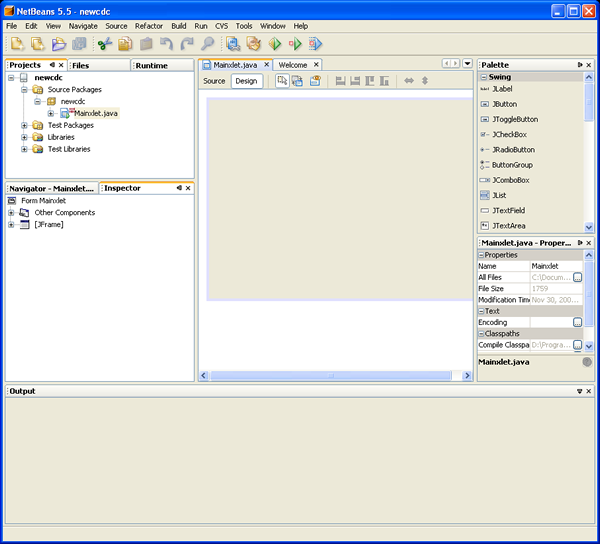
- Click Finish. The IDE creates the new application and opens the main class
in the Source Editor. The project structure is shown in the following figure.
Note that the generated code is based on the profile. In this case, the
main class is derived from
jp.co.ricoh.dsdk.xlet.Xlet. This
profile does not support the Netbeans GUI Designer.
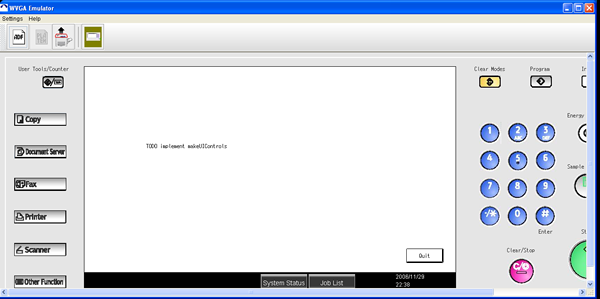
- To run the project, choose Run > Run Main Project. The emulator displays
the text, "TODO implement makeUIControls."
- You can also debug the project, and create and debug tests using the JUnit
framework.
Creating a New CDC Application - Personal Profile
Here we create an applet for the Personal Profile using the Nokia
Series 80 Platform SDK for Symbian OS, for Java, Personal Profile. The Sony
Ericsson platform also supports the Personal Profile.
- Choose File > New Project (Ctrl+Shift+N). Under Categories, select
Mobility. Under Projects, select the CDC Application template. Click Next.
- Name the project S80CdcApplication and specify a location for
the project on your computer. Leave the Create Main Class check box selected.
Click Next.
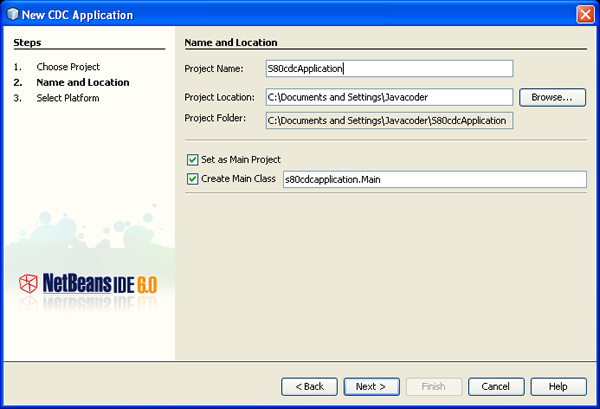
- In the Select Platform Page, choose the Nokia S80 Platform.
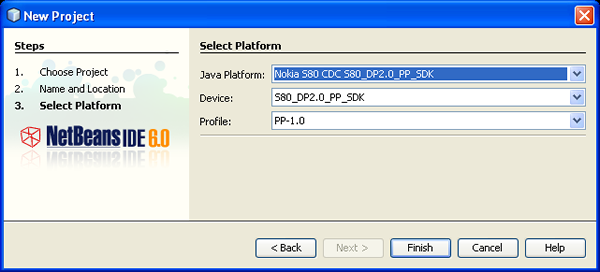
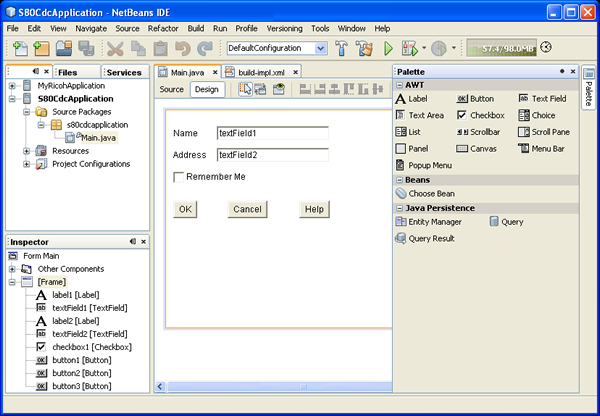
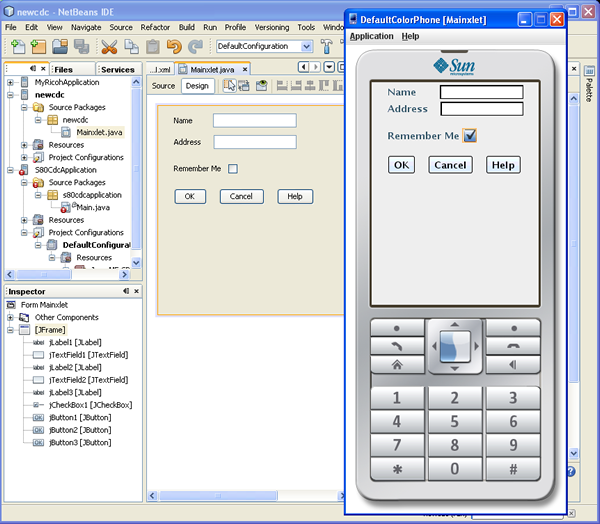
- Click Finish. The IDE creates the new application and opens the main class
form in the GUI Builder, as shown in the following figure. Click on Source
to see the source code for the applet. Note that the generated code is based
on the profile. In this case, the main class is derived from
java.awt.Frame.

Creating the Application Interface Using the Project
Matisse GUI Builder
You can use the Project Matisse GUI Builder in the same way you use it for
regular J2SE development. In the GUI Builder, right-click the Main.java form
and choose Set Layout > Free Design. Then drag and drop components from
the Palette window into the Design Area of the GUI Builder. Make sure you
only use AWT components in your form. Because all the Nokia Series 80
devices support the Personal Profile, only AWT widgets are available.
For more information on using the IDE's GUI Builder, see the Java
GUIs and Project Matisse Learning Trail.
When you are done, right-click the project in the Projects window and
choose Run Project. Your application should be displayed in the Applications
menu in the device emulator. You can now run the device in the emulator.
You can also debug the project, and create and debug tests using the JUnit
framework.
Creating a New CDC Application - AGUI Profile
Here we create a CDC Application, or Xlet, for the AGUI Profile
using the Sun Java Toolkit for CDC 1.0.
- Choose File > New Project (Ctrl+Shift+N) from the main window.
- From Categories, select Mobility. From Projects, select CDC Application.
Click Next.
- In the Name and Location page:
- Name the project
newcdc.
- Change the Main Class name to
newcdc.Mainxlet.
- Leave the Set as Main Project and Create Main Class check boxes checked.
- In the Select Platform page, use the drop-down menus to choose
Sun
    Java Toolkit for Connected Device Configuration for the Java Platform and
    DefaultColorPhone
as the Device. Leave the Profile settings as it is.
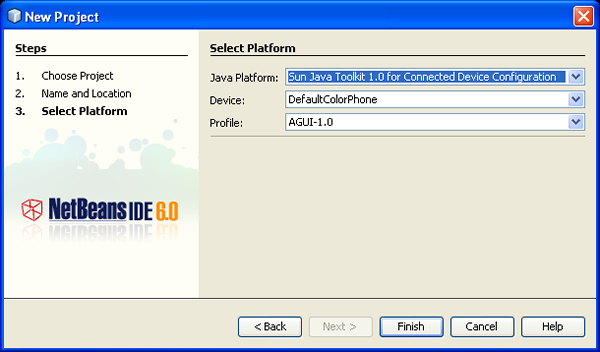
- Click Finish. The IDE creates the new application and opens the main class
form in the GUI Builder, as shown in the following figure.
Creating the Application Interface Using the Project
Matisse GUI Builder
You can use the Project Matisse GUI Builder in the same way you use it
for regular J2SE development. In the GUI Builder, right-click the Main.java
form and choose Set Layout > Free Layout. Then drag and drop components
from the Palette window into the Design Area of the GUI Builder. Make
sure you only use Swing components in your form. Because the AGUI
platform supports Swing, only Swing widgets are available.
For more information on using the IDE's GUI Builder, see the Java
GUIs and Project Matisse Learning Trail.
When you are done, right-click the project in the Projects window and choose
Run Project. Your application should be displayed in the device emulator.
You can also debug the project, and create and debug tests using the JUnit
framework.
Creating a New CDC Application for Windows CE (Using the
CrEme VM)
The NSIcom CrEme VM enables you to create and run Java Swing applications for
devices running Windows CE.
Creating an Application
- Choose File > New Project (Ctrl+Shift+N) from the main window.
- Under Categories, select CDC. Under Projects, select the CDC Application
template. Click Next.
- In the Name and Location Page, name the project
cremeapp. Click
Next.
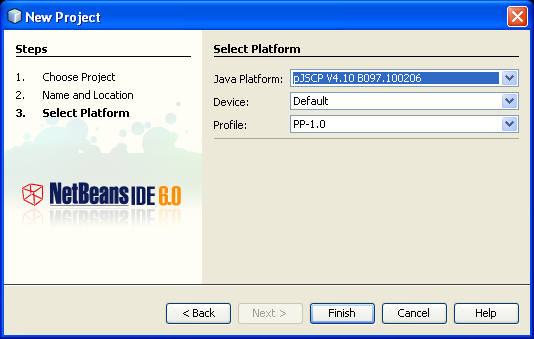
- In the Select Platform Page, choose pJSCP V4.10. Click Finish.
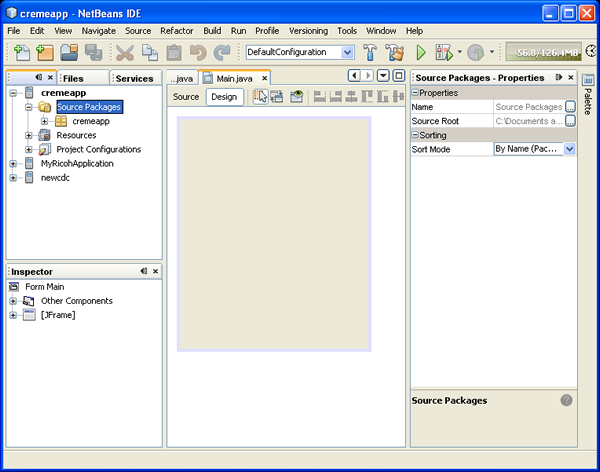
- In the Explorer window, right-click on the Source Packages node of your
project and choose New > JFrame form. Click Finish. The NetBeans GUI Builder
(Matisse) displays the new form.
Note: Make sure that the first fragment of code in the main()
method is as is shown below when you are going to run the application in
CrEme default emulator. This make sure that Swing is loaded.
try {
    UIManager.setLookAndFeel(UIManager.getCrossPlatformLookAndFeelClassName());
} catch(Exception exception) {
    System.out.println("Error loading L&F: " + exception);
}
-
Use the Project Matisse GUI builder to create your application. You can
use the Project Matisse GUI Builder in the same way you use it for regular
J2SE development.
Note that if there is an exception that crashes the emulator, the emulator
prints it to the standard output window and waits for a key press. You cannot,
however, send the keypress from the IDE. You must instead kill the VM from
the Process Explorer.
Compiling and Running the Application on a Device or Emulator
- Connect your mobile device using cable or Bluetooth.
If you have a device, skip to Step 12.
If you do not have a device, install the Microsoft Device Emulator and the
Virtual Machine Network Driver for the Microsoft Device Emulator as described
in the NetBeans
Mobility Pack for CDC 5.5.1 Installation Guide. Then follow steps 2 through
4.
If you do have a device, skip to Step 5.
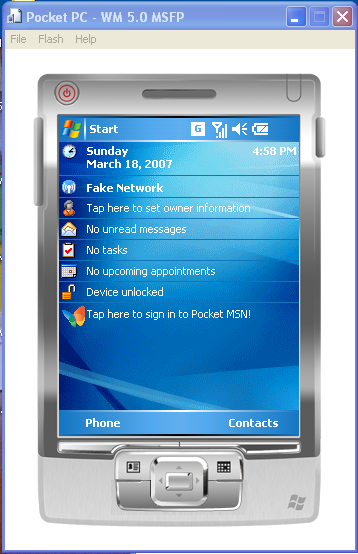
- Start the Microsoft Device Emulator by choosing Start > Programs >
Microsoft Windows Mobile 5.0 MSFP Emulator Images > Pocket PC Coldboot.
This opens the Pocket PC emulator.
- Choose Start > Programs > Microsoft Windows Mobile 5.0 MSFP Emulator
Images > Device Emulator Manager. This opens the Device Emulator Manager.
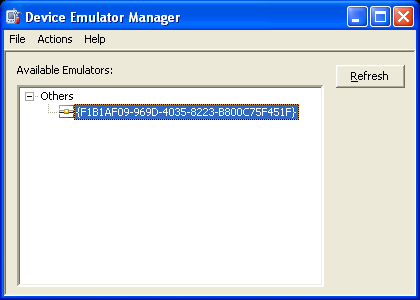
- In the Device Emulator Manager, choose Actions > Cradle.
- Open ActiveSync by clicking on the icon in the Application tray.
If you do not have ActiveSync installed, download and install it as described
in the NetBeans
Mobility Pack for CDC 5.5.1 Installation Guide.
When you open ActiveSync, it should, ActiveSync should detect and connect
to the device or the device emulator.
If it does not:
- Click on the ActiveSync icon in the Application Tray.
- Choose File > Connection settings.
- Do one or both of the following:
- Check the Allow connections to one of the following check box and select
DMA for the emulator, or USB or port number for a real device.
- Choose Run Connect which should detect the device automatically.
- Download and install the CrEme VM on your device (download).
Double-click on the downloaded file.
It install both on your PC and your device.
- Download and install Swing extensions (
CrE-ME410_swing.CAB)
for your device from NSIcom (download).
To install the Swing extensions on your device or device emulator:
- In the ActiveSync dialog, choose Tools > Explore Device.
The Mobile Device opens in an Explorer window.
- Copy
CrE-ME410_swing.CAB into the Explorer window.
- In the device or device emulator, choose Start > Programs > File
Explorer.
- Start CrE-ME410_swing.CAB.
Running the Application
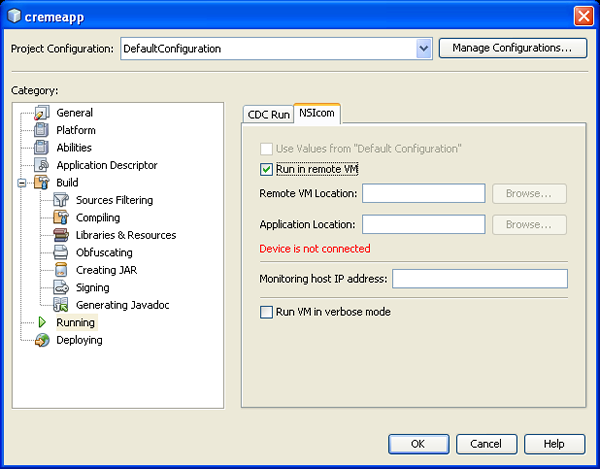
- Right-click the project and choose Properties.
The Properties page opens.
- Under Categories, choose Running.
- Choose the NSIcom tab and check Run in remote VM. Click OK to close the
Properties page.
- Choose Run > Run Main Application.
Using Configurations
You can use configurations to create more than one set of distribution JAR
and Java Application Descriptor (JAD) files for your project. This enables you
to create one set of source code and customize it for each mobile device you're
programming for.
The instructions below are generalized, but work for each of the platforms
previously described.
Adding a Configuration
- Right-click the Project node and choose Properties. In the Properties
dialog, Choose Add Configuration from the Project Configuration drop-down
list. This opens the Add Configuration dialog.
- Enter a name for your configuration in the Configuration Name field. The
name should identify the target platform on which you deploy the JAR/JAD
created for this configuration. For this example, enter
BlackWhiteDisplay
and click OK. You have just created a new configuration.
- Configurations can also be added by clicking the Manage Configurations
button in the Properties dialog. This brings up the Project Configuration
Manager dialog which contains options for adding, removing, or duplicating
configurations.
Customizing a Configuration
You can add as many configurations as you would like to your project. You
can then modify settings in the Project Properties dialog for each configuration
that you've added.
- Right-click the Project node and choose Properties. In the Properties
dialog, choose the Platform node.
- Choose the
BlackWhiteDisplay configuration from the configuration
combo box at the top of the Properties dialog.
- The components in the Platform dialog are all disabled. This is because
this configuration is currently taking the values used by the default configuration
for this panel. Uncheck the Use Values from "DefaultConfiguration"
option at the top of the panel. All components on this panel can now be
edited.
- Change the Device option to DefaultGrayPhone.
- Toggle the Project Configuration dialog at the top of the Properties dialog
and observe that the Device option changes based on which configuration
is currently selected. This method of configuration customization works
for each panel (other than the general panel) in the dialog. Click OK to
save your configuration changes and exit the Properties dialog.
Creating an Ability
An Ability is a specific attribute of a project configuration. It
can be a physical attribute such as screen size, or an API or JSR supported
by the configuration. You can create a new ability and associate it with one
or more project configurations. You can then use preprocessior code blocks
to associate certain code with that ability. If you later need to add or remove
configurations, you won't have to go through all your code and associate the
configuration with each code block. Instead, you need only to add that ability
to the configuration. The configuration is then automatically associated with
any code block that is associated with the ability.
- Right-click on the project node and choose Properties.
- Choose the Abilities page from the Category menu tree.
- Choose a configuration from the Project Configuration dropdown menu. This
is the configuration with which the ability is associated.
- If necessary, uncheck the Use Values from "DefaultConfiguration" checkbox.
- Click the Add button.
This opens the Add Ability dialog.
- In the New Ability dialog, enter a name for the ability, or choose an
ability from the drop-down menu. Optionally, enter a value for the ability.
Click Ok to close the New Ability dialog. The ability is now associated
with the selected project configuration.
You can associate the ability with other configurations by choosing a different
configuration from the Project Configuration menu and clicking the Add button.
Running Configurations
Configurations can be built and run individually or multiple configurations.
- Right-click the Project node and choose Run.
- Use the configuration combo box in the Toolbar to change the configuration.
Choose Run again.
- Two emulators appear, one for each configuration.
-
To build multiple configurations simultaneously, right-click
on a project and choose Batch Build. In the dialog that opens, check the
box next to each configuration you want to build.
-
To test a device on the fly, right-click on the project
and choose Run With. In the dialog that opens, choose the emulator platform
and device you want to run.
Next Steps
In addition to the IDE's built-in help documentation about Java ME CDC development, tutorials
and articles about the technologies supported by the Mobility pack can be found at the following location: