Consuming Web Services in Mobile Applications
This tutorial describes how you can use NetBeans IDE to create a mobile client application
that consumes a web service. You will create an application that fetches the daily Dilbert comic strip via
a live on-line web service, converts the graphics to a space-saving format, and displays
the strip on a mobile device.
In this tutorial, you first create a web service client in a mobile application
to connect to the on-line DailyDilbert service.
You are then shown how to use the Visual MIDlet Designer to graphically design the layout of
your application. Next, you add code that transforms the comic's graphic format from GIF
to PNG, which is the format that mobile devices support. Finally, you use an
emulator to see the daily strip in the IDE.
Contents
|
|
 |
Software Needed for the Tutorial
Before you begin, you need to download or install the following software on your computer:
- Java Standard Development Kit (JDK) version 5.0 or 6.0
- Sun Java Wireless Toolkit (WTK) 2.5.2 for CLDC (download)
- The full distribution of NetBeans IDE 6.0
- A Java EE 5 server, such as GlassFish or Tomcat, which can be installed together with the above item.
Creating the Web Service Client
First, we'll create a new Web Application project. The project will contain our web service client.
- Choose File > New Project. From Categories, choose Web. From Projects, choose Web Application. Click Next.
- Name the project DilbertWebApplication and choose Java EE 5, as shown below.
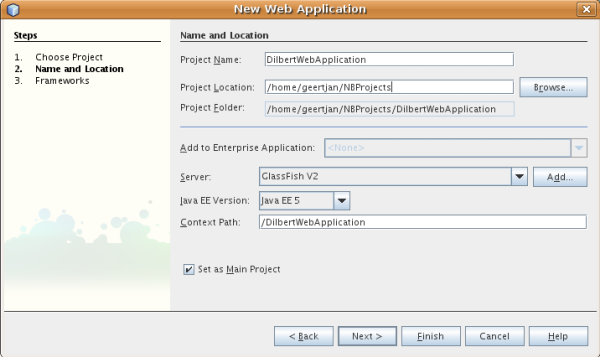
- Click Finish to let the IDE create the application.
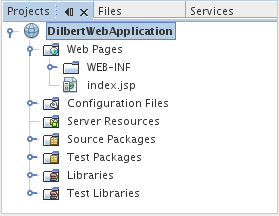
The application is created and looks as follows in the Projects window:
Using the Web Service Client Wizard
Now we'll add a web service client to consume the DailyDiblert service.
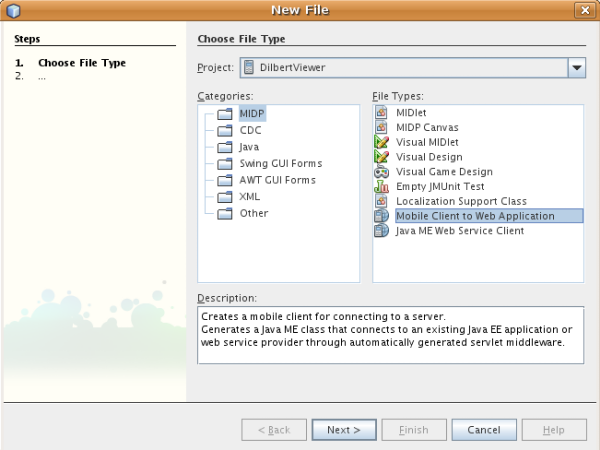
- Right-click the DilbertWebApplication project node and choose
New > Web Service Client. Alternatively, you can also select this wizard
from the New File wizard, as shown here:
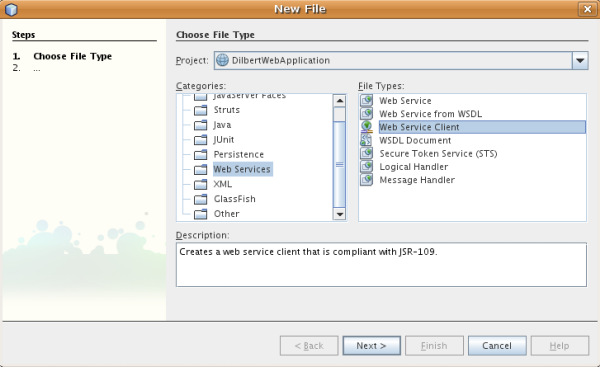
The Web Service Client wizard appears.
- Select WSDL URL and enter the following URL:
http://www.esynaps.com/WebServices/DailyDiblert.asmx?WSDL
- Name the package dilbert. You should now see the following:
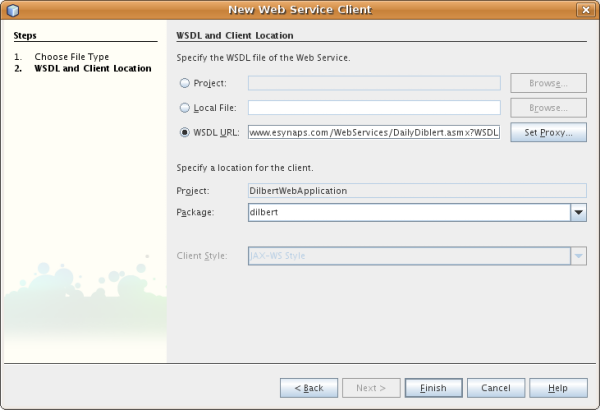
- Click Finish.
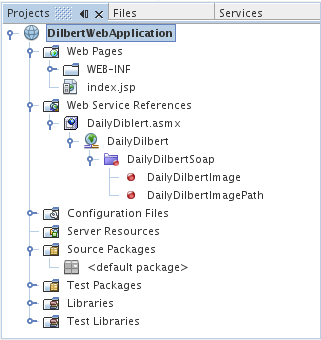
The IDE downloads the WSDL file and creates the client-side artifacts, which you can see
in the build folder, within the Files window. The Projects window displays the logical
view as shown here:
Creating the Mobile Client
In this section, we'll create a new Mobile Application project.
We then use the Mobile Client to Web Application wizard to connect the application
to the DailyDiblert service.
- Choose File > New Project. From Categories, choose Mobility. From Projects, choose MIDP Application, as shown below:
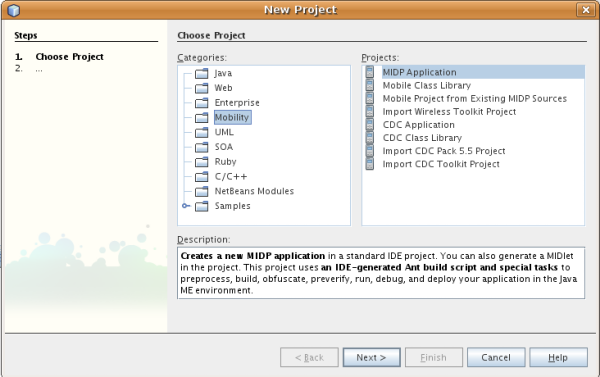
Click Next.
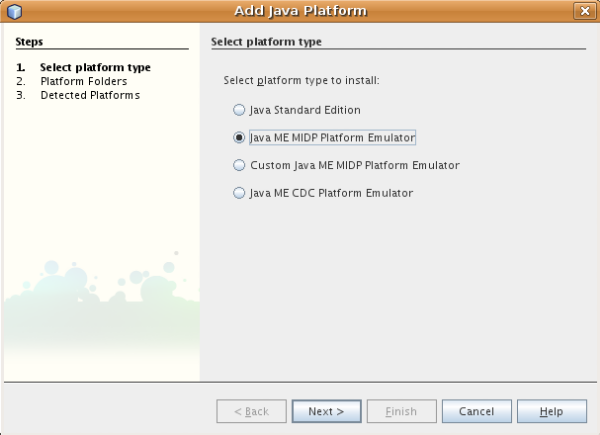
- If you have not registered a Java ME MIDP Platform Emulator, you now see this dialog:
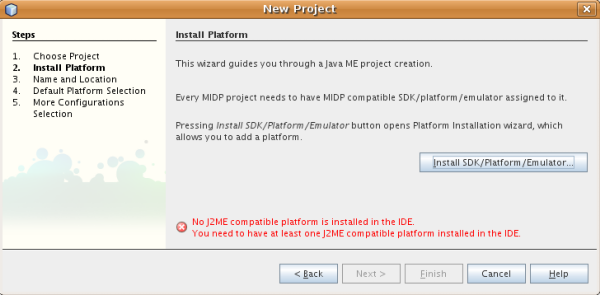
Note:
When you click Install SDK/Platform/Emulator, you see the following dialog, where
you should click Java ME MIDP Platform Emulator:
Complete the wizard to install the emulator.
- Enter DilbertViewer as the Project Name and uncheck the Create Hello MIDlet
check box.
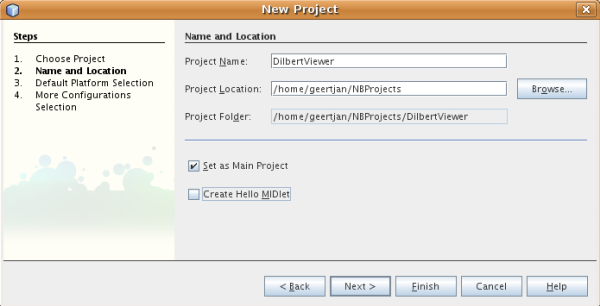
- Click Finish to create the MIDlet.
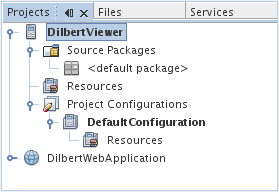
The mobile application is created and looks as follows in the Projects window:
Using the Mobile Client to Web Application Wizard
The Mobile Client to Web Application wizard generates a servlet that connects
to a web application that includes a web service client.
- In the Projects window, right-click the DilbertViewer project node and choose New
> Mobile Client to Web Application, as shown below:
Click Next.
- DibertWebApplication should be listed as the Web application. Change the
Servlet name to DilbertServlet and name the package dilbert. For Mobile Client
Uses, select Web Service Client in Web Application and select
DailyDiblert.asmx, as shown here:
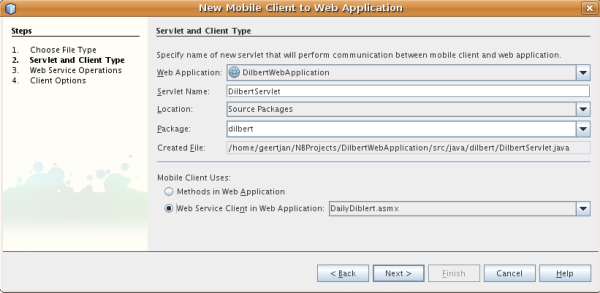
Click Next.
- Select DailyDilbertImage, as shown below:
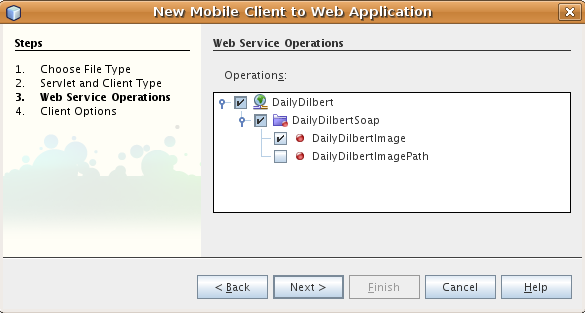
Click Next.
- Change the Client Name to DilbertViewer,
within a package named dilbert, as below:

- Click Finish.
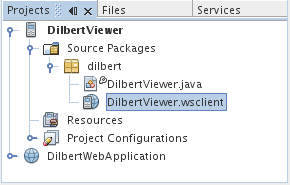
The new artifacts are created and the Projects window now displays the application's logical view, as below:
Creating the Visual MIDlet
In this section, you will create a visual MIDlet and use the designer
to add components and connect them to each other.
- Right-click the project node and choose New > Visual MIDlet.
- Name the file DilbertVisualMIDlet and specify dilbert
as the package name, as shown below:

Click Finish.
A new visual MIDlet file is created and is opened in the Visual MIDlet Designer.
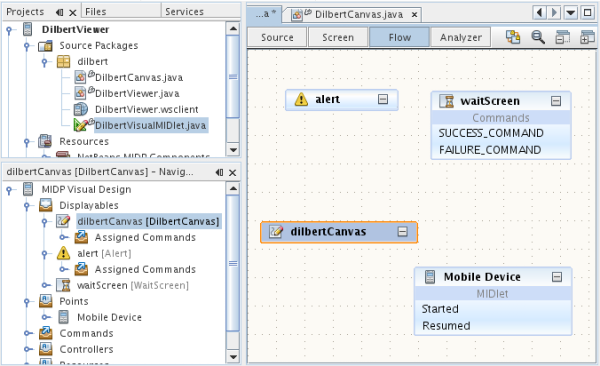
- Now use the Palette (Ctrl-Shift-8) to drag and drop an Alert component and a Wait Screen
component onto the canvas, as follows:
You can put the components anywhere you like on the designer.
In the next section, we will create a new component and add it to the palette. Then we will drag it
onto the designer. Next, we will connect the components to each other to establish
the relationships between them.
Creating the Canvas Component
In this section, we'll create a custom canvas component to display the graphic file.
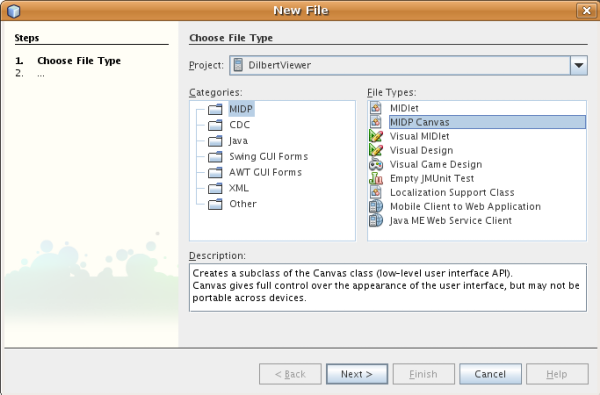
- Right-click on the DilbertViewer project node and choose New > Other.
Under Categories, choose MIDP. Under File Types, choose MIDP Canvas, as shown here:
Click
Next.
- Enter DilbertCanvas for the MIDP Class Name and dilbert for the package
name. Click Finish.
- Open the newly created file in the IDE and insert code so it looks as follows:
package dilbert;

import javax.microedition.lcdui.Canvas;
import javax.microedition.lcdui.Graphics;
import javax.microedition.lcdui.Image;

public class DilbertCanvas extends Canvas {

    private int coordX,  coordY;
    private int imageWidth,  imageHeight;
    private Image image;
    private int screenWidth,  screenHeight;

    /** Creates a new instance of DilbertCanvas */
    public DilbertCanvas() {
        screenHeight = getHeight();
        screenWidth = getWidth();
    }

    public void setImage(Image image) {
        this.imageWidth = image.getWidth();
        this.imageHeight = image.getHeight();
        this.image = image;
    }

    protected void paint(Graphics graphics) {
        graphics.setColor(255, 255, 255);
        graphics.fillRect(0, 0, getWidth(), getHeight());
        graphics.drawImage(image, coordX, coordY, Graphics.LEFT | Graphics.TOP);
    }

    protected void keyPressed(int keyCode) {
        int key = getGameAction(keyCode);
        if (key == DOWN) {
            if (coordY - screenHeight + imageHeight > 0) {
                coordY -= 10;
            }
        } else if (key == UP) {
            if (coordY < 0) {
                coordY += 10;
            }
        } else if (key == RIGHT) {
            if (coordX - screenWidth + imageWidth > 0) {
                coordX -= 10;
            }
        } else if (key == LEFT) {
            if (coordX < 0) {
                coordX += 10;
            }
        }
        repaint();
    }
 }
- Right-click DilbertCanvas and choose Build Project.
You have now built and compiled the canvas component.
In the next section, we add the component to the palette and then we drag it from there
and drop it on the designer.
Adding the Canvas Component to the Palette
Next, you add the canvas component
to the palette and then you incorporate the canvas component
into the application.
- Open the DilbertVisualMIDlet file in the editor and then
open the Palette (Ctrl-Shift-8). Right-click in the Palette and
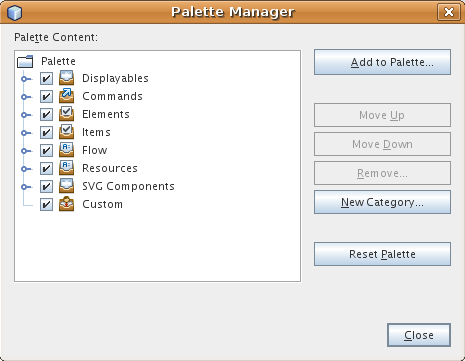
choose Palette Manager. The Palette Manager appears, as shown below:
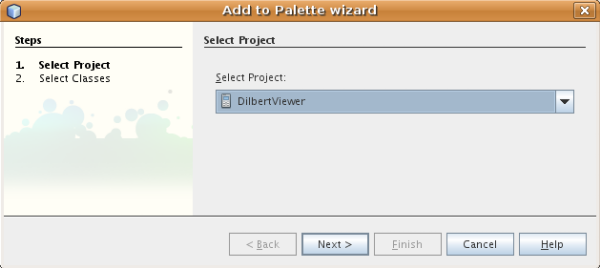
- Click on Add to Palette. The Add to Palette wizard appears, as shown below,
displaying the mobile application that contains the Java class that you want to
add to the palette:
Click Next.
- Select
dilbert.DilbertCanvas.
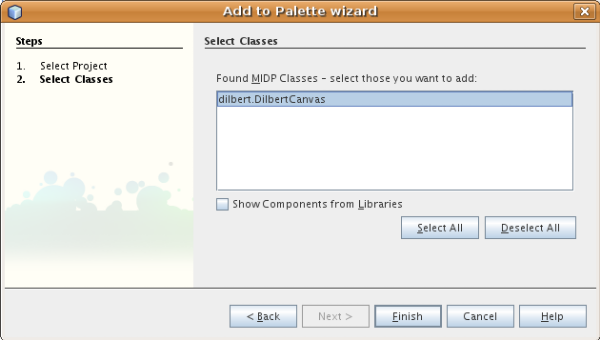
Click Finish.
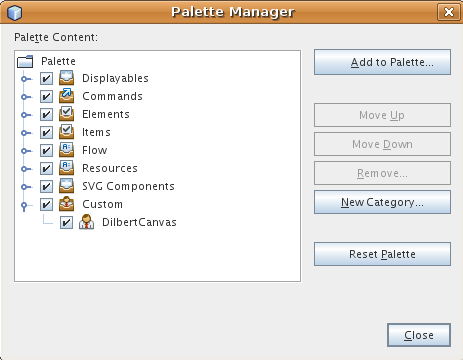
- Check that you see the addition of the canvas class, as shown below:
Using the Canvas Component
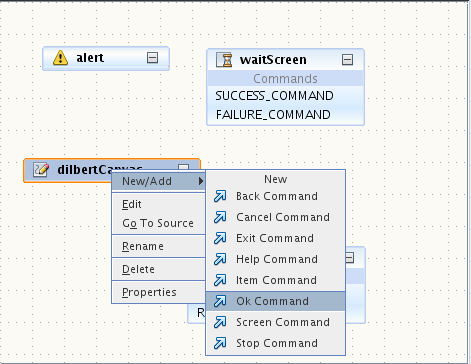
- Open the visual MIDlet and the Palette (Ctrl-Shift-8). Drag the DilbertCanvas
item from the Custom category in the Palette into the designer.
- Right-click on the dropped canvas component and choose
New/Add > OK command, as shown below:
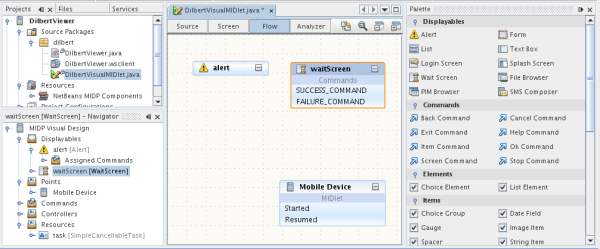
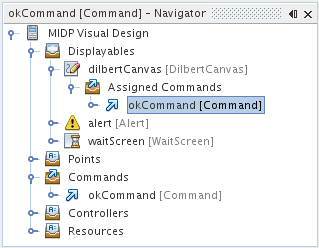
In the Navigator (Ctrl-7), you should now see the following:
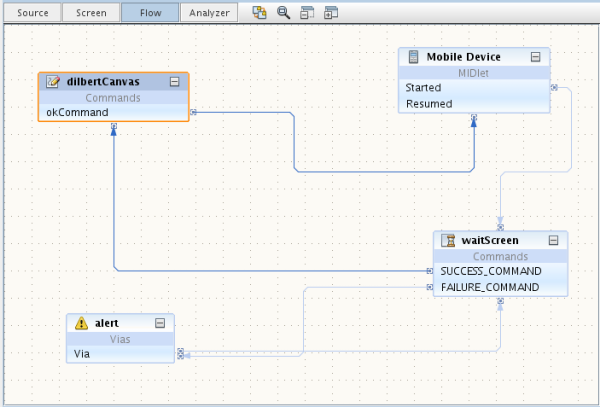
- Create a flow between the components by connecting them as follows:
- Connect from the Started point of the Mobile Device to the waitScreen component.
- Connect from the Success command of the waitScreen component to the dilbertCanvas component.
- Connect from the Failure command of the waitScreen component to the alert component.
- Connect from the okCommand of the dilbertCanvas component to the Mobile Device.
At this point, you should see the following:
- Switch to the Source view and change the
getTask() method as shown below in bold:
   private byte[] dailyDilbertImage_returnValue;

   public SimpleCancellableTask getTask() {
        if (task == null) {
            // write pre-init user code here
            task = new SimpleCancellableTask();
            task.setExecutable(new org.netbeans.microedition.util.Executable() {
                public void execute() throws Exception {

                    if (dailyDilbertImage_returnValue == null) {
                        DilbertViewer client = new DilbertViewer();
                        dailyDilbertImage_returnValue = client.dailyDilbertImage();
                        Image dilbertImage = Image.createImage(dailyDilbertImage_returnValue, 0, dailyDilbertImage_returnValue.length);
                        getDilbertCanvas().setImage(dilbertImage);
                    }
                }
            });
        // write post-init user code here
        }
        return task;
   }
Transforming the Image
Now we have a client application to receive the daily image. But the received
image is in GIF format, which is much too large for mobile devices with limited
memory. So we'll need to transform the image to the PNG format, which is smaller
and more easily sized for the many different display sizes available to mobile
devices.
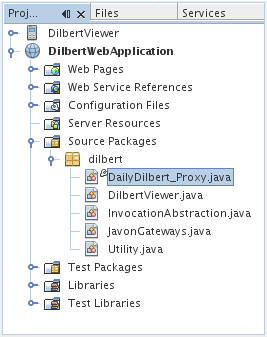
- Open the
DailyDilbert_Proxy file, shown below:
- Change the
dailyDilbertImage() method by adding the highlighted code below:
public byte[] dailyDilbertImage() throws RemoteException, Exception {
    try {
        ByteArrayInputStream in = new ByteArrayInputStream(getService().getDailyDilbertSoap().dailyDilbertImage());
        BufferedImage image = ImageIO.read(in);
        ByteArrayOutputStream out = new ByteArrayOutputStream();
        ImageIO.write(image, "png", out);
        return out.toByteArray();
    } catch (java.rmi.RemoteException ex) {
        throw ex;
    } catch (Exception ex) {
        throw ex;
    }
}
Deploying the Application
First we deploy the web application. Then we run the mobile application.
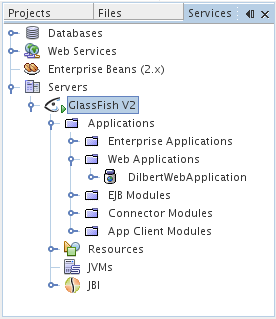
- In the Projects window, right-click the DilbertWebApplication and choose
Deploy Application. After a moment, the server starts up, if it is not
already running. Then the application deploys to the server. To see it
deployed, look in the Services window, as below:
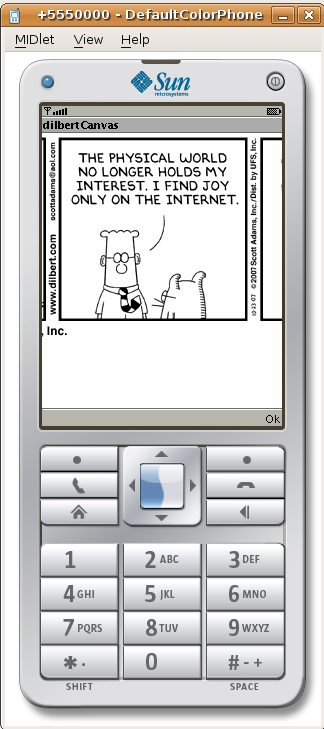
- Right-click the mobile project and choose Run.
The mobile application runs. A device emulator opens. In the device emulator screen, click the button under Launch. Then click
the Select button. The application will go out to the internet and return the latest Dilbert
strip, as shown below:
Summary
This tutorial showed how you can use the Mobile Client to Web Application to
quickly create a MIDlet that consumes a Web service.
It also demonstrated how you can create a custom component and add it to your
application using the Visual Mobile Designer.
Next Steps
In addition to the IDE's built-in help documentation about Java ME CDC development, tutorials
and articles about the technologies supported by the Mobility pack can be found at the following location: