This tutorial demonstrates how to create a module containing file templates. Once you have installed the module in the IDE, the file templates are available in the New File wizard. Sharing file templates is easy once you have a module that contains them—the IDE lets you create a binary that you can make available to others, who can then install it through the Update Center.
A file template consists of a template file, an HTML description file, and an icon. The HTML description file displays information about the template in the New File wizard. The icon identifies the template and distinguishes it from other templates in the New File wizard. In this tutorial, you create a new file template by copying the content of an existing file template into an empty file. Then, once you have set up a description file for the New File wizard and a distinguishing icon, you register the template, the HTML description file, and the icon in the NetBeans configuration file, the layer.xml file.
Note: If you use the New File Type wizard, a file template is automatically created for you. The manual steps described in this tutorial are not necessary when the New File Type wizard is used. The New File Type wizard also lets you select an icon and it creates an HTML description file. The New File Type wizard automatically registers the file template, the HTML description file, and the icon in the layer.xml file. Therefore, if the file template that you want to create relates to a new file type, it is better to use the New File Type wizard. For details, see NetBeans DataLoader Module Tutorial.
|
|
For more information on working with NetBeans modules, see the NetBeans Development Project home on the NetBeans website. If you have questions, visit the NetBeans Developer FAQ or use the feedback link at the top of this page.
Before you begin, you need to install the following software on your computer:
We begin by going through the New Module Project wizard, which will create a source structure, with all the minimum requirements, for our new module.
The IDE creates the Additional File Templates project. The project contains all of your sources and project metadata, such as the project's Ant build script. The project opens in the IDE. You can view its logical structure in the Projects window (Ctrl-1) and its file structure in the Files window (Ctrl-2). For example, the Projects window should now look as follows:
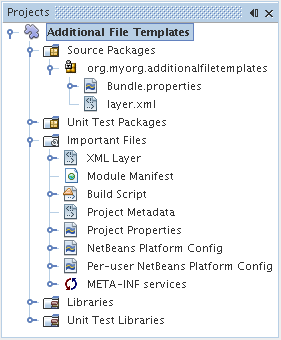
For basic information on each of the files above, see the Introduction to NetBeans Module Development.
A file template consists of a template file, an HTML description file, and an icon. An easy way to create a new file template is to copy the content of an existing file template into an empty file. Then, once you have set up a description file for the New File wizard and a distinguishing icon, you are ready to register the template in the layer.xml file.
A new HTML file, called HTML.html, opens in the Source Editor, containing the standard HTML file's content shown below:
<!DOCTYPE HTML PUBLIC "-//W3C//DTD HTML 4.01 Transitional//EN">

<html>
  <head>
    <title></title>
  </head>
  <body>

  </body>
</html>
An empty HTML file opens in the Source Editor and its node appears in the Projects window.
<!DOCTYPE HTML PUBLIC "-//W3C//DTD HTML 4.01 Transitional//EN">
<html>
   <head>
      <title></title>
   </head>
   <body>
      Creates new HTML file.
   </body>
</html>
The icon accompanies the file template in the New File wizard. It identifies it and distinguishes it from other file templates. The icon must have a dimension of 16x16 pixels.
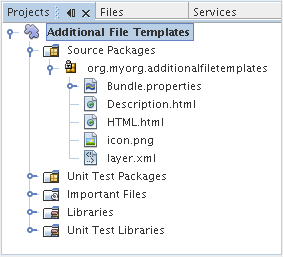
Name the icon icon.png and add it to the org.myorg.additionalfiletemplates package.
The Projects window should now look as follows:
Once you have created the file template, you must register it in the NetBeans System Filesystem. The layer.xml file is made for this purpose.
<folder name="Templates">

        <folder name="Other">

            <attr name="SystemFileSystem.localizingBundle" stringvalue="org.myorg.additionalfiletemplates.Bundle"/>
            <file name="MyHTML.html" url="HTML.html">
                <attr name="template" boolvalue="true"/>
                <attr name="SystemFileSystem.localizingBundle" stringvalue="org.myorg.additionalfiletemplates.Bundle"/>
                <attr name="SystemFileSystem.icon" urlvalue="nbresloc:/org/myorg/additionalfiletemplates/icon.png"/>
                <attr name="templateWizardURL" urlvalue="nbresloc:/org/myorg/additionalfiletemplates/Description.html"/>
            </file>

        </folder>

</folder>
Templates/Other/MyHTML.html=My HTML File
The IDE uses an Ant build script to build and install your module. The build script is created for you when you create the module project.
In the Projects window, right-click the Additional File Templates project and choose Install/Reload in Target Platform.
The module is built and installed in the target IDE or Platform. The target IDE or Platform opens so that you can try out your new module. The default target IDE or Platform is the installation used by the current instance of the development IDE. Note that when you run your module, you will be using a temporary test user directory, not the development IDE's user directory.
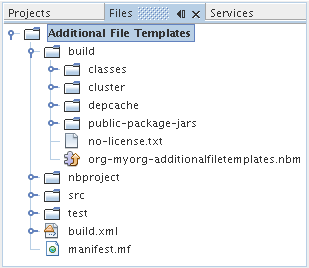
The NBM file is created and you can view it in the Files window (Ctrl-2):
For more information about creating and developing NetBeans Module, see the following resources:
|
Version
|
Date
|
Changes
|
| 1 | 26 June 2005 | Initial version |
| 2 | 28 June 2005 |
|
| 3 | 2 October 2005 |
|
| 4 | 3 October 2005 |
|
| 5 | 16 March 2006 |
|
| 6 | 12 September 2006 |
|
| 7 | 9 June 2007 | Started updating to NetBeans 6. |