Contents
Getting started
Who should read this guide
This guide is for experienced software developers who want to deploy applications to OpenStack clouds.
If you are familiar with OpenStack but have not created a cloud application in general or an OpenStack application in particular, this section teaches you how to program with OpenStack components.
What you will learn
Deploying applications in a cloud environment can be very different from deploying them in a traditional IT environment. This guide teaches you how to deploy applications on OpenStack and some best practices for cloud application development.
A general overview
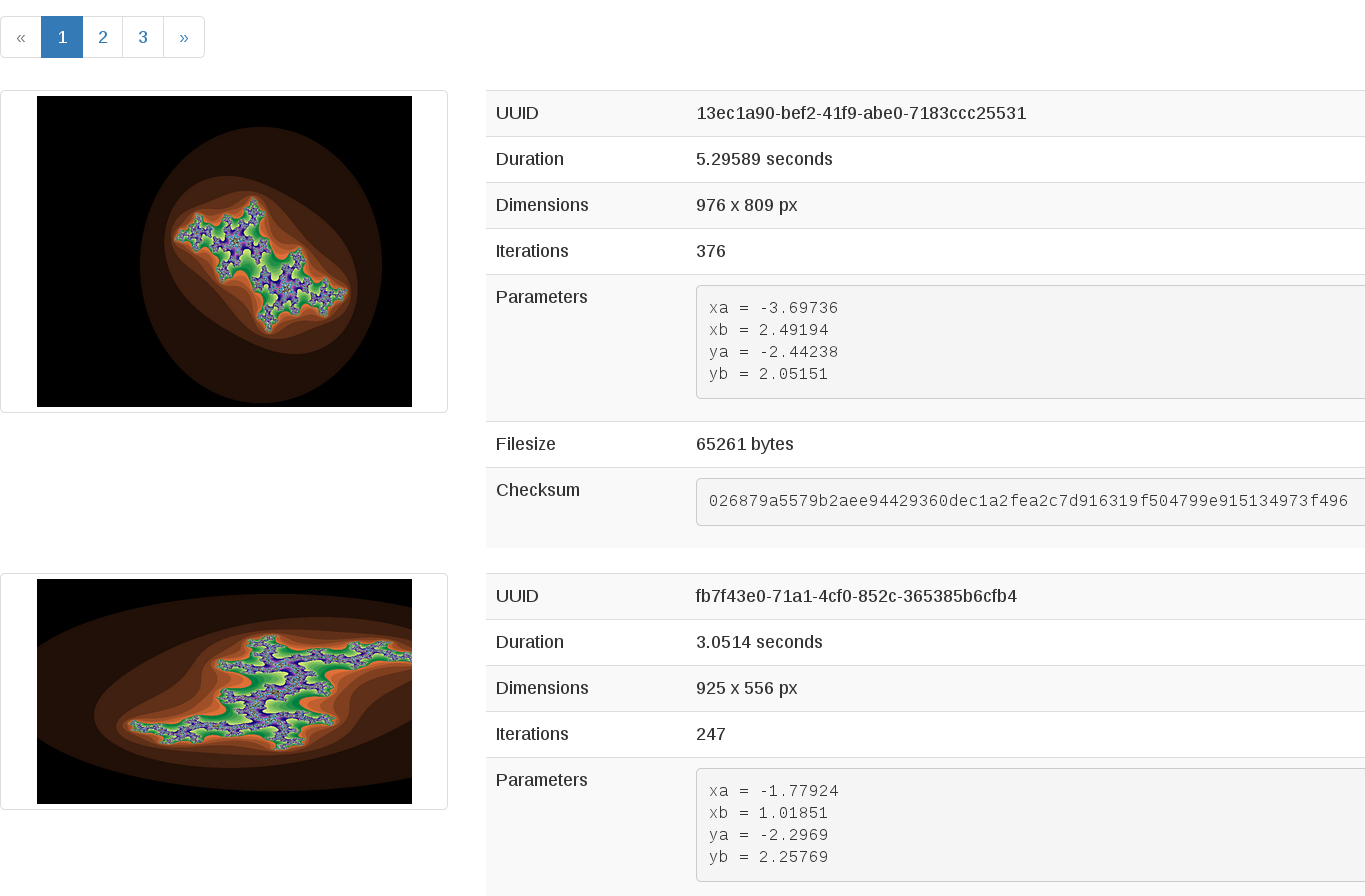
This tutorial shows two applications. The first application is a simple fractal generator that uses mathematical equations to generate beautiful fractal images. We show you this application in its entirety so that you can compare it to a second, more robust, application.
The second application is an OpenStack application that enables you to:
- Create and delete compute resources. These resources are virtual machine instances where the Fractals application runs.
- Make cloud-related architecture decisions such as turning functions into micro-services and modularizing them.
- Scale available resources up and down.
- Use Object and Block storage for file and database persistence.
- Use Orchestration services to automatically adjust to the environment.
- Customize networking for better performance and segregation.
- Explore and apply advanced OpenStack cloud features.
Choose your OpenStack SDK
Anyone with a programming background can easily read the code in this guide. Although this guide focuses on a particular SDK, you can use other languages and toolkits with the OpenStack cloud:
| Language | Name | Description | URL |
|---|---|---|---|
| Python | Libcloud | A Python-based library that the Apache Foundation manages. Use it to work with multiple cloud types. | https://libcloud.readthedocs.org/en/latest/compute/drivers/openstack.html |
| Python | OpenStack SDK | A Python-based library for OpenStack. | https://developer.openstack.org/sdks/python/openstacksdk/ |
| Python | Shade | A Python-based library developed by OpenStack Infra team. Use it to operate multiple OpenStack clouds. | https://docs.openstack.org/infra/shade/ |
| Java | jClouds | A Java-based library that the Apache Foundation manages. Use it to work with multiple cloud types. | https://jclouds.apache.org/guides/openstack/ |
| Ruby | fog | A Ruby-based SDK. Use it to work with multiple clouds. | https://github.com/fog/fog-openstack/blob/master/docs/getting_started.md |
| node.js | pkgcloud | A Node.js-based SDK. Use it work with multiple clouds. | https://github.com/pkgcloud/pkgcloud/tree/master/docs/providers/openstack |
| PHP | php-opencloud | A PHP-based library. Use it to write PHP code that works with OpenStack clouds. | http://php-opencloud.readthedocs.org/en/latest/getting-started-with-openstack.html |
| .NET Framework | OpenStack SDK for Microsoft .NET | A .NET-based library. Use it to write C++ or C# code for Microsoft applications. | https://www.nuget.org/packages/openstack.net |
| Go | gophercloud | A go-based SDK. Use it to write Golang code that works with OpenStack clouds. | http://gophercloud.io/ |
For a list of available SDKs, see Software Development Kits.
Other versions of this guide show you how to use the other SDKs and languages to complete these tasks. If you are a developer for another toolkit that you would like this guide to include, feel free to submit code snippets. For more information, contact OpenStack Documentation team members.
What you need
We assume that you can already access an OpenStack cloud. You must have a project, also known as a tenant, with a minimum quota of six instances. Because the Fractals application runs in Ubuntu, Debian, Fedora-based, and openSUSE-based distributions, you must create instances that use one of these operating systems.
To interact with the cloud, you must also have
libcloud 0.15.1 or higher installed.
Obtain the following information from your cloud provider:
- auth URL
- user name
- password
- project ID or name (projects are also known as tenants)
- cloud region
You can also download the OpenStack RC file from the OpenStack Horizon
dashboard. Log in to the dashboard and click Project->Access &
Security->API Access->Download OpenStack RC file. If you use this method, be
aware that the “auth URL” does not include the path. For example, if your
openrc.sh file shows:
export OS_AUTH_URL=http://controller:5000/v2.0
The actual auth URL is:
http://controller:5000
How you interact with OpenStack
In this tutorial, you interact with your OpenStack cloud through the SDK that you chose in “Choose your OpenStack SDK.” This guide assumes that you know how to run code snippets in your language of choice.
To try it, add the following code to a Python script (or use an
interactive Python shell) by calling python -i.
from libcloud.compute.types import Provider
from libcloud.compute.providers import get_driver

auth_username = 'your_auth_username'
auth_password = 'your_auth_password'
auth_url = 'http://controller:5000'
project_name = 'your_project_name_or_id'
region_name = 'your_region_name'

provider = get_driver(Provider.OPENSTACK)
conn = provider(auth_username,
                auth_password,
                ex_force_auth_url=auth_url,
                ex_force_auth_version='2.0_password',
                ex_tenant_name=project_name,
                ex_force_service_region=region_name)
Note
Because the tutorial reuses the conn object,
make sure that you always have one handy.
Note
If you receive the
libcloud.common.types.InvalidCredsError: 'Invalid
credentials with the provider'
exception when you run
one of these API calls, double-check your credentials.
Note
If your provider does not support regions, try a blank string (‘’) for the region_name.
Flavors and images
To run your application, you must launch an instance. This instance serves as a virtual machine.
To launch an instance, you choose a flavor and an image. The flavor represents the size of the instance, including the number of CPUs and amount of RAM and disk space. An image is a prepared OS installation from which you clone your instance. When you boot instances in a public cloud, larger flavors can be more expensive than smaller ones in terms of resources and monetary cost.
To list the images that are available in your cloud, run some API calls:
images = conn.list_images()
for image in images:
    print(image)
This code returns output like this:
<NodeImage: id=2cccbea0-cea9-4f86-a3ed-065c652adda5, name=ubuntu-14.04, driver=OpenStack  ...>
<NodeImage: id=f2a8dadc-7c7b-498f-996a-b5272c715e55, name=cirros-0.3.3-x86_64, driver=OpenStack  ...>
You can also get information about available flavors:
flavors = conn.list_sizes()
for flavor in flavors:
    print(flavor)
This code returns output like this:
<OpenStackNodeSize: id=1, name=m1.tiny, ram=512, disk=1, bandwidth=None, price=0.0, driver=OpenStack, vcpus=1,  ...>
<OpenStackNodeSize: id=2, name=m1.small, ram=2048, disk=20, bandwidth=None, price=0.0, driver=OpenStack, vcpus=1,  ...>
<OpenStackNodeSize: id=3, name=m1.medium, ram=4096, disk=40, bandwidth=None, price=0.0, driver=OpenStack, vcpus=2,  ...>
<OpenStackNodeSize: id=4, name=m1.large, ram=8192, disk=80, bandwidth=None, price=0.0, driver=OpenStack, vcpus=4,  ...>
<OpenStackNodeSize: id=5, name=m1.xlarge, ram=16384, disk=160, bandwidth=None, price=0.0, driver=OpenStack, vcpus=8,  ...>
Your images and flavors will be different, of course.
Choose an image and flavor for your instance. You need about 1GB RAM, 1 CPU, and a 1GB disk. This example uses the Ubuntu image with a small flavor, which is a safe choice. In subsequent tutorial sections in this guide, you must change the image and flavor IDs to correspond to the image and flavor that you choose.
If the image that you want is not available in your cloud, you can usually upload one depending on the policy settings of your cloud. For information about how to upload images, see obtaining images.
Set the image and size variables to appropriate values for your cloud. We will use these variables in later sections.
First, tell the connection to get a specified image by using the ID of the image that you picked in the previous section:
image_id = '2cccbea0-cea9-4f86-a3ed-065c652adda5'
image = conn.get_image(image_id)
print(image)
This code returns output like this:
<NodeImage: id=2cccbea0-cea9-4f86-a3ed-065c652adda5, name=ubuntu-14.04, driver=OpenStack ...>
Next, tell the script which flavor you want to use:
flavor_id = '2'
flavor = conn.ex_get_size(flavor_id)
print(flavor)
This code returns output like this:
<OpenStackNodeSize: id=2, name=m1.small, ram=2048, disk=20, bandwidth=None, price=0.0, driver=OpenStack, vcpus=1, ...>
Now, you can launch the instance.
Launch an instance
Use your selected image and flavor to create an instance.
Note
The following instance creation example assumes that you have a single-tenant network. If you receive the ‘Exception: 400 Bad Request Multiple possible networks found, use a Network ID to be more specific’ error, you have multiple-tenant networks. You must add a networks parameter to the call that creates the server. See Appendix for details.
Create the instance.
Note
Your SDK might call an instance a ‘node’ or ‘server’.
instance_name = 'testing'
testing_instance = conn.create_node(name=instance_name, image=image, size=flavor)
print(testing_instance)
This code returns output like this:
<Node: uuid=1242d56cac5bcd4c110c60d57ccdbff086515133, name=testing, state=PENDING, public_ips=[], private_ips=[], provider=OpenStack ...>
If you list existing instances:
instances = conn.list_nodes()
for instance in instances:
    print(instance)
The new instance appears.
<Node: uuid=1242d56cac5bcd4c110c60d57ccdbff086515133, name=testing, state=RUNNING, public_ips=[], private_ips=[], provider=OpenStack ...>
Before you continue, you must do one more thing.
Destroy an instance
Cloud resources, such as running instances that you no longer use, can cost money. To avoid unexpected expenses, destroy cloud resources.
conn.destroy_node(testing_instance)
If you list the instances again, the instance disappears.
Leave your shell open to use it for another instance deployment in this section.
Deploy the application to a new instance
Now that you know how to create and delete instances, you can deploy the sample application. The instance that you create for the application is similar to the first instance that you created, but this time, we introduce a few extra concepts.
Note
Internet connectivity from your cloud instance is required to download the application.
When you create an instance for the application, you want to give it a bit more information than you supplied to the bare instance that you just created and deleted. We will go into more detail in later sections, but for now, simply create the following resources so that you can feed them to the instance:
- A key pair. To access your instance, you must import an SSH public key into
OpenStack to create a key pair. OpenStack installs this key pair on the new
instance. Typically, your public key is written to
.ssh/id_rsa.pub. If you do not have an SSH public key file, follow these instructions first. We will cover these instructions in depth in Introduction to the fractals application architecture.
In the following example, set pub_key_file to the location of
your public SSH key file.
Note
If you see an IOError, you may need to change ~/.ssh/ to
/home/{USERNAME}/.ssh/, using an absolute path.
print('Checking for existing SSH key pair...')
keypair_name = 'demokey'
pub_key_file = '~/.ssh/id_rsa.pub'
keypair_exists = False
for keypair in conn.list_key_pairs():
    if keypair.name == keypair_name:
        keypair_exists = True

if keypair_exists:
    print('Keypair ' + keypair_name + ' already exists. Skipping import.')
else:
    print('adding keypair...')
    conn.import_key_pair_from_file(keypair_name, pub_key_file)

for keypair in conn.list_key_pairs():
    print(keypair)
<KeyPair name=demokey fingerprint=aa:bb:cc... driver=OpenStack>
- Network access. By default, OpenStack filters all traffic. You must create a security group and apply it to your instance. The security group allows HTTP and SSH access. We will go into more detail in Introduction to the fractals application architecture.
print('Checking for existing security group...')
security_group_name = 'all-in-one'
security_group_exists = False
for security_group in conn.ex_list_security_groups():
    if security_group.name == security_group_name:
        all_in_one_security_group = security_group
        security_group_exists = True

if security_group_exists:
    print('Security Group ' + all_in_one_security_group.name + ' already exists. Skipping creation.')
else:
    all_in_one_security_group = conn.ex_create_security_group(security_group_name, 'network access for all-in-one application.')
    conn.ex_create_security_group_rule(all_in_one_security_group, 'TCP', 80, 80)
    conn.ex_create_security_group_rule(all_in_one_security_group, 'TCP', 22, 22)

for security_group in conn.ex_list_security_groups():
    print(security_group)
- Userdata. During instance creation, you can provide userdata to OpenStack to configure instances after they boot. The cloud-init service applies the user data to an instance. You must pre-install the cloud-init service on your chosen image. We will go into more detail in Introduction to the fractals application architecture.
userdata = '''#!/usr/bin/env bash
curl -L -s https://git.openstack.org/cgit/openstack/faafo/plain/contrib/install.sh | bash -s -- \
    -i faafo -i messaging -r api -r worker -r demo
'''
Now, you can boot and configure the instance.
Boot and configure an instance
Use the image, flavor, key pair, and userdata to create an instance. After you request the instance, wait for it to build.
print('Checking for existing instance...')
instance_name = 'all-in-one'
instance_exists = False
for instance in conn.list_nodes():
    if instance.name == instance_name:
        testing_instance = instance
        instance_exists = True

if instance_exists:
    print('Instance ' + testing_instance.name + ' already exists. Skipping creation.')
else:
    testing_instance = conn.create_node(name=instance_name,
                                        image=image,
                                        size=flavor,
                                        ex_keyname=keypair_name,
                                        ex_userdata=userdata,
                                        ex_security_groups=[all_in_one_security_group])
    conn.wait_until_running([testing_instance])

for instance in conn.list_nodes():
    print(instance)
When the instance boots, the ex_userdata variable value instructs the instance to deploy the Fractals application.
Associate a floating IP for external connectivity
We cover networking in detail in Networking.
To see the application running, you must know where to look for it. By default, your instance has outbound network access. To make your instance reachable from the Internet, you need an IP address. By default in some cases, your instance is provisioned with a publicly rout-able IP address. In this case, you see an IP address listed under public_ips or private_ips when you list the instances. If not, you must create and attach a floating IP address to your instance.
To see whether a private IP address is assigned to your instance:
private_ip = None
if len(testing_instance.private_ips):
    private_ip = testing_instance.private_ips[0]
    print('Private IP found: {}'.format(private_ip))
If one is assigned, users can use this address to access the instance on some OpenStack clouds.
To determine whether a public IP address is assigned to your instance:
public_ip = None
if len(testing_instance.public_ips):
    public_ip = testing_instance.public_ips[0]
    print('Public IP found: {}'.format(public_ip))
If one is assigned, users can use this address to access the instance.
To create a floating IP address to use with your instance:
Use ex_list_floating_ip_pools() and select the first floating IP
address pool. Allocate this pool to your project and use it to get a
floating IP address.
print('Checking for unused Floating IP...')
unused_floating_ip = None
for floating_ip in conn.ex_list_floating_ips():
    if not floating_ip.node_id:
        unused_floating_ip = floating_ip
        break

if not unused_floating_ip and len(conn.ex_list_floating_ip_pools()):
    pool = conn.ex_list_floating_ip_pools()[0]
    print('Allocating new Floating IP from pool: {}'.format(pool))
    unused_floating_ip = pool.create_floating_ip()
This code returns the floating IP address:
<OpenStack_1_1_FloatingIpAddress: id=4536ed1e-4374-4d7f-b02c-c3be2cb09b67, ip_addr=203.0.113.101, pool=<OpenStack_1_1_FloatingIpPool: name=floating001>, driver=<libcloud.compute.drivers.openstack.OpenStack_1_1_NodeDriver object at 0x1310b50>>

Attach the floating IP address to the instance:
if public_ip:
    print('Instance ' + testing_instance.name + ' already has a public ip. Skipping attachment.')
elif unused_floating_ip:
    conn.ex_attach_floating_ip_to_node(testing_instance, unused_floating_ip)
Run the script to start the deployment.
Access the application
Deploying application data and configuration to the instance can take some time. Consider enjoying a cup of coffee while you wait. After the application deploys, you can use your preferred browser to visit the awesome graphic interface at the following link.
actual_ip_address = None
if public_ip:
    actual_ip_address = public_ip
elif unused_floating_ip:
    actual_ip_address = unused_floating_ip.ip_address
elif private_ip:
    actual_ip_address = private_ip

print('The Fractals app will be deployed to http://{}'.format(actual_ip_address))
Note
If you do not use floating IP addresses, substitute another IP address, as appropriate.
Next steps
Do not worry if these concepts are not yet completely clear. In Introduction to the fractals application architecture, we explore these concepts in more detail.
- Scaling out: Learn how to scale your application.
- Make it durable: Learn how to use Object Storage to make your application durable.
- Block Storage: Migrate the database to block storage, or use the database-as-a-service component.
- Orchestration: Automatically orchestrate your application.
- Networking: Learn about complex networking.
- Advice for developers new to operations: Get advice about operations.
- Going crazy: Learn some crazy things that you might not think to do ;)
Complete code sample
The following file contains all of the code from this section of the tutorial. This comprehensive code sample lets you view and run the code as a single script.
Before you run this script, confirm that you have set your authentication information, the flavor ID, and image ID.
# step-1
from libcloud.compute.types import Provider
from libcloud.compute.providers import get_driver

auth_username = 'your_auth_username'
auth_password = 'your_auth_password'
auth_url = 'http://controller:5000'
project_name = 'your_project_name_or_id'
region_name = 'your_region_name'

provider = get_driver(Provider.OPENSTACK)
conn = provider(auth_username,
                auth_password,
                ex_force_auth_url=auth_url,
                ex_force_auth_version='2.0_password',
                ex_tenant_name=project_name,
                ex_force_service_region=region_name)

# step-2
images = conn.list_images()
for image in images:
    print(image)

# step-3
flavors = conn.list_sizes()
for flavor in flavors:
    print(flavor)

# step-4
image_id = '2cccbea0-cea9-4f86-a3ed-065c652adda5'
image = conn.get_image(image_id)
print(image)

# step-5
flavor_id = '2'
flavor = conn.ex_get_size(flavor_id)
print(flavor)

# step-6
instance_name = 'testing'
testing_instance = conn.create_node(name=instance_name, image=image, size=flavor)
print(testing_instance)

# step-7
instances = conn.list_nodes()
for instance in instances:
    print(instance)

# step-8
conn.destroy_node(testing_instance)

# step-9
print('Checking for existing SSH key pair...')
keypair_name = 'demokey'
pub_key_file = '~/.ssh/id_rsa.pub'
keypair_exists = False
for keypair in conn.list_key_pairs():
    if keypair.name == keypair_name:
        keypair_exists = True

if keypair_exists:
    print('Keypair ' + keypair_name + ' already exists. Skipping import.')
else:
    print('adding keypair...')
    conn.import_key_pair_from_file(keypair_name, pub_key_file)

for keypair in conn.list_key_pairs():
    print(keypair)

# step-10
print('Checking for existing security group...')
security_group_name = 'all-in-one'
security_group_exists = False
for security_group in conn.ex_list_security_groups():
    if security_group.name == security_group_name:
        all_in_one_security_group = security_group
        security_group_exists = True

if security_group_exists:
    print('Security Group ' + all_in_one_security_group.name + ' already exists. Skipping creation.')
else:
    all_in_one_security_group = conn.ex_create_security_group(security_group_name, 'network access for all-in-one application.')
    conn.ex_create_security_group_rule(all_in_one_security_group, 'TCP', 80, 80)
    conn.ex_create_security_group_rule(all_in_one_security_group, 'TCP', 22, 22)

for security_group in conn.ex_list_security_groups():
    print(security_group)

# step-11
userdata = '''#!/usr/bin/env bash
curl -L -s https://git.openstack.org/cgit/openstack/faafo/plain/contrib/install.sh | bash -s -- \
    -i faafo -i messaging -r api -r worker -r demo
'''

# step-12
print('Checking for existing instance...')
instance_name = 'all-in-one'
instance_exists = False
for instance in conn.list_nodes():
    if instance.name == instance_name:
        testing_instance = instance
        instance_exists = True

if instance_exists:
    print('Instance ' + testing_instance.name + ' already exists. Skipping creation.')
else:
    testing_instance = conn.create_node(name=instance_name,
                                        image=image,
                                        size=flavor,
                                        ex_keyname=keypair_name,
                                        ex_userdata=userdata,
                                        ex_security_groups=[all_in_one_security_group])
    conn.wait_until_running([testing_instance])

for instance in conn.list_nodes():
    print(instance)

# step-13
private_ip = None
if len(testing_instance.private_ips):
    private_ip = testing_instance.private_ips[0]
    print('Private IP found: {}'.format(private_ip))

# step-14
public_ip = None
if len(testing_instance.public_ips):
    public_ip = testing_instance.public_ips[0]
    print('Public IP found: {}'.format(public_ip))

# step-15
print('Checking for unused Floating IP...')
unused_floating_ip = None
for floating_ip in conn.ex_list_floating_ips():
    if not floating_ip.node_id:
        unused_floating_ip = floating_ip
        break

if not unused_floating_ip and len(conn.ex_list_floating_ip_pools()):
    pool = conn.ex_list_floating_ip_pools()[0]
    print('Allocating new Floating IP from pool: {}'.format(pool))
    unused_floating_ip = pool.create_floating_ip()

# step-16
if public_ip:
    print('Instance ' + testing_instance.name + ' already has a public ip. Skipping attachment.')
elif unused_floating_ip:
    conn.ex_attach_floating_ip_to_node(testing_instance, unused_floating_ip)

# step-17
actual_ip_address = None
if public_ip:
    actual_ip_address = public_ip
elif unused_floating_ip:
    actual_ip_address = unused_floating_ip.ip_address
elif private_ip:
    actual_ip_address = private_ip

print('The Fractals app will be deployed to http://{}'.format(actual_ip_address))

Except where otherwise noted, this document is licensed under Creative Commons Attribution 3.0 License. See all OpenStack Legal Documents.