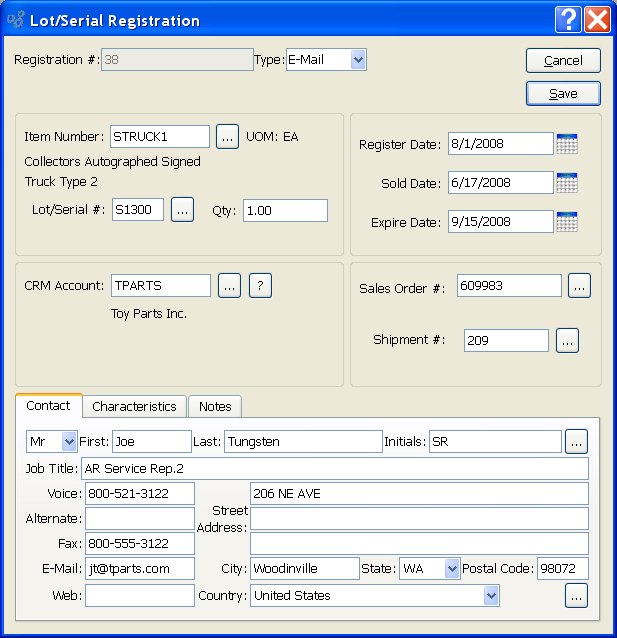
Lot/Serial Items may be registered for Warranty tracking or other purposes. To register a Lot/Serial Item, select the NEW button on the Lot/Serial screen. The following screen will appear.

When creating a registration, you are presented with the following options:
- Registration #
Displays the system-defined registration number.
- Type
-
Specify the type of registration by selecting one of the following options:
Select if the registration was submitted by email.
- Internet
Select if the registration was submitted over the Internet.
Select if the registration was mailed in.
- Other
Select if the registration was submitted by some other method.
- Phone
Select if the registration was phoned in.
- Shipment
Select if the registration was made automatically when the specified Lot/Serial quantity was shipped. This feature is triggered by a setting on the Item Site screen. For Lot/Serial Items, you have the option on the Item Site screen to auto register quantity at Shipping.
- Item Number
Displays the Item Number of the Lot/Serial Item specified on the previous screen.
- UOM
Displays the Inventory Unit of Measure for the specified Lot/Serial Item.
- Lot/Serial #
Displays the Lot/Serial Number specified on the previous screen.
- Qty
Specify the quantity of the Lot/Serial Item covered by the current registration.
- CRM Account
Specify the CRM Account associated with the registration.
- Register Date
Specify the date when the registration was received. This date will default to the shipment date for auto registrations.
- Sold Date
Specify the date when the Lot/Serial quantity was sold. The sold date marks the beginning of the warranty period for warranty Items. This date will default to the Sales Order date for auto registrations.
- Expire Date
Specify the expiration date for the Lot/Serial quantity. For warranty Items, the expiration date is based on the sold date plus the number of warranty days specified on the Item master. This date will default to the Sales Order date plus the warranty days for auto registrations.
- Sales Order #
Specify the Sales Order (if any) associated with the registration. This information will be added automatically by auto registrations.
- Shipment #
Specify the shipment number (if any) associated with the registration. This information will be added automatically by auto registrations.
When defining a Contact for the registration, you are presented with the following options:
Tip
For Contacts, you have two options:
Attach an existing Contact to the Account
Enter new Contact information
If a new Contact is entered, that Contact will be added automatically to the master list of Contacts.
- Contact
Specify the details for the registration Contact. You can manually enter Contact information in the fields shown—or use the browse button to select pre-existing Contact information. If the registration is created automatically from the shipment of a Sales Order, the name of the Customer billing Contact will be used.
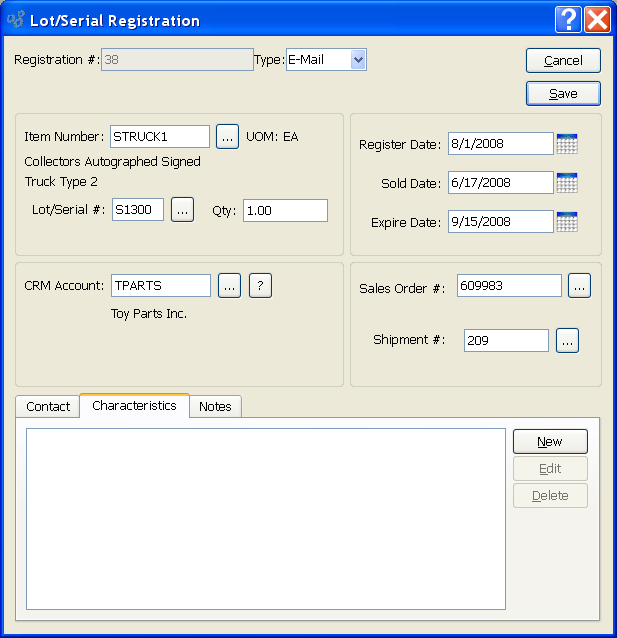
Registration Characteristics are user-defined definitions of an Account which may be used to provide additional layers of description. To enter Characteristics associated with a registration, select the "Characteristics" tab. The following screen will appear:

When associating Characteristics with a registration, you are presented with the following options:
- Characteristics
Displays the Characteristics related to the registration.
To the far right of the screen, the following buttons are available:
- NEW
Opens screen for creating a new registration Characteristic.
- EDIT
Enables you to edit highlighted registration Characteristics. The edit screen is the same as that for creating a new registration Characteristic—except that when editing, the fields will contain registration Characteristic information. Double-clicking on a registration Characteristic will also bring you to the editing screen.
- DELETE
Highlight a registration Characteristic and then select this button to remove the registration Characteristic from the list.
To create a new registration Characteristic, select the NEW button. The following screen will appear:

When creating a new registration Characteristic, you are presented with the following options:
- Characteristic
Select a Characteristic from the list of Characteristics designated as being available for use as registration Characteristics.
- Value
Enter a value to associate with the registration Characteristic.
To the far right of the screen, the following buttons are available:
- CANCEL
Closes the screen without creating the registration Characteristic, returning you to the previous screen.
- SAVE
Creates the registration Characteristic and adds it to the list of registration Characteristics.
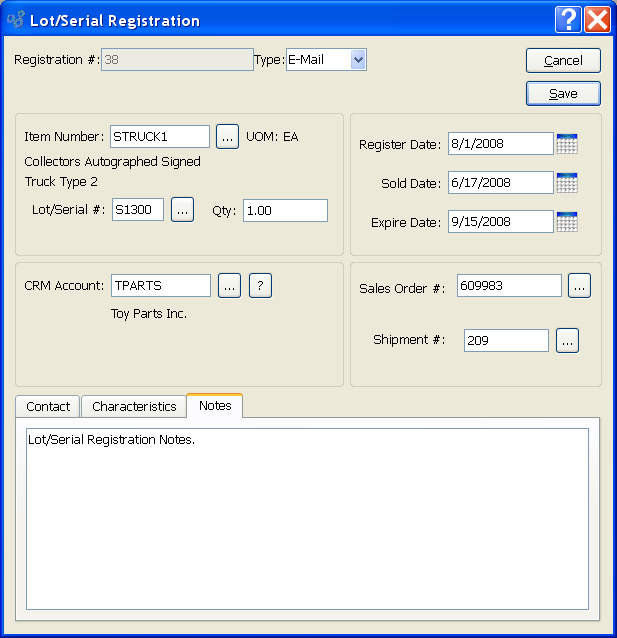
To add Notes to the registration, select the "Notes" tab. The following screen will appear:

When adding Notes to a registration, you are presented with the following options:
- Notes
This is a scrolling text field with word-wrapping for entering Notes related to the registration. Any Notes entered on this screen are for internal purposes only.