Site Locations—also known as Locations—are the specific, unique material sites where Inventory is located inside a Site. If the ARBL naming convention is being enforced within a Site, Locations may be identified by aisle, rack, bin, and Location number. Locations may also exist within Site Zones, if Zones are defined for the specified Site. In most cases, related Items will be stored near to each other to simplify picking and Inventory counting. To access a master list of Site Locations, select the "Site Locations" option. The following screen will appear:
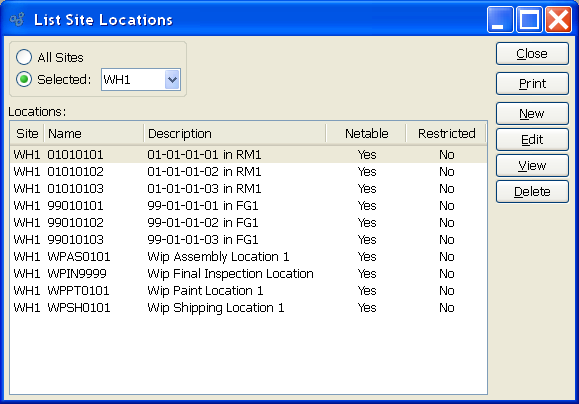
The "Site Locations" screen displays information on all existing Site Locations, including Site code, Location name, Location description, and whether the Location is netable or restricted. When displaying available Site Locations, you are presented with the following options:
- All Sites
Select to display Site Locations for all Sites.
- Selected
Specify Site whose Locations you want to display.
To the far right of the screen, the following buttons are available:
- CLOSE
Closes the screen, returning you to the application desktop.
Runs the report associated with this screen.
- NEW
Opens screen for creating a new Site Location.
- EDIT
Enables you to edit highlighted Site Locations. The edit screen is the same as that for creating a new Site Location—except that when editing, the fields will contain Site Location information. Double-clicking on a Site Location also bring you to the editing screen.
- VIEW
Highlight a Site Location and then select this button to reach a read-only view of the "Edit" screen.
- DELETE
Highlight a Site Location and then select this button to remove the Location from the list.
To create a new Site Location, select the NEW button. The following screen will appear:
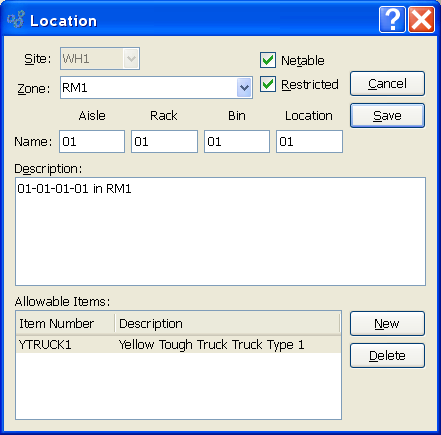
When creating a new Site Location, you are presented with the following options:
- Site
Specify Site for the Site Location.
Note
When an Item is received into a non-netable Location, the Inventory transaction history will reflect a two-step process. First, the Quantity on Hand for the Item will be increased in the quantity received. Second, a non-netable (NN) correction will occur. This correction returns the Quantity on Hand to the pre-receipt levels—indicating a receipt into a non-netable Location. Again, quantity stored in a non-netable Location is considered separately. Changes in non-netable quantity do not affect bottom-line Quantity on Hand levels.
- Restricted
Select if only a restricted set of Items may be placed in this Location. Not selecting means any Item that exists in the same Site as this Location may be placed into it.
- Zone
Specify the Site Zone you want to associate with the Location, if any. Zone selection will be activated only if Site Zones have been defined for the specified Site.
- Name
Enter a name to identify the Location. The name of the Location will vary, depending on whether the specified Site enforces the aisle, rack, bin, Location (ARBL) naming convention. If the convention is enforced, then the name for the Location may also include aisle, rack, or bin information. If ARBL is not enforced, then the Location name will consist of only one field.
Note
The parameters for the ARBL naming convention are set within a Site master. These parameters include the maximum length allowed for names and whether alpha characters or numeric only may be used.
- Description
This is a scrolling text field with word-wrapping for entering a description of the Location.
To the far right of the screen, the following buttons are available:
- CANCEL
Closes the screen without creating the Site Location, returning you to the previous screen.
- SAVE
Creates the Site Location and adds it to the master list of Site Locations.
- NEW
Select to pick an Item from the master list of Items and designate it as allowed within the restricted Location.
- DELETE
Highlight an Item and then select this button to remove the Item from the list of allowable items.