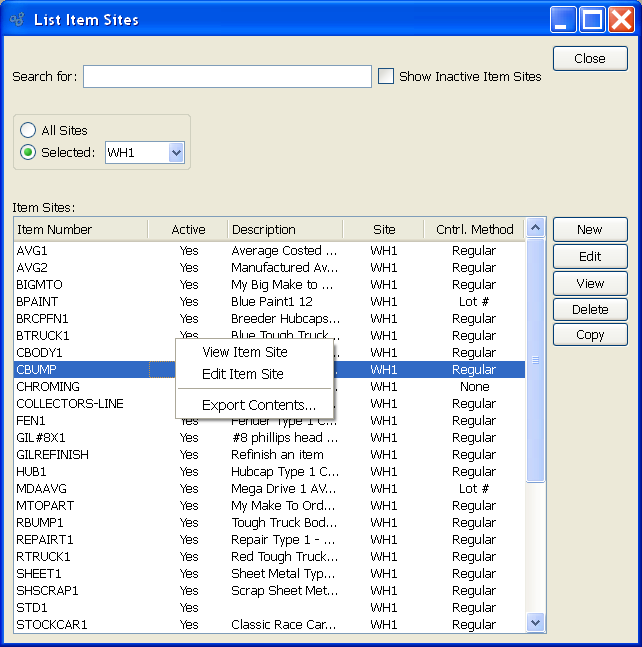
To access the master list of Item Sites in your system, select the "List Item Sites" option. The "following screen will appear:

At the top of the screen is a "Search for" field. To search for an Item Site, begin typing in the search field. As you type, the Item Site list will automatically scroll toward the Item Number you are typing. You can also search for Item Sites manually by scrolling through the list. The following views are also available:
- All Sites
Select to display a list of all Item Sites for all Sites.
- Selected
Specify Site whose Item Sites you want to display.
- Show Inactive Item Sites
Select to display active as well as inactive Item Sites.
To the far right of the screen, the following buttons are available:
- CLOSE
Closes the screen, returning you to the application desktop.
- NEW
-
Opens screen for creating a new Item Site, as described in Section 3.9.1, “Enter Item Site”.
Tip
Mac users may use COMMAND + N to enter a new Item Site.
- EDIT
Enables you to edit highlighted Item Sites. The edit screen is the same as that for creating a new Item Site—except that when editing, the fields will contain Item Site information. Double-clicking on an Item Site will also bring you to the editing screen. Mac users may use COMMAND + E to edit an existing Item Site.
- VIEW
Highlight an Item Site and then select this button to reach a read-only view of the "Edit" screen.
- DELETE
Highlight an Item Site and then select this button to remove the Item Site from the list.
Right-clicking on an Item Site in the Item Sites list enables you to select from the following menu options:
- View Item Site
Highlight an Item Site and then select this button to reach a read-only view of the "Edit" screen.
- Edit Item Site
Enables you to edit highlighted Item Sites. The edit screen is the same as that for creating a new Item Site—except that when editing, the fields will contain Item Site information. Double-clicking on an Item Site will also bring you to the editing screen. Mac users may use COMMAND + E to edit an existing Item Site.