Sales Utilities section.
The Customer Information Export utility enables you to selectively identify Customer information, which you may then export into a plain-text, TAB-delimited file. The exporting of selected information is handled using the "Export Contents" option in the screen's right-click menu. To specify the Customer information you want to tag for export, select the "Customer Information Export" option. The following screen will appear:
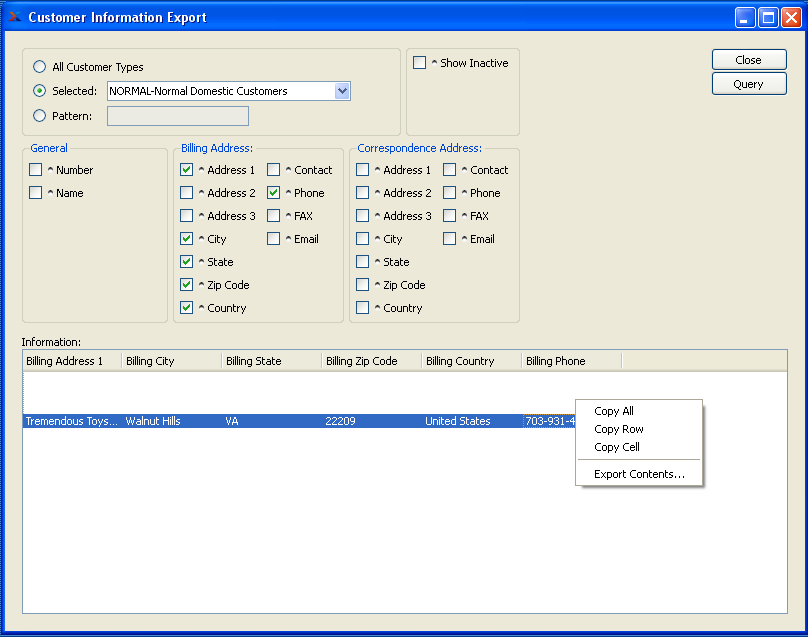
When specifying Customer information you want to tag for export, you are presented with the following options:
- All Customer Types
Select to tag all Customer Types for export.
- Selected
Specify Customer Type you want to tag for export.
- Pattern
Enter a Customer Type pattern to select a range of Customer Types. Refine your search using Regular Expressions.
- Show Inactive
Select to include inactive Customers in the list of Customers tagged for export.
- General
Select from the following general information categories:
- Number
Select to tag the Customer Number for export.
- Name
Select to tag the Customer name for export.
- Billing Address
Select from the following billing address categories:
- Address 1
Select to tag the first address line for export.
- Address 2
Select to tag the second address line for export.
- Address 3
Select to tag the third address line for export.
- City
Select to tag the city for export.
- State
Select to tag the state for export.
- Zip Code
Select to tag the zip code for export.
- Country
Select to tag the country for export.
- Contact
Select to tag the contact name for export.
- Phone
Select to tag the contact's phone number for export.
- FAX
Select to tag the contact's fax number for export.
Select to tag the contact's email address for export.
- Correspondence Address
Select from the following correspondence address categories:
- Address 1
Select to tag the first address line for export.
- Address 2
Select to tag the second address line for export.
- Address 3
Select to tag the third address line for export.
- City
Select to tag the city for export.
- State
Select to tag the state for export.
- Zip Code
Select to tag the zip code for export.
- Country
Select to tag the country for export.
- Contact
Select to tag the contact name for export.
- Phone
Select to tag the contact's phone number for export.
- FAX
Select to tag the contact's fax number for export.
Select to tag the contact's email address for export.
- Information
Display lists Customer information tagged for export.
To the far right of the screen, the following buttons are available:
- CLOSE
Closes the screen, returning you to the application desktop.
- QUERY
Select to generate the display, using the specified parameters.
To reassign Customer Types by Customer Type, select the "Reassign Customer Types by Customer Type" option. The following screen will appear:
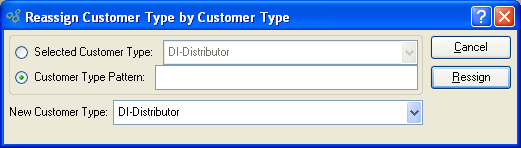
When reassigning Customer Types by Customer Type, you are presented with the following options:
- Selected Customer Type
Specify the Customer Type you want to reassign.
- Pattern
Enter a Customer Type pattern to select a range of Customer Types. Refine your search using Regular Expressions.
- New Customer Type
Specify the new Customer Type you want to reassign the Customers to.
To the far right of the screen, the following buttons are available:
- CANCEL
Closes the screen without reassigning Customer Type(s), returning you to the application desktop.
- REASSIGN
Reassigns Customer Type(s), using the specified parameters.
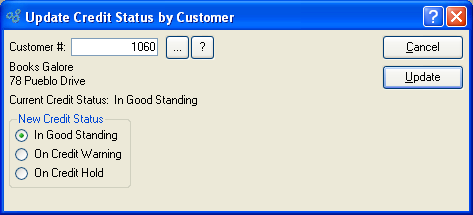
The credit status of a Customer has a direct bearing on whether Sales Orders can be created for that Customer. For example, Customers whose credit status is either "On Credit Warning" or "On Credit Hold" may not have Sales Orders entered for them. To update a Customer's credit status, select the "Update Credit Status by Customer" option. The following screen will appear:
Note
The credit status for a Customer may also be updated using the Customer master. Any updates made using this utility will be reflected in the Customer master.
When updating the credit status for a Customer, you are presented with the following options:
- Customer #
Enter the Customer Number of the Customer whose credit status you want to update. The browse button located to the right of the field leads to a searchable Customers list. You may also access this list using the keyboard shortcut "CTRL + L". Once a Customer Number is entered, the Customer name and billing address will display.
- Current Credit Status
Displays the specified Customer's current credit status. Current credit status is drawn from the Customer master.
- In Good Standing
Select to make the Customer's credit status "In Good Standing." Customers with credit "In Good Standing" may have Sales Orders issued for them. A black-colored typeface will be associated with their account.
- On Credit Warning
Select to make the Customer's credit status "On Credit Warning." Customers with credit "On Credit Warning" may not have Sales Orders issued for them. An orange-colored typeface will be associated with their account.
- On Credit Hold
Select to make the Customer's credit status "On Credit Hold." Customers with credit "On Credit Hold" may not have Sales Orders issued for them. A red-colored typeface will be associated with their account.
To the far right of the screen, the following buttons are available:
- CANCEL
Closes the screen without updating the Customer's credit status, returning you to the application desktop.
- UPDATE
Updates the Customer's credit status, using the specified parameters.
Purging Invoice records is one method for freeing up disk storage space—without losing important sales history. Running this utility will also purge the whole chain of documents associated with an Invoice. The chain of documents which will be purged when this utility is run include the following: Invoices (invchead, invcitem); Return Authorization (rahead, raitem, rahist); Lot/Serial Registrations (lsreg); Sales Orders (cohead, coitem, payco, backup_payco); Shipments (shiphead, shipitem, pack); and Billing (cobmisc, cobill). Again, running this utility will not purge sales history. That information is retained for historical sales analysis purposes.
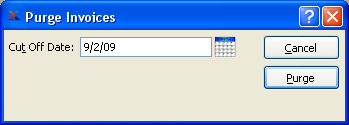
To purge Invoices and their associated documents, select the "Purge Invoices" option. The following screen will appear:
Note
The consequence of purging Invoice records is that any purged Invoice records can no longer be re-printed.
When purging Invoices and their associated documents, you are presented with the following options:
- Cut Off Date
Invoice records created before and including this date will be purged.
To the far right of the screen, the following buttons are available:
- CANCEL
Closes the screen without purging any Invoice records, returning you to the application desktop.
- PURGE
Purges the Invoice records.
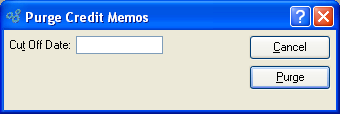
Purging Credit Memo records is one method for freeing up disk storage space—without losing important sales history. To purge Credit Memo records, select the "Credit Memo Records" option. The following screen will appear:
Note
The consequence of purging Credit Memo records is that any purged Credit Memo records can no longer be re-printed.
When purging Credit Memo records, you are presented with the following options:
- Cut Off Date
Credit Memo records created before and including this date will be purged.
To the far right of the screen, the following buttons are available:
- CANCEL
Closes the screen without purging any Credit Memo records, returning you to the application desktop.
- PURGE
Purges the Credit Memo records.
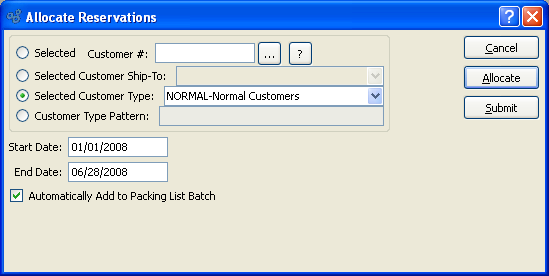
The Allocate Reservations utility enables you to allocate Inventory to batches of open Sales Orders. This can be a more efficient method for quickly making hard Inventory allocations, as compared to allocating Inventory one-at-a-time at the individual Sales Order Line Item level. You can allocate Inventory to batches of Sales Orders using the following screen:
Note
Only Sales Order Line Items that can be completely reserved using actual Quantity on Hand will be affected when this utility is run. If a Line Item cannot be completely reserved, it will be skipped.
When allocating Inventory to batches of open Sales Orders, you are presented with the following options:
- Selected Customer
Select to allocate Inventory to an individual Customer's open Sales Orders.
- Customer #
Specify the Customer Number of the Customer whose open Sales Orders you want to allocate Inventory to. The browse button located to the right of the field leads to a searchable Customers list. You may also access this list using the keyboard shortcut "CTRL + L". Once a Customer Number is entered, the Customer name and billing address will display. Select the "?" or "$" symbol next to the browse button to view Customer information for the specified Customer. If a Customer's credit is "In Good Standing," the button will feature a black question mark ("?") icon. If the icon turns to an orange dollar sign ("$"), the Customer's credit Status is "On Credit Warning." A red dollar sign ("$") indicates the Customer's credit Status is "On Credit Hold."
- Selected Customer Ship-To
Specify the Customer Ship-To Address whose open Sales Orders you want to allocate Inventory to. This is an optional setting which may be used in conjunction with the "Selected Customer" setting. The Ship-To option gives you the added flexibility of being able to assign multiple Pricing Schedules to a single Customer based on separate Ship-To Addresses.
- Selected Cust. Ship-To Pattern
Enter a Ship-To Address pattern to select a range of Ship-To Addresses for the selected Customer.
- Selected Customer Type
Specify the Customer Type you want to assign a Pricing Schedule to.
- Customer Type Pattern
Enter a Customer Type pattern to select a range of Customer Types. Refine your search using Regular Expressions.
- Start Date
Open Sales Orders having a due date on and after this date will have Inventory allocated to them. Start date and end date must be entered for calculation to proceed.
- End Date
Open Sales Orders having a due date on and before this date will have Inventory allocated to them. Start date and end date must be entered for calculation to proceed.
- Automatically Add to Packing List Batch
Select to automatically add affected Sales Orders to the Packing List Batch.
To the far right of the screen, the following buttons are available:
- CANCEL
Closes the screen, returning you to the application desktop.
- ALLOCATE
Select to run the batch allocation process, using the specified parameters.
- SUBMIT
Select to submit requested action to the Batch Manager for processing.
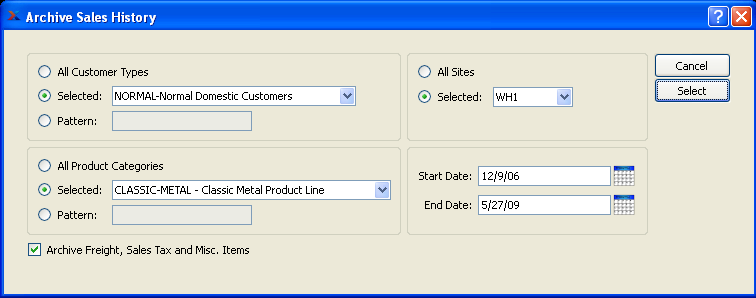
If your system contains Sales history which is no longer required for Sales Analysis purposes, you may archive that history—effectively removing it from view. Archived Sales history may be restored to view at any point. To archive Sales history, select the "Archive Sales History" option. The following screen will appear:
Note
Archiving Sales history does not delete Sales history. Rather, the historical data is simply relocated to a storage archive on the database. You may restore Sales history from the archive at any time.
When archiving Sales history, you are presented with the following options:
- All Customer Types
Select to archive Sales history for all Customer Types.
- Selected
Specify Customer Type whose Sales history you want to archive.
- Pattern
Enter a Customer Type pattern to select a range of Customer Types. Refine your search using Regular Expressions.
- All Product Categories
Select to archive Sales history for all Product Categories.
- Selected
Specify Product Category whose Sales history you want to archive.
- Pattern
Enter a Product Category pattern to select a range of Product Categories. Refine your search using Regular Expressions.
- Archive Freight, Sales Tax and Misc. Items
Select to archive all the sales information which is not directly related to the Item Sites for a Sales Order—that is, Freight charges, Tax, etc.
- All Sites
Select to archive Sales history for all Sites.
- Selected
Specify Site whose Sales history you want to archive.
- Start Date
Sales history generated on or after this date will be archived.
- End Date
Sales history by Shipping Zone by Item generated on or before this date will be archived.
To the far right of the screen, the following buttons are available:
- CANCEL
Closes the screen without archiving Sales history, returning you to the application desktop.
- SELECT
Archives Sales History using the specified parameters.
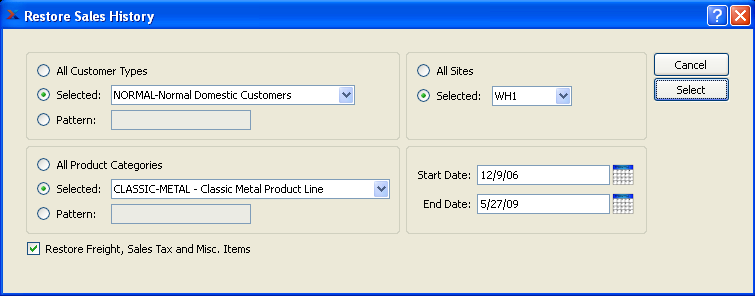
If you have Sales history stored in an archive on the database, you may restore that history at any point. Restoring Sales history makes it available again for Sales Analysis purposes. To restore Sales history that has been archived, select the "Archive Sales History" option. The following screen will appear:
Note
Archiving Sales history does not delete Sales history. Rather, the historical data is simply relocated to a storage archive on the database. You may restore Sales history from the archive at any time.
When restoring Sales history, you are presented with the following options:
- All Customer Types
Select to restore Sales history for all Customer Types.
- Selected
Specify Customer Type whose Sales history you want to restore.
- Pattern
Enter a Customer Type pattern to select a range of Customer Types. Refine your search using Regular Expressions.
- All Product Categories
Select to restore Sales history for all Product Categories.
- Selected
Specify Product Category whose Sales history you want to restore.
- Pattern
Enter a Product Category pattern to select a range of Product Categories. Refine your search using Regular Expressions.
- Restore Freight, Sales Tax and Misc. Items
Select to restore all the sales information which is not directly related to the Item Sites for a Sales Order—that is, Freight charges, Tax, etc.
- All Sites
Select to restore Sales history for all Sites.
- Selected
Specify Site whose Sales history you want to restore.
- Start Date
Sales history generated on or after this date will be restored.
- End Date
Sales history by Shipping Zone by Item generated on or before this date will be restored.
To the far right of the screen, the following buttons are available:
- CANCEL
Closes the screen without restoring Sales history, returning you to the application desktop.
- SELECT
Restores Sales History using the specified parameters.