
Creating Projects
Creating a project enables you to:
- Group files together
- Add custom build steps
- Include forms and resource files
- Specify settings for running applications
Setting up a new project in Qt Creator is aided by a wizard that guides you step-by-step through the project creation process. The wizards prompt you to enter the settings needed for that particular type of project and create the necessary files for you. You can add your own custom wizards to standardize the way subprojects and classes are added to a project.
Most wizards create projects that use the Qt build tool, qmake. It is a cross-platform system for build automation that helps simplify the build process for development projects across different platforms. qmake automates the generation of build configurations so that only a few lines of information are needed to create each configuration. For more information about qmake, see the qmake Manual. You can modify the build and run settings for qmake projects in the Projects mode.
You can use wizards also to create plain C or C++ projects that use Qbs or CMake, but do not use the Qt library.
In addition, you can import projects as generic projects that do not use qmake, Qbs, or CMake. This enables you to use Qt Creator as a code editor and to fully control the steps and commands used to build the project.
You can install tools for mobile devices as part of Qt distributions. The kits and build and run settings for the installed device types are set up automatically. However, you might need to install and configure some additional software on the devices to be able to connect to them from the development PC.
Using Project Wizards
In the first step, you select a template for the project. You can filter templates (1) to view only those that apply to a particular device type.

Next, you select a location for the project and specify settings for it.
When you have completed the steps, Qt Creator automatically generates the project with required headers, source files, user interface descriptions and project files, as defined by the wizard. For example, if you choose to create a Qt Quick application, Qt Creator generates a QML file that you can modify with the integrated Qt Quick Designer.
Selecting Project Type
You can use wizards to create following types of projects:
- Applications
- Qt Widgets Application
Use Qt Designer forms to design a Qt widget based user interface for the desktop and C++ to implement the application logic
- Qt Quick Application
Create a Qt Quick application that contains both QML and C++ code. The project includes a QDeclarativeView or a QQuickView. You can build the application and deploy it to desktop and mobile target platforms.
- Qt Console Application
Use a single main.cpp file
- Qt Quick UI
Use a single QML file that contains the main view. You can review Qt Quick UI projects in a preview tool and you need not build them. You do not need to have the development environment installed on your computer to create and run this type of projects
- Qt Widgets Application
- Libraries
- C++ Library
Shared or static C++ library based on qmake
- Qt Quick 1 Extension Plugin
C++ plugin that makes it possible to offer extensions that can be loaded dynamically into Qt Quick 1 applications by using the QDeclarativeEngine class
- Qt Quick 2 Extension Plugin
C++ plugin that makes it possible to offer extensions that can be loaded dynamically into Qt Quick 2 applications by using the QQmlEngine class
- Qt Creator Plugin
- C++ Library
- Other Projects
- Qt Unit Test
Qt unit tests for features or classes
- Qt Custom Designer Widgets
Custom Qt Designer widget or widget collection
- Empty Qt Project
Empty Qt project that is based on qmake but does not use any default classes
- Subdirs Project
Subprojects that enable you to structure your qmake projects as a tree hierarchy
- Code Snippet
Creates a qmake project from a code snippet. When fixing bug reports that contain a code snippet, you can place the code snippet into a project to compile and check it.
- Qt Unit Test
- Non-Qt Projects
- Plain C or C++ Project
Plain C or C++ project that uses qmake but does not use the Qt library
- Plain C or C++ Project (CMake Build)
Plain C or C++ project that uses CMake but does not use the Qt library
- Plain C or C++ Project (Qbs Build)
Plain C or C++ project that uses Qbs but does not use the Qt library.
- Plain C or C++ Project
- Import Project
- Project from version control
Import a project from a supported version control system. For more information on how version control systems are integrated in Qt Creator, see Using Version Control Systems
- Import Existing Project
Import an existing project that does not use any of the supported build systems: qmake, CMake, or Autotools. This enables you to use Qt Creator as a code editor
- Project from version control
To create a new project, select File > New File or Project and select the type of your project. The contents of the wizard dialogs depend on the project type and the kits that you select in the Kit Selection dialog. Follow the instructions of the wizard.
For examples of creating different types of projects, see Tutorials.
For more information about creating Qt Quick projects, see Creating Qt Quick Projects.
To change the location of the project directory, and to specify settings for building and running projects, select Tools > Options > Build & Run > General.
To specify build and run settings for different target platforms, select Projects.
Adding Files to Projects
You can use wizards also to add individual files to your projects. You can create the following types of files:
- C++
C++ class, source, or header files that you can use to write the application logic in both Qt Quick projects and Qt widget based projects
- Qt
- Qt Designer forms and Qt Designer form classes, which specify parts of user interfaces in Qt widget based projects
- Qt resource files, which allow you to store binary files in the application executable
- QML files, which specify items in Qt Quick projects. Qt Quick 1 creates a QML file that imports Qt Quick 1.1 and Qt Quick 2 creates a QML file that imports Qt Quick 2.0. Select Qt Quick 1 to add files to a Qt Quick 1 application and Qt Quick 2 to add files to a Qt Quick 2 application.
- JavaScript files that you can use to write the application logic in Qt Quick projects
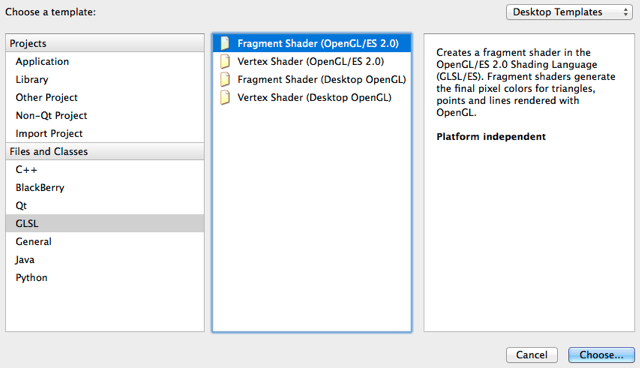
- GLSL
GLSL files that define fragment and vertex shaders in both Qt Quick projects and Qt widget based projects
- General
- Text files
- Scratch buffers that use temporary files. You can create this type of files for temporarily storing information that you do not intend to save
- Python
Python class and source files that you can use to create Python classes and scripts with UTF-8 encoding.
Creating C++ Classes
The C++ Class Wizard allows you to create a C++ header and source file for a new class that you can add to a C++ project. Specify the class name, base class, and header and source files for the class.
The wizard supports namespaces. To use a namespace, enter a qualified class name in the Class name field. For example: MyNamespace::MySubNamespace::MyClass.

The names of the header and source file are based on the class name. To change the default suffix of a file, select Tools > Options > C++ > File Naming.
You can create your own project and class wizards. For more information, see Adding New Custom Wizards.
Creating OpenGL Fragment and Vertex Shaders
Qt provides support for integration with OpenGL implementations on all platforms, which allows you to display hardware accelerated 3D graphics alongside a more conventional user interface. For more information, see Qt GUI.
You can use the QOpenGLShader class to compile OpenGL shaders written in the OpenGL Shading Language (GLSL) and in the OpenGL/ES Shading Language (GLSL/ES). QOpenGLShader and QOpenGLShaderProgram shelter you from the details of compiling and linking vertex and fragment shaders.
You can use Qt Creator code editor to write fragment and vertex shaders in GLSL or GLSL/ES. The code editor provides syntax highlighting and code completion for the files.
Displaying Additional File Types in Projects Pane
Qt Creator determines whether to display files from the project folder in the Projects pane depending on the file type (.pro, .pri, .cpp, .h, .qrc, and so on). To display other types of files, edit the project file. Add filenames as values of the DISTFILES variable. You can also use wildcards.
For example, the following code specifies that text files are displayed in the Projects pane:
DISTFILES += *.txt
This also makes the files available in the Locator.
Adding Subprojects to Projects
In addition to Qt libraries, you can link your application to other libraries, such as system libraries or your own libraries. Further, your own libraries might link to other libraries. To be able to compile your project, you must add the libraries to your project. This also enables code completion and syntax highlighting for the libraries. The procedure of adding a library to a project depends on the build system that you use.
When you create a new project, you can add it to another project as a subproject in the Project Management dialog. However, the root project must specify that qmake uses the subdirs template to build the project.
To create a root project, select File > New File or Project > Other Project > Subdirs Project > Choose.
On the Summary page, select Finish & Add Subproject to create the root project and to add another project, such as a C++ library.
The wizard creates a project file (.pro) that defines a subdirs template and the subproject that you add as a value of the SUBDIRS variable. It also adds all the necessary files for the subproject.
To add more subprojects, right-click the project name in the Projects pane, and select New Subproject in the context menu.
To remove subprojects, right-click the project name in the Projects pane, and select Remove Subproject in the context menu.
To specify dependencies, use the Add Library wizard. For more information, see Adding Libraries to Projects.
Related Topics
© 2015 The Qt Company Ltd. Documentation contributions included herein are the copyrights of their respective owners. The documentation provided herein is licensed under the terms of the GNU Free Documentation License version 1.3 as published by the Free Software Foundation. Qt and respective logos are trademarks of The Qt Company Ltd in Finland and/or other countries worldwide. All other trademarks are property of their respective owners.