4.2. RHN Satellite Server Installation Program
The following instructions describe how to run the RHN Satellite Server Installation Program:
Log into the machine as root.
Insert the RHN Satellite Server CD containing the installation files or download the ISO image from the RHN website.
Create a directory in /mnt to store the files with the command:
mkdir /mnt/cdrom
If you are installing from CD and it is not mounted automatically, mount it using the command:
mount /dev/cdrom /mnt/cdrom
If you are installing from download, mount the file from within the directory containing it using the command:
mount iso_filename /mnt/cdrom -o loop
The rest of the instructions assume it is mounted in /mnt/cdrom.
Ensure the RHN Entitlement Certificate has been loaded onto the Satellite. It can be named anything and located in any directory. The installation program will ask you for its contents or location. Also, make sure your account has been granted the necessary entitlements to conduct the installation. For instance, a new Satellite will require both a Management or Provisioning entitlement for Red Hat Enterprise Linux AS and an RHN Satellite Server entitlement.

Warning Users should note that the RHN Satellite Server Installation Program updates the kernel, as well as all required packages.
Launch the RHN Satellite Server Installation Program as root with the command:
/mnt/cdrom/install.sh
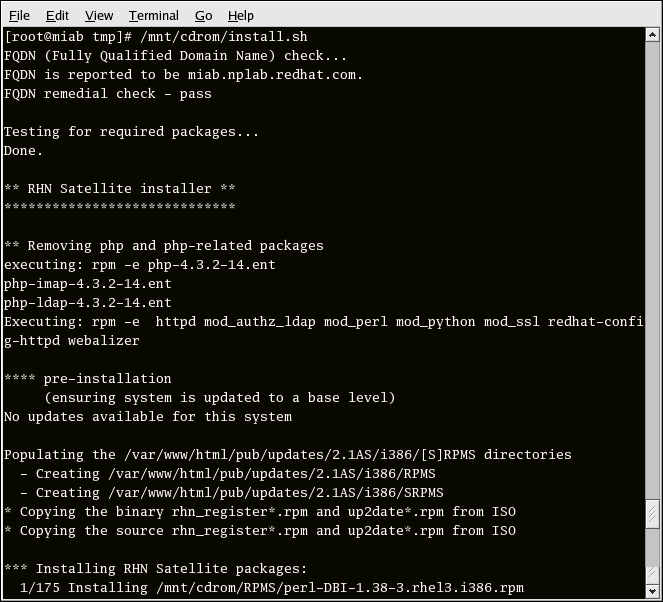
This script runs through the pre-installation process without user intervention. See Figure 4-1 This takes between 20 and 30 minutes.
It will first update the system and then install the RHN Satellite Server packages, GPG keys, database, and default configuration. It will then restart key services, such as httpd.
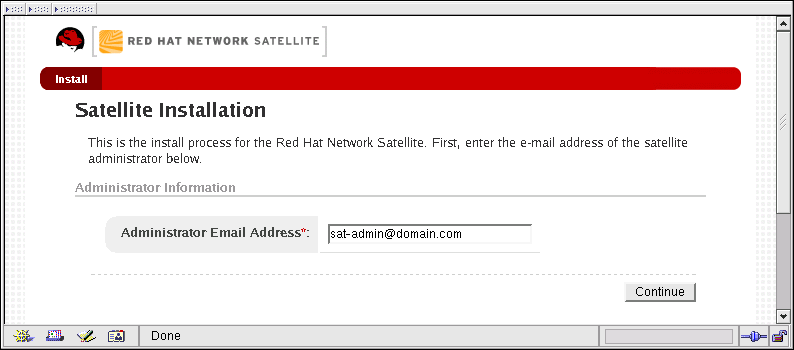
After the system is back up, open a Web browser and go to the fully qualified domain name (FQDN) of the RHN Satellite Server. The Administrator Email Address page appears.
The Administrator Email Address page requires an email address to receive administrative correspondence. Ideally, this address serves multiple people in your organization to ensure delivery. Keep in mind, this address will receive all mail generated by the Satellite, including sometimes large quantities of error-related tracebacks. To stem this flow, consider establishing mail filters that capture messages with a subject of "RHN TRACEBACK from hostname". Click Continue. The Database Configuration page appears for RHN Satellite Server with Stand-Alone Database, while the Database Schema page appears for RHN Satellite Server with Embedded Database.
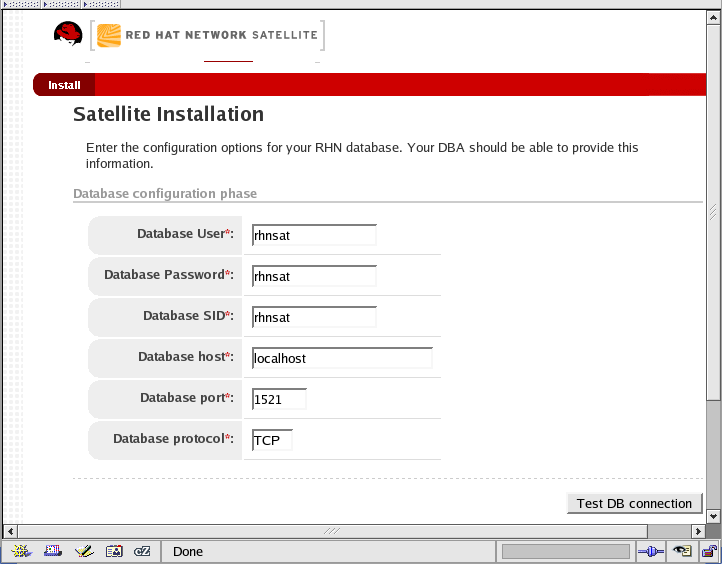
The Database Configuration page collects information required for the Satellite with Stand-Alone Database to connect to its database. If this is Satelllite with Embedded Database, skip to the Database Schema page description. For Satellite with Stand-Alone Database, consult your database administrator for the appropriate values. Then click Test DB Connection. The Database Schema page appears.
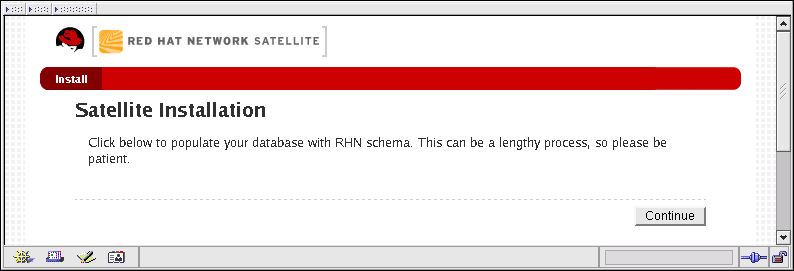
No input is required on the Database Schema page other than your consent. Click Continue to populate the database. This too can take a while. The Database Population page appears to help you track progress.
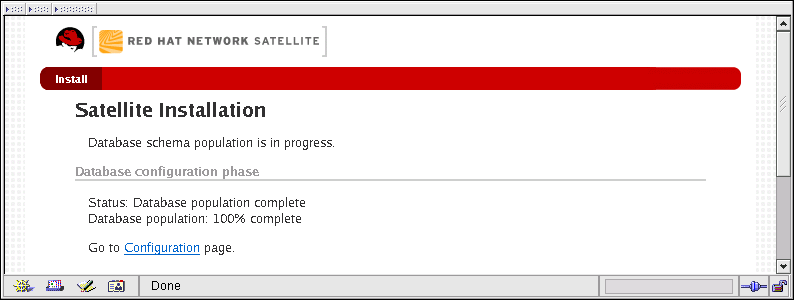
The Database Population page displays a link when population is complete. Click Configuration to continue. The RHN Configuration page appears.
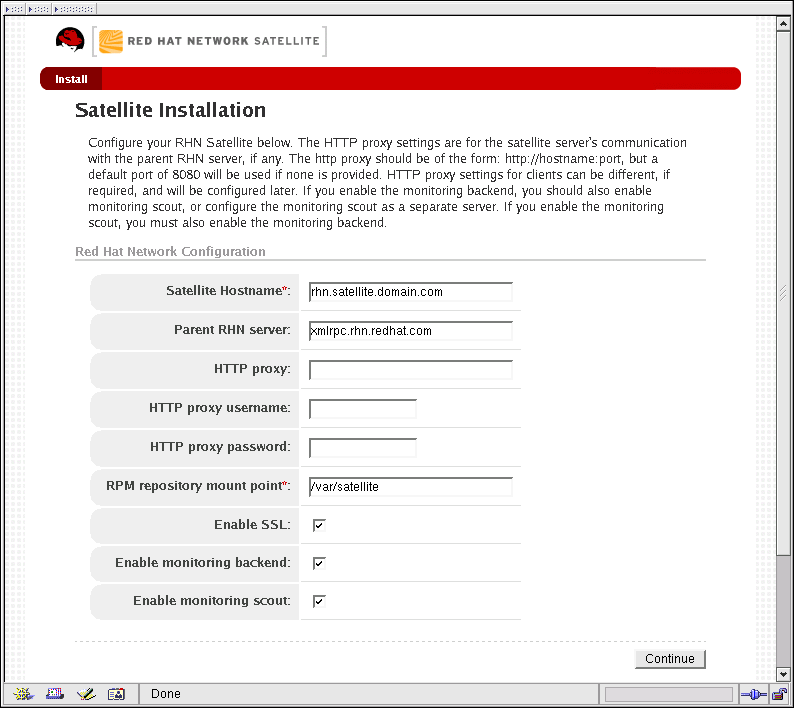
The RHN Configuration page enables you to change the way the Satellite communicates with Red Hat Network. You may alter the Satellite's hostname, its parent RHN server (to connect to another Satellite, for instance) and the location, or mountpoint of the package repository. Typically, the defaults will do. If you intend to monitor systems with this Satellite, select both the Enable monitoring backend and Enable monitoring scout checkboxes.
In addition, this page allows you to configure the Satellite to use an HTTP proxy server. To do this, complete all associated fields. Note that references to protocol such as http:// or https:// should not be included in the HTTP proxy server field. Insert only the hostname and port in the form hostname:port, such as my.corporate.gateway.example.com:3128. When finished, click Continue. The Monitoring Configuration page appears.
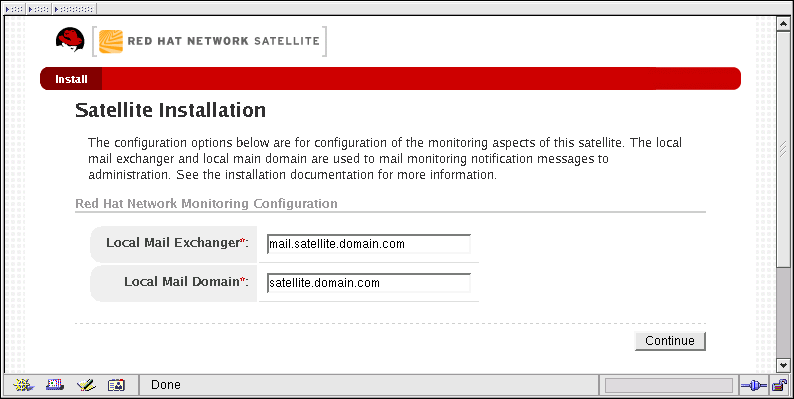
The Monitoring Configuration page captures email routing information used in monitoring. This is required only if you intend to receive alert notifications from probes. If you do, provide the mail server (exchanger) and domain to be used. Note that sendmail must be configured to handle email redirects of notifications. Refer to Section 4.3 Sendmail Configuration for instructions. When finished, click Continue. The RHN Registration page appears.
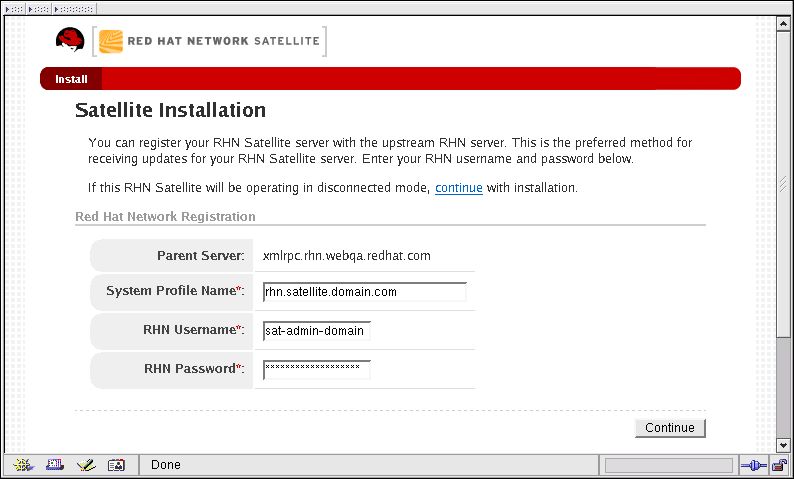
The RHN Registration page enables you to register the Satellite with Red Hat Network, allowing it to get updates and software channel package data directly. To register the Satellite, ensure its system profile name is correct (usually the hostname) and complete the RHN Username and RHN Password fields with the account information provided by your sales representative or established previously by you. This account must be entitled for RHN Satellite Server.
To skip this step, such as for Satellites that will operate in disconnected mode, click either the continue link or button. If you do not register the Satellite, the RHN Satellite Synchronization Tool cannot be used to populate software channels. Contact your Red Hat representative to obtain the packages and updates manually. When finished, click Continue. The RHN Satellite Entitlement Certificate page appears.
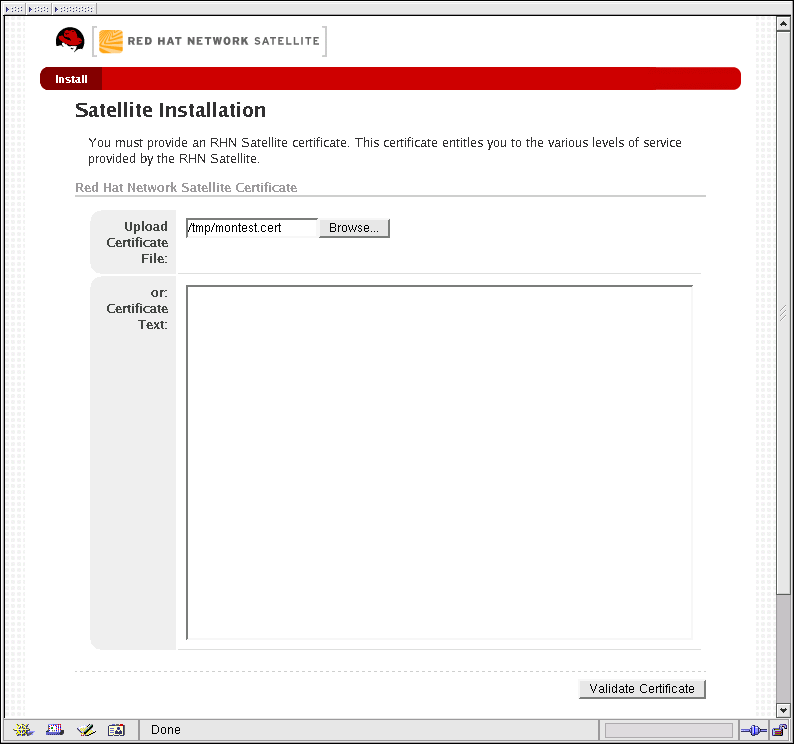
The RHN Satellite Entitlement Certificate page gathers your RHN Entitlement Certificate either by obtaining its location or collecting its contents. To identify the certificate's path, click Browse, navigate to the file, and select it. To input its contents, open your certificate in a text editor, copy all lines, and paste them directly into the large text field at the bottom. Red Hat recommends using the file locator as it's less error prone. Click Validate Certificate to continue. If you receive errors related to DNS, ensure your Satellite is configured correctly. Refer to Section 7.3 Host Not Found/Could Not Determine FQDN. The Satellite Synchronization page appears next.
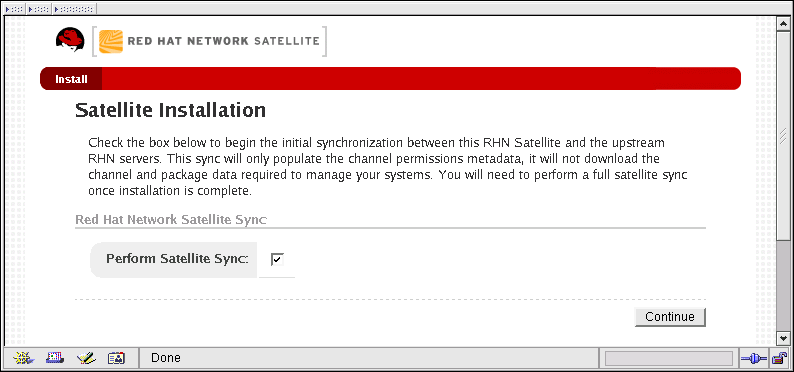
The Satellite Synchronization page allows you to initially populate your Satellite with software channel metadata. This is possible during installation only if you chose to register your Satellite with RHN. To synchronize, select the Perform Satellite Sync checkbox and click Continue. After the installation, you will still need to populate the channels with packages. Refer to Chapter 6 Importing and Synchronizing for instructions. The SSL Certificate page appears next.
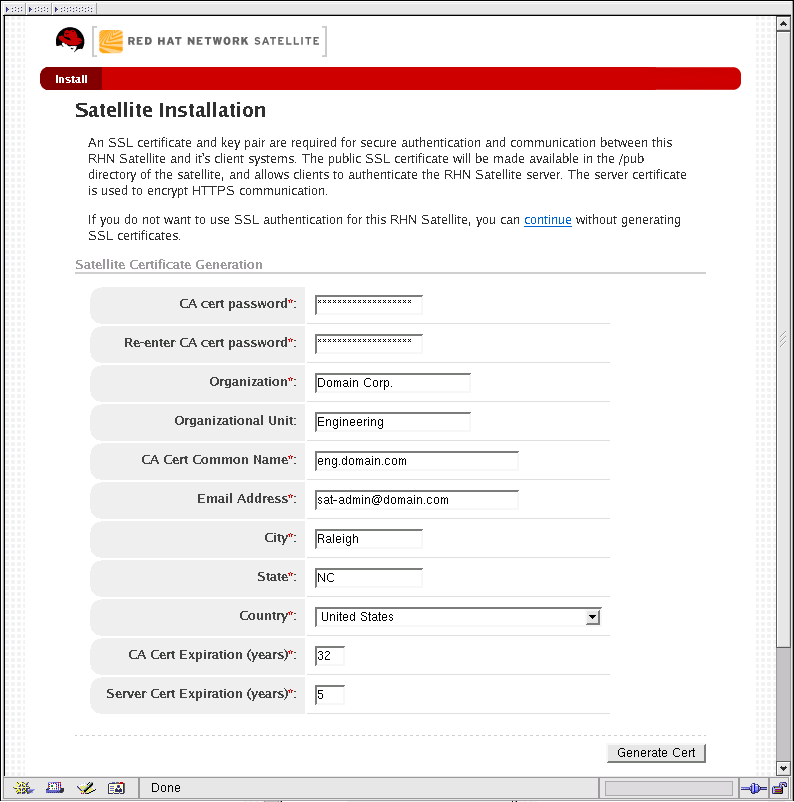
The SSL Certificate page collects information necessary to create the Secure Sockets Layer (SSL) certificate used by the Satellite and its client machines. In addition, you may manage your SSL infrastructure using the RHN SSL Maintenance Tool. Refer to the SSL Certificates chapter of the RHN Client Configuration Guide for instructions.
Create an SSL Certificate Authority (CA) password and complete the rest of the fields with your and your organization's information. As always, ensure this information exists on the backups of login information described in Chapter 2 Requirements. The CA Cert Common Name field may already be populated with the name of the host machine. This may need to be altered if you're using multiple RHN Servers in tandem.
Use the Expiration fields at the bottom to establish usage limits for the Certificate Authority and the certificate. The public certificate will be placed in the /var/www/html/pub/ directory on the Satellite where it can be downloaded from and installed on all client systems. Once finished, click Generate Cert. The Bootstrap Script page appears next.
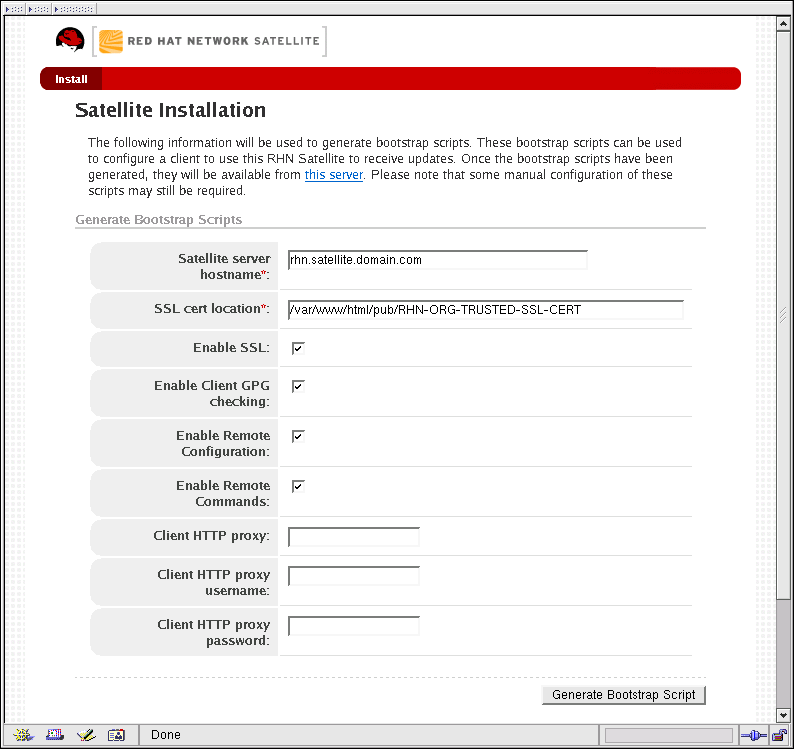
The Bootstrap Script page allows you to create a script for redirecting client systems from the central RHN Servers to the Satellite. This script, to be placed in the /var/www/html/pub/bootstrap/ directory of the Satellite, significantly reduces the effort involved in reconfiguring all systems, which by default obtain packages from the central RHN Servers. The required fields are prepopulated with values derived from previous installation steps. Ensure this information is accurate.
Checkboxes offer options for including built-in security SSL and GNU Privacy Guard (GPG) features, both of which are advised. In addition, you may enable remote command acceptance and remote configuration management of the systems to be bootstrapped here. Both features are useful for completing client configuration. Finally, if you are using an HTTP proxy server, complete the related fields. When finished, click Generate Bootstrap Script. The Installation Complete page appears.
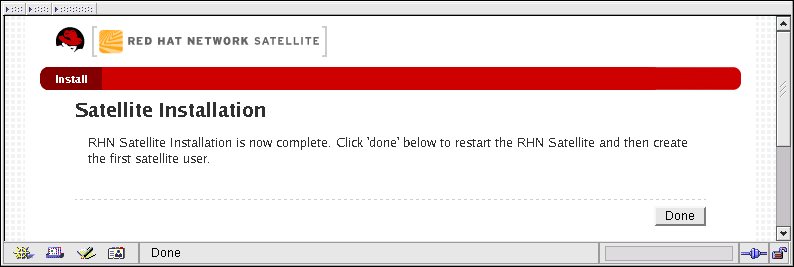
The Installation Complete page marks the end of the initial Satellite installation and configuration. Click Complete to reboot the system and create the Satellite Administrator account. The Satellite Restart page appears.
The Satellite Restart page requires no user input and merely provides a placeholder while the system is rebooted. Once finished, the browser window is redirected to the Satellite Administrator page.
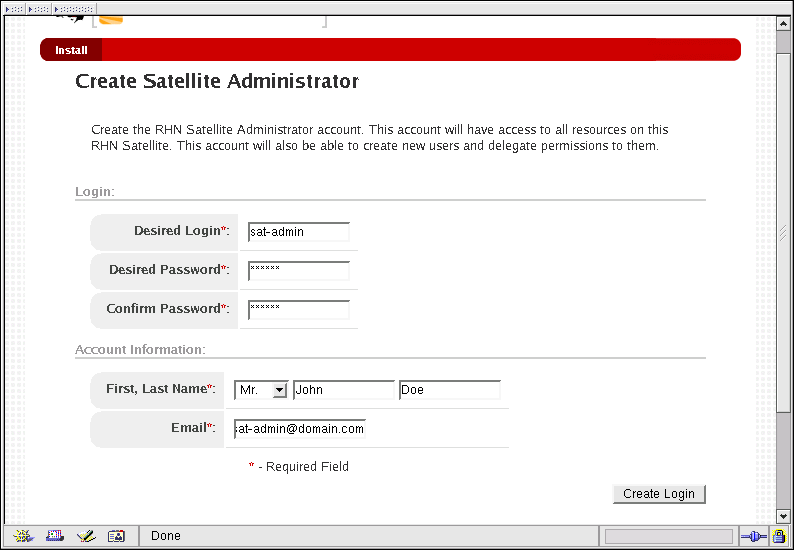
The Satellite Administrator page enables you to create the Organization Administrator account on the Satellite. This master account can conduct any task available to all other user levels, as well as create other user accounts. As always, ensure this information exists on the backups of login information described in Chapter 2 Requirements. When finished, click Create Login. The Account Created page appears.
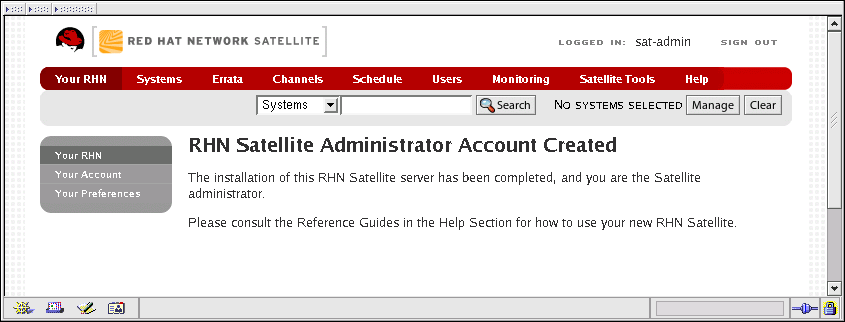
The Account Created page signals the end of the installation and configuration process. You may now begin to import software packages and reconfigure client systems to use the Satellite. Refer to Chapter 6 Importing and Synchronizing and the RHN Client Configuration Guide (available under Help) respectively, for instructions.
