| Red Hat Docs > Manuals > Red Hat High Availability Server Manuals > |
| Red Hat Linux 6.2: The Official Red Hat High Availability Server Installation Guide | ||
|---|---|---|
| Prev | Chapter 9. The Piranha Web Interface — Features and Configuration | Next |
 | Please Note | |
|---|---|---|
Before using the Piranha Web Interface for the first time, you must restrict access to it by creating a password. This is done by using /usr/sbin/piranha-passwd. First, login as root, and issue the following command:
If you change the password for user piranha while you have an active Piranha Web Interface session in progress, you will be prompted to provide the password for again. This is due to your browser providing the old password to the Web server. Simply type in the new password when prompted. |
To use the Piranha Web Interface you will minimally need a text-only Web browser. Point your browser to this URL:
http://localhost/piranha/
|
When your browser connects to the Piranha Web Interface, you will notice that you must login to access the cluster configuration services. Enter "piranha" in the User ID field, and the password you set with piranha-passwd in the Password field.
While the user interface provided by the Piranha Web Interface is similar to that found on many websites, there are two hints that you should keep in mind as you use the interface to configure your cluster:
Selecting a specific service using the radio buttons
Saving modified information using the ACCEPT button
Some of the screens (which are known as panels) have the ability to list more than one service. [1] On these panels, each service will be represented by a one-line summary, and preceded by a radio button. In order to perform an action (such as editing or deleting) on a specific service, you must first press that service's radio button, and then perform the desired action.
On those panels where this section method is used, there will be a note reminding you of this behavior.
On most panels, there is a button labeled ACCEPT. This button used to confirm any changes you have made to the data displayed on that panel. Note that if you change any displayed information, and then move to another panel without first pressing ACCEPT, your changes will be lost.
 | Always press the ACCEPT button after changing any information! |
Keeping these hints in mind, let's begin our tour of the Piranha Web Interface.
The first screen you will be presented with is the CONTROL / MONITORING panel. From this panel, it is possible to obtain information about the state of the cluster. It also has the ability to automatically update the table listings. This is useful when you're behind the back of a machine tearing out cables trying to test your cluster and do not have easy access to the mouse and keyboard. To enable the auto-update feature, simply press the Auto update button, enter the desired update frequency in the provided text box, and press Enter:
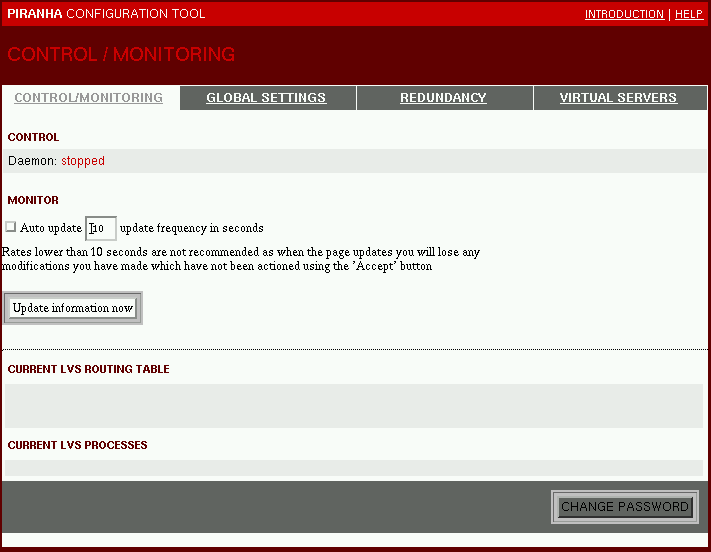
Figure 9-1. The CONTROL/MONITORING Panel
You can also manually update the contents of the CONTROL/MONITORING panel by pressing the Update information now button.
If you now click on the GLOBAL SETTINGS tab, you will be presented with the following page:
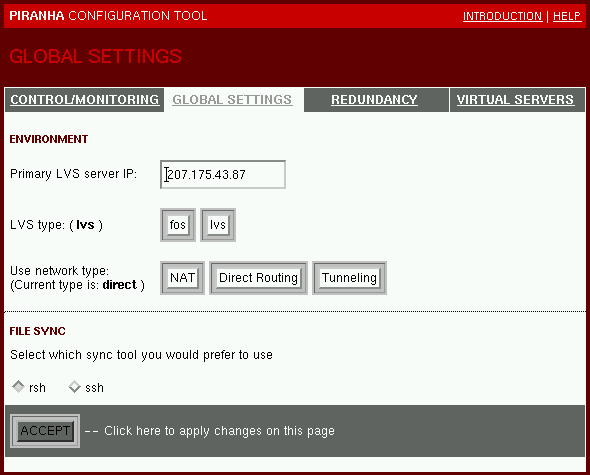
Figure 9-2. Global Settings Panel
lvs (Linux Virtual Services)
fos (Fail Over Services)
If you've selected LVS, you will be prompted to select from the three types of packet forwarding offered:
NAT (Network Address Translation)
Direct Routing
Tunneling
The NAT router IP address
The router device (eth0:2, for example)
Below the packet forwarding selection, you can select the method of file replication used to synchronize the cluster configuration files between the clustered systems. The default is to synchronize using rsh, although ssh may be used if you have it installed.
Next, click on the REDUNDANCY link; you will be presented with a screen displaying information on the redundant LVS server. Initially, this page will be blank because no redundant LVS server has been defined:
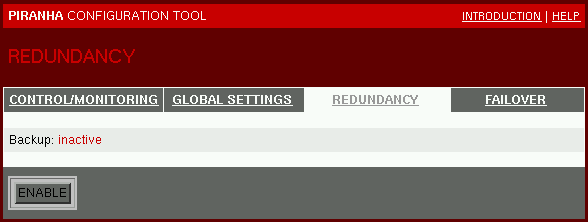
Figure 9-3. Redundancy Panel (initial)
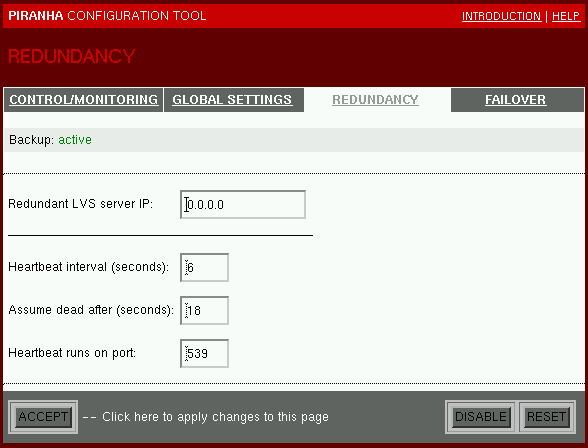
Figure 9-4. Redundany Panel (expanded)
The title of the fourth tab header depends on your choice of LVS service in the LVS type section on the GLOBAL SETTINGS panel. If you selected FOS, the fourth tab will be entitled FAILOVER. If, on the other hand, you selected LVS, the fourth tab will be entitled VIRTUAL SERVERS.
Let's start with the FAILOVER panel. (If you selected LVS, please skip ahead to the section called The VIRTUAL SERVERS Panel.) Click on the FAILOVER tab. You will be presented with the following panel:
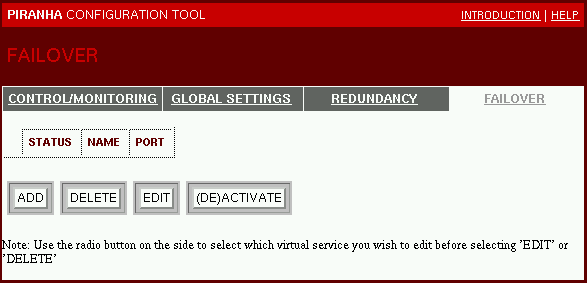
Figure 9-5. Failover Panel (Initial)
Here you'll be presented with the following buttons:
ADD (Adds a blank service template)
DELETE (Removes the selected service)
EDIT (Makes changes to the selected service)
(DE)ACTIVATE (Toggles the selected service's status)
Click on the ADD button to start defining a new server. The FAILOVER panel will now include a new server entry:
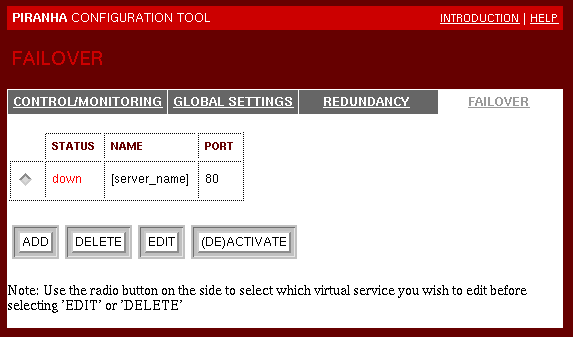
Figure 9-6. The FAILOVER Panel (Server Added)
| Please Note |
|---|---|
If you add more than one server, use the radio button in front of each line to indicate which server you wish to delete, edit, or (de)activate. |
By clicking EDIT, you will be presented with the following panel:
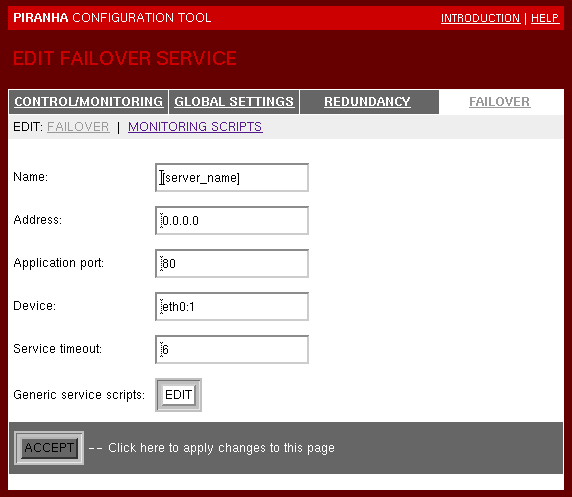
Figure 9-7. Failover Panel (Editing)
By pressing the EDIT button (after first saving any data with the ACCEPT button) you will be shown the following panel:
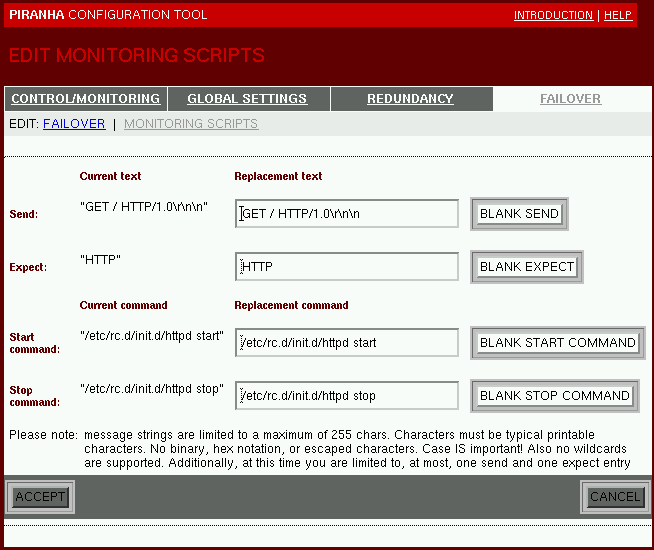
Figure 9-8. Failover Panel (script editing)
Note that the fields have a default example inserted. which you can use as-is, modify, or replace entirely.
If, in your initial setup, you chose to use LVS services from the GLOBAL SETTINGS panel, the fourth tab will read VIRTUAL SERVERS instead of FAILOVER. The panel will look similar to the FOS page, except that you will notice an extra field labeled PROTOCOL:
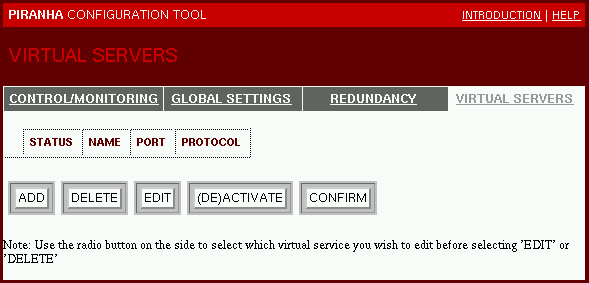
Figure 9-9. Virtual Servers Panel (Initial)
The PROTOCOL field makes it possible to define the server as using either the TCP or UDP protocols. A CONFIRM button has also been added to permit confirmation of any changes to the PROTOCOL field.
A new server can now be added using the ADD button:
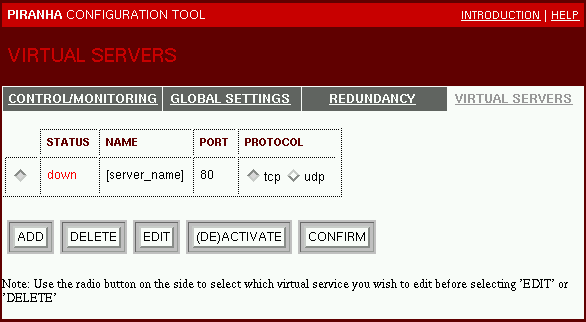
Figure 9-10. Virtual Servers Panel (Server Added)
| Please Note |
|---|---|
If you add more than one server, use the radio button in front of each line to indicate which server you wish to delete, edit, (de)activate, or confirm. |
Once a new server has been added and selected with the radio button, the EDIT button will bring you to a panel similar to the one used in FOS:
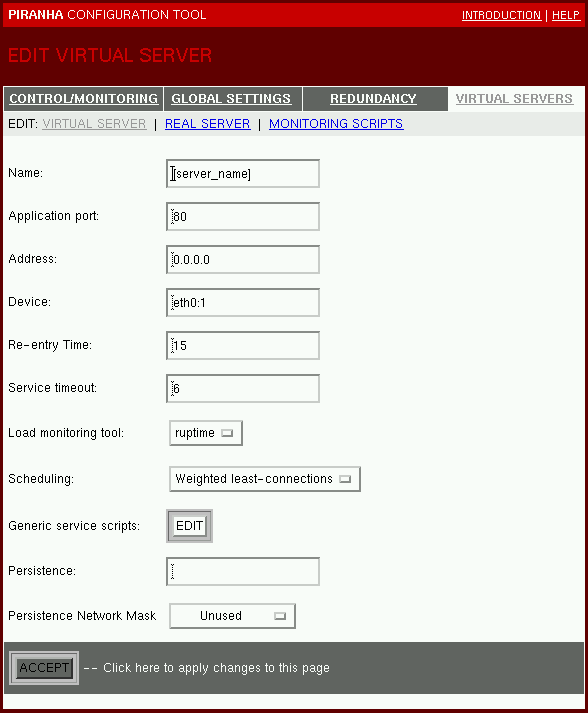
Figure 9-11. Virtual Servers Panel (Server Editing)
The fields will be filled in with defaults; the Name and Address fields must be modified. Modify the remaining fields as appropriate.
| [1] | Specifically, these are the FAILOVER and VIRTUAL SERVERS panels. |